

Updated Top 10 Transformative Voice Modification Tools High-Pitched Female Renditions for Males for 2024
Top 10 Transformative Voice Modification Tools: High-Pitched Female Renditions for Males
If you’ve been searching for the best android and iOS voice-changing apps around the internet, you’re on the right spot. Voice-changing applications are always fun. They’re handy when you’re pulling a prank on a friend, or you want some amazing effects to test your voice. Thus, we provide you with all the best male to female voice changer apps in the list below.
Record & Edit Voice Fast before Changing Voice
Before changing your voice from male to female, I suggest you edit your voice first. Filmora is an easy-to-use yet powerful video editor helping you quickly edit voice no matter your voice or the audio extracted from videos. Explore Filmora’s audio editing features and get ready for changing voice 
For Win 7 or later (64-bit)
For macOS 10.12 or later


Part 1: Changing Voice Online for Free with Media.io

If you want to change voice without downloading and installing any app on your mobile phone, you can try some online solutions. Media.io is an all-in-one online video toolkit that allows you to edit, convert and compress video, audio and image files easily. The online voice changer from Media.io can transform your voice to a male voice, female voice, child voice, robot voice, and Donald Duck voice. If you wish to have voice filters, you won’t have any problems in the future with the Media.io voice changer.

This online voice changer works best on the Chrome browser, so you can utilize it whether using a Windows, Mac, Linux, or Chromebook device. As a result, you can deceive your family or friends by speaking in another people’s voice rather than your own. Doesn’t that sound like fun?
![]()
A cross-platform for making videos anywhere for all creators

Why your video editing isn’t good enough? How about some creative inspo?
- 100 Million+ Users
- 150+ Countries and Regions
- 4 Million+ Social Media Followers
- 5 Million+ Stock Media for Use
* Secure Download 
Part 2: Best Male to Female Voice Changer Apps for iPhone and Android
- Girls Voice Changer
- Voice Changer Voice Recorder Editor & Effect
- VoiceFX
- Voice Changer
- Voice Changer - Audio effects
- Magic Call App
- Voice Changer and Sound Recorder
- Super Voice Editor
- Voice Changer with Effects
- Voice Changer - Girls Voice changer Male to Female
1. Girls Voice Changer
Available for: Android, iOS
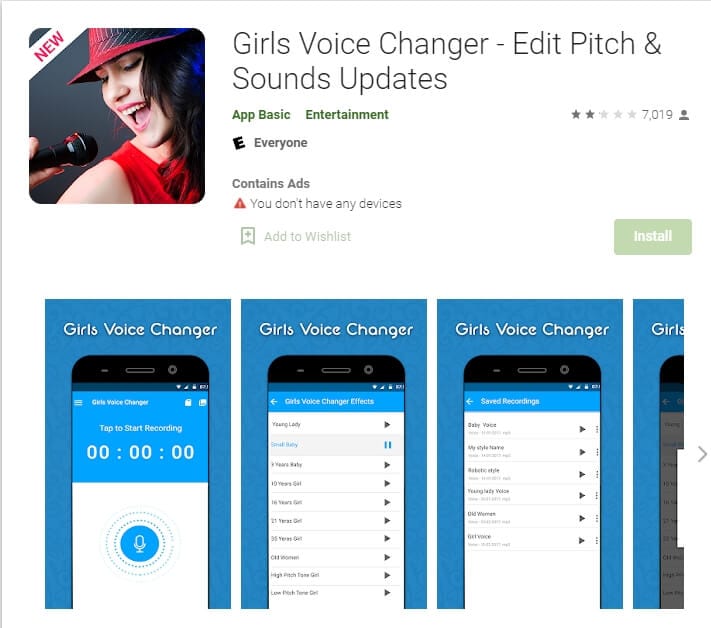
This girl voice changer app is highly portable and easy for any user to use comfortably. It is specifically more popular for changing male voice to female and for pitch adjustments. It’s completely free, so download on your android if you have a storage of about 8MB ready, and start using it!
This male-to-female voice changer app has several options in the library. Though the pitch adjustments are easy to make, some users have informed a lack of performance on very high-pitched settings. However, the smoothness of an android application also depends on how much space is readily available in the device. So next time you’re bored at a part, you have the perfect partner!
2. Voice Changer Voice Recorder Editor & Effect
Available for: Android
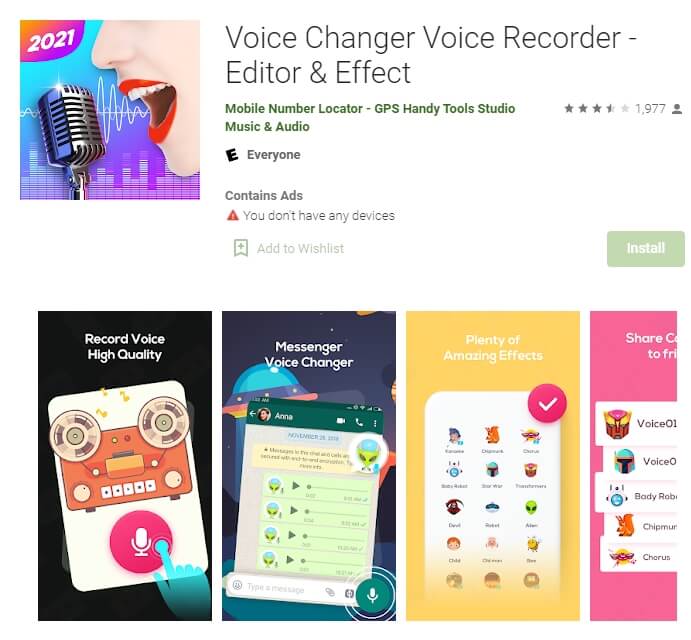
This voice changer application is for multi-purpose. Yes, you can use it as a girl voice changer smoothly and with ease. But apart from male to female voice changing, The “voice changer - voice editor application” can also be used to autotune your voice.
Now autotune is a big feature that every singer uses to make their voices tuned perfectly. With this app, you can also do the same to record your music or have fun while you are bored. The application is pretty to use and can be used as a girl voice changer not only for entertainment but also if you’re practicing. Many people who wish to seek a career in background voices might find this useful.
3. VoiceFX
Available for: Android 
The VoiceFX application is filled with a lot of exciting options and features. If you are looking for an app that is more than just a male-to-female voice changer app, the voice fx is highly recommended.
You can also convert your voice into a robot or even an animal from male to female voice. Yes, you read it right. You can turn your manly voice into any of the fictional cartoons you want. This one’s a very easy and efficient way of filming a video with added effects or developing a mini-game with different voice characters. If you haven’t forgotten, there was a very big trend of converting famous music into chipmunk voices. With this app, you can convert your favorite songs into a chipmunk addition song without any problem.
4. Voice Changer
Available for: Android

The voice changer is a very famous male-to-female voice changer app. With over 10 million downloads on the google play store, the voice changer is highly recommended for users who have fun changing their voices from male to female. Compared to other voice changer applications, The Voice changer app has a very elegant and sleek design that makes it very easy to use.
Apart from the male to female voice change option, There are more than 50 other options that you can enjoy. Furthermore, you can share your creations with your friends through Bluetooth or other social media.
5. Voice Changer - Audio effects
Available for: Android

There are a lot of girl voice changer applications on the google play store. But not all of them are up to the mark. The Voice changer - audio effects is another highly recommended voice changer application.
The Voice Changer - Audio effects have a lot of other things to offer as well. Converting your voice from a male to a female has never been easier. Not only can you convert your voice into a girl, but you can also modify it. Furthermore, you can talk to your friends on the phone while you use the voice changer application. Moreover, the voices of animals and robots can also be an alternative to the female voice if you ever get bored of it.
6. Magic Call App
Available for: Android

The magic call is a real-time voice changer app that you can use for changing your voice during a call specifically. It is a really fun app which you can use with your friends to prank even your family!
This is a perfect option for people looking for a real-time girl voice changer app. The main purpose of this application is real-time calls. The magic call is ideal specifically for a male-to-female voice modification. And you can operate this application easily in call durations.
All you have to do is open the voice changer app and dial your call. Apart from Female voice, you can also convert your voice into a cartoon or an animal.
7. Voice Changer and Sound Recorder
Available for: iOS

If you are an iPhone user, then you must know that finding a voice changer on the apple store is like digging a diamond from the ground.
The Voice changer and sound recorder application is found exclusively on the apple store for people who love girl voice changer apps. It is a live call voice changer app, which means converting your voice from a male to a female in between the call. Furthermore, you can even add background voices such as traffic and echo to make your call even funnier. If you are looking for an excuse to get off from your call, then this application has got your back.
8. Super Voice Editor
Available for: Android
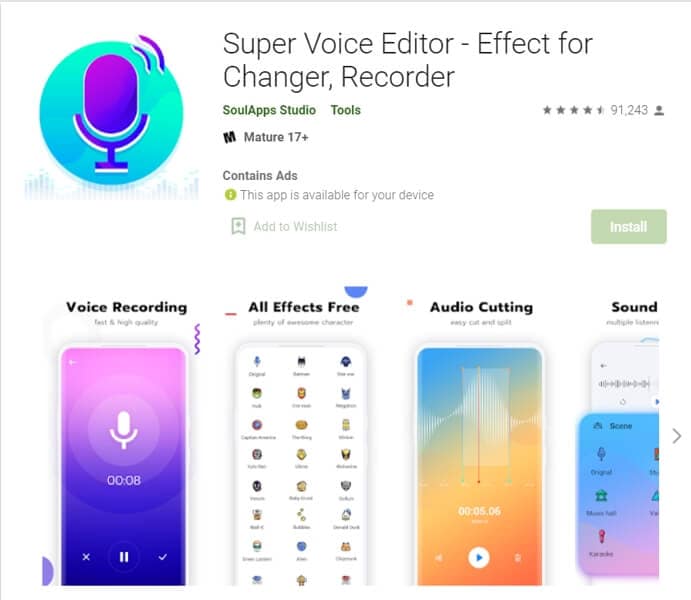
This one is a fun application for people searching for a voice changer app male to female. Not only can you record the audio that you edit, but also use it in real-time! Amazing right? Super voice editor enables you to add effects to your voice while you’re on a call as well. This feature means, next time you’re pulling a prank on the birthday boy, he won’t ever know! Sound like the wonder woman or dexter from his laboratory. The Super-Voice editor is perfect for kids playing in the house and even teenagers looking for something interesting. The SoulApps studio has made it easy for you to sound like your dream faces on the screen. With an MP3 cutter and Ringtone maker, this girl voice changer app is pure creativity.
9. Voice Changer with Effects
Available for: Android

Our list of girl voice changers, Voice changer with effects, is a very practical application that we highly recommend to our users.
With over 50 million downloads on google play, Voice changer with effects is highly suited for anyone looking for more than just a male-to-female voice changer. It has over 40 plus options such as helium, chipmunk, zombie, alien, and many more. With this application, you can even import a favorite audio clip of yours, and then you can easily convert it into a voice you like. If you want to modify your ringtone to an audio clip you just converted, then there is no better application than this one.
10. Voice Changer - Girls Voice changer Male to Female
Available for: Android

If you are looking for a girl voice changer app solely, this application perfectly fits you. The application is specifically designed only to change your voice from a male to a female. Although this application does provide options apart from female voice conversions, those features don’t function ideally. However, if you want a girl voice changer, you won’t have any trouble.
You can use this application while you are on a call. Hence, you can fool your family or friends by using a girl voice instead of your own. We recommend this as an average application that would fit your needs sufficiently.
In conclusion, you have now gone through the list of the perfect options for your android or iOS. Therefore, now you must be ready to choose the best girl voice changer app. So head on to your play store and search for your favorite app right now
For Win 7 or later (64-bit)
For macOS 10.12 or later
Part 1: Changing Voice Online for Free with Media.io
If you want to change voice without downloading and installing any app on your mobile phone, you can try some online solutions. Media.io is an all-in-one online video toolkit that allows you to edit, convert and compress video, audio and image files easily. The online voice changer from Media.io can transform your voice to a male voice, female voice, child voice, robot voice, and Donald Duck voice. If you wish to have voice filters, you won’t have any problems in the future with the Media.io voice changer.
This online voice changer works best on the Chrome browser, so you can utilize it whether using a Windows, Mac, Linux, or Chromebook device. As a result, you can deceive your family or friends by speaking in another people’s voice rather than your own. Doesn’t that sound like fun?
![]()
A cross-platform for making videos anywhere for all creators
Why your video editing isn’t good enough? How about some creative inspo?
- 100 Million+ Users
- 150+ Countries and Regions
- 4 Million+ Social Media Followers
- 5 Million+ Stock Media for Use
* Secure Download
Part 2: Best Male to Female Voice Changer Apps for iPhone and Android
- Girls Voice Changer
- Voice Changer Voice Recorder Editor & Effect
- VoiceFX
- Voice Changer
- Voice Changer - Audio effects
- Magic Call App
- Voice Changer and Sound Recorder
- Super Voice Editor
- Voice Changer with Effects
- Voice Changer - Girls Voice changer Male to Female
1. Girls Voice Changer
Available for: Android, iOS
This girl voice changer app is highly portable and easy for any user to use comfortably. It is specifically more popular for changing male voice to female and for pitch adjustments. It’s completely free, so download on your android if you have a storage of about 8MB ready, and start using it!
This male-to-female voice changer app has several options in the library. Though the pitch adjustments are easy to make, some users have informed a lack of performance on very high-pitched settings. However, the smoothness of an android application also depends on how much space is readily available in the device. So next time you’re bored at a part, you have the perfect partner!
2. Voice Changer Voice Recorder Editor & Effect
Available for: Android
This voice changer application is for multi-purpose. Yes, you can use it as a girl voice changer smoothly and with ease. But apart from male to female voice changing, The “voice changer - voice editor application” can also be used to autotune your voice.
Now autotune is a big feature that every singer uses to make their voices tuned perfectly. With this app, you can also do the same to record your music or have fun while you are bored. The application is pretty to use and can be used as a girl voice changer not only for entertainment but also if you’re practicing. Many people who wish to seek a career in background voices might find this useful.
3. VoiceFX
Available for: Android
The VoiceFX application is filled with a lot of exciting options and features. If you are looking for an app that is more than just a male-to-female voice changer app, the voice fx is highly recommended.
You can also convert your voice into a robot or even an animal from male to female voice. Yes, you read it right. You can turn your manly voice into any of the fictional cartoons you want. This one’s a very easy and efficient way of filming a video with added effects or developing a mini-game with different voice characters. If you haven’t forgotten, there was a very big trend of converting famous music into chipmunk voices. With this app, you can convert your favorite songs into a chipmunk addition song without any problem.
4. Voice Changer
Available for: Android
The voice changer is a very famous male-to-female voice changer app. With over 10 million downloads on the google play store, the voice changer is highly recommended for users who have fun changing their voices from male to female. Compared to other voice changer applications, The Voice changer app has a very elegant and sleek design that makes it very easy to use.
Apart from the male to female voice change option, There are more than 50 other options that you can enjoy. Furthermore, you can share your creations with your friends through Bluetooth or other social media.
5. Voice Changer - Audio effects
Available for: Android
There are a lot of girl voice changer applications on the google play store. But not all of them are up to the mark. The Voice changer - audio effects is another highly recommended voice changer application.
The Voice Changer - Audio effects have a lot of other things to offer as well. Converting your voice from a male to a female has never been easier. Not only can you convert your voice into a girl, but you can also modify it. Furthermore, you can talk to your friends on the phone while you use the voice changer application. Moreover, the voices of animals and robots can also be an alternative to the female voice if you ever get bored of it.
6. Magic Call App
Available for: Android
The magic call is a real-time voice changer app that you can use for changing your voice during a call specifically. It is a really fun app which you can use with your friends to prank even your family!
This is a perfect option for people looking for a real-time girl voice changer app. The main purpose of this application is real-time calls. The magic call is ideal specifically for a male-to-female voice modification. And you can operate this application easily in call durations.
All you have to do is open the voice changer app and dial your call. Apart from Female voice, you can also convert your voice into a cartoon or an animal.
7. Voice Changer and Sound Recorder
Available for: iOS
If you are an iPhone user, then you must know that finding a voice changer on the apple store is like digging a diamond from the ground.
The Voice changer and sound recorder application is found exclusively on the apple store for people who love girl voice changer apps. It is a live call voice changer app, which means converting your voice from a male to a female in between the call. Furthermore, you can even add background voices such as traffic and echo to make your call even funnier. If you are looking for an excuse to get off from your call, then this application has got your back.
8. Super Voice Editor
Available for: Android
This one is a fun application for people searching for a voice changer app male to female. Not only can you record the audio that you edit, but also use it in real-time! Amazing right? Super voice editor enables you to add effects to your voice while you’re on a call as well. This feature means, next time you’re pulling a prank on the birthday boy, he won’t ever know! Sound like the wonder woman or dexter from his laboratory. The Super-Voice editor is perfect for kids playing in the house and even teenagers looking for something interesting. The SoulApps studio has made it easy for you to sound like your dream faces on the screen. With an MP3 cutter and Ringtone maker, this girl voice changer app is pure creativity.
9. Voice Changer with Effects
Available for: Android
Our list of girl voice changers, Voice changer with effects, is a very practical application that we highly recommend to our users.
With over 50 million downloads on google play, Voice changer with effects is highly suited for anyone looking for more than just a male-to-female voice changer. It has over 40 plus options such as helium, chipmunk, zombie, alien, and many more. With this application, you can even import a favorite audio clip of yours, and then you can easily convert it into a voice you like. If you want to modify your ringtone to an audio clip you just converted, then there is no better application than this one.
10. Voice Changer - Girls Voice changer Male to Female
Available for: Android
If you are looking for a girl voice changer app solely, this application perfectly fits you. The application is specifically designed only to change your voice from a male to a female. Although this application does provide options apart from female voice conversions, those features don’t function ideally. However, if you want a girl voice changer, you won’t have any trouble.
You can use this application while you are on a call. Hence, you can fool your family or friends by using a girl voice instead of your own. We recommend this as an average application that would fit your needs sufficiently.
In conclusion, you have now gone through the list of the perfect options for your android or iOS. Therefore, now you must be ready to choose the best girl voice changer app. So head on to your play store and search for your favorite app right now!
“Advanced Audio Filtration: How to Mute Irrelevant Clips in CinemaPro”
Adobe Premiere Pro is a video editing tool. In the editing world, Premiere Pro has a separate fan base; people use this video editing tool because of its unmatchable features. People love the quality of editing that Premiere Pro delivers. Among its many features, few are color correction, safe margins, rulers, and audio assign.
Moreover, the video editor has an Auto Reframe feature. Along with this, Premiere Pro offers Comparison View and many other things. If you want to learn more about Premiere Pro and how to remove noise from video in Premiere Pro, then stay with us.
In this article
01 Remove Background Noise Premiere Pro
02 How to Mute A Clip in Premiere Pro
03 Tips and Tricks to Help You Better Editing Audio in Premiere Pro
Part 1. Remove Background Noise Premiere Pro
While recording a video, you cannot control every noise. Sometimes, you get disturbed by your doorbell. Sometimes, it’s your neighbor’s horn that might bother you or anything else. What do you do when this happens to you? Do you stop the recording and wait until it’s quiet?
If this is what you do, then let us share a smart solution with you. Background noise can be removed from your video using the remove background noise Premiere Pro feature. Allow us to share its steps to guide you more about it.
Step 1: Import the File
To remove background noise from your videos, you first need to import the media file to Premiere Pro. Then drag and drop the file onto the timeline. After that, you need to select and open the ‘Effects’ menu.

Step 2: Add Denoise Effect
On the right side of the Effects menu, type and search for ‘Denoise.’ Then, you should select the Denoise option and drag it onto the timeline over the media file. The Denoise feature removes nearly 50% of the noise automatically.

Step 3: Denoise Effects Control
The rest of the background noise can be customized. For that, head to the ‘Effects Control’ section. You will see Denoise-related options. There, click on ‘Edit’ for Custom Setup. You can adjust both the ‘Frequency’ and ‘Amount’ values.

Step 4: Voice Enhance Effect
Removing background noise damages the quality of voice. This quality can be improved by using ‘Vocal Enhance.’ You can search it from the search bar in the Effects tab and drag it over to the media file in the timeline. You can also customize this from the ‘Effects Control’ tab.

Part 2. How to Mute A Clip in Premiere Pro
Sometimes, you might need to mute a clip. You can use such clips as your status. You can also add your desired background music and then share the clips. In any case, you need to mute the clip, but what if you don’t know how to mute the clip in Premiere Pro?
Don’t worry because we are here to help you. The following section of this article will share different methods to mute clips in Adobe Premiere Pro.
Method 1: The first method is to mute an entire clip on the timeline. This could be done by checking the Mute Track ‘M’ button. You will find the mute button beside the track name.

Method 2: The next method is to mute a specific clip. For that, go to the ‘Audio’ section from the menu bar. Then, look at the ‘Essential Sound’ panel on the right side of the screen. From you will see various tags. Open your desired tag and check the box against the ‘Mute’ option.

Method 3: Another method that could be used to mute a clip is by right-clicking on the clip that you want to mute. A menu appears on the screen. From that menu, you need to uncheck the ‘Enable’ button. This mutes the clip.

Method 4: The next method demands you to first select the video clip. Then, from the menu bar, head over to the ‘Editing’ tab. There go to the ‘Audio Clip Mixer’ section. You will see volume sliders; drag down the Volume slider to negative to mute the clip.

Part 3. Tips and Tricks to Help You Better Editing Audio in Premiere Pro
As we have mentioned earlier, noise removal damages the overall quality of the audio. All your effort goes to waste if your voice is not clear or anything else. Now that you know how you can handle background noise removal, it’s time to talk about something new and different.
The following section of this article is going to share tips and tricks that could be adopted. These will help you to get better and improved quality while editing audio.
1. Restore Bass
The first tip that we are going to introduce is restoring the bass of the media file. You can do this by using the Parametric Equalizer and dragging it onto the timeline. With an equalizer, you can play with different audio frequencies. Whatsoever suits the best, you can set it.
2. Atmosphere Setting
Its essential to first of all create an atmosphere. For this, you can mix sounds, add reverb and even adjust the loudness. An ambiance audio tag can be used for background noise. You need to set the scene for your music or the dialogue.
3. Compress the Audio
To make the audio better and more consistent, it is essential to compress it. Like the name is presenting, compression lowers the volume of loud parts, increases the volume of fairly quiet parts, it compresses the waveform of audio. After compression, your audio sounds instantly better, especially the voices.
4. Dialogue Adjustments
You can unify different recordings for a common loudness if you tag audio clips as Dialogue. If you plan to add a voiceover to your video, then you must improve the clarity, reduce or remove any background noise and also, adjust the reverb. Subtitles could be added to make the conversation understandable in your video.
5. Remove Noise
The noise of the computer fan or the weird hissing noise of the microphone and other similar things are referred to as Background noise. This can become a distracting element. While editing the audio, it matters that you remove the background noise because it does not get automatically removed. So, to have good audio, always remove background noise.
Bottom Line
If background noise is bothering you, then this problem is resolved. The article above has shared how to remove noise from video in premiere pro. The easy step-by-step guide for removing background noise with Premiere Pro has been shared.
To remove background noise, Premiere Pro is not the only editor. Wondershare Filmora is another stunning and known video editor. You can use the tool to remove background noise from your videos. With this editor, you can also mute your clips.
Not just this, but the editor has many more classic features. Filmora allows keyframing, motion tracking, and doing cool edits with a split-screen. Color match is another offered feature among the many other features of Filmora. It also has an asset library. You can get fantastic effects, transitions, elements, and whatnot from its library.
For Win 7 or later (64-bit)
For macOS 10.12 or later
02 How to Mute A Clip in Premiere Pro
03 Tips and Tricks to Help You Better Editing Audio in Premiere Pro
Part 1. Remove Background Noise Premiere Pro
While recording a video, you cannot control every noise. Sometimes, you get disturbed by your doorbell. Sometimes, it’s your neighbor’s horn that might bother you or anything else. What do you do when this happens to you? Do you stop the recording and wait until it’s quiet?
If this is what you do, then let us share a smart solution with you. Background noise can be removed from your video using the remove background noise Premiere Pro feature. Allow us to share its steps to guide you more about it.
Step 1: Import the File
To remove background noise from your videos, you first need to import the media file to Premiere Pro. Then drag and drop the file onto the timeline. After that, you need to select and open the ‘Effects’ menu.
Step 2: Add Denoise Effect
On the right side of the Effects menu, type and search for ‘Denoise.’ Then, you should select the Denoise option and drag it onto the timeline over the media file. The Denoise feature removes nearly 50% of the noise automatically.
Step 3: Denoise Effects Control
The rest of the background noise can be customized. For that, head to the ‘Effects Control’ section. You will see Denoise-related options. There, click on ‘Edit’ for Custom Setup. You can adjust both the ‘Frequency’ and ‘Amount’ values.
Step 4: Voice Enhance Effect
Removing background noise damages the quality of voice. This quality can be improved by using ‘Vocal Enhance.’ You can search it from the search bar in the Effects tab and drag it over to the media file in the timeline. You can also customize this from the ‘Effects Control’ tab.
Part 2. How to Mute A Clip in Premiere Pro
Sometimes, you might need to mute a clip. You can use such clips as your status. You can also add your desired background music and then share the clips. In any case, you need to mute the clip, but what if you don’t know how to mute the clip in Premiere Pro?
Don’t worry because we are here to help you. The following section of this article will share different methods to mute clips in Adobe Premiere Pro.
Method 1: The first method is to mute an entire clip on the timeline. This could be done by checking the Mute Track ‘M’ button. You will find the mute button beside the track name.
Method 2: The next method is to mute a specific clip. For that, go to the ‘Audio’ section from the menu bar. Then, look at the ‘Essential Sound’ panel on the right side of the screen. From you will see various tags. Open your desired tag and check the box against the ‘Mute’ option.
Method 3: Another method that could be used to mute a clip is by right-clicking on the clip that you want to mute. A menu appears on the screen. From that menu, you need to uncheck the ‘Enable’ button. This mutes the clip.
Method 4: The next method demands you to first select the video clip. Then, from the menu bar, head over to the ‘Editing’ tab. There go to the ‘Audio Clip Mixer’ section. You will see volume sliders; drag down the Volume slider to negative to mute the clip.
Part 3. Tips and Tricks to Help You Better Editing Audio in Premiere Pro
As we have mentioned earlier, noise removal damages the overall quality of the audio. All your effort goes to waste if your voice is not clear or anything else. Now that you know how you can handle background noise removal, it’s time to talk about something new and different.
The following section of this article is going to share tips and tricks that could be adopted. These will help you to get better and improved quality while editing audio.
1. Restore Bass
The first tip that we are going to introduce is restoring the bass of the media file. You can do this by using the Parametric Equalizer and dragging it onto the timeline. With an equalizer, you can play with different audio frequencies. Whatsoever suits the best, you can set it.
2. Atmosphere Setting
Its essential to first of all create an atmosphere. For this, you can mix sounds, add reverb and even adjust the loudness. An ambiance audio tag can be used for background noise. You need to set the scene for your music or the dialogue.
3. Compress the Audio
To make the audio better and more consistent, it is essential to compress it. Like the name is presenting, compression lowers the volume of loud parts, increases the volume of fairly quiet parts, it compresses the waveform of audio. After compression, your audio sounds instantly better, especially the voices.
4. Dialogue Adjustments
You can unify different recordings for a common loudness if you tag audio clips as Dialogue. If you plan to add a voiceover to your video, then you must improve the clarity, reduce or remove any background noise and also, adjust the reverb. Subtitles could be added to make the conversation understandable in your video.
5. Remove Noise
The noise of the computer fan or the weird hissing noise of the microphone and other similar things are referred to as Background noise. This can become a distracting element. While editing the audio, it matters that you remove the background noise because it does not get automatically removed. So, to have good audio, always remove background noise.
Bottom Line
If background noise is bothering you, then this problem is resolved. The article above has shared how to remove noise from video in premiere pro. The easy step-by-step guide for removing background noise with Premiere Pro has been shared.
To remove background noise, Premiere Pro is not the only editor. Wondershare Filmora is another stunning and known video editor. You can use the tool to remove background noise from your videos. With this editor, you can also mute your clips.
Not just this, but the editor has many more classic features. Filmora allows keyframing, motion tracking, and doing cool edits with a split-screen. Color match is another offered feature among the many other features of Filmora. It also has an asset library. You can get fantastic effects, transitions, elements, and whatnot from its library.
For Win 7 or later (64-bit)
For macOS 10.12 or later
From Raw Tape to Polished Production: Advanced Techniques Using Sony Vegas Pro [2023 Release]
Sony Vegas Audio Editor: How to Edit Audio in Vegas Pro
Benjamin Arango
Mar 27, 2024• Proven solutions
Being the most commonly used professional video editing tool, Sony (Magix) Vegas Pro provides complete control over audio files inside every project. If you are new to this platform then following details will help you to get complete information about how to edit audio volume, apply unique effects, remove noise and adjust fade in as well as fade out options for projects.
You May Also Like: How to Edit YouTube Audio >>
Sony (Magix) Vegas Audio Editor: How to edit audio in Vegas Pro
This tutorial is divided into 6 different sections that contain complete details about all possible audio track adjustments and customization options.
- Section 1: Edit volume for audio track
- Section 2: Fade in and Fade Out
- Section 3: Speed up or Slow down
- Section 4: Reverse audio clip
- Section 5: Noise Removal
- Section 6: Apply unique Audio Effects
Section 1: Edit volume for audio track
First of all you need to import your desired audio file to timeline of Vegas Pro; it can be done by using drag and drop option directly. On Vegas timeline you will find so many sound adjustment options that appear on audio track header.

Mute the Audio Track: Press M
Manage volume control for all events of loaded track: Use Volume Slider switch that is denoted by dB.
Pan Slider: It is possible to make adjustments for audio pan using a slider named as Center. Users can slide it to left side or right side as per audio project requirements.

Note:
1. Put on your headphone to better verify the output result.
2. To reset the volume, just double click on the options.
Those who want to control volume separately for different portions of audio file can go to Audio Envelop (go Insert > Audio Envelopes)and then make all essential settings as:
Mute: A blue line is visible on timeline at your selected audio event, simply double click over it for addition of a specific point and then right click for mute adjustments. From appeared drop down menu you can select muted or not muted and the adjustments will be effective on right side of event point.

Volume: Check the deep blue line on selected event and then double click over it for addition of a marking point. Drag this point up or down for appropriate volume settings and use right click option for additional adjustments.

Pan: Pan Adjustments can be done using red lien control over event. Double click over it and move the point up or down to set pan at specific range. Use right click button for advanced options.

Section 2: Fade in and Fade Out
Some professional settings to audio project can be made using fade in/out options. Users can pull the fade adjust curser to any direction for easy customization.
Hover your cursor on the audio event in timeline, you will find the fade in/out offset handle at the up side corner of the audio event. Pull the Fade in/out offset handle as long as you want:

Section 3: Speed up or Slow down
If you want to change the speed of specific portions of your audio project then hold CTRL button and then start moving your curser over Trim Event handle. If you drag it to right side then it will directly speed up your audio clip and dragging to left side will automatically reduce speed.

Section 4: Reverse audio clip
One can easily reverse his selected audio clip; simply right click over it and then choose Reverse option from drop down menu; it will help to move audio frames in reverse order.

Section 5: Noise Removal
One classic feature of Vegas Pro is its Sound Restoration in Audio FX control. But it does not work as good compared to Audacity. Check this article to see how to remove noise from audio using Sony Vegas Pro & Audacity.
Or check this video tutorial below:
Section 6: Apply unique Audio Effects
If you want to add specific effects to your audio files then use two simple methods on Vegas Pro with its Audio FX tool: One is to add effects on entire video file and second option is to make changes to specific layers of audio project. Use these steps to achieve great results:
To entire audio layer

To an individual portion of the audio layer

Step 1: First of all go to Track Description Box and then press the Track FX icon, an audio track FX will soon appear on your device screen. The three basic controls are always activated, that are Track Compressor, Track EQ and Track Noise Gate.

For additional personalization you need to use plug-in chain button from right corner.

Step 2: Now select any desired effect from list that can make your audio track more impressive and press Add; once applied then hit OK.

Step 3: Make required adjustments with the help of slider or users can also open the drop down box on screen for selection of present templates as per need.

Recommendation
The Vegas Pro is rated as a professional editing software tool due to its advanced user interface, high price range and availability on Mac devices only. If you are searching for some video editing tools that can work on Windows as well as Mac devices then Wondershare Filmora is one of the best options for you all.
 Download Mac Version ](https://tools.techidaily.com/wondershare/filmora/download/ )

Benjamin Arango
Benjamin Arango is a writer and a lover of all things video.
Follow @Benjamin Arango
Benjamin Arango
Mar 27, 2024• Proven solutions
Being the most commonly used professional video editing tool, Sony (Magix) Vegas Pro provides complete control over audio files inside every project. If you are new to this platform then following details will help you to get complete information about how to edit audio volume, apply unique effects, remove noise and adjust fade in as well as fade out options for projects.
You May Also Like: How to Edit YouTube Audio >>
Sony (Magix) Vegas Audio Editor: How to edit audio in Vegas Pro
This tutorial is divided into 6 different sections that contain complete details about all possible audio track adjustments and customization options.
- Section 1: Edit volume for audio track
- Section 2: Fade in and Fade Out
- Section 3: Speed up or Slow down
- Section 4: Reverse audio clip
- Section 5: Noise Removal
- Section 6: Apply unique Audio Effects
Section 1: Edit volume for audio track
First of all you need to import your desired audio file to timeline of Vegas Pro; it can be done by using drag and drop option directly. On Vegas timeline you will find so many sound adjustment options that appear on audio track header.
Mute the Audio Track: Press M
Manage volume control for all events of loaded track: Use Volume Slider switch that is denoted by dB.
Pan Slider: It is possible to make adjustments for audio pan using a slider named as Center. Users can slide it to left side or right side as per audio project requirements.
Note:
1. Put on your headphone to better verify the output result.
2. To reset the volume, just double click on the options.
Those who want to control volume separately for different portions of audio file can go to Audio Envelop (go Insert > Audio Envelopes)and then make all essential settings as:
Mute: A blue line is visible on timeline at your selected audio event, simply double click over it for addition of a specific point and then right click for mute adjustments. From appeared drop down menu you can select muted or not muted and the adjustments will be effective on right side of event point.
Volume: Check the deep blue line on selected event and then double click over it for addition of a marking point. Drag this point up or down for appropriate volume settings and use right click option for additional adjustments.
Pan: Pan Adjustments can be done using red lien control over event. Double click over it and move the point up or down to set pan at specific range. Use right click button for advanced options.
Section 2: Fade in and Fade Out
Some professional settings to audio project can be made using fade in/out options. Users can pull the fade adjust curser to any direction for easy customization.
Hover your cursor on the audio event in timeline, you will find the fade in/out offset handle at the up side corner of the audio event. Pull the Fade in/out offset handle as long as you want:
Section 3: Speed up or Slow down
If you want to change the speed of specific portions of your audio project then hold CTRL button and then start moving your curser over Trim Event handle. If you drag it to right side then it will directly speed up your audio clip and dragging to left side will automatically reduce speed.
Section 4: Reverse audio clip
One can easily reverse his selected audio clip; simply right click over it and then choose Reverse option from drop down menu; it will help to move audio frames in reverse order.
Section 5: Noise Removal
One classic feature of Vegas Pro is its Sound Restoration in Audio FX control. But it does not work as good compared to Audacity. Check this article to see how to remove noise from audio using Sony Vegas Pro & Audacity.
Or check this video tutorial below:
Section 6: Apply unique Audio Effects
If you want to add specific effects to your audio files then use two simple methods on Vegas Pro with its Audio FX tool: One is to add effects on entire video file and second option is to make changes to specific layers of audio project. Use these steps to achieve great results:
To entire audio layer
To an individual portion of the audio layer
Step 1: First of all go to Track Description Box and then press the Track FX icon, an audio track FX will soon appear on your device screen. The three basic controls are always activated, that are Track Compressor, Track EQ and Track Noise Gate.
For additional personalization you need to use plug-in chain button from right corner.
Step 2: Now select any desired effect from list that can make your audio track more impressive and press Add; once applied then hit OK.
Step 3: Make required adjustments with the help of slider or users can also open the drop down box on screen for selection of present templates as per need.
Recommendation
The Vegas Pro is rated as a professional editing software tool due to its advanced user interface, high price range and availability on Mac devices only. If you are searching for some video editing tools that can work on Windows as well as Mac devices then Wondershare Filmora is one of the best options for you all.
Download Mac Version ](https://tools.techidaily.com/wondershare/filmora/download/ )
Benjamin Arango
Benjamin Arango is a writer and a lover of all things video.
Follow @Benjamin Arango
Also read:
- Updated 2024 Approved Mastering Sound Integrating Audio with Visuals in Film Production
- Ethereal Soundscapes Review Analyzing Best-in-Class Audio Editors and Their Pros, Cons, and Alternatives
- User-Friendly Harmony Dissector for Novice Singers & Virtuosos for 2024
- Updated Effortless Audio Artistry – Discover 9 Free Online Voice Generators for 2024
- New 2024 Approved Mastering Top Mac MP3 Labeling Software A Comprehensive Guide
- New Exploring Audible Wilderness Wolves in Vocal Display
- Updated Mastering Audio Normalization with DaVinci Resolve An In-Depth Tutorial
- New In 2024, The Year of Transformation Advanced Audio Editors and Their Impact on Music Creation
- Updated Breathing Life Into Your Sound A Comprehensive Guide to Modifying Your Natural Voice
- New 2024 Approved Scouting for Professional Recordings of Wolves Howling Sessions
- 2024 Approved Advanced Listeners Playbook Essential Equalizer Tweaks
- Updated 2024 Approved The Art of Leveraging Tension-Evoking Soundtracks in Cinematic Compositions
- New In 2024, Essential Speech Recognition Software Android & iOS Comparisons
- Unlocking the Power of Pitch Alteration A Step-by-Step Voice Transformation Guide
- Updated The Ultimate Guide Selecting the Highest-Rated MP3 Recorders (Windows/Mac) for 2024
- Updated Essential 2023 Playlist The Most Influential Rock Hits So Far for 2024
- Elite Selection of 4 High-Definition Online Video Volume Enhancers for 2024
- New No Investment Needed? Discover the Free, Powerful Voice-Changing Software S Best!
- 2024 Approved Auditory Access From MP4 An Assembled List of Simple Steps to Tap Into Sound
- New In 2024, A Novices Compendium of Choosing Chords and Tracks for Spoken Word Artists
- New In 2024, Funny Noise Finder A Directory of Humorous Audio Elements
- Updated In 2024, Essential Guide to Top 10 Budget-Friendly Podcasting Software (Free)
- Updated In 2024, 10 Popular Sites to Download BGM Music
- Updated Premier Choices for Accessing Lofi Beats and Imagery
- Updated 2024 Approved The Ultimate Selection 8 Premium DAWs Shaping the Future of Hip-Hop Beats
- How to Remove Background Noise and Mute Clip in Premiere Pro
- New Top-Ranked Noise Reducer App Boost Visual Impact in Your Clips for 2024
- New In 2024, Navigating the Process of Archiving Google Voice Conversations on Smartphones & Computers
- New In 2024, The Complete Guide to Isolating Soundtracks with iMovie on macOS
- New 2024 Approved Your First Steps in Podcast Editing A Comprehensive Beginners Guide
- Updated In 2024, Premier Percussive Pace Collaboration Software for Videos, 2023 Edition
- New A New Dawn for Music Creation A Compilation of the Most Promising AI Composers for 2024
- New In 2024, Silent Soundscape Revolution A Deep Dive Into Eliminating Sound Interference with the Right Tools (Online & Offline)
- New The Definitive Guide to High-Quality Audio Edits on Apples Mobile Devices This Year for 2024
- Updated 2024 Approved Less Loud, More Effective A Comprehensive Overview of Audio Cleanup in Premiere Pro
- Updated Audio Alchemy for Mac The Premier MP3 Mixing App
- New 2024 Approved The Ultimate Audio Editing Playbook Mastering the Use of Keyframes for Dynamic Filmmaking in Final Cut Pro X
- Online Image Ratio Converters Top Picks and Reviews for 2024
- Updated 2024 Approved From Script to Screen The Top Explainer Video Software
- 2024 Approved Video Tempo Changers Best Free and Paid Options for Windows, Mac, and Online
- In 2024, How to Unlock SIM Card on OnePlus Nord N30 5G online without jailbreak
- New Mastering FCPX Tips and Tricks for Overcoming Common Obstacles
- New Create a Heartfelt Valentines Day Message A Step-by-Step Guide
- New In 2024, Of the Incredible Tools Hidden Under Final Cut Pro X, We Bring Final Cut Pro L-Cuts and J-Cuts in Todays Article. Learn What Is a J-Cut in Final Cut Pro Along with an L-Cut and How to Do Them in FCPX
- In 2024, Best Infinix Note 30 VIP Pattern Lock Removal Tools Remove Android Pattern Lock Without Losing Data
- The Most Complete Guide to Make Fortnite Montage
- Universal Unlock Pattern for Vivo G2
- Recommended Best Applications for Mirroring Your Xiaomi Redmi 12 5G Screen | Dr.fone
- Complete Tutorial for OnePlus Nord N30 SE Hard Reset | Dr.fone
- In 2024, Top 12 Prominent Samsung Galaxy F54 5G Fingerprint Not Working Solutions
- How to Perform Hard Reset on OnePlus Nord N30 5G? | Dr.fone
- New In 2024, From Photo to Toon 16 Top-Rated Cartoonizing Apps
- How to Restore Deleted Vivo Y100A Photos An Easy Method Explained.
- How to Mirror Samsung Galaxy A15 5G to Mac? | Dr.fone
- Title: Updated Top 10 Transformative Voice Modification Tools High-Pitched Female Renditions for Males for 2024
- Author: Jacob
- Created at : 2024-06-26 08:06:06
- Updated at : 2024-06-27 08:06:06
- Link: https://audio-shaping.techidaily.com/updated-top-10-transformative-voice-modification-tools-high-pitched-female-renditions-for-males-for-2024/
- License: This work is licensed under CC BY-NC-SA 4.0.
