
:max_bytes(150000):strip_icc():format(webp)/GettyImages-151812569-ff7311e1de18461da9f8698205953384.jpg)
Updated Step-by-Step to Free Digital Sound Logging The Audacity Way
Step-by-Step to Free Digital Sound Logging: The Audacity Way
Natural audio recording software, such as Voice Memos for Macs or Sound Recorder for Windows PCs, is included with every machine. These applications enable users to record audio using either the desktop’s internal or an external microphone, and they generally have basic audio editing features.
However, when you’re looking for a higher-quality recording program, Audacity is the way to go. Audacity is a free audio editor with a lot of cutting-edge features. More significantly, recording using Audacity is as simple as clicking a button.
In this Audacity Record Computer Audio guide, we will show you all the methods of recording internal audio on your computer and Mac.
In this article
01 Record Audio On Audacity with a Microphone
02 Record Sounds Playing on Your Computer Using Audacity on Win
03 Record Sounds Playing on Your Computer Using Audacity on Mac
04 Set up Audacity to Record as Schedule
Part 1: How to Record Audio On Audacity with a Microphone On Windows and Mac Computers?
For both Windows and Mac, the procedures for recording audio from a microphone are the same if you’re utilizing your desktop’s built-in mic or an external microphone. Here’s your step-by-step guide to audacity record using a microphone:
Step 1: Launch Audacity and get to know the Device Toolbar, situated underneath the playback controls. You may modify the Audio Host and the Recording and Playback Devices—all of which are required for Audacity recording.

Step 2: To begin, select Tracks under the Add New tab, Stereo Track, or Mono Track to create a new track.

Step 3: Select Recording Device from the options list. Select your microphone from the dropdown menu and hit the Record option.

Step 4: A soundwave emerges along the track as you talk into the speaker. The Recording Level may be found at the top of the display. To pause or stop the recording, click Stop or Pause until you select Record anew.

Step 5: With the mouse over any recording area, click the Delete button to cut out any portion of it quickly. Click Ctrl + A, then Delete to erase whatever you’ve just saved. Alternatively, press the X button to delete the track completely.

Part 2: How to Record Sounds Playing on Your Computer Using Audacity On Windows?
Unlike Mac, Windows makes it simple to capture audio from a movie or media file running on your desktop. There seem to be two primary methods for accomplishing audacity record desktop audio in this way:
1. Use MME as the Audio Host
Step 1: To use MME as your audio host, go to Tracks in the Add New tab in Stereo Track and create a new file.

Step 2: Change the Audio Host (to the left of Recording Device) to MME—this is the standard setting, so you might not have to change anything.

Step 3: Choose desired option from the Recording Device dropdown menu. Based on your configuration, this might be referred to as Wave Out or Loopback. When you’re uncertain, try it out.

Step 4: To record your audio source, click Record, then play it back.
2. Use WASAPI as the Audio Host
WASAPI provides higher-resolution digital recordings. If capturing audio from an external monitor, it’s also a good idea to utilize it.
Step 1: Convert the Audio Host from MME to Windows WASAPI after creating a fresh Stereo Track.

Step 2: Switch the Recording Device to Speaker (loopback). To display the entire label, you might have to slide the toolbar’s knobs outwards. Begin recording by pressing the red dot and then listen to the audio source. Audacity will capture the audio even if your PC is muted.
Part 3: How to Record Sounds Playing on Your Computer Using Audacity on Mac?
Unfortunately, there’s no ready-made method to record computer audio using Audacity on a Mac. Some alternative ways to use Audacity to record from Mac including using a loopback cable, or download and using a third-party software. You can try some Audacity alternatives to record the computer audio on Mac.
For Win 7 or later (64-bit)
For macOS 10.12 or later
If you have installed Filmora already, you can use it to record the sound playing on your Mac with some tricks.
Step 1: Luanch Filmora, and then click the Record button and select Record PC Screen.

Step 2: Set up the recording settings based on the need. Since we’re going to record the playing audio from the Mac computer, select Microphone and System Audio On and click the Red button to start.

Step 3: Now you have a screen captured video with sound included. Since we need th audio only, we can attache the audio from the video first and then do some editing such as adding fade in and fade out effect, or remove unwanted audio clip.

Part 4: How to Set up Audacity to Record as Schedule?
A streaming video recorder or cassette can be used to arrange a recording. All of those are identical to Time Recordings in that they are used to schedule recording. The Timer record configuration dialog box may be used to set the beginning and finish of the recording. This is how you do it:
Step 1: By definition, the recording’s Start Date and Time are set to the present time. It will begin recording on the present day and hour by default when you don’t alter it. There is no default setting for the End Date and Time. You must either choose a date and time to determine the end time.

Step 2: There is a Checkbox to Save the work immediately. By Ticking the option, you may choose the path or Folder where the file will be saved when the recording is finished.

Conclusion
Well, there you have it – your complete Audacity Record Computer Audio guide. One thing is for certain that Audacity allows some great ways of recording audio from internal and external components of your Windows and Mac. However, if your Audacity is having issues, we would highly recommend opting for another software, such as Wondershare Filmora.
Wondershare Filmora is the finest thing that has come out in recent years for recording audio from a desktop. It is intended not just for pros but also for any enthusiast videographer who desires to create a high-quality movie for their family and friends. Download it today to make your movie a delightful journey with high-quality audio recording.
02 Record Sounds Playing on Your Computer Using Audacity on Win
03 Record Sounds Playing on Your Computer Using Audacity on Mac
04 Set up Audacity to Record as Schedule
Part 1: How to Record Audio On Audacity with a Microphone On Windows and Mac Computers?
For both Windows and Mac, the procedures for recording audio from a microphone are the same if you’re utilizing your desktop’s built-in mic or an external microphone. Here’s your step-by-step guide to audacity record using a microphone:
Step 1: Launch Audacity and get to know the Device Toolbar, situated underneath the playback controls. You may modify the Audio Host and the Recording and Playback Devices—all of which are required for Audacity recording.
Step 2: To begin, select Tracks under the Add New tab, Stereo Track, or Mono Track to create a new track.
Step 3: Select Recording Device from the options list. Select your microphone from the dropdown menu and hit the Record option.
Step 4: A soundwave emerges along the track as you talk into the speaker. The Recording Level may be found at the top of the display. To pause or stop the recording, click Stop or Pause until you select Record anew.
Step 5: With the mouse over any recording area, click the Delete button to cut out any portion of it quickly. Click Ctrl + A, then Delete to erase whatever you’ve just saved. Alternatively, press the X button to delete the track completely.
Part 2: How to Record Sounds Playing on Your Computer Using Audacity On Windows?
Unlike Mac, Windows makes it simple to capture audio from a movie or media file running on your desktop. There seem to be two primary methods for accomplishing audacity record desktop audio in this way:
1. Use MME as the Audio Host
Step 1: To use MME as your audio host, go to Tracks in the Add New tab in Stereo Track and create a new file.
Step 2: Change the Audio Host (to the left of Recording Device) to MME—this is the standard setting, so you might not have to change anything.
Step 3: Choose desired option from the Recording Device dropdown menu. Based on your configuration, this might be referred to as Wave Out or Loopback. When you’re uncertain, try it out.
Step 4: To record your audio source, click Record, then play it back.
2. Use WASAPI as the Audio Host
WASAPI provides higher-resolution digital recordings. If capturing audio from an external monitor, it’s also a good idea to utilize it.
Step 1: Convert the Audio Host from MME to Windows WASAPI after creating a fresh Stereo Track.
Step 2: Switch the Recording Device to Speaker (loopback). To display the entire label, you might have to slide the toolbar’s knobs outwards. Begin recording by pressing the red dot and then listen to the audio source. Audacity will capture the audio even if your PC is muted.
Part 3: How to Record Sounds Playing on Your Computer Using Audacity on Mac?
Unfortunately, there’s no ready-made method to record computer audio using Audacity on a Mac. Some alternative ways to use Audacity to record from Mac including using a loopback cable, or download and using a third-party software. You can try some Audacity alternatives to record the computer audio on Mac.
For Win 7 or later (64-bit)
For macOS 10.12 or later
If you have installed Filmora already, you can use it to record the sound playing on your Mac with some tricks.
Step 1: Luanch Filmora, and then click the Record button and select Record PC Screen.
Step 2: Set up the recording settings based on the need. Since we’re going to record the playing audio from the Mac computer, select Microphone and System Audio On and click the Red button to start.
Step 3: Now you have a screen captured video with sound included. Since we need th audio only, we can attache the audio from the video first and then do some editing such as adding fade in and fade out effect, or remove unwanted audio clip.
Part 4: How to Set up Audacity to Record as Schedule?
A streaming video recorder or cassette can be used to arrange a recording. All of those are identical to Time Recordings in that they are used to schedule recording. The Timer record configuration dialog box may be used to set the beginning and finish of the recording. This is how you do it:
Step 1: By definition, the recording’s Start Date and Time are set to the present time. It will begin recording on the present day and hour by default when you don’t alter it. There is no default setting for the End Date and Time. You must either choose a date and time to determine the end time.
Step 2: There is a Checkbox to Save the work immediately. By Ticking the option, you may choose the path or Folder where the file will be saved when the recording is finished.
Conclusion
Well, there you have it – your complete Audacity Record Computer Audio guide. One thing is for certain that Audacity allows some great ways of recording audio from internal and external components of your Windows and Mac. However, if your Audacity is having issues, we would highly recommend opting for another software, such as Wondershare Filmora.
Wondershare Filmora is the finest thing that has come out in recent years for recording audio from a desktop. It is intended not just for pros but also for any enthusiast videographer who desires to create a high-quality movie for their family and friends. Download it today to make your movie a delightful journey with high-quality audio recording.
Discovering the Best Animated Sounds: A Curated List for Download
8 Best Cartoon Sound Effects You Can Download

Benjamin Arango
Mar 27, 2024• Proven solutions
The sound plays a significant role in the videos. Without the right sound effects, your videos become dull. It doesn’t create an impact to grab the attention of the viewers. Especially when it comes to attracting the attention of kids while they watch cartoons.
Are you working on a cartoon video for kids or some animated action cartoons? Use the cartoon sound effects to add more intensity and emotions to the videos. Every time creating a new sound effect for your cartoon video becomes difficult.
If you are on a strict budget, producing new content becomes almost impossible. In such situations, free cartoon sound effects are the best way to enhance your cartoon videos.
In this article, you will learn eight best cartoon sound effects that you can download and make your videos perfect.
8 Best Cartoon Sound Effects Resources
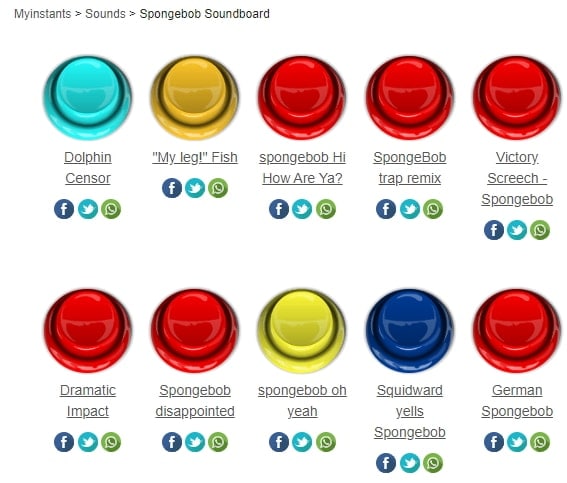
1. Spongebob Sound Effects
MyInstant’s Spongebob soundboard offers a range of cartoon sound effects that can be easily downloaded just by clicking on the Download mp3 sound effect button. You can listen to over 120 classic cartoon sound effects and download it for free. You can also copy the embed link and paste it to your website.
2. Hanna Barbera Sound Effects
From Sounddogs, Hanna Barbera sound effects library, you can find over 2200 cartoon sound effects that are divided into 4 CDs. It has almost all the legendary classic cartoon sound effects from the cartoon shows like Yogi Bear, Huckleberry Hound, the Flintstones, The Jetsons, Quick Draw McGraw, and all the rest of the gang.
You can download the mp3 cartoon sound effects completely free by clicking on the Download ID number mentioned at the right end of each link.
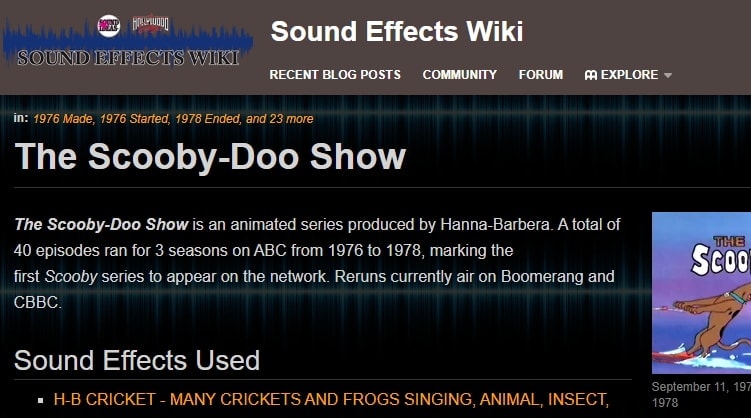
3. Scooby Doo Running Sound
Fandom’s Scooby Doo running sound effects offers all the ideas used in 40 episodes of Scooby Doo throughout the three seasons on ABC. It is over 37000 pages wiki that you can click and browse through the pages to find the right sound effect and download it for free.
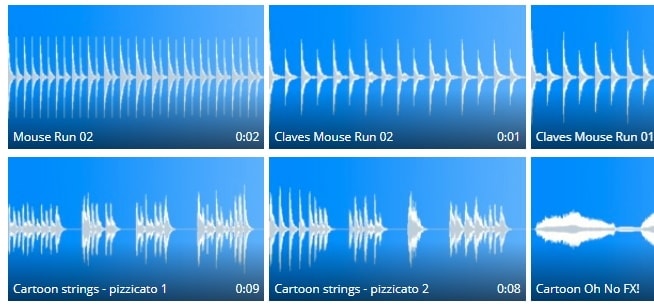
4. Tom and Jerry Sound Effects
Pond5 offers 13 Tom and Jerry sound effects that you can listen by scrolling the cursor over the boxes and download the free preview of cartoon sound effects by clicking on Download Preview.
If you want to download the entire cartoon sound effect, you need to register, log in, and pay for it. There are filters like price, collections, duration, etc. to make your selection more precise.
5. Free SFX
In FreeSFX website, you can find a range of comical cartoon sound effects that includes classic effects like descend, boink, impact, pop, musical, running, rip and snap, bounce spring, slide whistle, squelch and splat, horn and loads more.
You need to log in to the website to download free cartoon sound effects.

6.GRSites
With over 1980 cartoon sound effects, the GRSites is one of the best free sites for downloading both mp3 and WAV files. You can browse from a range of categories to find the best cartoon sound effects for your videos.
7. Cartoon Running Sound Effect
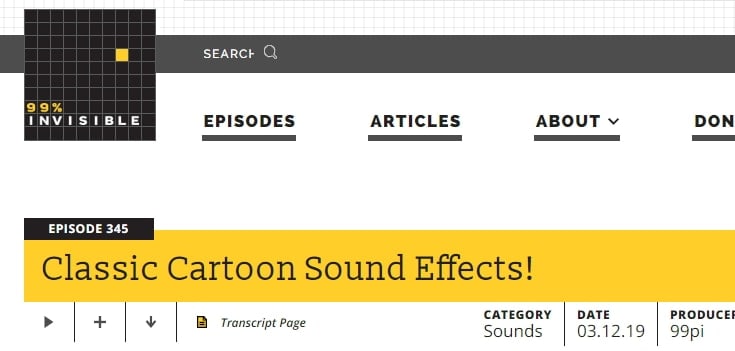
If you are looking for cartoon running sound effect, turn to Episode 345 in 99PercentInvisible. You can download the complete transcript page of around 30 minutes to use it in your video. Use the cartoon running sound effect produced by 99pi to enhance your video.
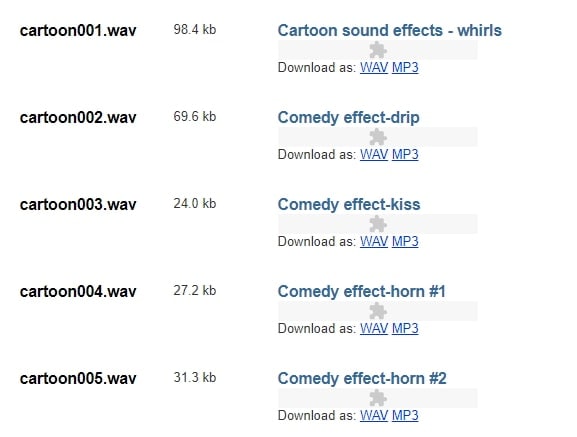
8. Big Fish Audio
The Big Fish Audio’s cartoon sound FX includes 23 free classic cartoon sound effects. The filters include a range of sound FX types, styles, format, brand, etc.
You can click on the cartoon sound effect and listen to it or add it to your playlist. But, if you wish to download the free cartoon sound effects, you need to register and pay to use the sound effect.

You may also like: How to Extract Audio from Videos on Win/Mac/Phone >>
Conclusion
Make your cartoon videos perfect with the fantastic free cartoon sound effects available for download completely free. With the range of free cartoon sound effects, you don’t need to worry about creating new sounds or expenses. You need to download the free sounds and beautifully enhance it with your creativity. There are several other sites for downloading free cartoon sound effects, but here you can check out some of the trusted ones to use.
Benjamin Arango
Benjamin Arango is a writer and a lover of all things video.
Follow @Benjamin Arango
Benjamin Arango
Mar 27, 2024• Proven solutions
The sound plays a significant role in the videos. Without the right sound effects, your videos become dull. It doesn’t create an impact to grab the attention of the viewers. Especially when it comes to attracting the attention of kids while they watch cartoons.
Are you working on a cartoon video for kids or some animated action cartoons? Use the cartoon sound effects to add more intensity and emotions to the videos. Every time creating a new sound effect for your cartoon video becomes difficult.
If you are on a strict budget, producing new content becomes almost impossible. In such situations, free cartoon sound effects are the best way to enhance your cartoon videos.
In this article, you will learn eight best cartoon sound effects that you can download and make your videos perfect.
8 Best Cartoon Sound Effects Resources
1. Spongebob Sound Effects
MyInstant’s Spongebob soundboard offers a range of cartoon sound effects that can be easily downloaded just by clicking on the Download mp3 sound effect button. You can listen to over 120 classic cartoon sound effects and download it for free. You can also copy the embed link and paste it to your website.
2. Hanna Barbera Sound Effects
From Sounddogs, Hanna Barbera sound effects library, you can find over 2200 cartoon sound effects that are divided into 4 CDs. It has almost all the legendary classic cartoon sound effects from the cartoon shows like Yogi Bear, Huckleberry Hound, the Flintstones, The Jetsons, Quick Draw McGraw, and all the rest of the gang.
You can download the mp3 cartoon sound effects completely free by clicking on the Download ID number mentioned at the right end of each link.
3. Scooby Doo Running Sound
Fandom’s Scooby Doo running sound effects offers all the ideas used in 40 episodes of Scooby Doo throughout the three seasons on ABC. It is over 37000 pages wiki that you can click and browse through the pages to find the right sound effect and download it for free.
4. Tom and Jerry Sound Effects
Pond5 offers 13 Tom and Jerry sound effects that you can listen by scrolling the cursor over the boxes and download the free preview of cartoon sound effects by clicking on Download Preview.
If you want to download the entire cartoon sound effect, you need to register, log in, and pay for it. There are filters like price, collections, duration, etc. to make your selection more precise.
5. Free SFX
In FreeSFX website, you can find a range of comical cartoon sound effects that includes classic effects like descend, boink, impact, pop, musical, running, rip and snap, bounce spring, slide whistle, squelch and splat, horn and loads more.
You need to log in to the website to download free cartoon sound effects.
6.GRSites
With over 1980 cartoon sound effects, the GRSites is one of the best free sites for downloading both mp3 and WAV files. You can browse from a range of categories to find the best cartoon sound effects for your videos.
7. Cartoon Running Sound Effect
If you are looking for cartoon running sound effect, turn to Episode 345 in 99PercentInvisible. You can download the complete transcript page of around 30 minutes to use it in your video. Use the cartoon running sound effect produced by 99pi to enhance your video.
8. Big Fish Audio
The Big Fish Audio’s cartoon sound FX includes 23 free classic cartoon sound effects. The filters include a range of sound FX types, styles, format, brand, etc.
You can click on the cartoon sound effect and listen to it or add it to your playlist. But, if you wish to download the free cartoon sound effects, you need to register and pay to use the sound effect.
You may also like: How to Extract Audio from Videos on Win/Mac/Phone >>
Conclusion
Make your cartoon videos perfect with the fantastic free cartoon sound effects available for download completely free. With the range of free cartoon sound effects, you don’t need to worry about creating new sounds or expenses. You need to download the free sounds and beautifully enhance it with your creativity. There are several other sites for downloading free cartoon sound effects, but here you can check out some of the trusted ones to use.
Benjamin Arango
Benjamin Arango is a writer and a lover of all things video.
Follow @Benjamin Arango
“Premier 3 Online Audio Amplification Apps for Maximum Volume Control”
There are times when we download certain videos online and when we play the videos, the volume seems to be very low. Naturally, watching such videos is never going to be comfortable because you have to strain your attention to listen to the dialogues. Besides, the background sound effects will not be prominent which will make the video watching experience underwhelming. That is where an audio booster online tool is useful.
There is no need to download any video volume booster software or app as you will need such a tool occasionally. That is why a video volume booster online tool is more effective. You need to upload your video whichever has low volume and adjust the volume as per requirement. Thereafter, you can export the modified video to save it on your device storage. Here is the list of the top 4 sound booster online for videos.
2. VideoLouder
VideoLouder is free to use audio volume booster online tool. You can increase the volume of any video file that you have downloaded on your hard drive. The online tool supports video file size up to 500 MB. If you want, you can also decrease the volume of the video file. You can directly go to the website and upload the video to increase or decrease the volume. You can even select the number of decibels of sound you want to adjust. Here are the key features of VideoLouder volume booster tool.

- Increase or decrease volume for free.
- Supports different video file formats like AVI, MP4, MPEG, MOV.
- Allows setting the decibels for increase or decrease.
- Allows video file size up to 500 MB which is quite generous.
How to boost video volume online with VideoLouder?
Step 1: From your device web browser, visit <www.videolouder.com>.
Step 2: You will have to click on ‘Browse’ button and select the video file from your device storage whose volume you want to increase or decrease.
Step 3: You will have to click on Select Action and choose the option of the ‘Increase Volume’ or ‘Decrease Volume’ as per requirements.
Step 4: There is the option of ‘How many decibels (dB)?’ where you have to choose the decibel of your preference for increasing or decreasing that much decibel value of sound.
Step 5: Finally, you will have to click on ‘Upload File’ and wait patiently for the video file to get uploaded and volume to get boosted as per your settings.
Thereafter, you can save the file on your device storage and listen to the changes.
3. FileConverto
This is another legitimate MP4 volume booster online to adjust the volume of your video files. Not just MP4 files, you can upload different file formats including AVI and MOV. It is absolutely free to use and has an easy and simple user interface. However, just like other online volume boosters, it also lets you import video having a maximum size of 500 MB. Even FileConverto allows you to customize the decibels freely. Here are the features of FileConverto online tool.

- Can increase as well as decrease volume of video files.
- Ability to customize sound as per decibel requirements.
- Supports multiple video file formats apart from MP4.
- Does not require the setting up of any account.
How to Boost Video Volume Online with FileConverto?
Step 1**:** From your web browser, visit fileconverto.com/boost-video-volume
Step 2: Now click on Browse to select the video file from your device storage.
Step 3: From ‘Select desired action’ option, you will have to select ‘Increase Volume’ or ‘Decrease Volume’.
Step 4: You can set the dB accordingly from ‘How many decibels? option.
Step 5: Finally, click on Submit Now button and wait for the file to upload and volume to get adjusted.
4. Online Video Cutter Volume Booster
There is a wide collection of video editing tools available under Online Video Cutter. Volume Booster is specifically designed to increase the volume of video files. The user interface is better than most other video volume booster online tools. You can drag and drop your video file instantly on its user interface. In fact, you can even select video files from Google Drive and DropBox.
Moreover, you can also paste the URL of the video file such as from YouTube and boost its volume and thereafter, download the video file. You can also check its MP3 volume booster online for increasing or decreasing audio file volume. Here are the key features of Online Video Cutter Volume Booster tool.

- Drag and drop video file instantly.
- Upload video file from Google Drive and DropBox.
- Supports MP4, FLV, AVI, MOV, 3GP, MKV, WM and more file formats.
- Change video speed and preview the changes before downloading.
How to Boost Video Volume Online with Online Video Cutter Volume Booster**?**
Step 1: From your web browser, visit online-video-cutter.com/volume.
Step 2: Drag and drop your video file on the web interface.
Step 3: After the file is uploaded, click on Volume option. Adjust the slider at the bottom as per your requirement.
Step 4: Once done, click on Save button to save the modified video.
Bonus: Video Volume Booster Software
If you are looking for a dedicated software to boost the volume of your videos, we recommend Wondershare Filmora. A standalone software is useful when you have to boost the volume of multiple large video files. Uploading large video files online is a time-consuming as well as a heavy data-consumption process.
With Filmora, you can not only adjust the volume but also optimize various parameters of the audio in a video file. Filmora is a professional video editor and you can ever capture video through webcam as well as capture your screen video with system sound and mic audio. You can add video effects as well as audio effects during the editing phase and export the edited video files in different file formats.
Here are the steps to boost volume in Filmora.
Step 1: Download and install Filmora on your computer. Open the software and click on New Project.
For Win 7 or later (64-bit)
For macOS 10.12 or later
Step 2: Drag and drop your video file on the primary window. Thereafter, drag the video file on Video Timeline.

Step 3: Double-click on the video file to open Editing Panel. Go to Audio tab and adjust the volume and audio parameters to boost the overall volume. When done, click on Ok button.
Step 4: After adjusting, you can play the video to listen to the boosted volume. Finally, click on Export and save the edited video file to your hard drive.
The Bottom Line
Increasing the volume of a video to make the dialogues sound properly and amplify the background music is no more an issue. We have picked the best audio volume booster online where you can adjust video volume instantly. We have also recommended a professional sound booster software named Wondershare Filmora if you want to edit video volume on your computer.
How to boost video volume online with VideoLouder?
Step 1: From your device web browser, visit <www.videolouder.com>.
Step 2: You will have to click on ‘Browse’ button and select the video file from your device storage whose volume you want to increase or decrease.
Step 3: You will have to click on Select Action and choose the option of the ‘Increase Volume’ or ‘Decrease Volume’ as per requirements.
Step 4: There is the option of ‘How many decibels (dB)?’ where you have to choose the decibel of your preference for increasing or decreasing that much decibel value of sound.
Step 5: Finally, you will have to click on ‘Upload File’ and wait patiently for the video file to get uploaded and volume to get boosted as per your settings.
Thereafter, you can save the file on your device storage and listen to the changes.
3. FileConverto
This is another legitimate MP4 volume booster online to adjust the volume of your video files. Not just MP4 files, you can upload different file formats including AVI and MOV. It is absolutely free to use and has an easy and simple user interface. However, just like other online volume boosters, it also lets you import video having a maximum size of 500 MB. Even FileConverto allows you to customize the decibels freely. Here are the features of FileConverto online tool.
- Can increase as well as decrease volume of video files.
- Ability to customize sound as per decibel requirements.
- Supports multiple video file formats apart from MP4.
- Does not require the setting up of any account.
How to Boost Video Volume Online with FileConverto?
Step 1**:** From your web browser, visit fileconverto.com/boost-video-volume
Step 2: Now click on Browse to select the video file from your device storage.
Step 3: From ‘Select desired action’ option, you will have to select ‘Increase Volume’ or ‘Decrease Volume’.
Step 4: You can set the dB accordingly from ‘How many decibels? option.
Step 5: Finally, click on Submit Now button and wait for the file to upload and volume to get adjusted.
4. Online Video Cutter Volume Booster
There is a wide collection of video editing tools available under Online Video Cutter. Volume Booster is specifically designed to increase the volume of video files. The user interface is better than most other video volume booster online tools. You can drag and drop your video file instantly on its user interface. In fact, you can even select video files from Google Drive and DropBox.
Moreover, you can also paste the URL of the video file such as from YouTube and boost its volume and thereafter, download the video file. You can also check its MP3 volume booster online for increasing or decreasing audio file volume. Here are the key features of Online Video Cutter Volume Booster tool.
- Drag and drop video file instantly.
- Upload video file from Google Drive and DropBox.
- Supports MP4, FLV, AVI, MOV, 3GP, MKV, WM and more file formats.
- Change video speed and preview the changes before downloading.
How to Boost Video Volume Online with Online Video Cutter Volume Booster**?**
Step 1: From your web browser, visit online-video-cutter.com/volume.
Step 2: Drag and drop your video file on the web interface.
Step 3: After the file is uploaded, click on Volume option. Adjust the slider at the bottom as per your requirement.
Step 4: Once done, click on Save button to save the modified video.
Bonus: Video Volume Booster Software
If you are looking for a dedicated software to boost the volume of your videos, we recommend Wondershare Filmora. A standalone software is useful when you have to boost the volume of multiple large video files. Uploading large video files online is a time-consuming as well as a heavy data-consumption process.
With Filmora, you can not only adjust the volume but also optimize various parameters of the audio in a video file. Filmora is a professional video editor and you can ever capture video through webcam as well as capture your screen video with system sound and mic audio. You can add video effects as well as audio effects during the editing phase and export the edited video files in different file formats.
Here are the steps to boost volume in Filmora.
Step 1: Download and install Filmora on your computer. Open the software and click on New Project.
For Win 7 or later (64-bit)
For macOS 10.12 or later
Step 2: Drag and drop your video file on the primary window. Thereafter, drag the video file on Video Timeline.
Step 3: Double-click on the video file to open Editing Panel. Go to Audio tab and adjust the volume and audio parameters to boost the overall volume. When done, click on Ok button.
Step 4: After adjusting, you can play the video to listen to the boosted volume. Finally, click on Export and save the edited video file to your hard drive.
The Bottom Line
Increasing the volume of a video to make the dialogues sound properly and amplify the background music is no more an issue. We have picked the best audio volume booster online where you can adjust video volume instantly. We have also recommended a professional sound booster software named Wondershare Filmora if you want to edit video volume on your computer.
Also read:
- In 2024, Techniques to Lessen Song Tempo Without Compromising Pitch Recognition
- New In 2024, Mastering Sound Integration Adding Audio to Your AE Projects
- Updated The Ultimate Guide to Quieting Down Films and Videos for 2024
- New Mac Users Top 4 Choices for Exquisite Music Editing Software for 2024
- In 2024, Innovations in Android Call Technology The Best Replacements for FaceTime Outside of iOS
- Updated In 2024, The Art of Pitch Correction Implementing Autotune Effects Seamlessly in Audacity
- Real-Time Vocal Engineering The Top 5 Innovations to Watch
- Updated In 2024, Expert Approach to Extracting and Erasing Drum Tracks From Songs Digitally Hosted Online
- New In 2024, Recognizing Clear Barrier Collapse Soundscape
- Updated In 2024, The Ultimate Guide to Chrome Audio Recording – Top Picks Revealed
- New Audacitys Magic Wand Techniques for Effortless Removal of Singers From Soundscapes for 2024
- New How Can You Choose the Best Sound Editor, In 2024
- 2024 Approved Favorite Free Online Sites Featuring a Variety of Guitar Music and Designs
- 2024 Approved The Premier Guide to Cutting-Edge Audio Masking Tech, Apps & Online Sites
- Updated In 2024, Interactive Webcast The Ultimate Informative Experience
- New Vanguard Platforms Transforming Audiovisual Industry with Next-Gen Voice Over Technology for 2024
- New In 2024, The Ultimate Guide to Equalizing Auditory Output in VLC Software
- Updated Top 4 Best Music Editor for Mac
- 2024 Approved Top 11 Voice Modification Gadgets Your Comprehensive Guide
- New Adobe Audition Expertise Eliminating Unwanted Sounds and Noise for 2024
- New In 2024, The Ultimate Breakthrough in Video-Derived Audio Extraction
- New Video Platform Auditory Archive for 2024
- Updated Harmonious Majesties A Treasury of Royalty-Free Cinematic Piano Music for Film & Video Production for 2024
- Updated 2024 Approved A Comparative Review of Top 6 Chrome Devices Offering Advanced Voice Manipulation Features - FilmMagicWorkshop
- Updated In 2024, The Ultimate Cyber Companion Downloading Digital Radio Programs to Your PC
- In 2024, Audio Creation at Your Fingertips A Comprehensive Look Into Adobes Audio Editor Features
- Updated IPhone Voice Modification Made Simple Getting Started with VoiceChanger for 2024
- In 2024, Preferred Playlists and Music Packages for Effortless Background Entertainment
- Discovering the Free World of Vocal Transformation Rankings & Reviews - Top 7 List for 2024
- Updated 2024 Approved Melodies in Motion Curating a List of Audiovisual Wonders for Music Lovers (Free and Paid)
- New 2024 Approved Behind the Scenes of Music Production A Look at the Top 8 Best Digital Audio Workstations for Studio Sound Experts
- Updated Best Recommendations for Music Video Editors for 2024
- New 2024 Approved The Ultimate List 10 Prime Web Destinations for High-Quality Wallpapers and Background Videos
- New Ultimate Guide to Premium Feminine Vocalization Web Tools, Update
- New Navigating the Transformation of AIFF to MP3 Audio Streams
- Updated Elevate Audio Output Simple, Gratis Methods to Increase Volume on Windows for 2024
- New The Puzzle of Production Piecing Together Roles for an Immersive Filming Experience
- Mastering the Art of Downloading Podcast Episodes on Laptops and Desktops
- Updated 2024 Approved Harmonizing Hear and See Innovative Approaches to Auto-Synchronize Audio with Video
- Updated Soundscape Quest Finding the Path of Giggles and Guffaws
- New Expert Picks Convert MP3 Audio to Written Format for 2024
- Updated In 2024, Audio Splitter How to Split Audio Files Easily
- New The Ultimate Technique for Uniform Audio Amplitude in VLC A Detailed Walkthrough for 2024
- Unveiling Androids 7 Best-Rated Voice Transformation Software for 2024
- In 2024, Unlock Your Samsung Galaxy S24 Ultras Potential The Top 20 Lock Screen Apps You Need to Try
- 5 Hassle-Free Solutions to Fake Location on Find My Friends Of Itel S23+ | Dr.fone
- Elevate Your Video Quality The Top 5 HD Video Editors
- Updated In 2024, Online Video Creation Made Easy WeVideo
- How to Unlock Disabled iPhone 7 Plus/iPad Without Computer
- Updated In 2024, The Ultimate Aspect Ratio Calculator Simplifying Image Editing
- How to recover deleted photos from Android Gallery without backup on Xiaomi 13 Ultra
- Latest way to get Shiny Meltan Box in Pokémon Go Mystery Box On Lava Yuva 3 | Dr.fone
- Remove Google FRP Lock on Vivo Y28 5G
- In 2024, How to Transfer Contacts from Nokia G42 5G to Other Android Devices Devices? | Dr.fone
- 2024 Approved 10 Must Watch Netflix Cartoon Series For You
- How do i sign a .doc file electronically
- About Infinix Hot 40 FRP Bypass
- In 2024, Unlock Your Device iCloud DNS Bypass Explained and Tested, Plus Easy Alternatives From Apple iPhone 15 Plus
- In 2024, Process of Screen Sharing Vivo S17e to PC- Detailed Steps | Dr.fone
- New Boost the Pace of Your Instagram Reels Videos with These Simple Tricks
- Full Guide on Mirroring Your Oppo Find X7 to Your PC/Mac | Dr.fone
- How to Unlock Realme 11 Pro Phone Password Without Factory Reset?
- 2024 Approved Convert Music with Ease The Best MP3 Converters for Mac
- How to recover deleted photos from Android Gallery after format on Galaxy Z Flip 5
- Things You Dont Know About Tecno Spark Go (2024) Reset Code | Dr.fone
- Restore Missing App Icon on Vivo Y27 5G Step-by-Step Solutions | Dr.fone
- Does Life360 Notify When You Log Out On OnePlus Ace 2V? | Dr.fone
- The Ultimate Guide to iMovie Alternatives for Windows 10 Users
- In 2024, How to Mirror Tecno Camon 20 Pro 5G to Mac? | Dr.fone
- The Magnificent Art of Pokemon Go Streaming On Lava Yuva 2? | Dr.fone
- How to Factory Reset Oppo Find X7 without Losing Data | Dr.fone
- How to Transfer Photos from Samsung Galaxy S23 Ultra to New Android? | Dr.fone
- Best Methods for Samsung Galaxy Z Fold 5 Wont Turn On | Dr.fone
- New Mac Subtitle Editing Software Top Alternatives to Subtitle Edit for 2024
- New You Must Be Wondering Which the Best Online Transparent Image-Maker Is! Well, There Is No Need to Get Confused as Here; You Will Get a Curated List for the Same
- Why is iPogo not working On Meizu 21 Pro? Fixed | Dr.fone
- Title: Updated Step-by-Step to Free Digital Sound Logging The Audacity Way
- Author: Jacob
- Created at : 2024-05-20 00:04:25
- Updated at : 2024-05-21 00:04:25
- Link: https://audio-shaping.techidaily.com/updated-step-by-step-to-free-digital-sound-logging-the-audacity-way/
- License: This work is licensed under CC BY-NC-SA 4.0.
