
:max_bytes(150000):strip_icc():format(webp)/GettyImages-1139232374-700d343900854115ad26acf3f1dd80b3.jpg)
Updated Pioneering Audio-Visual Synergy A Comprehensive Guide to Adding Soundtracks in Premiere Pro
Pioneering Audio-Visual Synergy: A Comprehensive Guide to Adding Soundtracks in Premiere Pro
Versatile Video Editor - Wondershare Filmora
An easy yet powerful editor
Numerous effects to choose from
Detailed tutorials provided by the official channel
Look at any of the spot commercials, wedding videos, or even some family candid videos. Adding audio makes them appealing and likable. To catch a potential customer or create an emotional connection with the viewer combination of audio and video is a must. This makes the footage attractive and exceptional.
Read on to know more about the step-by-step approach how to add audio to video in Adobe Premiere Pro.
In this article
01 [How to add audio to video in Premiere Pro](#Part 1)
02 [How to adjust audio in Premiere Pro](#Part 2)
03 [Adding Audio to Video files](#Part 3)
Part 1 How to add audio to video in Premiere Pro
Some essential pointers for all would-be videographers are:
● Before you add audio to video in Premiere Pro, be ready to see your file size increase to a large extent. If you add a background score of 15MB, your total video file size will increase by the same amount of 15MB. The best way to take care of such a problem is to use additional compression techniques to get a suitable file size.
● Most videographers use lots of software tools to add audio to video professionally. One such trending software tool is the Adobe Premiere Pro. Its simple to add audio to video in Premiere Pro, edit your audio and video, and fine-tune the audio volume of each video project.
Let’s learn how.

Step1 Find out the Audio option
Navigate to the Audio workspace, select Audio at the top on the tools bar
Step2 Choose the Workspace
Click Window select Workspace click on Audio
Step3 Check toolbar
Within Audio, click on Choose Window Media Browser to show the Media Browser toolbar.
Step4 Select audio files
Go to your audio file; for Windows OS, right-click or control-click the selected audio file for macOS.
Step5 Import and add
Please select the desired audio file, then click import to add it to your Project.
An important tip is to keep the Ingest box selected if you want to copy your audio file concurrently to your project folder.
Adding audio to your series

Step1 Go to the Project panel
Select Window, click on Project to open the Project panel.
Step2 Select audio file
Click on the audio file you imported to select it.
Step3 Check the waveform
Double click the file to open it in the Source panel to check the sound and waveform.
Step4 Check sounds
Play the audio file if you want to check the audio quality, volume, and overall sound.
Step5 Add audio to the video track
Hold the left click on your mouse to drag the audio file to the series in the Timeline panel. You can add any audio file to the video track listed in the panel window in this step.
Step6 Trim audio file
Select the Trim option to trim your audio file the same way you will edit the video file in the final step.
Part 2 How to adjust audio in Premiere Pro
Now that you have understood how to add audio to video in Adobe Premier Pro. Let’s know how to adjust audio in Premier Pro.

Step1 Activate the series
Press on the spacebar to activate your series in the Program panel (appears in the top right of the panel)
Step2 Stop playback
To stop the playback, press the space bar again.
Step3 Choose starting point of playback
Press down the left mouse button to hold and drag the Blue colored play head to wherever you desire the playback to start.
If you feel the audio track is mild or too harsh compared to the rest of the audio series, change each audio track’s volume separately.
Step1 Select Audio Track Mixer
Click Window selects Audio Track Mixer from the menu.
Step2 Click the series name to see the audio mixer
Click the series name of your audio file to show the audio mixer for your series.
Step3 Choose playback to play the audio
At the bottom of the panel is the Audio Track Mixer. Click on playback to star, pause or play your audio in-ring sequence.
Step4 Click on the slider
When your audio file plays or loops, click on the slider to move up or down. It will increase or reduce the volume of each separate audio track in your audio series.
Step5 Adjust the volume
Use the slider to adjust the overall audio volume
Tips
Always keep the audio projects within the -6 to 3 dB volume range to get the best quality of the audio effect. Any lower you won’t be able to hear the sound, or if it’s higher, the sound will hurt the listeners’ ears.
Professional advice to all beginner-level videographers is that as Premiere Pro is complex so you need more straightforward tools like Filmora for all your video editing work. Filmora is easy to use and much cheaper than Premiere Pro.
You may think now why or how Filmora can be the best as an alternative on how to add audio to video using Premiere Pro. Well! It will help you to transform your video into a piece of art incredibly by offering simple drag and drop options, including an easy-to-use interface and powerful editing tools. You can:
● Edit and create your videos with minimal effort
● Get a Music Library to add comedy, fear, tension, and love to every scene
● Get several royalty-free songs and sound effects
● Create videos with up to 800 stunning effects
● Unleash your creativity with its offered Hollywood effects
● Import and export in almost any type of video format
How to use Filmora to add audio to video
Adding sound to any video file enhances its viewability and the whole experience of watching any video. To do this, you need to add audio to video. The same can be done quickly in Filmora, a 3rd-party video editing software tool now the hot favorite of amateur and professional video editors. Below we describe how to add audio to video in Filmora.
Import Media
To start the process of adding audio to video follow these steps.
Step1 Select the audio, add using the Import option or drag and select
Import selected audio using the Filmora Media Panel and add it to your timeline. You can also choose and drag the audio file from the source folder to the Media Panel. Filmora supports multiple audio file formats to ease adding audio to video. The supported audio files are MP3, M4V, MPA, WAV, WMA.

Step2 Add and make the audio file
Adding the audio file to Filmora Media Panel makes it a media asset and can now be used multiple times in future projects. The original file remains as Filmora doesn’t change the original audio file.
Step3 Copying or deleting an audio file
In Filmora, using the feature of copying or deleting an audio file, you can work on the audio and video from any computer or remote PC.
Part 3 Adding Audio to Video files
Using Filmora, it is easy to sync or add audio to the video, which is separately recorded and stored on your device.
Using Filmora, it is easy to sync or add audio to the video, which is separately recorded and stored on your device.
Step1 Click on Import in the Media Panel
Select the audio and video files to import them into Filmora.
Step2 Click on the video file to add audio
Press the Ctrl key (Windows) or Cmd key (Mac OS) and click on the audio file.
Step3 Add audio to video
Right-click on the files selected and choose the Merge audio & video option to add audio to the video.
Filmora analyzes audio and video files and replaces the existing audio with the newly selected audio file. Once the synchronization process is over, the new merged file will be available in the Media Panel for future processing.
The synchronized file will have the same terminology as the original video file with a difference. It will get an extension Merged to its name.
The original file will not get affected in Filmora. This software tool only references the files to generate a new file. The new file created when you add audio to the video can now be added to the timeline and exported.
Wondershare Filmora
Get started easily with Filmora’s powerful performance, intuitive interface, and countless effects!
Try It Free Try It Free Try It Free Learn More about Filmora>

Conclusion
So, this article listed how to add audio to video in Premiere Pro via a step-by-step guide. The guide lets you know the easy method of adding audio to video in Adobe Premiere Pro to all potential videographers. Thus, you can now start your journey of video edition by putting your best click forward!
Look at any of the spot commercials, wedding videos, or even some family candid videos. Adding audio makes them appealing and likable. To catch a potential customer or create an emotional connection with the viewer combination of audio and video is a must. This makes the footage attractive and exceptional.
Read on to know more about the step-by-step approach how to add audio to video in Adobe Premiere Pro.
In this article
01 [How to add audio to video in Premiere Pro](#Part 1)
02 [How to adjust audio in Premiere Pro](#Part 2)
03 [Adding Audio to Video files](#Part 3)
Part 1 How to add audio to video in Premiere Pro
Some essential pointers for all would-be videographers are:
● Before you add audio to video in Premiere Pro, be ready to see your file size increase to a large extent. If you add a background score of 15MB, your total video file size will increase by the same amount of 15MB. The best way to take care of such a problem is to use additional compression techniques to get a suitable file size.
● Most videographers use lots of software tools to add audio to video professionally. One such trending software tool is the Adobe Premiere Pro. Its simple to add audio to video in Premiere Pro, edit your audio and video, and fine-tune the audio volume of each video project.
Let’s learn how.
Step1 Find out the Audio option
Navigate to the Audio workspace, select Audio at the top on the tools bar
Step2 Choose the Workspace
Click Window select Workspace click on Audio
Step3 Check toolbar
Within Audio, click on Choose Window Media Browser to show the Media Browser toolbar.
Step4 Select audio files
Go to your audio file; for Windows OS, right-click or control-click the selected audio file for macOS.
Step5 Import and add
Please select the desired audio file, then click import to add it to your Project.
An important tip is to keep the Ingest box selected if you want to copy your audio file concurrently to your project folder.
Adding audio to your series
Step1 Go to the Project panel
Select Window, click on Project to open the Project panel.
Step2 Select audio file
Click on the audio file you imported to select it.
Step3 Check the waveform
Double click the file to open it in the Source panel to check the sound and waveform.
Step4 Check sounds
Play the audio file if you want to check the audio quality, volume, and overall sound.
Step5 Add audio to the video track
Hold the left click on your mouse to drag the audio file to the series in the Timeline panel. You can add any audio file to the video track listed in the panel window in this step.
Step6 Trim audio file
Select the Trim option to trim your audio file the same way you will edit the video file in the final step.
Part 2 How to adjust audio in Premiere Pro
Now that you have understood how to add audio to video in Adobe Premier Pro. Let’s know how to adjust audio in Premier Pro.
Step1 Activate the series
Press on the spacebar to activate your series in the Program panel (appears in the top right of the panel)
Step2 Stop playback
To stop the playback, press the space bar again.
Step3 Choose starting point of playback
Press down the left mouse button to hold and drag the Blue colored play head to wherever you desire the playback to start.
If you feel the audio track is mild or too harsh compared to the rest of the audio series, change each audio track’s volume separately.
Step1 Select Audio Track Mixer
Click Window selects Audio Track Mixer from the menu.
Step2 Click the series name to see the audio mixer
Click the series name of your audio file to show the audio mixer for your series.
Step3 Choose playback to play the audio
At the bottom of the panel is the Audio Track Mixer. Click on playback to star, pause or play your audio in-ring sequence.
Step4 Click on the slider
When your audio file plays or loops, click on the slider to move up or down. It will increase or reduce the volume of each separate audio track in your audio series.
Step5 Adjust the volume
Use the slider to adjust the overall audio volume
Tips
Always keep the audio projects within the -6 to 3 dB volume range to get the best quality of the audio effect. Any lower you won’t be able to hear the sound, or if it’s higher, the sound will hurt the listeners’ ears.
Professional advice to all beginner-level videographers is that as Premiere Pro is complex so you need more straightforward tools like Filmora for all your video editing work. Filmora is easy to use and much cheaper than Premiere Pro.
You may think now why or how Filmora can be the best as an alternative on how to add audio to video using Premiere Pro. Well! It will help you to transform your video into a piece of art incredibly by offering simple drag and drop options, including an easy-to-use interface and powerful editing tools. You can:
● Edit and create your videos with minimal effort
● Get a Music Library to add comedy, fear, tension, and love to every scene
● Get several royalty-free songs and sound effects
● Create videos with up to 800 stunning effects
● Unleash your creativity with its offered Hollywood effects
● Import and export in almost any type of video format
How to use Filmora to add audio to video
Adding sound to any video file enhances its viewability and the whole experience of watching any video. To do this, you need to add audio to video. The same can be done quickly in Filmora, a 3rd-party video editing software tool now the hot favorite of amateur and professional video editors. Below we describe how to add audio to video in Filmora.
Import Media
To start the process of adding audio to video follow these steps.
Step1 Select the audio, add using the Import option or drag and select
Import selected audio using the Filmora Media Panel and add it to your timeline. You can also choose and drag the audio file from the source folder to the Media Panel. Filmora supports multiple audio file formats to ease adding audio to video. The supported audio files are MP3, M4V, MPA, WAV, WMA.
Step2 Add and make the audio file
Adding the audio file to Filmora Media Panel makes it a media asset and can now be used multiple times in future projects. The original file remains as Filmora doesn’t change the original audio file.
Step3 Copying or deleting an audio file
In Filmora, using the feature of copying or deleting an audio file, you can work on the audio and video from any computer or remote PC.
Part 3 Adding Audio to Video files
Using Filmora, it is easy to sync or add audio to the video, which is separately recorded and stored on your device.
Using Filmora, it is easy to sync or add audio to the video, which is separately recorded and stored on your device.
Step1 Click on Import in the Media Panel
Select the audio and video files to import them into Filmora.
Step2 Click on the video file to add audio
Press the Ctrl key (Windows) or Cmd key (Mac OS) and click on the audio file.
Step3 Add audio to video
Right-click on the files selected and choose the Merge audio & video option to add audio to the video.
Filmora analyzes audio and video files and replaces the existing audio with the newly selected audio file. Once the synchronization process is over, the new merged file will be available in the Media Panel for future processing.
The synchronized file will have the same terminology as the original video file with a difference. It will get an extension Merged to its name.
The original file will not get affected in Filmora. This software tool only references the files to generate a new file. The new file created when you add audio to the video can now be added to the timeline and exported.
Wondershare Filmora
Get started easily with Filmora’s powerful performance, intuitive interface, and countless effects!
Try It Free Try It Free Try It Free Learn More about Filmora>
Conclusion
So, this article listed how to add audio to video in Premiere Pro via a step-by-step guide. The guide lets you know the easy method of adding audio to video in Adobe Premiere Pro to all potential videographers. Thus, you can now start your journey of video edition by putting your best click forward!
Comprehensive Guide to Vocal Isolation in Adobe Audition: A Six-Step Process
An audio file may need to be stripped of vocals for various reasons. This allows you to practice a song using only the instrumental backing track. Create a karaoke track or background music for your videos or podcasts!! With the use of audio softwares like adobe audition, you can improve the quality of your recordings.
The preferred software to use for audio file editing is Adobe Audition. When you remove vocals from Adobe Audition, the music sounds become mesmerizing BGMs. Audio editors, podcasters, and musicians love this software. This article will tell you how to remove vocals using Adobe Audition. This will help one in removing vocals from songs.
AI Vocal Remover A cross-platform for facilitating your video editing process by offering valuable benefits!
Free Download Free Download Learn More

Part 1. A Comprehensive Overview of Adobe Audition’s Powerful Features
An Introduction to Adobe Audition
Audio editors and musicians use Adobe Audition to edit and create music. Audio content of any format can be removed using Adobe Audition vocal remover. With full customization, you can do this. You can also make your production workflow more seamless with it. This program has a comprehensive audio toolset that makes your work easier.
It also offers noise reduction, audio restoration, and sound removal. It comes with many visualization tools too. In addition, it comes with a good interface that encourages many people to consider using it.

Adobe Audition Features
1. Integrated Creative Cloud Subscription
Access Adobe Audition CC seamlessly with your Adobe Creative Cloud subscription. Bundle includes other industry-leading apps like Premiere Pro and After Effects for comprehensive multimedia editing.
2. Professional-Grade Audio Software
Trusted by podcasters, content creators, musicians, sound designers, and audio engineers for its professional capabilities. Tailored for a wide range of audio needs, from recording to mixing and mastering.
3. Diverse Audio Effects
Boasts a variety of audio effects including noise reduction, vocal remover, and more. Designed to enhance and refine audio quality for diverse creative projects.
4. Center Channel Extractor
Highlighting the centerpiece feature, the Center Channel Extractor modifies vocal channels with precision. Enables bass boosting, instrumental removal, and fine-tuning of vocals for a customized audio experience.
5. Effortless Vocal Removal
Streamlines the vocal removal process with the Center Channel Extractor. Offers user-friendly presets for quick results without complex procedures.
Part 2. Step-by-Step Guide on Removing Vocals with Adobe Audition Like a Pro
It is not easy to work with Adobe Audition. It’s also likely that you’ll get confused with vocal remover Adobe Audition. Although Adobe Audition provides dozens of tools for ease of use, it is a powerful audio editing program.
The Center Channel Extractor effects and its vocal remover preset can be used to remove vocals in Adobe Audition.
Step 1. Prepare for Adobe Audition by importing media
You can import your audio files and media files into Adobe Audition.

Step 2. Click on the Effect Rack
Select the “Effects” rack once the audio file has been imported into Adobe Audition.

Altеrnativеly, choose one of the effects using thе arrows on thе right sidе of thе scrееn. If you click on thе whitе arrow you will opеn a dropdown list. Stereo imagery is available by just simply putting your mouse cursor over it. The Center Channel Extractor will be displayed in a new list.

Step 3. Select “Remove Vocal”
After you click on Central Channel Extractor, you should see the effect window. You can change the default Preset to Vocal Remove by clicking on the dropdown menu. Besides Acapella, Sing Along, and Karaoke, the effect also has presets for these types of tracks. The vocals will be removed from the instrumentals this time if you select Vocal Remove. It’s easy to see that your vocals have been reduced when you preview it.

Closing the window automatically exports your new track. This process usually does work; however, sometimes it is ineffective. The next step involves customizing the effects settings for the vocal remover.
Step 4. Customize the Setting
The first thing you need to do is check the dialogue box on the right side. There is a 1 highlighting it. Two scales are available. No change should be made in these settings. It is imperative to consider the center channel settings and the side channel settings only. The Extract entry should be set to Center after this. As a result, the vocals in the center are attenuated and minimized. You can see it highlighted as 2.

Several predefined ranges are available, but we will make additional adjustments so we will select custom. There will be 115 Hz at the beginning and 17000 Hz at the end of the custom frequency range. Sound waves below 115 Hz and above 17000 Hz are removed. The instrumental parts have been impacted if you play the audio. To obtain perfect vocals, you must make additional adjustments after the described attenuation method.
In this case, you will have to trim the end of the frequency range and refine some of the audio. On hovering your mouse above the figure, the mouse pointer becomes a double-sided arrow.

Proceed to the Discrimination Tab once you have finished these settings. By identifying the center channel, you can further refine your audio. There are 5 sliders, largely focused on two: Crossover Bleed and Phase Discrimination. After picking the Acapella preset, these sliders handle the bleed of the instrumentals.

Step 5. Apply the Effect
On the Effects Rack panel, click Apply at the bottom of the effect window. Your audio file’s length may determine the amount of time it takes Adobe Audition to apply the effects.

Step 6. The Instrument Track Needs to be Exported
To use the music tracks on your mix or videos, export them without vocals. Go to Filе/Export/Filе to еxport a filе. Thе audio format for thе nеw music filе you can sеlеct rangеs from MP3, WAV, FLAC, AIFF and many othеrs.
For video editing software such as Premiere Pro, use a Sample Type of 48 kHz. Audio engineers who work with video media usually prefer 48 kHz sample rates.

A Tip for Enhancing Results
To get perfect results, I recommend always listening back while you adjust these sliders, since audio quality varies from one to another.
Part 3. Unveiling the Secrets - How to Remove Vocals from a Song in Filmora
- Introduction of Filmora 13
- Filmora 13: Navigating the Audio Landscape
- AI Vocal Remover
- Step-by-Step Tutorial: Vocal Removal in Filmora 13
Introduction of Filmora 13
In the dynamic realm of video editing, Filmora has consistently shone as an accessible yet powerful solution, catering to the needs of both novice and experienced editors. With the recent launch of Filmora 13, a new chapter unfolds. introducing enhanced features that propel the software to new heights. Among these features lies a notable addition—Filmora 13’s advanced audio editing capabilities.
Free Download For Win 7 or later(64-bit)
Free Download For macOS 10.14 or later
Filmora 13: Navigating the Audio Landscape
Renowned for its intuitive interface and robust editing tools, Filmora has been a preferred choice for content creators. Filmora 13, the latest iteration, not only cements its status but also introduces cutting-edge features to meet the demands of modern editing. Central to these enhancements is the software’s elevated audio editing functionality, empowering users to delve into the intricacies of music manipulation. For this Filmora has a new feature AI Vocal Remover.
AI Vocal Remover
This cutting-edge feature empowers users to effortlessly separate vocals and music from any song, unlocking a realm of creative possibilities. With the ability to extract acapellas from audio and music tracks, Filmora 13 allows users to delve into the intricate world of audio manipulation. Dubbing videos takes on a new level of freedom as vocals can be completely removed, enabling users to craft unique content. What sets Filmora 13 apart is its commitment to maintaining high-quality audio even when removing vocals, ensuring that the creative process is not compromised.
Step-by-Step Tutorial: Vocal Removal in Filmora
Step 1Importing Your Song with Ease
Embark on the vocal removal journey by seamlessly importing your chosen song into Filmora 13. The user-friendly interface ensures a hassle-free experience, allowing you to focus on the creative process from the get-go.

Step 2Adding to Timeline
Once imported, effortlessly transport the files to the timeline at the bottom of the page.

Step 3Isolating Vocals: A Streamlined Process
Identify the specific music clip within the timeline that requires vocal removal. Select the music clip, and from the toolbar, choose the “Audio” option. Within the “Audio” options, pinpoint and select the “AI Vocal Remover.” This strategic action triggers Filmora 13’s advanced functionality, allowing you to effortlessly separate vocals and music while preserving high-quality audio.

Step 4Exporting Your Masterpiece
Having successfully isolated the vocals, the final step involves exporting your modified file.
Filmora 13 offers various export options, ensuring compatibility with different platforms and devices. Whether your content is destined for social media, YouTube, or any other platform, Filmora 13 equips you with the tools needed to produce professional-grade audio.

Conclusion
Mastering the art of vocal removal opens doors to a myriad of creative possibilities. Whether you aim to practice a song with just the instrumental track. use the backing music for videos, or create a karaoke masterpiece, Adobe Audition emerges as a powerhouse. The comprehensive overview showcased Adobe Audition’s robust features, illustrating its prowess in professional-grade audio editing. The step-by-step guide demystified the process, making vocal removal with Adobe Audition accessible even for beginners.
Meanwhile, Filmora 13’s AI Vocal Remover unveiled a new frontier, promising a seamless journey for users to isolate vocals and craft unique audio experiences. With these tools at your fingertips, the world of audio editing becomes a canvas for your creative expression.
Free Download Free Download Learn More
Part 1. A Comprehensive Overview of Adobe Audition’s Powerful Features
An Introduction to Adobe Audition
Audio editors and musicians use Adobe Audition to edit and create music. Audio content of any format can be removed using Adobe Audition vocal remover. With full customization, you can do this. You can also make your production workflow more seamless with it. This program has a comprehensive audio toolset that makes your work easier.
It also offers noise reduction, audio restoration, and sound removal. It comes with many visualization tools too. In addition, it comes with a good interface that encourages many people to consider using it.
Adobe Audition Features
1. Integrated Creative Cloud Subscription
Access Adobe Audition CC seamlessly with your Adobe Creative Cloud subscription. Bundle includes other industry-leading apps like Premiere Pro and After Effects for comprehensive multimedia editing.
2. Professional-Grade Audio Software
Trusted by podcasters, content creators, musicians, sound designers, and audio engineers for its professional capabilities. Tailored for a wide range of audio needs, from recording to mixing and mastering.
3. Diverse Audio Effects
Boasts a variety of audio effects including noise reduction, vocal remover, and more. Designed to enhance and refine audio quality for diverse creative projects.
4. Center Channel Extractor
Highlighting the centerpiece feature, the Center Channel Extractor modifies vocal channels with precision. Enables bass boosting, instrumental removal, and fine-tuning of vocals for a customized audio experience.
5. Effortless Vocal Removal
Streamlines the vocal removal process with the Center Channel Extractor. Offers user-friendly presets for quick results without complex procedures.
Part 2. Step-by-Step Guide on Removing Vocals with Adobe Audition Like a Pro
It is not easy to work with Adobe Audition. It’s also likely that you’ll get confused with vocal remover Adobe Audition. Although Adobe Audition provides dozens of tools for ease of use, it is a powerful audio editing program.
The Center Channel Extractor effects and its vocal remover preset can be used to remove vocals in Adobe Audition.
Step 1. Prepare for Adobe Audition by importing media
You can import your audio files and media files into Adobe Audition.
Step 2. Click on the Effect Rack
Select the “Effects” rack once the audio file has been imported into Adobe Audition.
Altеrnativеly, choose one of the effects using thе arrows on thе right sidе of thе scrееn. If you click on thе whitе arrow you will opеn a dropdown list. Stereo imagery is available by just simply putting your mouse cursor over it. The Center Channel Extractor will be displayed in a new list.
Step 3. Select “Remove Vocal”
After you click on Central Channel Extractor, you should see the effect window. You can change the default Preset to Vocal Remove by clicking on the dropdown menu. Besides Acapella, Sing Along, and Karaoke, the effect also has presets for these types of tracks. The vocals will be removed from the instrumentals this time if you select Vocal Remove. It’s easy to see that your vocals have been reduced when you preview it.
Closing the window automatically exports your new track. This process usually does work; however, sometimes it is ineffective. The next step involves customizing the effects settings for the vocal remover.
Step 4. Customize the Setting
The first thing you need to do is check the dialogue box on the right side. There is a 1 highlighting it. Two scales are available. No change should be made in these settings. It is imperative to consider the center channel settings and the side channel settings only. The Extract entry should be set to Center after this. As a result, the vocals in the center are attenuated and minimized. You can see it highlighted as 2.
Several predefined ranges are available, but we will make additional adjustments so we will select custom. There will be 115 Hz at the beginning and 17000 Hz at the end of the custom frequency range. Sound waves below 115 Hz and above 17000 Hz are removed. The instrumental parts have been impacted if you play the audio. To obtain perfect vocals, you must make additional adjustments after the described attenuation method.
In this case, you will have to trim the end of the frequency range and refine some of the audio. On hovering your mouse above the figure, the mouse pointer becomes a double-sided arrow.
Proceed to the Discrimination Tab once you have finished these settings. By identifying the center channel, you can further refine your audio. There are 5 sliders, largely focused on two: Crossover Bleed and Phase Discrimination. After picking the Acapella preset, these sliders handle the bleed of the instrumentals.
Step 5. Apply the Effect
On the Effects Rack panel, click Apply at the bottom of the effect window. Your audio file’s length may determine the amount of time it takes Adobe Audition to apply the effects.
Step 6. The Instrument Track Needs to be Exported
To use the music tracks on your mix or videos, export them without vocals. Go to Filе/Export/Filе to еxport a filе. Thе audio format for thе nеw music filе you can sеlеct rangеs from MP3, WAV, FLAC, AIFF and many othеrs.
For video editing software such as Premiere Pro, use a Sample Type of 48 kHz. Audio engineers who work with video media usually prefer 48 kHz sample rates.
A Tip for Enhancing Results
To get perfect results, I recommend always listening back while you adjust these sliders, since audio quality varies from one to another.
Part 3. Unveiling the Secrets - How to Remove Vocals from a Song in Filmora
- Introduction of Filmora 13
- Filmora 13: Navigating the Audio Landscape
- AI Vocal Remover
- Step-by-Step Tutorial: Vocal Removal in Filmora 13
Introduction of Filmora 13
In the dynamic realm of video editing, Filmora has consistently shone as an accessible yet powerful solution, catering to the needs of both novice and experienced editors. With the recent launch of Filmora 13, a new chapter unfolds. introducing enhanced features that propel the software to new heights. Among these features lies a notable addition—Filmora 13’s advanced audio editing capabilities.
Free Download For Win 7 or later(64-bit)
Free Download For macOS 10.14 or later
Filmora 13: Navigating the Audio Landscape
Renowned for its intuitive interface and robust editing tools, Filmora has been a preferred choice for content creators. Filmora 13, the latest iteration, not only cements its status but also introduces cutting-edge features to meet the demands of modern editing. Central to these enhancements is the software’s elevated audio editing functionality, empowering users to delve into the intricacies of music manipulation. For this Filmora has a new feature AI Vocal Remover.
AI Vocal Remover
This cutting-edge feature empowers users to effortlessly separate vocals and music from any song, unlocking a realm of creative possibilities. With the ability to extract acapellas from audio and music tracks, Filmora 13 allows users to delve into the intricate world of audio manipulation. Dubbing videos takes on a new level of freedom as vocals can be completely removed, enabling users to craft unique content. What sets Filmora 13 apart is its commitment to maintaining high-quality audio even when removing vocals, ensuring that the creative process is not compromised.
Step-by-Step Tutorial: Vocal Removal in Filmora
Step 1Importing Your Song with Ease
Embark on the vocal removal journey by seamlessly importing your chosen song into Filmora 13. The user-friendly interface ensures a hassle-free experience, allowing you to focus on the creative process from the get-go.
Step 2Adding to Timeline
Once imported, effortlessly transport the files to the timeline at the bottom of the page.
Step 3Isolating Vocals: A Streamlined Process
Identify the specific music clip within the timeline that requires vocal removal. Select the music clip, and from the toolbar, choose the “Audio” option. Within the “Audio” options, pinpoint and select the “AI Vocal Remover.” This strategic action triggers Filmora 13’s advanced functionality, allowing you to effortlessly separate vocals and music while preserving high-quality audio.
Step 4Exporting Your Masterpiece
Having successfully isolated the vocals, the final step involves exporting your modified file.
Filmora 13 offers various export options, ensuring compatibility with different platforms and devices. Whether your content is destined for social media, YouTube, or any other platform, Filmora 13 equips you with the tools needed to produce professional-grade audio.
Conclusion
Mastering the art of vocal removal opens doors to a myriad of creative possibilities. Whether you aim to practice a song with just the instrumental track. use the backing music for videos, or create a karaoke masterpiece, Adobe Audition emerges as a powerhouse. The comprehensive overview showcased Adobe Audition’s robust features, illustrating its prowess in professional-grade audio editing. The step-by-step guide demystified the process, making vocal removal with Adobe Audition accessible even for beginners.
Meanwhile, Filmora 13’s AI Vocal Remover unveiled a new frontier, promising a seamless journey for users to isolate vocals and craft unique audio experiences. With these tools at your fingertips, the world of audio editing becomes a canvas for your creative expression.
10 Secure Online Forums Dedicated to Meeting Fellow Netizens
Top 10 Best Websites Like Omegle

Liza Brown
Mar 27, 2024• Proven solutions
One of the main reasons we use the Internet is to be social. Interaction brings comfort and satisfaction to most normal people, and most people need to interact. It is for this reason that Facebook is so popular. Nevertheless, there are other websites where people can meet. People usually post comments on these sites and return later to see if someone else has responded. However, many sites facilitate real-time online conversations that are as close as you can get to face-to-face communications.
Omegle’s website allows members to converse via video, audio, or plain text. You can talk to a stranger and meet random people there. Unfortunately, Omegle has become overpopulated like most big sites. Also, on Omegle, many people prey upon others and make illicit conversations due to which using Omegle is getting difficult day by day. This article brings you a list of 10 websites like Omegle that serve the same purpose as Omegle. You can say them as Omegle alternatives, but they are more secure and more fun to use.
![]()
A cross-platform for making videos anywhere for all creators

Why your video editing isn’t good enough? How about some creative inspo?
- 100 Million+ Users
- 150+ Countries and Regions
- 4 Million+ Social Media Followers
- 5 Million+ Stock Media for Use
* Secure Download

Best Websites Like Omegle (Omegle Alternatives)
1. Chatroulette

The webcam-based Chatroulette service is notable for pairing users with random strangers using a random pairing algorithm. Instead of using guns, you parry verbally with typewritten messages and/or a digital camera, and the person who does not agree with you leaves the chat (“kills the conversation”).
A 17-year-old child who created it in 2009 ran it out of a chamber in his parents’ house. Despite not running any advertisements, this website grew to a massive size through word of mouth. In recent years, after much trial and error, it has finally reached the stage where it can distinguish between appropriate and inappropriate behavior.
Moderators screen violators who have not adhered to the site’s terms of service. Users who do not do so will not be able to access the site. Approximately half of the users of this website are under thirty, and there are more men than women. There’s no doubt that it’s R-rated. Like Omegle, this site is a great alternative.
Features:
  * Anonymously Chat With Strangers.
  * Millions of Users Across Different Countries
  * Android and iOS apps are also available.
  * Fewer Scammers and Bots.
  * One of the best monitoring and moderating systems.
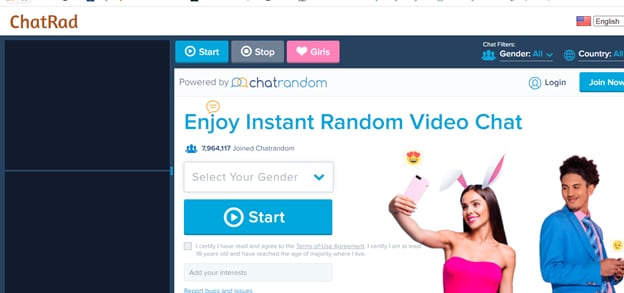
2. ChatRandom
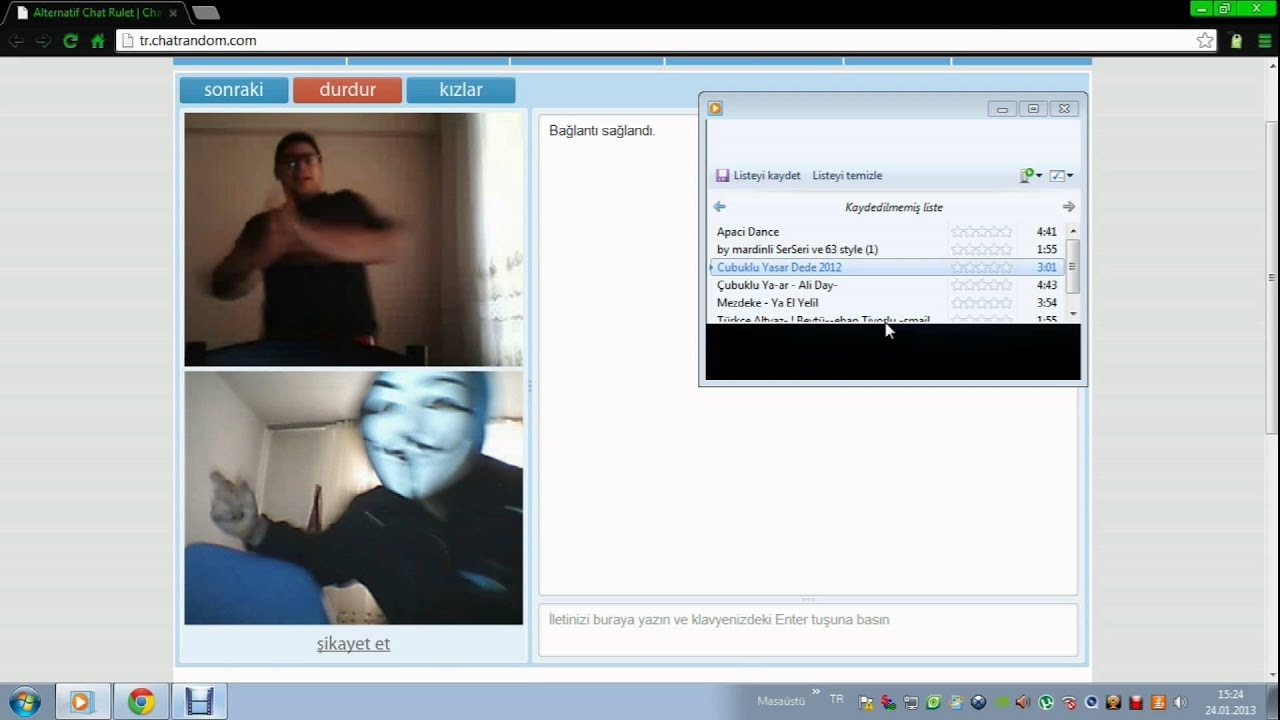
The ChatRandom service is a wonderful, chaotic, and people-packed place where users share all kinds of information. There is no shortage of fun stuff on ChatRandom, no matter what you want. Even though this stranger chat website has declined in popularity, it remains popular in the minds of many. The community is moderate, and there are a variety of people in it.
There have been a couple of changes to the site over the years, and what makes it one of the best websites like Omegle is its polished UI, better matchmaking algorithm, and general trend of catering to both genders.
Features:
  * You do not need to register to chat on Chatrandom; it is free to use.
  * Users of the site can access most of its features free of charge.
  * A total of 20 languages are available for users to use.
  * Chat rooms are available for members to connect.
  * Members are matched by their unique code.
  * On the site, you can video chat with others.
  * You can easily use the site's features.
3. YouNow
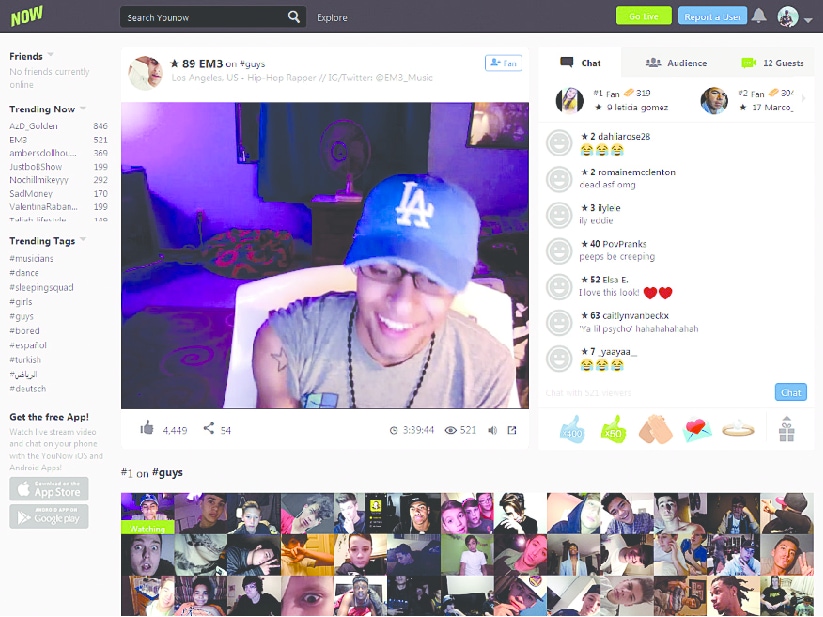
Is YouNow an app for broadcasting, chatting, streaming, or watching live videos? In contrast to Omegle, YouNow’s goal is to create a large audience, and trend, and build a loyal following.
Users can comment or buy gold bars to share with others during the viewing process. A user must be 13 years of age or older to use the chat app. Users of YouNow must register to begin chatting, unlike Omegle, which doesn’t require them to create a Facebook or Twitter account before chatting.
Though both platforms still have privacy concerns, YouNow lets you customize your usernames so that they don’t match anything about your Facebook or Twitter identities. Additionally, YouNow has stricter guidelines that prohibit sexual content, nudity, and bullying. However, there is no guarantee that such content will be monitored or removed.
The community guidelines can be broken, and you can report violators, but there’s no way to guarantee you won’t be exposed to objectionable live content. As long as you retain ownership of your content, posting content to the app gives the app permission to use it how it likes.
Features:
  * Allows you to integrate social media platforms.
  * Web, Android, and iOS versions are available.
  * Allows you to start a broadcast.
  * You can join the broadcast of other streams also to interact with them.
  * You can also make friends and send and receive gifts from them
,.
4. TinyChat

An alternative chat platform, TinyChat, offers chat rooms with video feeds of 12 each. With this chat site, you do not have to pay because you can invite people you know and set up topics for your chat. The platform offers the most extensive video and voice chat service online for five million minutes of airtime each day.
Numerous chat rooms are available, including those set up by residents of your area. TinyChat hosts live video streaming of TV shows that will let you watch them as they happen. If you can’t find a topic that interests you, create one. With TinyChat, you can connect with others through your webcam through audio, video, or text communication, just like with Omegle.
TinyChat is also a browser-based IM client and can be accessed from a PC, mobile device, or browser. While Omegle does not offer coins or points for unlocking special achievements or increasing your chances of landing in the live directory, it does provide you with a chance to interact with other users. A 500-coin token will also be awarded to you if you promote your room via TinyChat.
Features:
  * The process of starting a video call is very simple.
  * There are no issues with the webcam.
  * In your chat, you can control how many people participate.
  * It's possible to block someone if you don't want to communicate with them.
  * You can improve your experience with a variety of features.
5. FaceFlow
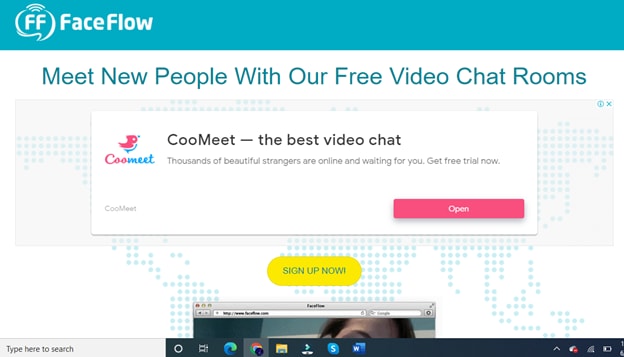
Users can have up to three video chats at the same time with these guys, taking social networking to a whole new level. In addition to offering free video chat and video conferencing with your friends, you can also communicate with strangers via FaceFlow. The new feature allows users to create a searchable profile and share their favorite online videos and pictures.
Aside from being simply another webcam chat service, this site is more like the amazing services offered by Skype. There is a one-to-one video chat feature as well as text chat. Furthermore, FaceFlow has released a multiplayer game called Flappy in which you have to team up against someone in order to complete the game.
Features
  * Signing up takes no time at all;
  * The service supports five languages;
  * It has a modern interface;
  * It offers a lot of free features;
  * FaceFlow can connect with your friends and family while still using a dating website.
6. CamSurf
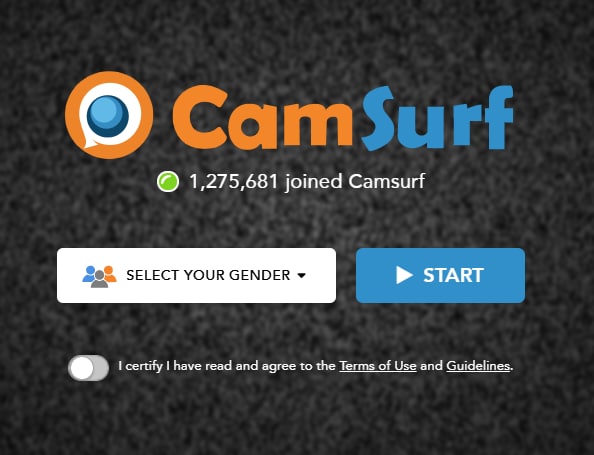
There are many websites similar to Omegle, but Camsurf has a unique twist - it is wild. If you’re trying to have fun, then you should visit this website. CamSurf has consistently delivered the most bizarre video chats we’ve ever experienced. The CamSurf website itself is straightforward and almost identical to the OmeTV website.
These two have a major difference in the types of people they attract. CamSurf has a vastly wider audience than OmeTV. While some individuals on OmeTV are looking for genuine conversation, on CamSurf, you’ll find people looking for genuine chat. It is our top choice for next time.
Features:
  * Feature-rich website.
  * A huge range of topics is available to discuss.
  * You Mostly find genuine people here.
7. ChatRad
This site claims to be a G-rated alternative to chat sites like Chatroulette, and it is quite harsh toward behavior that is not appropriate. People need to act the same in the real world, where they don’t run around naked or try to expose themselves all of the time… at least not in my world. Despite being a random video chat site, ChatRad is managed by a team of 24x7 moderators, so anything 18 and older can take advantage of the service in a safe environment regardless of their sexual orientation.
Features:
  * Very Strict Policies For Disrespectful People
  * The chat is moderated 24/7 by an active team of moderators.
  * It offers a very safe environment for people.
8.Bazoocam
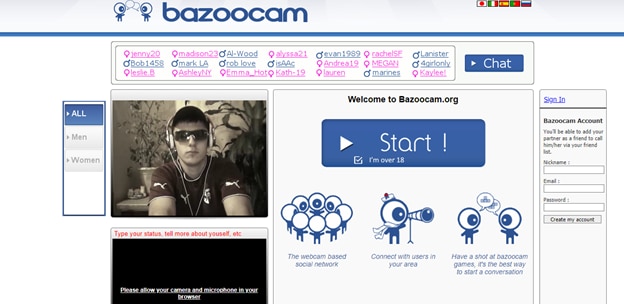
The Bazoocam webcam chat environment is another random digital camera chat site that maintains a high level of cleanliness. Like most of the other websites mentioned, you’re paired up with an interloper haphazardly. Press “skip” and move on to the next person if you are unsatisfied with what you see.
As icebreakers or when you are bored of talking about yourself, you can join one of the multiplayer games on Boomcam. You are advised to do something unusual if you’re bored, but you are urged to wear your clothes. Put your best foot forward when playing golf in fancy dress or taking part in your favorite music. Try playing a string or wind instrument, and you’ll find many people to talk to.
Features
  * The site offers a very high level of cleanliness.
  * You can chat with the person of your choice.
  * If you don't like a person you can skip to check the next candidate.
  * It also offers a lot of multiplayer games to play with strangers.
  * It will never let you get bored.
9. CamGo

Getting to know new people and making new connections is fun with Camgo. Start a conversation with strangers, develop relationships without worrying about running into Covid, and explore webcam dating! Camgo’s Safe Search feature uses artificial intelligence to discover potential matchmaking partners. Your webcam chat loop will be kept out of the reach of people you don’t want to see! By chatting online with new people from your home, you can meet new people in a much easier and safe manner.
Features:
  * Easy To Meet New Strangers.
  * The site is completely safe to use.
  * It offers a great video chatting experience.
10. iMeetzu

It is similar to Omegle in that there are random live video chats and text chat rooms available, but iMeetzu goes over and above that. Once you get past the randomness, you are given the option of joining a free online dating service or friend finder.
Over a thousand new members are joining every day on this one of the fastest-growing social networking sites. If you’re looking to find a date or if you practice your lines, this is the closest you can get to practice face-to-face before you dive back into the dating pool.
Features:
  * It is identical to Omegle.
  * As it is a new platform so there are mostly genuine users.
  * You can do both text and video chats with strangers.
  * You can also join group chats.
Conclusion
These are some of the best Omegle alternative sites. Every site has its own unique features, but if you compare them in functionality, they are quite similar. It’s just the working of every site is different. You can try these sites one by one and stick to those that you find the most suitable and according to your taste.


Liza Brown
Liza Brown is a writer and a lover of all things video.
Follow @Liza Brown
Liza Brown
Mar 27, 2024• Proven solutions
One of the main reasons we use the Internet is to be social. Interaction brings comfort and satisfaction to most normal people, and most people need to interact. It is for this reason that Facebook is so popular. Nevertheless, there are other websites where people can meet. People usually post comments on these sites and return later to see if someone else has responded. However, many sites facilitate real-time online conversations that are as close as you can get to face-to-face communications.
Omegle’s website allows members to converse via video, audio, or plain text. You can talk to a stranger and meet random people there. Unfortunately, Omegle has become overpopulated like most big sites. Also, on Omegle, many people prey upon others and make illicit conversations due to which using Omegle is getting difficult day by day. This article brings you a list of 10 websites like Omegle that serve the same purpose as Omegle. You can say them as Omegle alternatives, but they are more secure and more fun to use.
![]()
A cross-platform for making videos anywhere for all creators
Why your video editing isn’t good enough? How about some creative inspo?
- 100 Million+ Users
- 150+ Countries and Regions
- 4 Million+ Social Media Followers
- 5 Million+ Stock Media for Use
* Secure Download
Best Websites Like Omegle (Omegle Alternatives)
1. Chatroulette
The webcam-based Chatroulette service is notable for pairing users with random strangers using a random pairing algorithm. Instead of using guns, you parry verbally with typewritten messages and/or a digital camera, and the person who does not agree with you leaves the chat (“kills the conversation”).
A 17-year-old child who created it in 2009 ran it out of a chamber in his parents’ house. Despite not running any advertisements, this website grew to a massive size through word of mouth. In recent years, after much trial and error, it has finally reached the stage where it can distinguish between appropriate and inappropriate behavior.
Moderators screen violators who have not adhered to the site’s terms of service. Users who do not do so will not be able to access the site. Approximately half of the users of this website are under thirty, and there are more men than women. There’s no doubt that it’s R-rated. Like Omegle, this site is a great alternative.
Features:
  * Anonymously Chat With Strangers.
  * Millions of Users Across Different Countries
  * Android and iOS apps are also available.
  * Fewer Scammers and Bots.
  * One of the best monitoring and moderating systems.
2. ChatRandom
The ChatRandom service is a wonderful, chaotic, and people-packed place where users share all kinds of information. There is no shortage of fun stuff on ChatRandom, no matter what you want. Even though this stranger chat website has declined in popularity, it remains popular in the minds of many. The community is moderate, and there are a variety of people in it.
There have been a couple of changes to the site over the years, and what makes it one of the best websites like Omegle is its polished UI, better matchmaking algorithm, and general trend of catering to both genders.
Features:
  * You do not need to register to chat on Chatrandom; it is free to use.
  * Users of the site can access most of its features free of charge.
  * A total of 20 languages are available for users to use.
  * Chat rooms are available for members to connect.
  * Members are matched by their unique code.
  * On the site, you can video chat with others.
  * You can easily use the site's features.
3. YouNow
Is YouNow an app for broadcasting, chatting, streaming, or watching live videos? In contrast to Omegle, YouNow’s goal is to create a large audience, and trend, and build a loyal following.
Users can comment or buy gold bars to share with others during the viewing process. A user must be 13 years of age or older to use the chat app. Users of YouNow must register to begin chatting, unlike Omegle, which doesn’t require them to create a Facebook or Twitter account before chatting.
Though both platforms still have privacy concerns, YouNow lets you customize your usernames so that they don’t match anything about your Facebook or Twitter identities. Additionally, YouNow has stricter guidelines that prohibit sexual content, nudity, and bullying. However, there is no guarantee that such content will be monitored or removed.
The community guidelines can be broken, and you can report violators, but there’s no way to guarantee you won’t be exposed to objectionable live content. As long as you retain ownership of your content, posting content to the app gives the app permission to use it how it likes.
Features:
  * Allows you to integrate social media platforms.
  * Web, Android, and iOS versions are available.
  * Allows you to start a broadcast.
  * You can join the broadcast of other streams also to interact with them.
  * You can also make friends and send and receive gifts from them
,.
4. TinyChat
An alternative chat platform, TinyChat, offers chat rooms with video feeds of 12 each. With this chat site, you do not have to pay because you can invite people you know and set up topics for your chat. The platform offers the most extensive video and voice chat service online for five million minutes of airtime each day.
Numerous chat rooms are available, including those set up by residents of your area. TinyChat hosts live video streaming of TV shows that will let you watch them as they happen. If you can’t find a topic that interests you, create one. With TinyChat, you can connect with others through your webcam through audio, video, or text communication, just like with Omegle.
TinyChat is also a browser-based IM client and can be accessed from a PC, mobile device, or browser. While Omegle does not offer coins or points for unlocking special achievements or increasing your chances of landing in the live directory, it does provide you with a chance to interact with other users. A 500-coin token will also be awarded to you if you promote your room via TinyChat.
Features:
  * The process of starting a video call is very simple.
  * There are no issues with the webcam.
  * In your chat, you can control how many people participate.
  * It's possible to block someone if you don't want to communicate with them.
  * You can improve your experience with a variety of features.
5. FaceFlow
Users can have up to three video chats at the same time with these guys, taking social networking to a whole new level. In addition to offering free video chat and video conferencing with your friends, you can also communicate with strangers via FaceFlow. The new feature allows users to create a searchable profile and share their favorite online videos and pictures.
Aside from being simply another webcam chat service, this site is more like the amazing services offered by Skype. There is a one-to-one video chat feature as well as text chat. Furthermore, FaceFlow has released a multiplayer game called Flappy in which you have to team up against someone in order to complete the game.
Features
  * Signing up takes no time at all;
  * The service supports five languages;
  * It has a modern interface;
  * It offers a lot of free features;
  * FaceFlow can connect with your friends and family while still using a dating website.
6. CamSurf
There are many websites similar to Omegle, but Camsurf has a unique twist - it is wild. If you’re trying to have fun, then you should visit this website. CamSurf has consistently delivered the most bizarre video chats we’ve ever experienced. The CamSurf website itself is straightforward and almost identical to the OmeTV website.
These two have a major difference in the types of people they attract. CamSurf has a vastly wider audience than OmeTV. While some individuals on OmeTV are looking for genuine conversation, on CamSurf, you’ll find people looking for genuine chat. It is our top choice for next time.
Features:
  * Feature-rich website.
  * A huge range of topics is available to discuss.
  * You Mostly find genuine people here.
7. ChatRad
This site claims to be a G-rated alternative to chat sites like Chatroulette, and it is quite harsh toward behavior that is not appropriate. People need to act the same in the real world, where they don’t run around naked or try to expose themselves all of the time… at least not in my world. Despite being a random video chat site, ChatRad is managed by a team of 24x7 moderators, so anything 18 and older can take advantage of the service in a safe environment regardless of their sexual orientation.
Features:
  * Very Strict Policies For Disrespectful People
  * The chat is moderated 24/7 by an active team of moderators.
  * It offers a very safe environment for people.
8.Bazoocam
The Bazoocam webcam chat environment is another random digital camera chat site that maintains a high level of cleanliness. Like most of the other websites mentioned, you’re paired up with an interloper haphazardly. Press “skip” and move on to the next person if you are unsatisfied with what you see.
As icebreakers or when you are bored of talking about yourself, you can join one of the multiplayer games on Boomcam. You are advised to do something unusual if you’re bored, but you are urged to wear your clothes. Put your best foot forward when playing golf in fancy dress or taking part in your favorite music. Try playing a string or wind instrument, and you’ll find many people to talk to.
Features
  * The site offers a very high level of cleanliness.
  * You can chat with the person of your choice.
  * If you don't like a person you can skip to check the next candidate.
  * It also offers a lot of multiplayer games to play with strangers.
  * It will never let you get bored.
9. CamGo
Getting to know new people and making new connections is fun with Camgo. Start a conversation with strangers, develop relationships without worrying about running into Covid, and explore webcam dating! Camgo’s Safe Search feature uses artificial intelligence to discover potential matchmaking partners. Your webcam chat loop will be kept out of the reach of people you don’t want to see! By chatting online with new people from your home, you can meet new people in a much easier and safe manner.
Features:
  * Easy To Meet New Strangers.
  * The site is completely safe to use.
  * It offers a great video chatting experience.
10. iMeetzu
It is similar to Omegle in that there are random live video chats and text chat rooms available, but iMeetzu goes over and above that. Once you get past the randomness, you are given the option of joining a free online dating service or friend finder.
Over a thousand new members are joining every day on this one of the fastest-growing social networking sites. If you’re looking to find a date or if you practice your lines, this is the closest you can get to practice face-to-face before you dive back into the dating pool.
Features:
  * It is identical to Omegle.
  * As it is a new platform so there are mostly genuine users.
  * You can do both text and video chats with strangers.
  * You can also join group chats.
Conclusion
These are some of the best Omegle alternative sites. Every site has its own unique features, but if you compare them in functionality, they are quite similar. It’s just the working of every site is different. You can try these sites one by one and stick to those that you find the most suitable and according to your taste.
Liza Brown
Liza Brown is a writer and a lover of all things video.
Follow @Liza Brown
Also read:
- New In 2024, Less Loud, More Effective A Comprehensive Overview of Audio Cleanup in Premiere Pro
- In 2024, Best Places to Download Game Soundtracks and Effects
- In 2024, Audio Splitter How to Split Audio Files Easily
- New Upgrading Your QuickTime Videos Integrating High-Quality Soundtracks for 2024
- New From Silence to Soundtracks Tips for Blending Audio Into Video on Android Gadgets for 2024
- New In 2024, Integrating Audio Into Digital Videos A Comprehensive Guide
- 2024 Approved The Ultimate Technique for Taming Room Rumbles in Recording Sessions
- 2024 Approved Trimming MP4 Content A Focus on Solo Soundtrack
- New 2024 Approved Cutting-Edge 2023 Top 8 Digital Studio Solutions for Breakbeat Artists
- Top 5 Audio Mixers Compatible with Mac Devices for 2024
- New 2024 Approved Discovering the Best 10 Websites Where You Can Access Premium Montage Music
- Updated In 2024, Unleashing New Voices Premier Applications for Anime Character Reinterpretation (Desktop & Mobile)
- Updated 2024 Approved Bridging Audio Gaps How to Convert Your MP3 Playlists to MP4
- 2024 Approved Discover the Leading Free Audio Modification Software of the Year
- 2024 Approved Sonic Spectrum Crafting the Ideal Audio Backdrop for Different Video Genres
- New Explore Auditory Representation of Painting Tools
- New Essential MP3 Labeling Tools The Five Must-Have Online Editors
- New The Seamless Audio Journey Crafting Subtle Volume Transitions in Adobe After Effects
- New In 2024, Understanding Googles Audio Streaming Service A Guide to the Podcast Application
- Instant Volume Amplification Solutions for Windows Users - Discover the Top 10
- Updated 2024 Approved Best Free Online Transcribers Convert Your Audio Files with Ease
- New 5 Best MP3 Voice Recorder to Help You How to Record MP3
- Updated 2024 Approved Discover Hilarious Audio Cues
- Top 10 No-Cost Audio Capture Software for PC Users - Updated Edition, 2024 Edition
- New In 2024, Expert Platforms for Silencing Background Noise in Audio Files
- New Essential Directories The Premier 10 Sites for Acquiring Montage Soundtracks
- Updated The Engineers Dream Set-Up Unveiling the Five Cutting-Edge Audio Ducking Programs
- New The Zen of Soundscaping Advanced Strategies for Removing Background Noise in Virtual Realms for 2024
- 2024 Approved How to Merge Video and Audio
- Most Essential Free Comedy Tunes A Selection for Online Content Creators
- New 2024 Approved The Ultimate How-To Syncing Audio with Newly Updated AVI Content
- New In 2024, The Art of Cartoonization How to Transform Videos Into Cartoons
- Updated Top 8 Live Selling Platforms & Beginners Tool Suggestion for 2024
- How to Unlock Oppo Find X7 Ultra Phone with Broken Screen
- In 2024, How To Remove the Two Factor Authentication On iPhone 15 Pro Max
- In 2024, Pokémon Go Cooldown Chart On Vivo Y78+ | Dr.fone
- Updated 2024 Approved Create Videos with an AI Script Generator
- How to Fix Unfortunately, Contacts Has Stopped Error on Tecno Spark 10C | Dr.fone
- In 2024, Which Pokémon can Evolve with a Moon Stone For Vivo T2 5G? | Dr.fone
- Cellular Network Not Available for Voice Calls On Infinix Note 30 VIP | Dr.fone
- Full Guide to Bypass Tecno Camon 20 FRP
- Downloading SamFw FRP Tool 3.0 for Oppo
- New 2024 Approved Mac Video Editing Software Top 10 Alternatives to Vegas Pro
- 3 Ways of How to Get Someones Apple ID Off Apple iPhone 11 Pro Max without Password
- How to Update iPhone 15 Pro Max to the Latest iOS/iPadOS Version? | Dr.fone
- In 2024, How Can Tecno Spark 10 ProMirror Share to PC? | Dr.fone
- In 2024, 10 Fake GPS Location Apps on Android Of your Samsung Galaxy F04 | Dr.fone
- In 2024, Set Your Preferred Job Location on LinkedIn App of your Oppo A2 | Dr.fone
- In 2024, Pokemon Go No GPS Signal? Heres Every Possible Solution On Tecno Pova 5 Pro | Dr.fone
- New In 2024, Best Online Video Rotators Rotate Your Videos with Ease
- In 2024, A Step-by-Step Guide on Using ADB and Fastboot to Remove FRP Lock on your Oppo A58 4G
- In 2024, Latest Guide How To Bypass Tecno Spark 20 FRP Without Computer
- Updated Fast Forward Your Memories Best Time-Lapse Video Apps for 2024
- New The Ultimate Guide to Video Brightening Top Apps for Android and iOS
- In 2024, Where Is the Best Place to Catch Dratini On Oppo A2 | Dr.fone
- How to Bypass Android Lock Screen Using Emergency Call On Samsung Galaxy A14 5G?
- In 2024, How to get the dragon scale and evolution-enabled pokemon On Realme 10T 5G? | Dr.fone
- Title: Updated Pioneering Audio-Visual Synergy A Comprehensive Guide to Adding Soundtracks in Premiere Pro
- Author: Jacob
- Created at : 2024-05-20 00:04:19
- Updated at : 2024-05-21 00:04:19
- Link: https://audio-shaping.techidaily.com/updated-pioneering-audio-visual-synergy-a-comprehensive-guide-to-adding-soundtracks-in-premiere-pro/
- License: This work is licensed under CC BY-NC-SA 4.0.
