
:max_bytes(150000):strip_icc():format(webp)/macOS-Sonoma-Banner-fe4ffda2caaf4040b81ae0b66f2d6dc0.jpg)
Updated Mastering Sound with Adobe Audition An In-Depth Look at Its Core Components for 2024
“Mastering Sound with Adobe Audition: An In-Depth Look at Its Core Components”
What can be more useful than audio editing on a single platform? There is software that will solve this problem under the name of ‘Adobe Audition.’ This Adobe audio editor has got all the facilities that you might need while editing audio. The audio might be edited for professional purposes or random fun sessions.
Do you want to know more about this particular Adobe voice editor? Continue reading this article to enhance your knowledge of this specific editor.
In this article
01 What Is Adobe Audio Editor?
02 Key Features of Adobe Auditionos
03 Pros and Cons of Adobe Audio Editor-Adobe Audition
04 How Do You Edit Audio in Adobe Audition?
Part 1. What Is Adobe Audio Editor?
Adobe developed ‘Audition ,’ an Adobe audio editor that is a powerful platform that you can use for making significant changes in audio files. Audition is an editor for mastering audio editing for different purposes. You can use this Adobe voice editor to control the audio you want to edit, and it can remove the background noises.
This Adobe audio editor has an intuitive interface that attracts users. It has a straightforward way of editing that helps beginner-level users a lot. You can edit single track and also multi-tracks and use tons of plug-ins as they are supported by this Adobe voice editor.

Part 2. Key Features of Adobe Audition
This Adobe audio editor is a very famous editor among both beginners and professionals. It is loaded with amazing features and editing options. You can completely transform your audio files with Adobe Audition. Let’s share some of the key features of this Adobe voice editor.
· Audio Restoration
The biggest factor that attracts users is the AI Audio Restoration feature of Adobe Audition. This is not just an editor; it can automatically restore your damaged files. Moreover, the sound sampling tool also helps remove sounds like crack, rumble, etc.
· Spectral Analysis
Do you know that this Adobe voice editor offers spectral analysis? With this feature, you can look at the audio but in frequency. In addition to this, you can also select the unwanted part of the audio and easily remove it.
· Essential Sounds
For adding effects on Adobe Audition, this is the best option. Users can easily access this feature and assign a category like SFX, Music, Ambience, and Dialogue. After selecting a category, you get different effects like; In a large Room, From Outside, Podcast Voice, Make Distant, etc.
· Envelopes
What are envelopes in this Adobe audio editor? Each track has lines running through them in Adobe Audition. With these, you can control the volume the ability of the pan. Moreover, you can also have control over the EQ envelope.
Part 3. Pros and Cons of Adobe Audio Editor-Adobe Audition
There are a lot of audio editors available in the world that you can use. There is always some downside to any product you use, as nothing is perfect. In this section, we are discussing the pros and cons of Adobe Audition, Adobe Audio Editor.
Pros
- Have you used any software that allows the user to have AI recovery? Adobe Audition has given AI recovery access to users with ease.
- You must have used noise reduction in other software. The quality of the noise reduction services provided by this editor is among the top-notch service providers available.
- Have you used 100+ effects for audios? Audition provides 100+ audio effects. They can be edited on individual clips or over the whole track.
- Moreover, background noises like hum crackle can be reduced using AI tools, while sounds like barking dogs or cars passing by can be removed by Spectral Frequency Display.
Con
- Adobe voice editor has inconvenient subscription options. For example, you can buy Adobe Audition for 20.99$ per month; on the other hand; you can have all the Adobe applications for 52.99$ per month.
Part 4. How Do You Edit Audio in Adobe Audition?
This Adobe audio editor is an impressive audio editing software. You get different and unique editing options that are very useful for creating great audio files. If you are looking for steps to edit in Adobe Audition, this section is for you.
1. Adobe Audition Workflow for Beginner
Are you a beginner? Let’s share some basic details about Adobe Audition. You can start by recording the audio, and once done; you can pause it. The waveform view of the recording will appear on the screen. Furthermore, you have a Files option in the top left corner where all the files appear. Just below this, you get the Media Browser tab, where you can browse the media files from your device.
Do you know something about the Effects Rack? This part of the interface allows you to add and save effects for editing. If you record things and make notes, the Markers tab is great for noting things along the timeline. For adding audio effects, the Essential Sound section will be visible on the right side of the screen.
2. Getting Started with Audition Audio Mixing
Mixing files is always fun, but what about mixing files with Adobe voice editor? Let’s share the steps for this mixing purpose.
Step 1: Start by importing all the media files you plan to mix. Next, head to the Multitrack option from the top left corner to mix multiple tracks. Then, you have to drag and drop the audio files on the timeline.

Step 2: Now, listen to the audio files and analyze the volumes. If you need to adjust the volume, select the tracks, and from the sub-menu, hit on ‘Match Clip Loudness.’

Step 3: If you wish to add effects to the tracks, head to the ‘Effects Rack’ section. There you can get options like Amplify, Compression, etc.

Step 4: While mixing files with Adobe, you can also edit and add volume envelope points. Select the audio file, right-click on it, and look for the Remix option for smart mixing.

3. How Can You Apply Effects in Adobe Audition ?
If you have successfully mixed the files, we should discuss audio effects. So, let’s get started.
Step 1: For adding effects, start by heading to the Windows tab. From the submenu, select the Effects Rack option. Or else, you can also access Effect racks from the left screen pane. Remember, you can add effects in both forms, either its Waveform timeline or Multitrack.

Step 2: After this, it’s time to add your favorite effect; for that, hit the side arrow in front of every effect number. A list of offered effects will appear; you can select an effect of your choice.

Step 3: After adding an effect, the effect will be added to the list in the effect rack. Secondly, a window appears on the screen, it’s the Effect Control Box, to customize and adjust the settings of the added effect.

Step 4: This exceptional Adobe audio editor offers different presets that could be used instead of using the default effect. Moreover, you can also add the effect to the preset section after adjusting the Effect Control Box. You can also turn off or turn on individual effects by pressing the button along every option in Effect Rack.

4. How to Do Noise Reduction & Restoration in Adobe Audition
You might have recorded a great podcast or voiceover, but when you check it, you are devastated. This is because there is a lot of background noise, disturbing the file quality. Try Noise Reduction in Adobe voice editor by following these steps.
Step 1: Start by importing the audio file to Adobe Audition. Then, carefully listen and analyze the file. This is because you have to identify the part where you get the extra noise to work on it.

Step 2: After the part has been identified, let’s move further and head to the Effects tab. From the submenu, hover on the Noise Reduction/ Restoration option. Now, select the Capture Noise Print option; this feature finds all the highlighted part information.

Step 3: Next step demands you to open the Effects tab. Once that is done, go to the Noise Reduction / Restoration option. Further, select the Noise Reduction Process.

Step 4: This will open a pop-up window for Noise Reduction Control where you can adjust things. This Adobe voice editor allows you to adjust Noise reduction by using the slider. For detailed editing, open Advanced options like Smoothing, etc.

Final Thoughts
Adobe Audition is a known and stunning Adobe audio editor. For you to learn everything, we discussed Adobe Audition in detail. The article talked about its features, pros, cons, and various ways to edit files with this Adobe voice editor. An equally amazing audio editor is Filmora Audio Editor. An amazing, all-in-one audio editor.
Filmora offers a list of basic as well as advanced editing options. Wondershare Filmora is easy to download and quite simple to use. Users who have multiple uses of the software across the video along the audio should consider using this tool.
Wondershare Filmora
Get started easily with Filmora’s powerful performance, intuitive interface, and countless effects!
Try It Free Try It Free Try It Free Learn More >

02 Key Features of Adobe Auditionos
03 Pros and Cons of Adobe Audio Editor-Adobe Audition
04 How Do You Edit Audio in Adobe Audition?
Part 1. What Is Adobe Audio Editor?
Adobe developed ‘Audition ,’ an Adobe audio editor that is a powerful platform that you can use for making significant changes in audio files. Audition is an editor for mastering audio editing for different purposes. You can use this Adobe voice editor to control the audio you want to edit, and it can remove the background noises.
This Adobe audio editor has an intuitive interface that attracts users. It has a straightforward way of editing that helps beginner-level users a lot. You can edit single track and also multi-tracks and use tons of plug-ins as they are supported by this Adobe voice editor.
Part 2. Key Features of Adobe Audition
This Adobe audio editor is a very famous editor among both beginners and professionals. It is loaded with amazing features and editing options. You can completely transform your audio files with Adobe Audition. Let’s share some of the key features of this Adobe voice editor.
· Audio Restoration
The biggest factor that attracts users is the AI Audio Restoration feature of Adobe Audition. This is not just an editor; it can automatically restore your damaged files. Moreover, the sound sampling tool also helps remove sounds like crack, rumble, etc.
· Spectral Analysis
Do you know that this Adobe voice editor offers spectral analysis? With this feature, you can look at the audio but in frequency. In addition to this, you can also select the unwanted part of the audio and easily remove it.
· Essential Sounds
For adding effects on Adobe Audition, this is the best option. Users can easily access this feature and assign a category like SFX, Music, Ambience, and Dialogue. After selecting a category, you get different effects like; In a large Room, From Outside, Podcast Voice, Make Distant, etc.
· Envelopes
What are envelopes in this Adobe audio editor? Each track has lines running through them in Adobe Audition. With these, you can control the volume the ability of the pan. Moreover, you can also have control over the EQ envelope.
Part 3. Pros and Cons of Adobe Audio Editor-Adobe Audition
There are a lot of audio editors available in the world that you can use. There is always some downside to any product you use, as nothing is perfect. In this section, we are discussing the pros and cons of Adobe Audition, Adobe Audio Editor.
Pros
- Have you used any software that allows the user to have AI recovery? Adobe Audition has given AI recovery access to users with ease.
- You must have used noise reduction in other software. The quality of the noise reduction services provided by this editor is among the top-notch service providers available.
- Have you used 100+ effects for audios? Audition provides 100+ audio effects. They can be edited on individual clips or over the whole track.
- Moreover, background noises like hum crackle can be reduced using AI tools, while sounds like barking dogs or cars passing by can be removed by Spectral Frequency Display.
Con
- Adobe voice editor has inconvenient subscription options. For example, you can buy Adobe Audition for 20.99$ per month; on the other hand; you can have all the Adobe applications for 52.99$ per month.
Part 4. How Do You Edit Audio in Adobe Audition?
This Adobe audio editor is an impressive audio editing software. You get different and unique editing options that are very useful for creating great audio files. If you are looking for steps to edit in Adobe Audition, this section is for you.
1. Adobe Audition Workflow for Beginner
Are you a beginner? Let’s share some basic details about Adobe Audition. You can start by recording the audio, and once done; you can pause it. The waveform view of the recording will appear on the screen. Furthermore, you have a Files option in the top left corner where all the files appear. Just below this, you get the Media Browser tab, where you can browse the media files from your device.
Do you know something about the Effects Rack? This part of the interface allows you to add and save effects for editing. If you record things and make notes, the Markers tab is great for noting things along the timeline. For adding audio effects, the Essential Sound section will be visible on the right side of the screen.
2. Getting Started with Audition Audio Mixing
Mixing files is always fun, but what about mixing files with Adobe voice editor? Let’s share the steps for this mixing purpose.
Step 1: Start by importing all the media files you plan to mix. Next, head to the Multitrack option from the top left corner to mix multiple tracks. Then, you have to drag and drop the audio files on the timeline.
Step 2: Now, listen to the audio files and analyze the volumes. If you need to adjust the volume, select the tracks, and from the sub-menu, hit on ‘Match Clip Loudness.’
Step 3: If you wish to add effects to the tracks, head to the ‘Effects Rack’ section. There you can get options like Amplify, Compression, etc.
Step 4: While mixing files with Adobe, you can also edit and add volume envelope points. Select the audio file, right-click on it, and look for the Remix option for smart mixing.
3. How Can You Apply Effects in Adobe Audition ?
If you have successfully mixed the files, we should discuss audio effects. So, let’s get started.
Step 1: For adding effects, start by heading to the Windows tab. From the submenu, select the Effects Rack option. Or else, you can also access Effect racks from the left screen pane. Remember, you can add effects in both forms, either its Waveform timeline or Multitrack.
Step 2: After this, it’s time to add your favorite effect; for that, hit the side arrow in front of every effect number. A list of offered effects will appear; you can select an effect of your choice.
Step 3: After adding an effect, the effect will be added to the list in the effect rack. Secondly, a window appears on the screen, it’s the Effect Control Box, to customize and adjust the settings of the added effect.
Step 4: This exceptional Adobe audio editor offers different presets that could be used instead of using the default effect. Moreover, you can also add the effect to the preset section after adjusting the Effect Control Box. You can also turn off or turn on individual effects by pressing the button along every option in Effect Rack.
4. How to Do Noise Reduction & Restoration in Adobe Audition
You might have recorded a great podcast or voiceover, but when you check it, you are devastated. This is because there is a lot of background noise, disturbing the file quality. Try Noise Reduction in Adobe voice editor by following these steps.
Step 1: Start by importing the audio file to Adobe Audition. Then, carefully listen and analyze the file. This is because you have to identify the part where you get the extra noise to work on it.
Step 2: After the part has been identified, let’s move further and head to the Effects tab. From the submenu, hover on the Noise Reduction/ Restoration option. Now, select the Capture Noise Print option; this feature finds all the highlighted part information.
Step 3: Next step demands you to open the Effects tab. Once that is done, go to the Noise Reduction / Restoration option. Further, select the Noise Reduction Process.
Step 4: This will open a pop-up window for Noise Reduction Control where you can adjust things. This Adobe voice editor allows you to adjust Noise reduction by using the slider. For detailed editing, open Advanced options like Smoothing, etc.
Final Thoughts
Adobe Audition is a known and stunning Adobe audio editor. For you to learn everything, we discussed Adobe Audition in detail. The article talked about its features, pros, cons, and various ways to edit files with this Adobe voice editor. An equally amazing audio editor is Filmora Audio Editor. An amazing, all-in-one audio editor.
Filmora offers a list of basic as well as advanced editing options. Wondershare Filmora is easy to download and quite simple to use. Users who have multiple uses of the software across the video along the audio should consider using this tool.
Wondershare Filmora
Get started easily with Filmora’s powerful performance, intuitive interface, and countless effects!
Try It Free Try It Free Try It Free Learn More >
10 Best Online Music Makers [Free&Paid]
FREE 10 Best Online Music Makers

Benjamin Arango
Apr 26, 2024• Proven solutions


Expressing ideas through music was never easy, and even today in the age of powerful digital audio stations like Ableton Live or FruityLoops , producing original music requires a certain set of skills. However, online content producers often need music for their videos, but they neither have the time or the budget to hire a professional musician to create a soundtrack for their project in studio conditions. If you are looking for a quick way to make your own music online, then you should keep reading, because in this article we are going to take you through the ten best online music makers you should check out in 2021.
10 Best Online Music Makers in 2021
The music-making platforms that are currently available online are still not as nearly as powerful as professional software products for music producers. Nonetheless, this doesn’t mean that you can’t use them to create the music you like or just have fun with them. Here are the ten best online music makers in 2019.
1. Typeatone
Price: Free
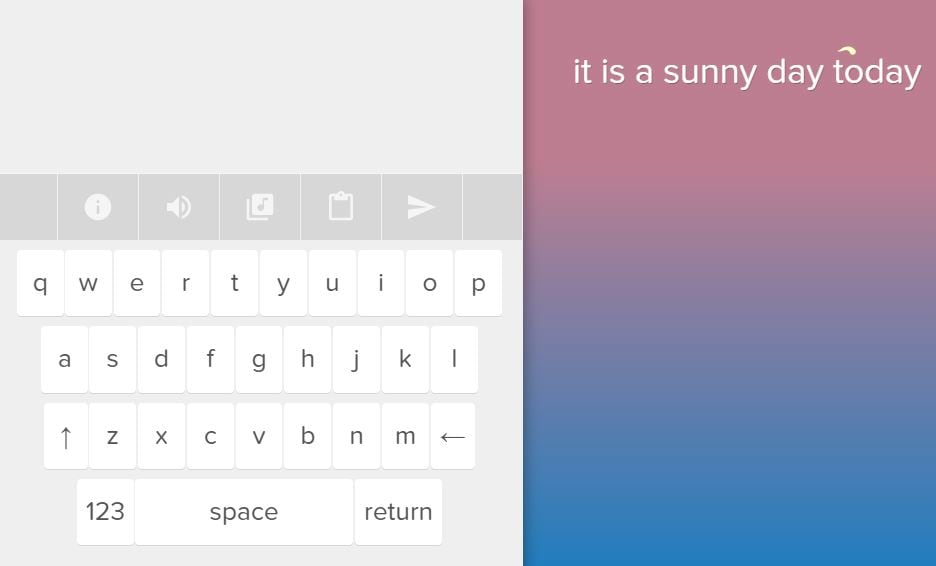
Image from Internet
Have you ever wondered what your words would sound like if they were turned into music? Head over to the Typeatone platform if you want to find out since all you have to do in order to start creating your own music is type in the text. As you type, the platform will automatically start playing your words and once you’re done, you’ll be able to hear your new song. You can also choose between different instruments to make the process of creating music with Typeatone even more entertaining. You can share all of your creations with your friends on social media.
![]()
A cross-platform for making videos anywhere for all creators

Why your video editing isn’t good enough? How about some creative inspo?
- 100 Million+ Users
- 150+ Countries and Regions
- 4 Million+ Social Media Followers
- 5 Million+ Stock Media for Use
* Secure Download

2. Audiotool
Price: Free

Image from Internet
Electronic music producers who often use synthesizers like Roland TB-303 or Roland TR-909 are going to love the features this online collaborative platform offers. Audiotool hosts a huge music library, you can explore even if you are not a registered user. In order to access the platform’s music studio, you first have to create an account and make sure that you are signed in. Audiotool is also a community of like-minded people where you can meet artists whose work you appreciate or hear what others think about your work. The only downside is that Audiotool’s abundance of features can be overwhelming for the newcomers to the world of electronic music production.
3. AudioSauna
Price: Free
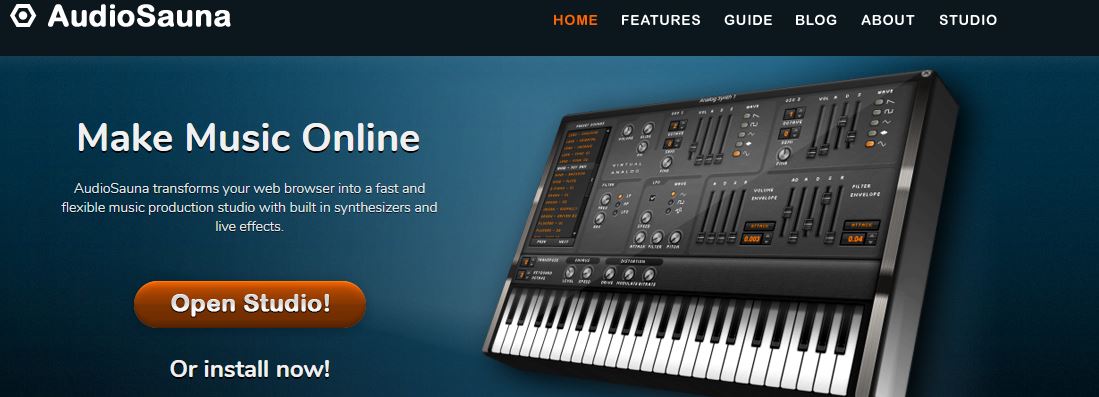
Image from Internet
AudioSauna seems to offer everything its users need to create inspiring music because it is equipped with frequency modulation synth, virtual analog synth and a sampler that provides layering features. Moreover, its intuitive interface makes the process of arranging the song structure or changing several note values simultaneously much easier. Creating an account on AudioSauna will enable to record all your projects and export them as audio files that can be uploaded to SoundCloud or any other audio distribution platform. AudioSauna is a perfect tool for skilled producers who want to create their music online.
4. Soundtrap
Price: Free trial available, subscription plans start at $3.99 per month

Image from Internet
Soundtrap offers a long list of features that enable professional musicians to create their music online. All you have to do is create an account and you will get access to the Sountrap’s studio that let you create new beat patterns, use a synthesizer or even invite friends to make music together. The platform also offers the possibility to connect your own instruments to the Soundtrap’s studio, so that you can record your music as you play it. This online platform also has an Education section where you can share your knowledge with others or learn valuable music lessons.
5. PatternSketch
Price: Free
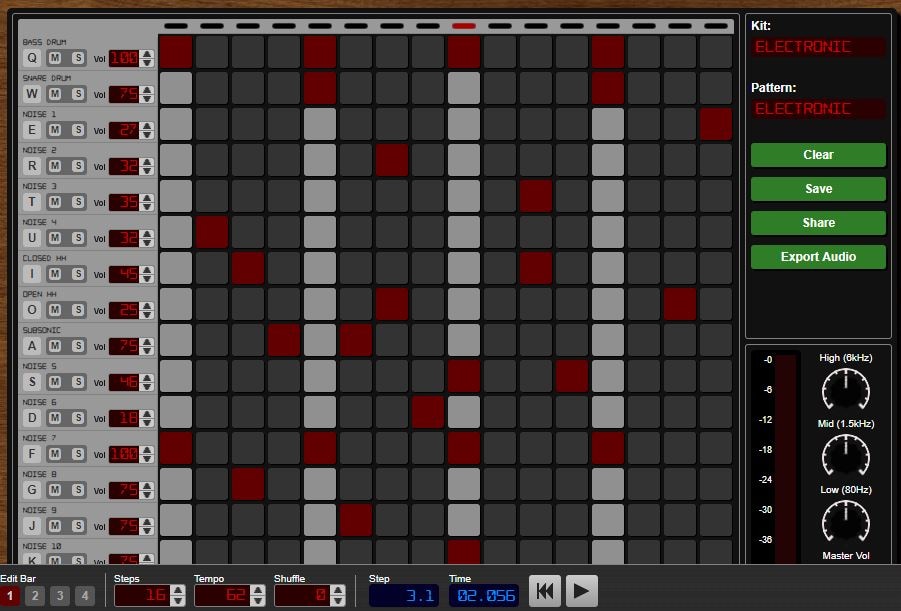
Image from Internet
This basic and yet effective drum machine can help you generate amazing beats for the songs you’re working on. Once you sign up, you will be able to choose from a number of different kits and patterns that are fully customizable or create your own original beats. After you create a pattern you like, you can save it with a single click or send it to your friends via email. Optionally, you can export all of your creations from PatternSketch and save them as wav, mp3 or ogg files, although in some cases mp3 audio files may not loop properly.
6. Soundation
Price: Free version available, pricing plans start at $1.99 per month

Image from Internet
If you choose to create music with the free version of Soundation, you’ll be able to work on up to ten projects, try out over 700 audio effects and loops, and export all your music in low quality. Purchasing the Intro pricing plan will enable you to work on an unlimited number of projects, make live audio recordings, import audio files smaller than 100MB or use an external midi controller. Moreover, opting for any of the annual or monthly subscription plans will allow you to export entire projects and audio files in high resolution from Soundation.
7. Text to Speech
Price: Free

online-music-maker-Text to Speech.jpg
Vocals are often overlooked in contemporary electronic music, but there are so many ways they can be used creatively. The platform lets you turn up to 50000 characters into speech at once, and it also offers several different voices you can choose from. Before you create an audio file you can determine how fast the text is going to be vocalized, so you should try different options and see which one fits your project the best. Text to Speech platform can be used during the process of creating a new song, but the tools it offers are not enough to make an entire song.
8. Looplabs
Price: Free
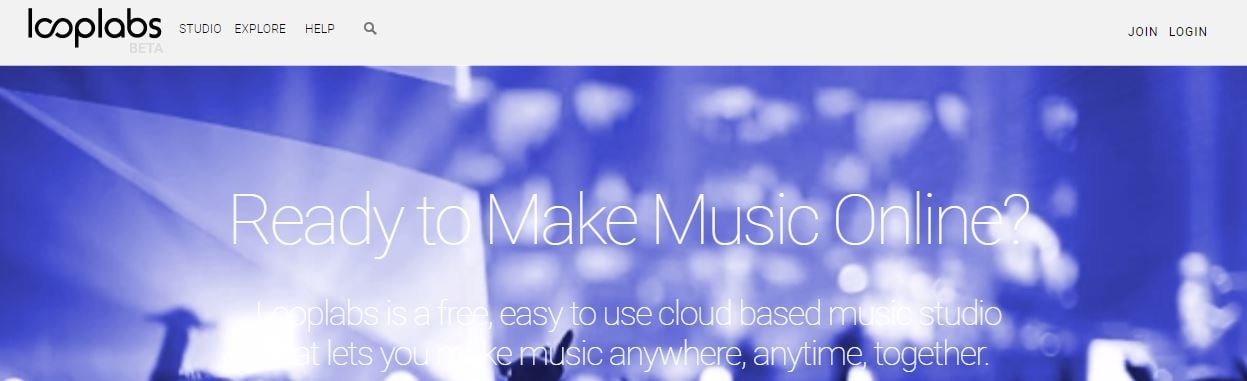
Music enthusiasts who would like to produce different genres of music online should definitely get familiar with Looplabs, as this online music maker lets its users remix songs or make music from scratch. Besides being one of the best places on the Internet to record music, Looplabs is also a community where you can meet people who like your music or discover artists whose work you admire. The Looplab’s studio features samples for a broad range of music genres and musical instruments, and you can use it to make Electro or Funk music equally effectively.
9. Online Sequencer
Price: Free
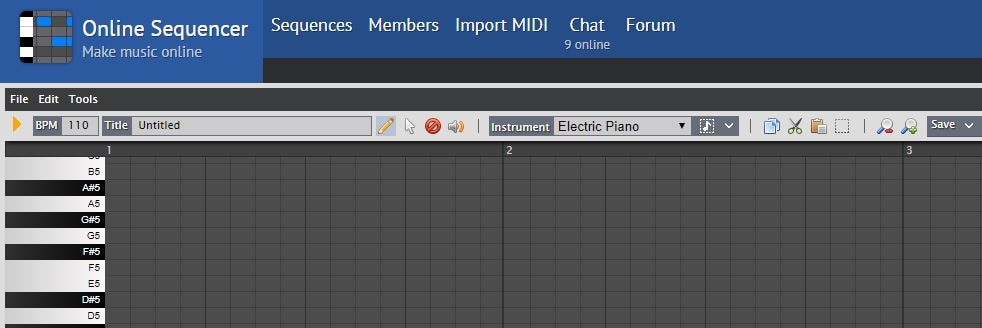
This is a perfect tool for developing an idea for a song, as you can create a sequence in just a few minutes. You can choose from Piano, Drums and Guitar categories of instruments or browse through a huge collection of fully customizable preset sequences that is updated on a daily basis. The platform also lets you import MIDI files and work on projects you’ve already started developing or you can export your sequences as MIDI files from the Online Sequencer and edit them with your DAW. Even though Online Sequencer is a useful tool for making music, the features it offers can’t really be compared with those on Soundation or AudioSauna.
10. Autochords
Price: Free
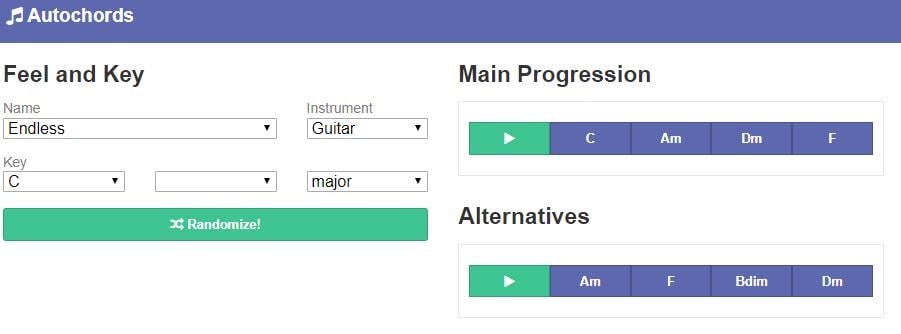
Finding new ideas for songs is often more difficult than it sounds, and if you ever face a creative block you should simply head over to Autochords. This platform suggests chord progressions based on the parameters you set, so you just have to select an instrument and the name of the song to set the feel, and the platform will show you the main progression and its alternatives. Rather than being an online music maker, Autochords is more a tool that helps piano and guitar players understand chord progressions better. iPhone and iPad users can download the Autochords app from the App Store for free.
Read More to Get : Best Free DAW for Windows and Mac for Beginners >>
Conclusion
You don’t have to be a professional musician in order to start making music online, you just have to love music, and an online music maker of your choice will take care of the rest. Do you use online music makers for entertainment or to express your creativity? Leave a comment below and share your opinions with us.
Benjamin Arango
Benjamin Arango is a writer and a lover of all things video.
Follow @Benjamin Arango
Benjamin Arango
Apr 26, 2024• Proven solutions
Expressing ideas through music was never easy, and even today in the age of powerful digital audio stations like Ableton Live or FruityLoops , producing original music requires a certain set of skills. However, online content producers often need music for their videos, but they neither have the time or the budget to hire a professional musician to create a soundtrack for their project in studio conditions. If you are looking for a quick way to make your own music online, then you should keep reading, because in this article we are going to take you through the ten best online music makers you should check out in 2021.
10 Best Online Music Makers in 2021
The music-making platforms that are currently available online are still not as nearly as powerful as professional software products for music producers. Nonetheless, this doesn’t mean that you can’t use them to create the music you like or just have fun with them. Here are the ten best online music makers in 2019.
1. Typeatone
Price: Free
Image from Internet
Have you ever wondered what your words would sound like if they were turned into music? Head over to the Typeatone platform if you want to find out since all you have to do in order to start creating your own music is type in the text. As you type, the platform will automatically start playing your words and once you’re done, you’ll be able to hear your new song. You can also choose between different instruments to make the process of creating music with Typeatone even more entertaining. You can share all of your creations with your friends on social media.
![]()
A cross-platform for making videos anywhere for all creators
Why your video editing isn’t good enough? How about some creative inspo?
- 100 Million+ Users
- 150+ Countries and Regions
- 4 Million+ Social Media Followers
- 5 Million+ Stock Media for Use
* Secure Download
2. Audiotool
Price: Free
Image from Internet
Electronic music producers who often use synthesizers like Roland TB-303 or Roland TR-909 are going to love the features this online collaborative platform offers. Audiotool hosts a huge music library, you can explore even if you are not a registered user. In order to access the platform’s music studio, you first have to create an account and make sure that you are signed in. Audiotool is also a community of like-minded people where you can meet artists whose work you appreciate or hear what others think about your work. The only downside is that Audiotool’s abundance of features can be overwhelming for the newcomers to the world of electronic music production.
3. AudioSauna
Price: Free
Image from Internet
AudioSauna seems to offer everything its users need to create inspiring music because it is equipped with frequency modulation synth, virtual analog synth and a sampler that provides layering features. Moreover, its intuitive interface makes the process of arranging the song structure or changing several note values simultaneously much easier. Creating an account on AudioSauna will enable to record all your projects and export them as audio files that can be uploaded to SoundCloud or any other audio distribution platform. AudioSauna is a perfect tool for skilled producers who want to create their music online.
4. Soundtrap
Price: Free trial available, subscription plans start at $3.99 per month
Image from Internet
Soundtrap offers a long list of features that enable professional musicians to create their music online. All you have to do is create an account and you will get access to the Sountrap’s studio that let you create new beat patterns, use a synthesizer or even invite friends to make music together. The platform also offers the possibility to connect your own instruments to the Soundtrap’s studio, so that you can record your music as you play it. This online platform also has an Education section where you can share your knowledge with others or learn valuable music lessons.
5. PatternSketch
Price: Free
Image from Internet
This basic and yet effective drum machine can help you generate amazing beats for the songs you’re working on. Once you sign up, you will be able to choose from a number of different kits and patterns that are fully customizable or create your own original beats. After you create a pattern you like, you can save it with a single click or send it to your friends via email. Optionally, you can export all of your creations from PatternSketch and save them as wav, mp3 or ogg files, although in some cases mp3 audio files may not loop properly.
6. Soundation
Price: Free version available, pricing plans start at $1.99 per month
Image from Internet
If you choose to create music with the free version of Soundation, you’ll be able to work on up to ten projects, try out over 700 audio effects and loops, and export all your music in low quality. Purchasing the Intro pricing plan will enable you to work on an unlimited number of projects, make live audio recordings, import audio files smaller than 100MB or use an external midi controller. Moreover, opting for any of the annual or monthly subscription plans will allow you to export entire projects and audio files in high resolution from Soundation.
7. Text to Speech
Price: Free

online-music-maker-Text to Speech.jpg
Vocals are often overlooked in contemporary electronic music, but there are so many ways they can be used creatively. The platform lets you turn up to 50000 characters into speech at once, and it also offers several different voices you can choose from. Before you create an audio file you can determine how fast the text is going to be vocalized, so you should try different options and see which one fits your project the best. Text to Speech platform can be used during the process of creating a new song, but the tools it offers are not enough to make an entire song.
8. Looplabs
Price: Free
Music enthusiasts who would like to produce different genres of music online should definitely get familiar with Looplabs, as this online music maker lets its users remix songs or make music from scratch. Besides being one of the best places on the Internet to record music, Looplabs is also a community where you can meet people who like your music or discover artists whose work you admire. The Looplab’s studio features samples for a broad range of music genres and musical instruments, and you can use it to make Electro or Funk music equally effectively.
9. Online Sequencer
Price: Free
This is a perfect tool for developing an idea for a song, as you can create a sequence in just a few minutes. You can choose from Piano, Drums and Guitar categories of instruments or browse through a huge collection of fully customizable preset sequences that is updated on a daily basis. The platform also lets you import MIDI files and work on projects you’ve already started developing or you can export your sequences as MIDI files from the Online Sequencer and edit them with your DAW. Even though Online Sequencer is a useful tool for making music, the features it offers can’t really be compared with those on Soundation or AudioSauna.
10. Autochords
Price: Free
Finding new ideas for songs is often more difficult than it sounds, and if you ever face a creative block you should simply head over to Autochords. This platform suggests chord progressions based on the parameters you set, so you just have to select an instrument and the name of the song to set the feel, and the platform will show you the main progression and its alternatives. Rather than being an online music maker, Autochords is more a tool that helps piano and guitar players understand chord progressions better. iPhone and iPad users can download the Autochords app from the App Store for free.
Read More to Get : Best Free DAW for Windows and Mac for Beginners >>
Conclusion
You don’t have to be a professional musician in order to start making music online, you just have to love music, and an online music maker of your choice will take care of the rest. Do you use online music makers for entertainment or to express your creativity? Leave a comment below and share your opinions with us.
Benjamin Arango
Benjamin Arango is a writer and a lover of all things video.
Follow @Benjamin Arango
The Clear Sound Solution: Eradicating Noise From Video Playback Across Devices and Browsers (2024 Update)
If you are using the wrong tool, then working with videos can be tough and frustrating. This is because not every tool offers the same features and functionalities that an amazing tool can offer. Let’s take a scenario; imagine you come across a video, but you don’t like the sound of it. What will you do now? Are you going to compromise on the sound, or are you going to find another video?
What if you get a chance to remove sound from the video? This option sounds a lot better than the other options. The next thing you need to look for is a good sound remover. There are a few brilliant tools that allow video editing and are also great sound remover from video. Keep reading the article if you are interested in learning more about this.
In this article
01 How to Remove Sound from Video on Windows and Mac
02 How to Remove Sound from Video Online
Part 1. How to Remove Sound from Video on Windows and Mac
This is the social media era. People are always uploading and sharing their life. Some people generally referred to as Influencers have adopted social media as their career. Suppose you are one of those, and you want to add a video clip to your content, but the background sound is not satisfying you. The best possible solution to this problem is to delete sound from the video.
If you are facing a similar problem, then this section of the article is for you. We are about to introduce background sound remover. It doesn’t matter if you are a Windows or Mac user; the sound removers work well on both platforms.
Method 1: Wondershare Filmora
The first sound remover from video that we are going to talk about is Wondershare Filmora. This amazing video editor offers a whole different editing world to you. With Filmora video editor, you can create unique videos without sweating. The software has a wide range of effects, transitions, titles, and other editing elements.
Moreover, Filmora offers limitless video editing features. With just a few clicks, you can do motion tracking keyframing. Cool edits like the split-screen are also possible with Filmora. The software is multi-track, drag and drop, and easy to use.
Along with this, Filmora also has audio editing features. From one platform, you can edit video audio and also remove sound. The audio editing lets you add background music, split audio, and also mute clip. You can also use Filmora’s Adjust Audio Volume, Audio Equalizer, and Audio Denoise feature. By following the steps shared below, you can quickly delete sound from video using Wondershare Filmora.
For Win 7 or later (64-bit)
For macOS 10.12 or later
Step 1: Create Project in Filmora
The process to remove sound from video starts when you launch Wondershare Filmora on your respective device. Then, select your desired aspect ratio and hit the ‘New Project’ option to get started.

Step 2: Import Media File
The next step asks you to import the media file from which you plan to remove sound. For this, head to the ‘File’ tab from the top panel. Click on it and select the ‘Import Media’ option. Then click on the ‘Import Media Files.’ As soon as the file is imported, drag and drop it onto the timeline. You can also change the resolution and the frame rate for the media file.

Step 3: Audio Editing
To remove sound from video, the user needs to open the audio menu. For that, right-click on the media file and select the option of ‘Audio.’ A sub-menu will show up on the screen. From that menu, you should choose the ‘Detach Audio’ option. This removes and separates the audio from the video, and it is displayed separately on the timeline.

Step 4: Exporting No Sound Video File
You can right-click on the audio file and delete it. Or else, select the audio file and hit the ‘Delete’ button on the keyboard to delete it. Lastly, you can preview the final file and export it. Select the output format for your video and hit the ‘Export’ button to get the sound-free video.

Method 2: Adobe Premiere Pro
The following background sound remover that we are sharing is Adobe Premiere Pro. The video editor is great to work on both Windows and Mac. Premiere Pro has a very responsive interface. It supports multiple file formats and various video types. It offers Motion Graphics templates along with VR editing and VR rotates sphere.
With Premiere Pro, you can open multiple projects at once and work on them simultaneously. You can switch and lift scenes from one another. The video editing software offers effects, transitions, labels, and other things. You can also remove background sound from videos with the help of Adobe Premiere Pro. If you don’t know how to remove sound from video, then follow the step-by-step guideline shared below.
Step 1: Create New Project
For removing sound from video, start by opening Adobe Premiere Pro. Once its interface appears, you need to create a ‘New Project’ so that you can get started.

Step 2: Import Video File
For the next step, you need to import the media file to Premiere Pro. This could be done by clicking on the ‘File’ option from the top panel. Then, select the ‘Import’ button and browse the media file you want to work with.

Step 3: Drag to Premiere Pro Timeline
Once your file has been imported, drag it to the Project timeline. After that, you need to highlight the clip in the timeline by clicking on it. Now, right-click on the highlighted clip. From the menu list, select the option of ‘Unlink.’ This separates and unlinks the audio from the video file.

Step 4: Delete the Audio
Since the audio is unlinked from the media file, you can now delete that audio file. You simply have to select the audio layer and press the ‘Delete’ key or right-click on the audio and select the ‘Clear’ option from the menu to delete the audio. Your video without sound is now ready to be exported.

Part 2. How to Remove Sound from Video Online
Since we have shared the 2 best sound removers from video for both Mac and Windows, now it’s time to shed light on an online sound remover. Clideo is the platform that you can use to remove sound from your video. The online tool is fast and easy to use for removing sound. Clideo supports a variety of video formats like MP4, AVI, MPG, WMV, and many more.
The tool lets you watch the preview of the video. If the video satisfies you, only then save it to your device. Clideo is compatible with multiple devices, for instance, iOS and Android phones. It also supports Windows and Mac computers. If you want to learn about how to delete sound from video using Clideo, then keep reading.
Step 1: Upload Media File
Start the process by accessing the online sound remover tool, Clideo. Then, you need to upload the media file that you want to work with. For this, you can either click on ‘Choose File’ or browse for the video on your device. Or else, you can also upload from Dropbox or Google Drive.

Step 2: Removing Sound
As the tool removes sound from videos. So, as soon as the video is uploaded, Clideo takes a few seconds to remove the sound and to mute your video.

Step 3: Download the Final Video
Once the sound has been removed, with Clideo, you can preview the result. Watch the muted video. If you are satisfied with the final video, then download it to your device.

Conclusion
Sound removers are very helpful tools. You can remove sound and add your desired background sound to it. If you have been struggling and looking for the best background sound removers from videos, then this article is perfect for you. We have talked about different tools to remove sound, both for Mac and Windows. We also discussed an online tool that is very fast and easy.
Versatile Video Editor - Wondershare Filmora
An easy yet powerful editor.
Numerous effects, footage and audio.
02 How to Remove Sound from Video Online
Part 1. How to Remove Sound from Video on Windows and Mac
This is the social media era. People are always uploading and sharing their life. Some people generally referred to as Influencers have adopted social media as their career. Suppose you are one of those, and you want to add a video clip to your content, but the background sound is not satisfying you. The best possible solution to this problem is to delete sound from the video.
If you are facing a similar problem, then this section of the article is for you. We are about to introduce background sound remover. It doesn’t matter if you are a Windows or Mac user; the sound removers work well on both platforms.
Method 1: Wondershare Filmora
The first sound remover from video that we are going to talk about is Wondershare Filmora. This amazing video editor offers a whole different editing world to you. With Filmora video editor, you can create unique videos without sweating. The software has a wide range of effects, transitions, titles, and other editing elements.
Moreover, Filmora offers limitless video editing features. With just a few clicks, you can do motion tracking keyframing. Cool edits like the split-screen are also possible with Filmora. The software is multi-track, drag and drop, and easy to use.
Along with this, Filmora also has audio editing features. From one platform, you can edit video audio and also remove sound. The audio editing lets you add background music, split audio, and also mute clip. You can also use Filmora’s Adjust Audio Volume, Audio Equalizer, and Audio Denoise feature. By following the steps shared below, you can quickly delete sound from video using Wondershare Filmora.
For Win 7 or later (64-bit)
For macOS 10.12 or later
Step 1: Create Project in Filmora
The process to remove sound from video starts when you launch Wondershare Filmora on your respective device. Then, select your desired aspect ratio and hit the ‘New Project’ option to get started.
Step 2: Import Media File
The next step asks you to import the media file from which you plan to remove sound. For this, head to the ‘File’ tab from the top panel. Click on it and select the ‘Import Media’ option. Then click on the ‘Import Media Files.’ As soon as the file is imported, drag and drop it onto the timeline. You can also change the resolution and the frame rate for the media file.
Step 3: Audio Editing
To remove sound from video, the user needs to open the audio menu. For that, right-click on the media file and select the option of ‘Audio.’ A sub-menu will show up on the screen. From that menu, you should choose the ‘Detach Audio’ option. This removes and separates the audio from the video, and it is displayed separately on the timeline.
Step 4: Exporting No Sound Video File
You can right-click on the audio file and delete it. Or else, select the audio file and hit the ‘Delete’ button on the keyboard to delete it. Lastly, you can preview the final file and export it. Select the output format for your video and hit the ‘Export’ button to get the sound-free video.
Method 2: Adobe Premiere Pro
The following background sound remover that we are sharing is Adobe Premiere Pro. The video editor is great to work on both Windows and Mac. Premiere Pro has a very responsive interface. It supports multiple file formats and various video types. It offers Motion Graphics templates along with VR editing and VR rotates sphere.
With Premiere Pro, you can open multiple projects at once and work on them simultaneously. You can switch and lift scenes from one another. The video editing software offers effects, transitions, labels, and other things. You can also remove background sound from videos with the help of Adobe Premiere Pro. If you don’t know how to remove sound from video, then follow the step-by-step guideline shared below.
Step 1: Create New Project
For removing sound from video, start by opening Adobe Premiere Pro. Once its interface appears, you need to create a ‘New Project’ so that you can get started.
Step 2: Import Video File
For the next step, you need to import the media file to Premiere Pro. This could be done by clicking on the ‘File’ option from the top panel. Then, select the ‘Import’ button and browse the media file you want to work with.
Step 3: Drag to Premiere Pro Timeline
Once your file has been imported, drag it to the Project timeline. After that, you need to highlight the clip in the timeline by clicking on it. Now, right-click on the highlighted clip. From the menu list, select the option of ‘Unlink.’ This separates and unlinks the audio from the video file.
Step 4: Delete the Audio
Since the audio is unlinked from the media file, you can now delete that audio file. You simply have to select the audio layer and press the ‘Delete’ key or right-click on the audio and select the ‘Clear’ option from the menu to delete the audio. Your video without sound is now ready to be exported.
Part 2. How to Remove Sound from Video Online
Since we have shared the 2 best sound removers from video for both Mac and Windows, now it’s time to shed light on an online sound remover. Clideo is the platform that you can use to remove sound from your video. The online tool is fast and easy to use for removing sound. Clideo supports a variety of video formats like MP4, AVI, MPG, WMV, and many more.
The tool lets you watch the preview of the video. If the video satisfies you, only then save it to your device. Clideo is compatible with multiple devices, for instance, iOS and Android phones. It also supports Windows and Mac computers. If you want to learn about how to delete sound from video using Clideo, then keep reading.
Step 1: Upload Media File
Start the process by accessing the online sound remover tool, Clideo. Then, you need to upload the media file that you want to work with. For this, you can either click on ‘Choose File’ or browse for the video on your device. Or else, you can also upload from Dropbox or Google Drive.
Step 2: Removing Sound
As the tool removes sound from videos. So, as soon as the video is uploaded, Clideo takes a few seconds to remove the sound and to mute your video.
Step 3: Download the Final Video
Once the sound has been removed, with Clideo, you can preview the result. Watch the muted video. If you are satisfied with the final video, then download it to your device.
Conclusion
Sound removers are very helpful tools. You can remove sound and add your desired background sound to it. If you have been struggling and looking for the best background sound removers from videos, then this article is perfect for you. We have talked about different tools to remove sound, both for Mac and Windows. We also discussed an online tool that is very fast and easy.
Versatile Video Editor - Wondershare Filmora
An easy yet powerful editor.
Numerous effects, footage and audio.
Also read:
- New In 2024, A-Listers Voice Alteration Essentials Comprehensive Guides to Transforming Your Singing Style
- Updated Sonic Storytelling Weaving a Tapestry of Sound and Imagery
- Top 10 Windows-Compatible Speech Recognition Tools
- Updated In 2024, Most Affordable Mac Audiophiles Editing App
- Updated 2024 Approved Techniques for Reducing Room Acoustics on Taped Music
- Updated Best Audio Editor Picks High-Quality Sound Engineering on Windows & Mac Devices
- New In 2024, Efficient Techniques for Transferring Audacity Tracks Into MP3 Files
- New Celebrity Soprano Shifters An All-Inclusive Guide to Pitch Modification Gadgets and Contingency Plans for 2024
- Updated In 2024, The Complete Tutorial on Augmenting Android Video Projects with Essential Audioscapes
- In 2024, Best Spotify Ripper How to Rip Music From Spotify?
- Updated 2024 Approved Navigate Through Melodious Comedy Effects
- Updated Gather Groaning Sound Tokens
- New In 2024, Finding Locations with the Hallmark of Enthusiastic Uproar
- New In 2024, Free Harmonies for Visuals Integrate Music Into Photos
- New In 2024, Combatting Audio Misfires Methods for Rectifying Sound Warping
- 2024 Approved Quietude Sweep The Ultimate Selection of Background Noise Removal Software for Android and iPhone Users
- New Incorporate Soundtracks Into The Boomerang Editing Suite
- Updated From Default Dial-Tones to Signature Sounds The Ringtone Artisans Manual for 2024
- New Sweeping the Audio Board Top Strategies for Sound Excellence at Home (Film Edition, 2023)
- New Voice-Transformation Trends Leading Tools to Enhance Your Google Meet Presence
- Updated How to Reduce Background Noise Using iMovie An Overview
- Speedy Sound Alteration Techniques for Audio Files for 2024
- Updated Voice in Virtual Space A Curated List of Premium Free PC Voice Capture Applications, Updated .
- Bypass/Reset Samsung Galaxy A05s Phone Screen Passcode/Pattern/Pin
- 3 Methods to Mirror Motorola G24 Power to Roku | Dr.fone
- Updated 2024 Approved Text to Voice, Made Simple A Beginners Guide to MP3 Conversion
- New In 2024, Best Vignette Apps for iOS and Android Free & Paid
- How to Fix Android.Process.Media Has Stopped on Tecno Pop 8 | Dr.fone
- New In 2024, Are You Looking to Remove Echo in Premiere Pro? Please Look at Our Guide for Advice and Suggestions on Getting the Best Possible Outcomes
- In 2024, Change Location on Yik Yak For your Gionee F3 Pro to Enjoy More Fun | Dr.fone
- Updated The Best Video Editing Apps for Adding Music (2024 Update)
- In 2024, How to Mirror PC Screen to Honor Magic 5 Pro Phones? | Dr.fone
- In 2024, How to Fix Pokemon Go Route Not Working On Samsung Galaxy A15 4G? | Dr.fone
- 4 Easy Ways for Your Vivo S18e Hard Reset | Dr.fone
- Unlocking Apple iPhone SE Passcode without a Computer
- Updated 2024 Approved IMovie Not Available on Android? No Problem! Try These 10 Alternatives
- Best Websites to Download Public Domain Videos for 2024
- In 2024, Is pgsharp legal when you are playing pokemon On Vivo Y78+? | Dr.fone
- Updated The Ultimate Premiere Pro PC Build A Beginners Guide
- In 2024, 3 Facts You Need to Know about Screen Mirroring Samsung Galaxy F34 5G | Dr.fone
- How to Fix the Soft Bricked Xiaomi Redmi 13C 5G? | Dr.fone
- New In 2024, Discovering The Best Wedding LUTs for Premiere Pro | An Overview
- Title: Updated Mastering Sound with Adobe Audition An In-Depth Look at Its Core Components for 2024
- Author: Jacob
- Created at : 2024-05-05 04:00:32
- Updated at : 2024-05-06 04:00:32
- Link: https://audio-shaping.techidaily.com/updated-mastering-sound-with-adobe-audition-an-in-depth-look-at-its-core-components-for-2024/
- License: This work is licensed under CC BY-NC-SA 4.0.
