
:max_bytes(150000):strip_icc():format(webp)/free-language-exchange-websites-1357059-d87c92dbdba3429dbf17d51ba313b1ff.png)
Updated Instant Silence Muting Zoom Sound From Your Computer or Smartphone
Instant Silence: Muting Zoom Sound From Your Computer or Smartphone
Zoom Meeting is a beneficial application, and video conferencing is on another level because of this app. Zoom offers high-quality audio and video. With this conferencing app, cross-platform messaging is also possible, and you can also schedule your meeting calendar with Zoom.
Many offices conduct formal meetings through Zoom. During the pandemic era, online classes were taken through Zoom. Sometimes, you wish to mute the mic and sit back. What bothers you is that you don’t know how to mute audio in zoom. If this is your case, then stay with us. We are about to discuss how you can mute zoom audio.
In this article
01 How to Mute Zoom Audio on Windows and Mac
02 How to Mute Zoom Audio on iPhone and Android
03 Tips To Optimize Zoom Audio Settings for Better Performance
04 Frequently Asked Questions about Zoom
Part 1. How to Mute Zoom Audio on Windows and Mac
Imagine you are having a meeting on Zoom, and there are a lot of people in the meeting. You are trying to do some office work, but their voices disturb you. You cannot even leave the meeting. What are you going to do now? Are you going to submit average quality work?
One thing that you can do is to mute audio on Zoom. The question is, do you know how to mute the microphone on zoom? Let us share the steps that will help you to mute Zoom audio on your Windows or Mac.
Step 1: First of all, open the desktop Zoom app and start a call. Then, for the options to appear on the screen, you need to move the cursor.
Step 2: To mute any participant, bring the cursor over their name. The options will appear. You can click on the blue ‘Mute’ button to mute them. Or else, you can open a pop-up menu by right-clicking on the participants’ names. There, select the option of ‘Mute Audio.’ You can unmute them in the same way.

Step 3: If you are the meeting host, you can manage all participants at once. For that, look at the bottom toolbar hit the ‘Manage Participants’ tab. Zoom meeting will display the total count of the participants in a sidebar on the screen. Along with the participants’ names, a microphone and video icon will also appear.

Step 5: If you are the meeting host, then you can mute individual participants. You have to bring the cursor over the microphone icon. A ‘Mute’ and ‘Unmute’ buttons will show up.

Step 6: Being the host, you can ‘Mute All’ and ‘Unmute All’ participants at once by clicking on these buttons at the bottom. A pop-up will appear on the screen, don’t forget to check the box. With this, the participants can unmute themselves.
Step 7: Also, the participants receive a message if the host is muting or unmuting everyone. To complete the process and apply the changes, hit the ‘Continue’ button.

Part 2. How to Mute Zoom Audio on iPhone and Android
Zoom meeting is compatible with Windows, Mac, Android, and also iPhone. You don’t need to always join zoom meetings with your computer. Sometimes, you join zoom with your mobile. In any case, you might need to mute zoom audio. Sadly, you don’t know how to mute Zoom audio. Let us share an easy step-by-step guideline to do this on both Android and iPhone.
Step 1: If you want to mute the sound of your mobile device, then in the top left corner, tap on the volume button. You will see ‘X’ appears over the speaker icon. You can tap on it again to play the sound.

Step 2: Being the host, you can manage participants. For that, look at the bottom and click on the ‘Participants’ tab. A pop-up will appear on your screen, and you can individually mute participants. For this, you need to hit the microphone icon visible next to the participants’ names. You can easily reverse this and unmute it by tapping on the microphone icon again. You can also manage the settings by clicking on the participant’s name.

Step 3: The host has the authority to Mute all participants at once. For this, the host needs to tap on the ‘Mute All’ button from the bottom. The host needs to check the box. This will allow the participants to unmute themselves.

Step 4: Lastly, once you are done and satisfied with everything, hit the ‘Close’ option. This will close the participants’ window.
Part 3. Tips To Optimize Zoom Audio Settings for Better Performance
Although Zoom meeting is itself an amazing app with so many different features, among those features, one is that Zoom has high-quality video and audio. Besides everything, you can still improve Zoom Audio’s performance by following the tips that are shared below.
· Reduce Background Noise
Your audio performance is instantly improved if you reduce background noise. Any disturbing noise in the background falls under this category. It can be the fan, air conditioning, ticking clocks, etc. You should move away from the noise.
· Use High-Quality Microphone
For better audio performance, use a high-quality microphone for your Zoom meetings. This factor is the most important factor when it comes to improving audio. Investing in a decent and good external microphone is never a bad option.
· Stable Internet Connection
With a weak internet connection, your voice breaks. If you want to have improved Zoom audio performance, then make sure that you have a stable internet connection. Distortion and disturbance cause problems while communicating.
· Distance from Microphone
You must sit at an average distance from your microphone. Sitting too close will sound like you are shouting. Whereas sitting too far, your voice is quieter, and background noise sounds loud. So, measure the appropriate distance from the microphone.
Part 4. Frequently Asked Questions about Zoom
1. Can you mute Zoom audio without muting the computer?
Yes, you can mute zoom without muting your computer. For Windows, look at the bottom right corner. Right-click on the speaker/volume icon. A pop-up menu will appear; from there, select ‘Open Volume Mixer.’ When Volume Mixer appears on the screen, turn down and mute the volume for Zoom Meetings.
In case you are a Mac user, then let us tell you what to do. During the Zoom call, click on the Zoom Meetings Control for Audio. Then select the option of ‘Audio Settings.’ From the audio setting panel, you can turn down the volume for the ‘Speaker.’ This lowers the volume for Zoom meetings and can even mute it.
2. How can I improve my zoom video quality?
Various ways could be adopted to improve the video quality for Zoom meetings. For instance, you can use the ‘Touch up my Appearance’ feature. Or else, you can enable HD, apply Studio Effects, enable Zoom’s Low Light Adjustment setting, etc.
3. How do I change the resolution of a video Zoom?
For changing the resolution of Zoom video, firstly open Zoom on either your mobile or computer. Then, head over to the ‘Settings’ section. There, you need to select ‘Video Quality’ settings. Lastly, check the box with HD. This will enable the HD option, and your device will stream high-quality videos.
4. How do you set a virtual background on Zoom without a green screen?
For setting a virtual background on Zoom, you firstly need to sign in to your account. After that, you should open the ‘Settings’ by clicking on your profile picture. From settings, select ‘Virtual Background.’ Now, you can add the image that you want as your virtual background. You can even upload any image and video by hitting the ‘+’ sign.
5. Where do you get zoom backgrounds?
Zoom website offers a variety of cool virtual backgrounds. You can easily download them and use them. In comparison, there is another site that offers free backgrounds. You can also download virtual background images from Unsplash and use them easily.
Final Thoughts
Now are days, Zoom Meeting is being widely used. This article will surely increase your knowledge regarding Zoom Audio. We have shared the steps for both computer and mobile for Zoom mute microphone. We also shared tips that will help you improve the Zoom audio performance.
02 How to Mute Zoom Audio on iPhone and Android
03 Tips To Optimize Zoom Audio Settings for Better Performance
04 Frequently Asked Questions about Zoom
Part 1. How to Mute Zoom Audio on Windows and Mac
Imagine you are having a meeting on Zoom, and there are a lot of people in the meeting. You are trying to do some office work, but their voices disturb you. You cannot even leave the meeting. What are you going to do now? Are you going to submit average quality work?
One thing that you can do is to mute audio on Zoom. The question is, do you know how to mute the microphone on zoom? Let us share the steps that will help you to mute Zoom audio on your Windows or Mac.
Step 1: First of all, open the desktop Zoom app and start a call. Then, for the options to appear on the screen, you need to move the cursor.
Step 2: To mute any participant, bring the cursor over their name. The options will appear. You can click on the blue ‘Mute’ button to mute them. Or else, you can open a pop-up menu by right-clicking on the participants’ names. There, select the option of ‘Mute Audio.’ You can unmute them in the same way.
Step 3: If you are the meeting host, you can manage all participants at once. For that, look at the bottom toolbar hit the ‘Manage Participants’ tab. Zoom meeting will display the total count of the participants in a sidebar on the screen. Along with the participants’ names, a microphone and video icon will also appear.
Step 5: If you are the meeting host, then you can mute individual participants. You have to bring the cursor over the microphone icon. A ‘Mute’ and ‘Unmute’ buttons will show up.
Step 6: Being the host, you can ‘Mute All’ and ‘Unmute All’ participants at once by clicking on these buttons at the bottom. A pop-up will appear on the screen, don’t forget to check the box. With this, the participants can unmute themselves.
Step 7: Also, the participants receive a message if the host is muting or unmuting everyone. To complete the process and apply the changes, hit the ‘Continue’ button.
Part 2. How to Mute Zoom Audio on iPhone and Android
Zoom meeting is compatible with Windows, Mac, Android, and also iPhone. You don’t need to always join zoom meetings with your computer. Sometimes, you join zoom with your mobile. In any case, you might need to mute zoom audio. Sadly, you don’t know how to mute Zoom audio. Let us share an easy step-by-step guideline to do this on both Android and iPhone.
Step 1: If you want to mute the sound of your mobile device, then in the top left corner, tap on the volume button. You will see ‘X’ appears over the speaker icon. You can tap on it again to play the sound.
Step 2: Being the host, you can manage participants. For that, look at the bottom and click on the ‘Participants’ tab. A pop-up will appear on your screen, and you can individually mute participants. For this, you need to hit the microphone icon visible next to the participants’ names. You can easily reverse this and unmute it by tapping on the microphone icon again. You can also manage the settings by clicking on the participant’s name.
Step 3: The host has the authority to Mute all participants at once. For this, the host needs to tap on the ‘Mute All’ button from the bottom. The host needs to check the box. This will allow the participants to unmute themselves.
Step 4: Lastly, once you are done and satisfied with everything, hit the ‘Close’ option. This will close the participants’ window.
Part 3. Tips To Optimize Zoom Audio Settings for Better Performance
Although Zoom meeting is itself an amazing app with so many different features, among those features, one is that Zoom has high-quality video and audio. Besides everything, you can still improve Zoom Audio’s performance by following the tips that are shared below.
· Reduce Background Noise
Your audio performance is instantly improved if you reduce background noise. Any disturbing noise in the background falls under this category. It can be the fan, air conditioning, ticking clocks, etc. You should move away from the noise.
· Use High-Quality Microphone
For better audio performance, use a high-quality microphone for your Zoom meetings. This factor is the most important factor when it comes to improving audio. Investing in a decent and good external microphone is never a bad option.
· Stable Internet Connection
With a weak internet connection, your voice breaks. If you want to have improved Zoom audio performance, then make sure that you have a stable internet connection. Distortion and disturbance cause problems while communicating.
· Distance from Microphone
You must sit at an average distance from your microphone. Sitting too close will sound like you are shouting. Whereas sitting too far, your voice is quieter, and background noise sounds loud. So, measure the appropriate distance from the microphone.
Part 4. Frequently Asked Questions about Zoom
1. Can you mute Zoom audio without muting the computer?
Yes, you can mute zoom without muting your computer. For Windows, look at the bottom right corner. Right-click on the speaker/volume icon. A pop-up menu will appear; from there, select ‘Open Volume Mixer.’ When Volume Mixer appears on the screen, turn down and mute the volume for Zoom Meetings.
In case you are a Mac user, then let us tell you what to do. During the Zoom call, click on the Zoom Meetings Control for Audio. Then select the option of ‘Audio Settings.’ From the audio setting panel, you can turn down the volume for the ‘Speaker.’ This lowers the volume for Zoom meetings and can even mute it.
2. How can I improve my zoom video quality?
Various ways could be adopted to improve the video quality for Zoom meetings. For instance, you can use the ‘Touch up my Appearance’ feature. Or else, you can enable HD, apply Studio Effects, enable Zoom’s Low Light Adjustment setting, etc.
3. How do I change the resolution of a video Zoom?
For changing the resolution of Zoom video, firstly open Zoom on either your mobile or computer. Then, head over to the ‘Settings’ section. There, you need to select ‘Video Quality’ settings. Lastly, check the box with HD. This will enable the HD option, and your device will stream high-quality videos.
4. How do you set a virtual background on Zoom without a green screen?
For setting a virtual background on Zoom, you firstly need to sign in to your account. After that, you should open the ‘Settings’ by clicking on your profile picture. From settings, select ‘Virtual Background.’ Now, you can add the image that you want as your virtual background. You can even upload any image and video by hitting the ‘+’ sign.
5. Where do you get zoom backgrounds?
Zoom website offers a variety of cool virtual backgrounds. You can easily download them and use them. In comparison, there is another site that offers free backgrounds. You can also download virtual background images from Unsplash and use them easily.
Final Thoughts
Now are days, Zoom Meeting is being widely used. This article will surely increase your knowledge regarding Zoom Audio. We have shared the steps for both computer and mobile for Zoom mute microphone. We also shared tips that will help you improve the Zoom audio performance.
Tailoring Your Timeline: A Step-by-Step Guide to Editing Lengthy Audios in iMovie on iOS Devices
Cutting Audio in iMovie: A Guide for Mac and iPhone Users

Marion Dubois
Apr 30, 2024• Proven solutions
Sometimes, we find the desired audio or soundtrack for our videos longer or shorter than we want, and that is where audio editing comes. Audio editing refers to manipulating audio to alter the length, speed, and volume or create additional effects such as loops. Are you new to audio trimming? Don’t worry, as our article today would show how to cut audio in iMovie on Mac and iPhone.
Part 1: How to Cut Music in iMovie on Mac?
Cutting music is audio editing carried out when the music or soundtrack seems longer than desired. To cut music or soundtrack in iMovie using Mac involves the following steps:
Step 1: Adjust the Playhead to Cut the Clip
You can cut an audio clip only when the specified audio is in the timeline. To perform the operation, right-click on the clip and pick out a split clip. This operation cuts the clip into two and divides the two pieces wherever the playhead is situated.
Step 2: Select Split Clip
Right-click and select the Split Clip. Once this step is over, you have successfully cut the audio clip.
Part 2: Cut Audio in iMovie Alternative – Wondershare Filmora
Generally, as humans, we feel more satisfied when we have options or choices because we get fed up with doing the same over and over again the same way without changes. Wondershare Filmora is an alternative for iMovie and can easily carry out the function of various forms of audio editing.
If you wish to trim off the beginning or the ending of a mp3 file quite swiftly, this section is for you. Things can get specifically weird if you want to import heavy mp3 files to your space-limited MP3 player to play.
You’re required to choose an intelligent MP3 trimmer to trim an MP3 file to any length. Here, we suggest this robust video editing software — Wondershare Filmora, which enables you to precisely extract an MP3 file or audio segment effortlessly without losing any original audio quality.


You can get both the Windows and Mac versions of this great video editor. It embodies the following features:
- Import videos, audio, or photos from various sources and edit them in one place.
- Three different video cutting methods to meet different editing needs.
- Various editing tools help you edit the video completely, including rotation, picture-in-picture, green screen, cropping, etc.
- Output the edited video to more than 20 different formats or locations as needed.
- Use more than 1,000 video effects in the effect store to customize videos.
Using Filmora is quite effortless. The following tutorial will display how to cut audio in it easily and quickly.
Step 1: Import MP3 Files for Editing
Firstly, drag the specific MP3 file or audio clip into the media library, or you can directly import audio files or video from portable devices such as your digital camera, smartphone, or camcorder, etc.
Step 2: Drag MP3 Files to the Timeline below for Cutting
Filmora provides two ways to cut audio/video files. You can either select to cut from the beginning or the end by trimming. You can also split it into various segments from the mid-sections.
Move the slider ahead to the cutting point within the midsection, and then tap the scissor icon to split it into little sections as desired.
When executed, please select the part that you don’t want to, hit the Delete button to remove.
Step 3: Export to Save
Hit the Export tab to save your edited project. If you want to save in the original MP3 format, select MP3 before you export.
Part 3: How to Trim Music in iMovie on iPhone
This section will offer you a guide on how to cut out parts of audio in an iMovie project on an iPad or iPhone. After adding music to your project, the audio is trimmed to the desired length using iMovie’s inbuilt tool.
Step #1: Open iMovie on your iPhone or iPad.
Step #2: Tap the movie project you want to edit.
It will display a list of your projects, among which you must select the one you want to edit.
If you want to edit a current section of video not even opened in iMovie, you have to make a new iMovie project to add your audio and video. Select the + icon, choose the Movie tab, select the video(s), and then choose the Create movie button.
Step #3: Hit the Edit button below the name of your project.
This opens your project in the editor. And, you’re already in the editor if you just created a new project in the previous step.
Step #4: Add audio to your project.
You can skip this step if your project already contains the audio. Hit the + icon in the upper-left timeline’s corner.
Choose Audio.
Go with a specific category:
Soundtracks are audio tracks provided by iMovie which are free to use in your project.
Select My Music to locate the file and use a song from iTunes or the music app.
Sound effects are shorter sounds—mostly below 10 seconds duration.
Choose an audio file for the preview.
Select the + icon to add the file to your project.
Step #5: Hit the audio bar on the timeline.
It is present below the multi-frame version of your video in the screen’s bottom area.
Now, detach the MP3 segment or audio from the video by tapping the video on the timeline and selecting the Detach button at the screen’s bottom area.
Step #6: Tap and drag the beginning of the audio track.
Drag or move the audio track to the exact point where you wish it to start from—the audio track’s left-end marks of the yellow bar starting your audio.
Step #7: Tap and drag the end of the audio track.
You can drag the yellow bar at the end and move it to the exact point where you want the audio to end.
If you can’t see the yellow bar on the far-right end of the audio track, swipe left below the audio track to scroll to the end.
To move the audio track to another location, select and hold it for about one second, and then move it to the desired video’s location.
Step #8: Select the Play tab for preview.
It’s the sideways triangle just below the video preview.
Step #9: Select the Done button when you’re finished.
It is present at the screen’s top-left corner. You have now confirmed the changes done to your project.
If you want to play it on any other device, tap the Share button at the bottom after choosing the Done tab and select Save Video to export it.
Part 4: Audio Editing Tips for iMovie Users
Here are some guidelines or tips for various audio editing processes, starting from cutting trim music on iMovie, using iMovie to trim audio and video together, and other audio and video editing tips.
- Use Waveforms to See What You Hear
Sound is just as relevant as the images in a video, and should focus just as much during editing. To efficiently and adequately edit audio, you need a good set of speakers and headphones to hear the sound, and you also need to be able to see the sound.
If the waveforms don’t appear, go to the “view” drop-down menu and select “show waveforms”, the waveform would show you the sound intensity level of a sound clip and definitely would give you an idea of what part will need to be turned up or down.
- Audio Adjustments
With the audio button situated at the top right, you have access to some essential audio editing tools for changing the sound level of your chosen clip or changing the relative volume of other films in the project.
The audio editing window also contains primary noise reduction and audio equalization tools and a range of effects – from robot to echo- which would affect how people sound in your video.
- Editing Audio with the Timeline
iMovie permits you to adjust the audio within the clips themselves, each volume as a bar. You can shift up and down to increase or decrease the audio level. The clips also have “fade in” and “fade out” buttons at the beginning and end, which are draggable to adjust the fade length.
Conclusion
Finally, with the answers to the question, how to cut audio in iMovie, you can follow the simple step guide and feel free to edit your audio or video to your taste using iMovie or Wondershare Filmora.
Marion Dubois
Marion Dubois is a writer and a lover of all things video.
Follow @Marion Dubois
Marion Dubois
Apr 30, 2024• Proven solutions
Sometimes, we find the desired audio or soundtrack for our videos longer or shorter than we want, and that is where audio editing comes. Audio editing refers to manipulating audio to alter the length, speed, and volume or create additional effects such as loops. Are you new to audio trimming? Don’t worry, as our article today would show how to cut audio in iMovie on Mac and iPhone.
Part 1: How to Cut Music in iMovie on Mac?
Cutting music is audio editing carried out when the music or soundtrack seems longer than desired. To cut music or soundtrack in iMovie using Mac involves the following steps:
Step 1: Adjust the Playhead to Cut the Clip
You can cut an audio clip only when the specified audio is in the timeline. To perform the operation, right-click on the clip and pick out a split clip. This operation cuts the clip into two and divides the two pieces wherever the playhead is situated.
Step 2: Select Split Clip
Right-click and select the Split Clip. Once this step is over, you have successfully cut the audio clip.
Part 2: Cut Audio in iMovie Alternative – Wondershare Filmora
Generally, as humans, we feel more satisfied when we have options or choices because we get fed up with doing the same over and over again the same way without changes. Wondershare Filmora is an alternative for iMovie and can easily carry out the function of various forms of audio editing.
If you wish to trim off the beginning or the ending of a mp3 file quite swiftly, this section is for you. Things can get specifically weird if you want to import heavy mp3 files to your space-limited MP3 player to play.
You’re required to choose an intelligent MP3 trimmer to trim an MP3 file to any length. Here, we suggest this robust video editing software — Wondershare Filmora, which enables you to precisely extract an MP3 file or audio segment effortlessly without losing any original audio quality.
You can get both the Windows and Mac versions of this great video editor. It embodies the following features:
- Import videos, audio, or photos from various sources and edit them in one place.
- Three different video cutting methods to meet different editing needs.
- Various editing tools help you edit the video completely, including rotation, picture-in-picture, green screen, cropping, etc.
- Output the edited video to more than 20 different formats or locations as needed.
- Use more than 1,000 video effects in the effect store to customize videos.
Using Filmora is quite effortless. The following tutorial will display how to cut audio in it easily and quickly.
Step 1: Import MP3 Files for Editing
Firstly, drag the specific MP3 file or audio clip into the media library, or you can directly import audio files or video from portable devices such as your digital camera, smartphone, or camcorder, etc.
Step 2: Drag MP3 Files to the Timeline below for Cutting
Filmora provides two ways to cut audio/video files. You can either select to cut from the beginning or the end by trimming. You can also split it into various segments from the mid-sections.
Move the slider ahead to the cutting point within the midsection, and then tap the scissor icon to split it into little sections as desired.
When executed, please select the part that you don’t want to, hit the Delete button to remove.
Step 3: Export to Save
Hit the Export tab to save your edited project. If you want to save in the original MP3 format, select MP3 before you export.
Part 3: How to Trim Music in iMovie on iPhone
This section will offer you a guide on how to cut out parts of audio in an iMovie project on an iPad or iPhone. After adding music to your project, the audio is trimmed to the desired length using iMovie’s inbuilt tool.
Step #1: Open iMovie on your iPhone or iPad.
Step #2: Tap the movie project you want to edit.
It will display a list of your projects, among which you must select the one you want to edit.
If you want to edit a current section of video not even opened in iMovie, you have to make a new iMovie project to add your audio and video. Select the + icon, choose the Movie tab, select the video(s), and then choose the Create movie button.
Step #3: Hit the Edit button below the name of your project.
This opens your project in the editor. And, you’re already in the editor if you just created a new project in the previous step.
Step #4: Add audio to your project.
You can skip this step if your project already contains the audio. Hit the + icon in the upper-left timeline’s corner.
Choose Audio.
Go with a specific category:
Soundtracks are audio tracks provided by iMovie which are free to use in your project.
Select My Music to locate the file and use a song from iTunes or the music app.
Sound effects are shorter sounds—mostly below 10 seconds duration.
Choose an audio file for the preview.
Select the + icon to add the file to your project.
Step #5: Hit the audio bar on the timeline.
It is present below the multi-frame version of your video in the screen’s bottom area.
Now, detach the MP3 segment or audio from the video by tapping the video on the timeline and selecting the Detach button at the screen’s bottom area.
Step #6: Tap and drag the beginning of the audio track.
Drag or move the audio track to the exact point where you wish it to start from—the audio track’s left-end marks of the yellow bar starting your audio.
Step #7: Tap and drag the end of the audio track.
You can drag the yellow bar at the end and move it to the exact point where you want the audio to end.
If you can’t see the yellow bar on the far-right end of the audio track, swipe left below the audio track to scroll to the end.
To move the audio track to another location, select and hold it for about one second, and then move it to the desired video’s location.
Step #8: Select the Play tab for preview.
It’s the sideways triangle just below the video preview.
Step #9: Select the Done button when you’re finished.
It is present at the screen’s top-left corner. You have now confirmed the changes done to your project.
If you want to play it on any other device, tap the Share button at the bottom after choosing the Done tab and select Save Video to export it.
Part 4: Audio Editing Tips for iMovie Users
Here are some guidelines or tips for various audio editing processes, starting from cutting trim music on iMovie, using iMovie to trim audio and video together, and other audio and video editing tips.
- Use Waveforms to See What You Hear
Sound is just as relevant as the images in a video, and should focus just as much during editing. To efficiently and adequately edit audio, you need a good set of speakers and headphones to hear the sound, and you also need to be able to see the sound.
If the waveforms don’t appear, go to the “view” drop-down menu and select “show waveforms”, the waveform would show you the sound intensity level of a sound clip and definitely would give you an idea of what part will need to be turned up or down.
- Audio Adjustments
With the audio button situated at the top right, you have access to some essential audio editing tools for changing the sound level of your chosen clip or changing the relative volume of other films in the project.
The audio editing window also contains primary noise reduction and audio equalization tools and a range of effects – from robot to echo- which would affect how people sound in your video.
- Editing Audio with the Timeline
iMovie permits you to adjust the audio within the clips themselves, each volume as a bar. You can shift up and down to increase or decrease the audio level. The clips also have “fade in” and “fade out” buttons at the beginning and end, which are draggable to adjust the fade length.
Conclusion
Finally, with the answers to the question, how to cut audio in iMovie, you can follow the simple step guide and feel free to edit your audio or video to your taste using iMovie or Wondershare Filmora.
Marion Dubois
Marion Dubois is a writer and a lover of all things video.
Follow @Marion Dubois
Mastering Podcast Accessibility: 10 Exemplary Cost-Free iOS Apps
10+ Best Podcast Player Apps for iPhone and Android

Benjamin Arango
Mar 27, 2024• Proven solutions
It has been a little over fifteen years since Ben Hammersley coined the term podcast. During this time, radio and TV stations, as well as people from all walks of life, have embraced this new medium of spreading information through either audio or video files.
Even though podcasts often have the form of a talk show, the topics podcasters cover in their shows range from presenting the latest music releases to discussing political topics. Listening to a podcast from a Smartphone without a player is not an option, which is why we made a selection of some of the best podcast player apps for iPhone and Android devices.
Best Free Podcast Player Apps for iOS and Android Devices
Nearly all podcast player apps have similar features. You can discover new shows, limit how many episodes can be downloaded to your device or reduce silences to the very minimum.
The list of features a podcast player provides should help you determine if that app is the right choice for you. Here are some of the best free podcast player apps for iOS and Android devices you can find on the market in 2019.
1. Breaker
Price: Free, but offers in-app purchases
Compatibility: iOS
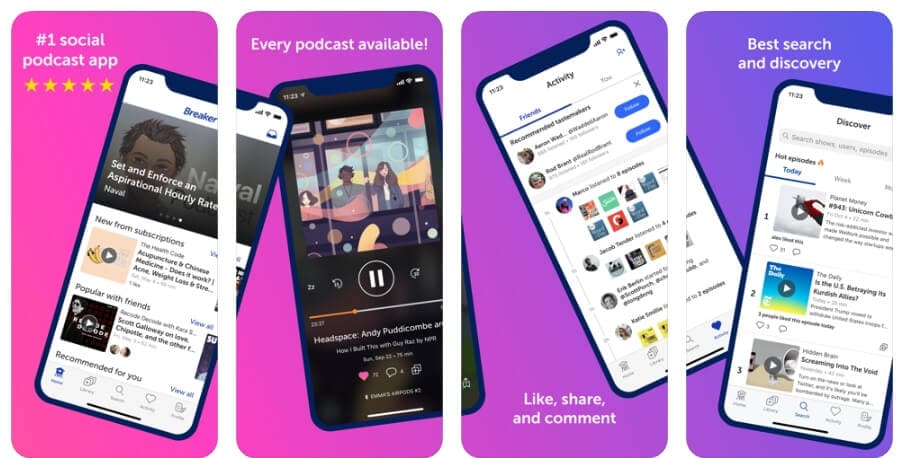
Discovering new podcasts, connecting with friends who use Breaker or sharing the latest episode of the podcast you’re following on Facebook or Twitter is easy with this podcast player. Moreover, the app lets you see which podcasts your friends like the most so you can send them messages and start conversations about an episode you like.
Breaker enables you to create your own playlists and customize them in any way you want. The Sleep Timer feature can be useful if you’re going to set up the episode playing time before your iPhone goes to the Sleep mode.
2. Castbox
Price: Free, but offers in-app purchases
Castbox lets you browse through million podcast episodes and choose from a variety of podcast genres. So, if you would like to follow the latest episodes of music and news related podcasts or talk shows, Castbox may be one of the best options on the market.
This cross-platform app is equipped with the tools that enable you to adjust the audio playback speed, trim silence or customize the sleep timer. You can subscribe to any podcast you discover with Castbox with a single tap, but you must make in-app purchases if you want to access to all features.
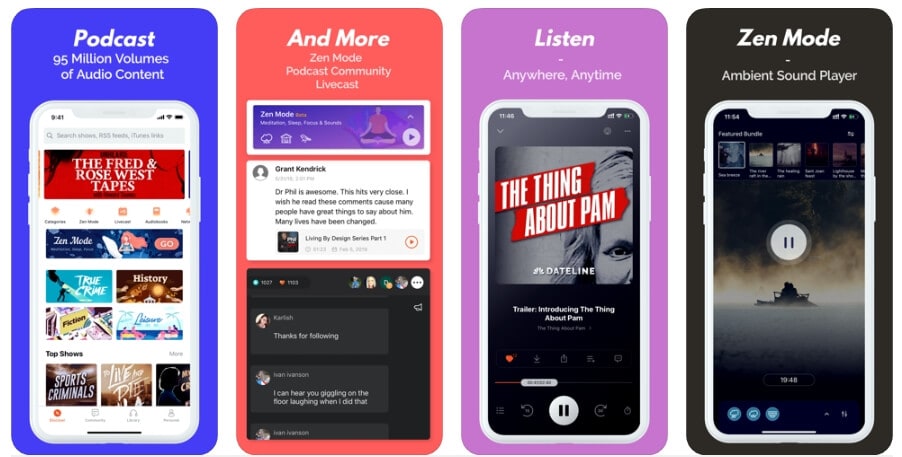
3. Himalaya
Price: Free

This app for Android and iOS devices lets you listen to radio shows, audiobooks, podcasts and allows you to stream shows from a single app. You can customize your homepage or create as many playlists as you want. Each podcast you discover with Himalaya can be shared with your accounts on Instagram, Twitter, and other popular social media platforms.
The app grants you access to more than 500, 000 shows that are organized into 30 categories so you can easily choose a topic and search for an episode you’d like to listen to. Himalaya features a sleep timer, which means that you can listen to your favorite podcast before you fall asleep.
4. Downcast
Price: $2,99, offers in-app purchases
Compatibility: iOS
This podcast player provides all the features you are going to need for a superb podcasting experience. Subscribing to a new podcast with this app is a straightforward process which can be completed in an instant. You can also choose if you want to download episodes to your device automatically or browse through old episodes of podcasts you subscribed to.
Downcast also lets you adjust the playback speed, and it offers chapter support for enhanced podcasts. Organizing and customizing podcasts with Downcast requires a minimum amount of effort, which makes this app an excellent choice for anyone who listens or watches a large number of podcasts daily.
5. Stitcher
Price: Free, offers in-app purchases

Politics, sports, or comedy are just a few topics podcasts available on Stitcher cover. You can use the app’s on-demand feature if you want to follow a particular show. Select your favorite genres and tap on the play button to listen to an episode of your choosing.
The app is compatible with more than fifty car models, which enables you to enjoy podcasts while driving. However, the free version of the app offers limited capabilities, and you must upgrade to the premium version if you want to have the full scope of the app’s options.
6. Pocket Casts
Price: Free, but offers in-app purchases

The app’s functional design makes it easy to find and manage podcasts by enabling you to create playback queues effortlessly. Trimming silence, skipping intros or streaming episodes without downloading them are just a few among countless options the Pocket Casts app offers.
Moreover, the Car Play feature enables you to play audio and video podcasts wherever you go. You can also download podcasts if you want to listen to them while you are offline.
Besides, you can play all episodes on your TV or your sound system using the Airplay and Chromecast integrations. The only downside is that you have to purchase the annual or monthly plan if you want to use all of the Pocket Casts’ podcasting options.
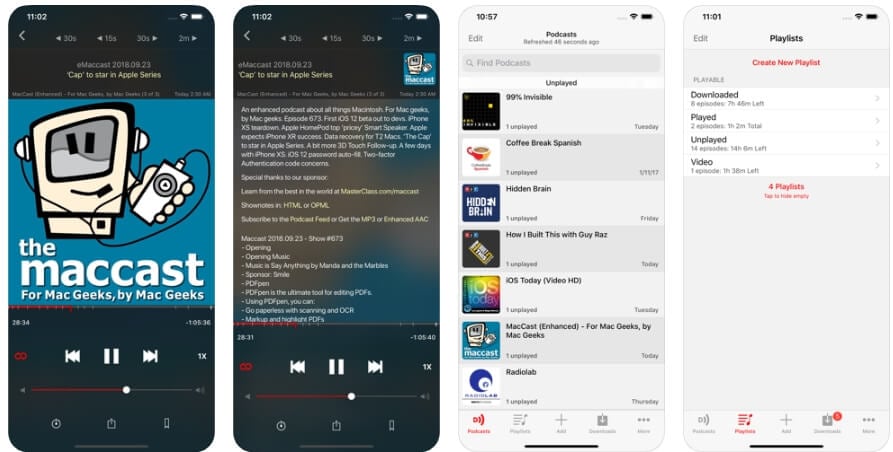
7. Apple Podcasts
Price: Free
Compatibility: iOS
This is one of the most popular destinations for all iPhone, iPad and Apple Watch owners who listen to podcasts frequently. Apple Podcasts lets you browse through more than 750.000 shows and 20 million episodes that are organized into categories. You can subscribe to any show you find on Apple Podcasts for free, download episodes you like to your Apple devices and listen to them wherever you go.
The platform’s editor recommends the shows based on your browsing history and helps you discover content that you are going to enjoy watching and listening to. Even so, Apple Podcasts lack the tools that enable its users to control the playback speed, skip intros or set timers before they go to sleep.
8. Spotify
Price: Free
Compatibility: web-based , iOS , Android

People from all over the world have been using Spotify to enjoy music from virtually any genre ever created. This Swedish-American company has been investing a lot into its podcasting services in the last couple of years.
Today Spotify offers access to podcasters to one of the most massive online audiences. Finding new shows and following the latest episodes your favorite podcasters share on this platform is as easy as discovering a new band. There are thousands of podcasts to browse through on Spotify, and some of them can only be played through this podcast player, either online or on iPhone or Android devices.
9. Overcast
Price: Free
Compatibility: iOS

Overcast was launched just five years ago, but today it is recognized as one of the best podcast player apps for iPhones, iWatches, and iPads. If you are looking for an app that will shorten the silences in podcasts, normalize the volume of the voices or enable you to adjust the playback speed of the audio files, then Overcast is probably one of your best options.
The app also provides CarPlay support and allows you to listen to your favorite podcasts even while you are on the road. However, Overcast contains ads, and you must purchase the Premium version of the app if you want to remove them.
10. Castro
Price: Free, but offers in-app purchases
Compatibility: iOS

Managing large numbers of episodes with Castro won’t take much more than a few moments of your time. Subscribe to a podcast you like, and all of the latest episodes will land in the New tab. You can then decide if you want to add them to the queue and listen to them while you are driving or on your iPhone.
The free version of the app doesn’t allow you to skip intros, enhance voices or reduce silence, and you must purchase Castro Plus to access these options. Before you decide to install Castro or Castro Plus on your device, you must make sure that the app is compatible with the version of iOS you have.
11. Podbean
Price: Free but offers in-app purchases

With the selection of over 50 million episodes, Podbean is easily one of the most versatile podcast player apps on this list. You can search for podcasts based on the topic you are interested in, or browse through different categories, and use the name of the podcast, or the author’s name to find the episode you are looking for.
Podbean is equipped with an audio recorder that features a rich selection of audio effects and a versatile set of audio editing tools. Moreover, the app provides support for live audio streaming so you can create or listen to live broadcast directly from your Smartphone.
12. Laughable
Price: Free, offers in-app purchases

Keeping in touch with the latest trends in the comedy world is going to become easy if you install Laughable on your device. The app hosts the world’s largest database of comedy artist profiles and enables you to discover and follow comedians effortlessly. Each time they release a new episode of their podcast or make a guest appearance, you’ll receive a notification, which enables you to follow their latest work.
Besides an impressive collection of comedy podcasts, Laughable also lets you browse through podcasts featuring celebrities like Jordan Peterson, Barak Obama or Oprah. The app is free for just ten days, afterward, you must upgrade to Laughable Insider if you want to have access to all the shows and episodes this podcast player has to offer.
How to Pick the Right Podcast Player App?
The majority of podcast players offer a similar set of options, which complicates the process of finding an app you can use to listen to podcasts on your Smartphones. The operating system your Smartphone supports or whether the app you’re considering offers podcast streaming options can influence your choice of a podcast player app.
Ultimately, the selection of shows and episodes an app offers, as well as its playback control options can help you determine which podcast player is the best option for you. In case you listen to podcasts on a daily basis, purchasing a monthly or annual subscription is a much better option than listening to podcasts with a free version of the app.
Below is a brief summary of the podcast player app listed above. Hope it can help to find out the best podcast app on your iPhone or Android phone.
| Podcast Player | User Rating | Supported OS | Price | Best For |
|---|---|---|---|---|
| Breaker | 4.7 | iOS 11.0 or later | Free, offers in-app purchases | Discovering and sharing podcasts |
| Castbox | 4.8 | iOS 10.0 or later, Android 5.0 or later | Free, offers in-app purchases | Discovering and listening to podcasts |
| Himalaya | 4.7 | iOS 9.1 or later, Android 4.1 or later | Free, offers in-app purchases | Discovering and listening to podcasts |
| Downcast | 4.2 | iOS 11.4 or later | $2,99, offers in-app purchases | Discovering and listening to podcasts |
| Stitcher | 3.6 | iOS 10.0 or later, Android 4.2 and up | Free, offers in-app purchases | Discovering and listening to podcasts |
| Pocket Cast | 3.9 | iOS 11.0 or later, Android 5.0 or up | Free, offers in-app purchases | Discovering and listening to podcasts |
| Apple Podcast | No information | iOS 10.0 or later | Free | Discovering and listening to podcasts |
| Spotify | 4.8 | Web-based, iOS 11.0 or later, varies on device | Free, offers in-app purchases | Discovering and listening to podcasts |
| Overcast | 4.7 | iOS 13.0 or later | Free, offers in-app purchases | Discovering and listening to podcasts |
| Castro | 4.7 | iOS 12.2 or later | Free, offers in-app purchases | Discovering and listening to podcasts |
| Podbean | 4.8 | iOS 10.0 or later | Free, offers in-app purchases | Discovering and listening to podcasts |
| Laughable | 4.8 | iOS 11.4 or later, Android 5.0 and up | Free, offers in-app purchases | Discovering comedy podcasts |
Conclusion
Listening to your favorite podcasts wherever you are, has never been easier, even if you don’t have access to the Internet. Podcast player apps like Spotify or Himalaya grant you access to millions of episodes, but each app we featured in this article can provide a superb experience. Which app are you using to listen to podcasts on your iOS and Android devices? Leave a comment and let us know.
Benjamin Arango
Benjamin Arango is a writer and a lover of all things video.
Follow @Benjamin Arango
Benjamin Arango
Mar 27, 2024• Proven solutions
It has been a little over fifteen years since Ben Hammersley coined the term podcast. During this time, radio and TV stations, as well as people from all walks of life, have embraced this new medium of spreading information through either audio or video files.
Even though podcasts often have the form of a talk show, the topics podcasters cover in their shows range from presenting the latest music releases to discussing political topics. Listening to a podcast from a Smartphone without a player is not an option, which is why we made a selection of some of the best podcast player apps for iPhone and Android devices.
Best Free Podcast Player Apps for iOS and Android Devices
Nearly all podcast player apps have similar features. You can discover new shows, limit how many episodes can be downloaded to your device or reduce silences to the very minimum.
The list of features a podcast player provides should help you determine if that app is the right choice for you. Here are some of the best free podcast player apps for iOS and Android devices you can find on the market in 2019.
1. Breaker
Price: Free, but offers in-app purchases
Compatibility: iOS
Discovering new podcasts, connecting with friends who use Breaker or sharing the latest episode of the podcast you’re following on Facebook or Twitter is easy with this podcast player. Moreover, the app lets you see which podcasts your friends like the most so you can send them messages and start conversations about an episode you like.
Breaker enables you to create your own playlists and customize them in any way you want. The Sleep Timer feature can be useful if you’re going to set up the episode playing time before your iPhone goes to the Sleep mode.
2. Castbox
Price: Free, but offers in-app purchases
Castbox lets you browse through million podcast episodes and choose from a variety of podcast genres. So, if you would like to follow the latest episodes of music and news related podcasts or talk shows, Castbox may be one of the best options on the market.
This cross-platform app is equipped with the tools that enable you to adjust the audio playback speed, trim silence or customize the sleep timer. You can subscribe to any podcast you discover with Castbox with a single tap, but you must make in-app purchases if you want to access to all features.
3. Himalaya
Price: Free
This app for Android and iOS devices lets you listen to radio shows, audiobooks, podcasts and allows you to stream shows from a single app. You can customize your homepage or create as many playlists as you want. Each podcast you discover with Himalaya can be shared with your accounts on Instagram, Twitter, and other popular social media platforms.
The app grants you access to more than 500, 000 shows that are organized into 30 categories so you can easily choose a topic and search for an episode you’d like to listen to. Himalaya features a sleep timer, which means that you can listen to your favorite podcast before you fall asleep.
4. Downcast
Price: $2,99, offers in-app purchases
Compatibility: iOS
This podcast player provides all the features you are going to need for a superb podcasting experience. Subscribing to a new podcast with this app is a straightforward process which can be completed in an instant. You can also choose if you want to download episodes to your device automatically or browse through old episodes of podcasts you subscribed to.
Downcast also lets you adjust the playback speed, and it offers chapter support for enhanced podcasts. Organizing and customizing podcasts with Downcast requires a minimum amount of effort, which makes this app an excellent choice for anyone who listens or watches a large number of podcasts daily.
5. Stitcher
Price: Free, offers in-app purchases
Politics, sports, or comedy are just a few topics podcasts available on Stitcher cover. You can use the app’s on-demand feature if you want to follow a particular show. Select your favorite genres and tap on the play button to listen to an episode of your choosing.
The app is compatible with more than fifty car models, which enables you to enjoy podcasts while driving. However, the free version of the app offers limited capabilities, and you must upgrade to the premium version if you want to have the full scope of the app’s options.
6. Pocket Casts
Price: Free, but offers in-app purchases
The app’s functional design makes it easy to find and manage podcasts by enabling you to create playback queues effortlessly. Trimming silence, skipping intros or streaming episodes without downloading them are just a few among countless options the Pocket Casts app offers.
Moreover, the Car Play feature enables you to play audio and video podcasts wherever you go. You can also download podcasts if you want to listen to them while you are offline.
Besides, you can play all episodes on your TV or your sound system using the Airplay and Chromecast integrations. The only downside is that you have to purchase the annual or monthly plan if you want to use all of the Pocket Casts’ podcasting options.
7. Apple Podcasts
Price: Free
Compatibility: iOS
This is one of the most popular destinations for all iPhone, iPad and Apple Watch owners who listen to podcasts frequently. Apple Podcasts lets you browse through more than 750.000 shows and 20 million episodes that are organized into categories. You can subscribe to any show you find on Apple Podcasts for free, download episodes you like to your Apple devices and listen to them wherever you go.
The platform’s editor recommends the shows based on your browsing history and helps you discover content that you are going to enjoy watching and listening to. Even so, Apple Podcasts lack the tools that enable its users to control the playback speed, skip intros or set timers before they go to sleep.
8. Spotify
Price: Free
Compatibility: web-based , iOS , Android
People from all over the world have been using Spotify to enjoy music from virtually any genre ever created. This Swedish-American company has been investing a lot into its podcasting services in the last couple of years.
Today Spotify offers access to podcasters to one of the most massive online audiences. Finding new shows and following the latest episodes your favorite podcasters share on this platform is as easy as discovering a new band. There are thousands of podcasts to browse through on Spotify, and some of them can only be played through this podcast player, either online or on iPhone or Android devices.
9. Overcast
Price: Free
Compatibility: iOS
Overcast was launched just five years ago, but today it is recognized as one of the best podcast player apps for iPhones, iWatches, and iPads. If you are looking for an app that will shorten the silences in podcasts, normalize the volume of the voices or enable you to adjust the playback speed of the audio files, then Overcast is probably one of your best options.
The app also provides CarPlay support and allows you to listen to your favorite podcasts even while you are on the road. However, Overcast contains ads, and you must purchase the Premium version of the app if you want to remove them.
10. Castro
Price: Free, but offers in-app purchases
Compatibility: iOS
Managing large numbers of episodes with Castro won’t take much more than a few moments of your time. Subscribe to a podcast you like, and all of the latest episodes will land in the New tab. You can then decide if you want to add them to the queue and listen to them while you are driving or on your iPhone.
The free version of the app doesn’t allow you to skip intros, enhance voices or reduce silence, and you must purchase Castro Plus to access these options. Before you decide to install Castro or Castro Plus on your device, you must make sure that the app is compatible with the version of iOS you have.
11. Podbean
Price: Free but offers in-app purchases
With the selection of over 50 million episodes, Podbean is easily one of the most versatile podcast player apps on this list. You can search for podcasts based on the topic you are interested in, or browse through different categories, and use the name of the podcast, or the author’s name to find the episode you are looking for.
Podbean is equipped with an audio recorder that features a rich selection of audio effects and a versatile set of audio editing tools. Moreover, the app provides support for live audio streaming so you can create or listen to live broadcast directly from your Smartphone.
12. Laughable
Price: Free, offers in-app purchases
Keeping in touch with the latest trends in the comedy world is going to become easy if you install Laughable on your device. The app hosts the world’s largest database of comedy artist profiles and enables you to discover and follow comedians effortlessly. Each time they release a new episode of their podcast or make a guest appearance, you’ll receive a notification, which enables you to follow their latest work.
Besides an impressive collection of comedy podcasts, Laughable also lets you browse through podcasts featuring celebrities like Jordan Peterson, Barak Obama or Oprah. The app is free for just ten days, afterward, you must upgrade to Laughable Insider if you want to have access to all the shows and episodes this podcast player has to offer.
How to Pick the Right Podcast Player App?
The majority of podcast players offer a similar set of options, which complicates the process of finding an app you can use to listen to podcasts on your Smartphones. The operating system your Smartphone supports or whether the app you’re considering offers podcast streaming options can influence your choice of a podcast player app.
Ultimately, the selection of shows and episodes an app offers, as well as its playback control options can help you determine which podcast player is the best option for you. In case you listen to podcasts on a daily basis, purchasing a monthly or annual subscription is a much better option than listening to podcasts with a free version of the app.
Below is a brief summary of the podcast player app listed above. Hope it can help to find out the best podcast app on your iPhone or Android phone.
| Podcast Player | User Rating | Supported OS | Price | Best For |
|---|---|---|---|---|
| Breaker | 4.7 | iOS 11.0 or later | Free, offers in-app purchases | Discovering and sharing podcasts |
| Castbox | 4.8 | iOS 10.0 or later, Android 5.0 or later | Free, offers in-app purchases | Discovering and listening to podcasts |
| Himalaya | 4.7 | iOS 9.1 or later, Android 4.1 or later | Free, offers in-app purchases | Discovering and listening to podcasts |
| Downcast | 4.2 | iOS 11.4 or later | $2,99, offers in-app purchases | Discovering and listening to podcasts |
| Stitcher | 3.6 | iOS 10.0 or later, Android 4.2 and up | Free, offers in-app purchases | Discovering and listening to podcasts |
| Pocket Cast | 3.9 | iOS 11.0 or later, Android 5.0 or up | Free, offers in-app purchases | Discovering and listening to podcasts |
| Apple Podcast | No information | iOS 10.0 or later | Free | Discovering and listening to podcasts |
| Spotify | 4.8 | Web-based, iOS 11.0 or later, varies on device | Free, offers in-app purchases | Discovering and listening to podcasts |
| Overcast | 4.7 | iOS 13.0 or later | Free, offers in-app purchases | Discovering and listening to podcasts |
| Castro | 4.7 | iOS 12.2 or later | Free, offers in-app purchases | Discovering and listening to podcasts |
| Podbean | 4.8 | iOS 10.0 or later | Free, offers in-app purchases | Discovering and listening to podcasts |
| Laughable | 4.8 | iOS 11.4 or later, Android 5.0 and up | Free, offers in-app purchases | Discovering comedy podcasts |
Conclusion
Listening to your favorite podcasts wherever you are, has never been easier, even if you don’t have access to the Internet. Podcast player apps like Spotify or Himalaya grant you access to millions of episodes, but each app we featured in this article can provide a superb experience. Which app are you using to listen to podcasts on your iOS and Android devices? Leave a comment and let us know.
Benjamin Arango
Benjamin Arango is a writer and a lover of all things video.
Follow @Benjamin Arango
Also read:
- New In 2024, Top Picks 5 Premier MP3 Mixing Programs Tailored for Mac Systems
- New Unlocking the Full Potential of Sound with Adobe Audition Features, Tips & Techniques
- Updated In 2024, Discover the Impact of Bristle Movement Noise
- In 2024, The Insiders Guide to Understanding Rap Lyrics and Themes
- The Ultimate Selection Identifying the Best PC Microphone Recorders of the Year for 2024
- In 2024, Methods of Extracting Audio From Video Footage in Premiere Pro
- Harmonizing Hues The 10 Best Free Mobile Apps That Transform Songs Into Vibrant Graphics for iPhone/Android
- Voice Mastery on Mac An Intuitive Tutorial for First-Time Users for 2024
- 2024 Approved Premier Insights Into Cutting-Edge Music Video Production
- Updated 2024 Approved Top 5 Premium Audio Capture Apps for Your Smartphone
- New 2024 Approved Fast-Track MP3 Splitting A Convenient Guide to Rapidly Dividing Audio Files
- Comprehensive Guidance Transforming Your Discord Chat with Voxal Sound Modification Techniques for 2024
- Add Song to iMovie for 2024
- Analyzing the Expression of Dog Anger Through Auditory Cues for 2024
- Updated 2024 Approved The MP4 Soundscape Guide Ten Straightforward Approaches to Accessing Audio
- New 2024 Approved Ultimate Tutorial Isolating Pure Audio From the Webbed Soundscape in Audacity
- In 2024, Lose the Extra Bits Effortless MP3 Downscaling for Spotless Sing-Along Sessions.
- 2024 Approved A Beginners Manual to Incorporating Sounds Into Your PowerPoint Presentations on PC/Mac Computers
- In 2024, Where Can I Find Funny Sound Effects?
- Top 10 Free & Paid Tools for Converting Podcasts Into Written Format
- Updated The Ultimate Guide to Film-to-Sound Transformation - Uncovering the Top 6 Free Techniques Set for 2E2024.
- New 2024 Approved Epic Classical Masterpieces Free Royalty-Free Symphonic Piano Scores for Visual Media
- How to Transfer Apple iPhone 11 Pro Data to iPhone 12 A Complete Guide | Dr.fone
- Best Anti Tracker Software For Apple iPhone 6s | Dr.fone
- In 2024, How to Unlock Realme Narzo N53 Phone without Google Account?
- Remove Device Supervision From your iPhone 11 Pro Max
- In 2024, Hassle-Free Ways to Remove FRP Lock on Meizu 21 Prowith/without a PC
- Updated In 2024, What Is an AI Art Generator? | Wondershare Virbo Glossary
- Updated In 2024, How to Make Lip Sync Video Without Installing Any App
- How to Resolve Nokia C22 Screen Not Working | Dr.fone
- How to Factory Reset Motorola Razr 40 Ultra If I Forgot Security Code or Password? | Dr.fone
- In 2024, Is GSM Flasher ADB Legit? Full Review To Bypass Your Xiaomi Mix Fold 3FRP Lock
- How to retrieve erased call logs from Samsung Galaxy A05s?
- In 2024, Still Using Pattern Locks with Realme 11 Pro? Tips, Tricks and Helpful Advice
- All Must-Knows to Use Fake GPS GO Location Spoofer On Poco M6 Pro 5G | Dr.fone
- In 2024, Here Are Some Reliable Ways to Get Pokemon Go Friend Codes For Apple iPhone 14 | Dr.fone
- Updated How to Use a Stabilization Tool in Filmora for 2024
- Title: Updated Instant Silence Muting Zoom Sound From Your Computer or Smartphone
- Author: Jacob
- Created at : 2024-05-20 00:04:13
- Updated at : 2024-05-21 00:04:13
- Link: https://audio-shaping.techidaily.com/updated-instant-silence-muting-zoom-sound-from-your-computer-or-smartphone/
- License: This work is licensed under CC BY-NC-SA 4.0.
