
:max_bytes(150000):strip_icc():format(webp)/football-referee-signaling-touchdown-in-stadium-599944339-5a84cb9e875db900367df025.jpg)
Updated In 2024, The 5 Highest-Rated Audio Mixers Suited to Mac Systems
The 5 Highest-Rated Audio Mixers Suited to Mac Systems
If you’ve ever considered singing, you might look for the ideal audio mixer that allows you to record, edit, and seamlessly mix audio. The suitable audio mixer for Mac enables you to create the best tracks for your audience. Even for professionals, a suitable audio mixer is essential for music producers because it helps them create good music and deliver crisp audio.
Even with quality sounds, you might find that your audio file comes with many traffic noises and unnecessary chatter. The ideal audio mixer will ensure your audio piece stands out. However, we know that finding the ideal audio mixer that’s compatible with the Mac operating system can be challenging. That’s why we’ve done the essential research for you and compiled this impressive list. So, let’s jump straight into the comprehensive list to determine the best audio mixer for you.
Audacity

We’re going to start with a veteran in the audio mixing world. Audacity has been around since 2000 and has continually updated its features to become a quality audio mixer. This explains why it is the best audio editing software out there. Audacity is free, open-source, and works across different platforms. It is also relatively simple to use by professionals and beginners; you don’t need to have any previous audio mixing experience to use this tool.
There are varying activities you can carry out on Audacity. For example, it allows you to record, edit, and add effects to your audio like distortion, reverb, echoes, and auto-tune. With Audacity, you can also digitize recordings from various media files. In addition, many keyboard shortcuts work with Audacity; using these shortcuts allows for a faster and more seamless workflow.
Using this tool, you can visualize the audio in frequencies using the spectrogram mode. It also offers professional-grade plugins to improve the mixing process. If you’d like to improve the sound quality of your file, you can choose to export in 24-bits or 32-bits. Beyond the Mac OS, Audacity also supports Linux and Windows. You should consider Audacity if you want a free editor with many audio mixing functions.
Pros
- It is intuitive and easy to use
- Offers varying plugins for easy mixing
- Keyboard shortcuts improve workflow
- Rich features to enhance overall sound quality
Cons
- Audacity tends to crash on Mac
Adobe Audition

We all know that Adobe only offers excellent software, and you can expect nothing different from Adobe Audition. This is a great audio mixer for editing and polishing your audio, making it into an impeccable sound. It allows you clean, mixes, and fine-tune your sound file by offering a smooth workflow. In addition, Adobe Audition offers a spectral display and a crucial sound panel that helps you restore audio. This tool also helps users achieve a professional-level quality even if you’re a beginner with little to no audio-mixing experience. You can also make audio remixes on this audio mixing software; you can achieve this by rearranging the different tacks to fit various durations.
The many features available on this Mac audio mixer allow you to record and convert audio files into lossless WAV files. If you’re looking to run a radio station, you can do that with Adobe Audition by downloading your audio files to the server after mixing. In addition, you can convert your audio files into MP3 format to use on varying devices if necessary. One of its excellent features is processing and analyzing various audio files.
Adobe Audition also offers users diagnostic tools like DeHummer, DeClipper, diagnostic panel, and audio reduction to determine and fix issues on audio files. It is made for different purposes, as you can always count on this tool to provide you with crisp, quality sounds. In addition, you can visualize the edits on your audio file on this software in real-time.
Pros
- Offers varying mixing and editing features
- Users can import and export audio files in various formats
- It comes with a spectral display for restoring audio files
- Features diagnostic tools for fixing audio file issues
- Interactive and easy-to-use interface
Cons
- Limited free version
WavePad

Another impressive audio mixer with basic and advanced features that you should explore is WavePad. This software is excellent for audio editing, recordings, and music productions. The best part is that it supports the major audio formats and allows users to trim, cut, split, copy, equalize, and amplify audio tracks within a few seconds. WavePad also offers you several options to minimize noise and access advanced tools like TFFT, FFT, and spectral analysis that help you understand video frequencies better.
This audio mixer is excellent for streaming and offers voice-over features. The developers continually update WavePad, and if you have issues, the customer support options on the website allow you to get help immediately. If you like to edit lots of soundtracks and would like to save them as you edit, then you would enjoy the batch processing feature. This feature is ideal for busy producers who want to mix their audio quickly. This versatile tool isn’t just compatible with Mac and works on Chromebook, Windows, Android, and iOS devices.
Pros
- Allows batch processing
- Allows you to amplify and equalize sounds
- It comes with an intuitive user interface
- Excellent customer support options
Cons
- The free version is limited
TwistedWave

Another audio mixer for Mac that allows you to record, mix, master, convert and batch-process your audio is TwistedWave. This tool is an all-in-one solution for everything audio-related. The best part is that it comes with an intuitive interface that’s easy for anyone to use. TwistedWave works with Mac OS alone and is available at a premium price. If you want to master audio with inbuilt effects and make quick, effective edits to audio files, this is the tool for you. In addition, a responsive interface can process large audio files in the background.
Its vast features allow for the seamless mixing and editing of audio files. It features a smart silence detector that detects silences, removes them, and exports the remaining audio as individual files. The batch processor also comes with effects like AU and VST plugins. If you’re uncomfortable with the effects, you can create your effect stacks and then utilize them with just a click. TwistedWave isn’t a basic editor as it has advanced features like pitch shifting, professional time stretching, and multichannel editing. This audio mixing tool also supports up to 32-bit audio and is great if you want a professional and crisp audio output.
Pros
- It easily detects silence points for easy splitting
- Corrects pitch and speeds it up seamlessly
- You can work on present audio tracks while loading large files in the background
- You can create your custom audio stack
- Offers professional-grade plugins
Cons
- No free version
- It can be difficult for beginners to use
Logic Pro

Apple’s Logic Pro is an excellent audio mixer that you can utilize to carry out some professional editing and audio-producing activities. This audio mixer has impressive features like Sampler, Step Sequencer, Quick Sampler, and many more. These features help you build melodic patterns and drum beats. You can also use them to transform various sounds into instruments within a few seconds. So if your goal is to improve your music, Logic Pro makes it relatively easy.
You can also create new music using this tool and, in the process, play different music arrangements on a cell grid and identify the best sounds for you. You can also add the sounds to your timeline before you get started. With Logic Pro, you can add DJ-style effects to your audio file. You can also play any instrument and record clean and high-quality audio to add to your existing file. Logic Pro also allows you to add new music to your track without disturbing its tempo; you can also correct pitch with this tool.
Another tool from Logic Pro is the mountable sound card which allows up to 24-track recording. It also features unique digital effects. Some features it comes with include delay, chorus, ping-pong delay, reverb, and many more. Logic Pro supports several popular audio formats and also allows multi-tracking editing. There’s also a library of royalty-free songs you can explore with this tool.
Pros
- It helps you identify the best sounds
- Users can implement DJ-style effects on audio files
- It offers many impressive features
- Impressive recording features
Cons
- Too complex for beginners
Alternative Option: Wondershare Filmora
Wondershare Filmora is the best software to carry out different audio mixing activating. You can easily edit your audio to ensure a clean and crisp audio output. In addition, this tool offers excellent features like silence detection and auto-beat sync. Beyond this, it offers features like an auto montage maker, which evaluates your audio file and informs you of its best points. It is also useful for adding soundtracks to video files when necessary.
Free Download For Win 7 or later(64-bit)
Free Download For macOS 10.14 or later
Wondershare Filmora allows you efficiently adjust pitch and speed. You can also minimize or increase the volume of your sound file or add sound fading in and out features to your audio file. The best part about this tool is that you can share the mix on social media after mixing and editing audio files. The steps to mix audio files using Wondershare Filmora are easy; check them out below.
Step1Download Wondershare Filmora from the official website and install it on your device following the installation guide.
Step2Launch the audio mixing software and choose ‘create new project’ on the homepage.

Step3Import media files by clicking on ‘import media files’ on the media menu.

Step4Choose the audio file you want to mix and click the ‘import media’ option. Alternatively, you can choose to drag and drop the audio file to the software’s timeline.
Step5Start editing your media file by clicking the ‘audio mixer’ option. It will provide various tools to mix and edit your audio file.

Step6click the master icon to decrease or increase audio volume. Once you’re done, hit the ‘OK’ button.

Step7After mixing, hit the ‘export’ button and choose the location you want to save your edited file. You can also choose to share directly on social media platforms.

Final Thoughts
Audio mixing and editing are sometimes essential to creating an excellent music track. However, finding an audio mixer for Mac can be difficult; we reviewed the 5 best audio mixers for Mac to provide you with options. With this list of best Mac audio mixers, you can transform your audio files into professional quality.
Adobe Audition
We all know that Adobe only offers excellent software, and you can expect nothing different from Adobe Audition. This is a great audio mixer for editing and polishing your audio, making it into an impeccable sound. It allows you clean, mixes, and fine-tune your sound file by offering a smooth workflow. In addition, Adobe Audition offers a spectral display and a crucial sound panel that helps you restore audio. This tool also helps users achieve a professional-level quality even if you’re a beginner with little to no audio-mixing experience. You can also make audio remixes on this audio mixing software; you can achieve this by rearranging the different tacks to fit various durations.
The many features available on this Mac audio mixer allow you to record and convert audio files into lossless WAV files. If you’re looking to run a radio station, you can do that with Adobe Audition by downloading your audio files to the server after mixing. In addition, you can convert your audio files into MP3 format to use on varying devices if necessary. One of its excellent features is processing and analyzing various audio files.
Adobe Audition also offers users diagnostic tools like DeHummer, DeClipper, diagnostic panel, and audio reduction to determine and fix issues on audio files. It is made for different purposes, as you can always count on this tool to provide you with crisp, quality sounds. In addition, you can visualize the edits on your audio file on this software in real-time.
Pros
- Offers varying mixing and editing features
- Users can import and export audio files in various formats
- It comes with a spectral display for restoring audio files
- Features diagnostic tools for fixing audio file issues
- Interactive and easy-to-use interface
Cons
- Limited free version
WavePad
Another impressive audio mixer with basic and advanced features that you should explore is WavePad. This software is excellent for audio editing, recordings, and music productions. The best part is that it supports the major audio formats and allows users to trim, cut, split, copy, equalize, and amplify audio tracks within a few seconds. WavePad also offers you several options to minimize noise and access advanced tools like TFFT, FFT, and spectral analysis that help you understand video frequencies better.
This audio mixer is excellent for streaming and offers voice-over features. The developers continually update WavePad, and if you have issues, the customer support options on the website allow you to get help immediately. If you like to edit lots of soundtracks and would like to save them as you edit, then you would enjoy the batch processing feature. This feature is ideal for busy producers who want to mix their audio quickly. This versatile tool isn’t just compatible with Mac and works on Chromebook, Windows, Android, and iOS devices.
Pros
- Allows batch processing
- Allows you to amplify and equalize sounds
- It comes with an intuitive user interface
- Excellent customer support options
Cons
- The free version is limited
TwistedWave
Another audio mixer for Mac that allows you to record, mix, master, convert and batch-process your audio is TwistedWave. This tool is an all-in-one solution for everything audio-related. The best part is that it comes with an intuitive interface that’s easy for anyone to use. TwistedWave works with Mac OS alone and is available at a premium price. If you want to master audio with inbuilt effects and make quick, effective edits to audio files, this is the tool for you. In addition, a responsive interface can process large audio files in the background.
Its vast features allow for the seamless mixing and editing of audio files. It features a smart silence detector that detects silences, removes them, and exports the remaining audio as individual files. The batch processor also comes with effects like AU and VST plugins. If you’re uncomfortable with the effects, you can create your effect stacks and then utilize them with just a click. TwistedWave isn’t a basic editor as it has advanced features like pitch shifting, professional time stretching, and multichannel editing. This audio mixing tool also supports up to 32-bit audio and is great if you want a professional and crisp audio output.
Pros
- It easily detects silence points for easy splitting
- Corrects pitch and speeds it up seamlessly
- You can work on present audio tracks while loading large files in the background
- You can create your custom audio stack
- Offers professional-grade plugins
Cons
- No free version
- It can be difficult for beginners to use
Logic Pro
Apple’s Logic Pro is an excellent audio mixer that you can utilize to carry out some professional editing and audio-producing activities. This audio mixer has impressive features like Sampler, Step Sequencer, Quick Sampler, and many more. These features help you build melodic patterns and drum beats. You can also use them to transform various sounds into instruments within a few seconds. So if your goal is to improve your music, Logic Pro makes it relatively easy.
You can also create new music using this tool and, in the process, play different music arrangements on a cell grid and identify the best sounds for you. You can also add the sounds to your timeline before you get started. With Logic Pro, you can add DJ-style effects to your audio file. You can also play any instrument and record clean and high-quality audio to add to your existing file. Logic Pro also allows you to add new music to your track without disturbing its tempo; you can also correct pitch with this tool.
Another tool from Logic Pro is the mountable sound card which allows up to 24-track recording. It also features unique digital effects. Some features it comes with include delay, chorus, ping-pong delay, reverb, and many more. Logic Pro supports several popular audio formats and also allows multi-tracking editing. There’s also a library of royalty-free songs you can explore with this tool.
Pros
- It helps you identify the best sounds
- Users can implement DJ-style effects on audio files
- It offers many impressive features
- Impressive recording features
Cons
- Too complex for beginners
Alternative Option: Wondershare Filmora
Wondershare Filmora is the best software to carry out different audio mixing activating. You can easily edit your audio to ensure a clean and crisp audio output. In addition, this tool offers excellent features like silence detection and auto-beat sync. Beyond this, it offers features like an auto montage maker, which evaluates your audio file and informs you of its best points. It is also useful for adding soundtracks to video files when necessary.
Free Download For Win 7 or later(64-bit)
Free Download For macOS 10.14 or later
Wondershare Filmora allows you efficiently adjust pitch and speed. You can also minimize or increase the volume of your sound file or add sound fading in and out features to your audio file. The best part about this tool is that you can share the mix on social media after mixing and editing audio files. The steps to mix audio files using Wondershare Filmora are easy; check them out below.
Step1Download Wondershare Filmora from the official website and install it on your device following the installation guide.
Step2Launch the audio mixing software and choose ‘create new project’ on the homepage.
Step3Import media files by clicking on ‘import media files’ on the media menu.
Step4Choose the audio file you want to mix and click the ‘import media’ option. Alternatively, you can choose to drag and drop the audio file to the software’s timeline.
Step5Start editing your media file by clicking the ‘audio mixer’ option. It will provide various tools to mix and edit your audio file.
Step6click the master icon to decrease or increase audio volume. Once you’re done, hit the ‘OK’ button.
Step7After mixing, hit the ‘export’ button and choose the location you want to save your edited file. You can also choose to share directly on social media platforms.
Final Thoughts
Audio mixing and editing are sometimes essential to creating an excellent music track. However, finding an audio mixer for Mac can be difficult; we reviewed the 5 best audio mixers for Mac to provide you with options. With this list of best Mac audio mixers, you can transform your audio files into professional quality.
Pioneering Digital Maestros: A Comprehensive List of AI’s Finest Composers (2024 Edition)
Top Best 10 AI Music Composers in 2024

Benjamin Arango
Mar 27, 2024• Proven solutions
Robots can’t be creative, right? A number of startups that focus on the development of artificial intelligence that is capable of composing music have proved this statement wrong. AI music composers generate original, copyright-free music you can use in your latest YouTube video or social media video ad. You don’t even have to be a sound designer or a musician to produce soundtracks for your videos with AI Music Composers, because you can upload the music that has already been recorded and create variations of it. So, let’s take a look at what AI music composers have to offer in 2024.
| 1 - Amper Music | 2 - AIVA |
|---|---|
| 3 - Jukedeck | 4 - Ecrett Music |
| 5 - Melodrive | 6 - ORB Composer |
| 7 - Amadeus Code | 8 - Humtap |
| 9 - Muzeek | 10 - Brain.fm |
Ten Best AI Music Composers You Should Know About
The AI technologies that can compose music are still relatively novel, and as time passes, they can only develop and grow further. Consequently, each of the AI music composers we featured in this article offers a different range of possibilities. Here are the ten best AI music composers you shouldn’t miss out on in 2024.

Filmora AI Music Editor
Edit Audio with AI Music Editor
Experience the power of Filmora’s AI tools and make your audio or music stand out like never before! Audio Denoise, Audio Ducking, Audio Synchronization, Audio Stretch, etc…
Try It Free Try It Free Try It Free Learn More >
1. Amper Music
Price: Available upon request
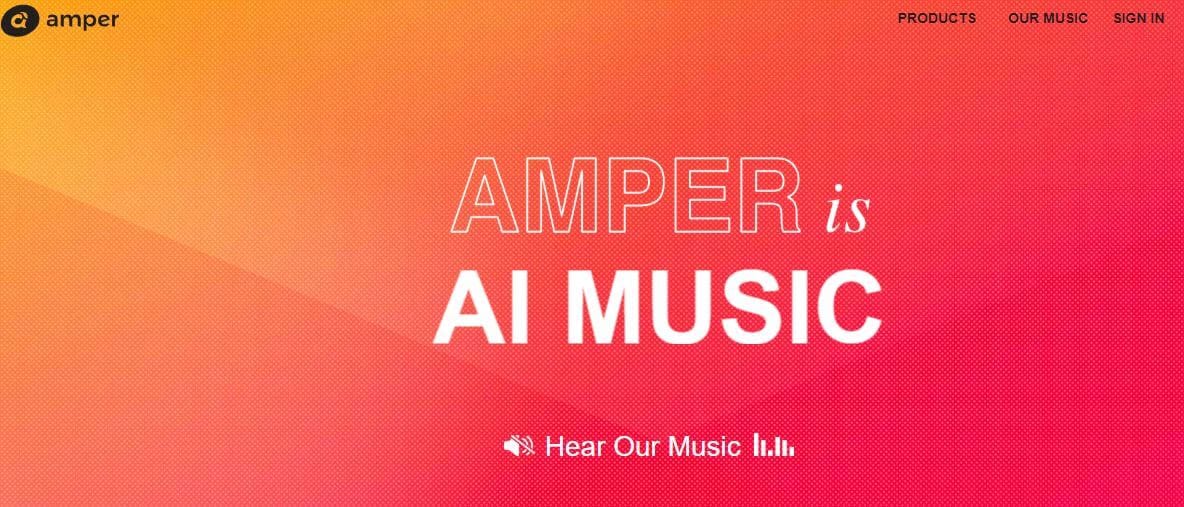
Industry professionals know just how frustrating the music licensing process can be. Amper Music is a cloud-based platform designed to simplify the process of creating soundtracks for movies and video games, as it produces AI generated algorithms that help users create music in a variety of music genres. You must first create an account on this platform, in order to be able to use the free version of Amper Music that provides only a limited amount of features. Upgrading to the pro version of Amper Music will enable you to enjoy the full potential of this rapidly growing AI Music Composer.
2. AIVA
Price: Free version available, subscription plans start from €14 p/month
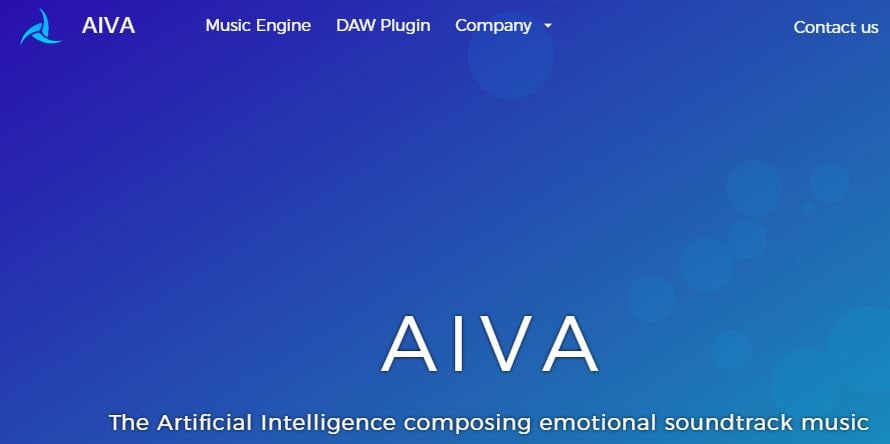
Since 2016, when AIVA Technologies was founded, its team has worked on developing an AI script that can compose emotional soundtracks for ads, video games, or movies. Soon after, the AI published its first oeuvre titled ‘Opus 1 for Piano Solo and in the subsequent years, AIVA released an album and composed music for a video game. Besides enabling its users to create music from scratch, AIVA can also be used to produce variations of existing songs. The music engine that powers this AI music composer makes the production of corporate or social media videos much easier, as it eliminates the need to go through the music licensing process.
3. Jukedeck
Price: Free version available, Pricing plans start from $0.99 per download

The AI music composer developed by the Jukedeck startup resembles the Amper’s music composer because they both rely on neural networks to analyze music data, that is then used by the AI to learn how to compose original music. Each track that is available through this AI music composer can be edited, so you can change its length or its tempo. You can create music with Jukedeck for free if you decide to give all the rights to the AI composer, while both individuals and small businesses can purchase the license to use the song created with Jukedeck for just $0.99.
Note: Jukedeck has been acquired by TikTok, and we are waiting for a new Jukedeck.
![]()
A cross-platform for making videos anywhere for all creators

Why your video editing isn’t good enough? How about some creative inspo?
- 100 Million+ Users
- 150+ Countries and Regions
- 4 Million+ Social Media Followers
- 5 Million+ Stock Media for Use
* Secure Download

4. Ecrett Music
Price: Subscription plans start at $5
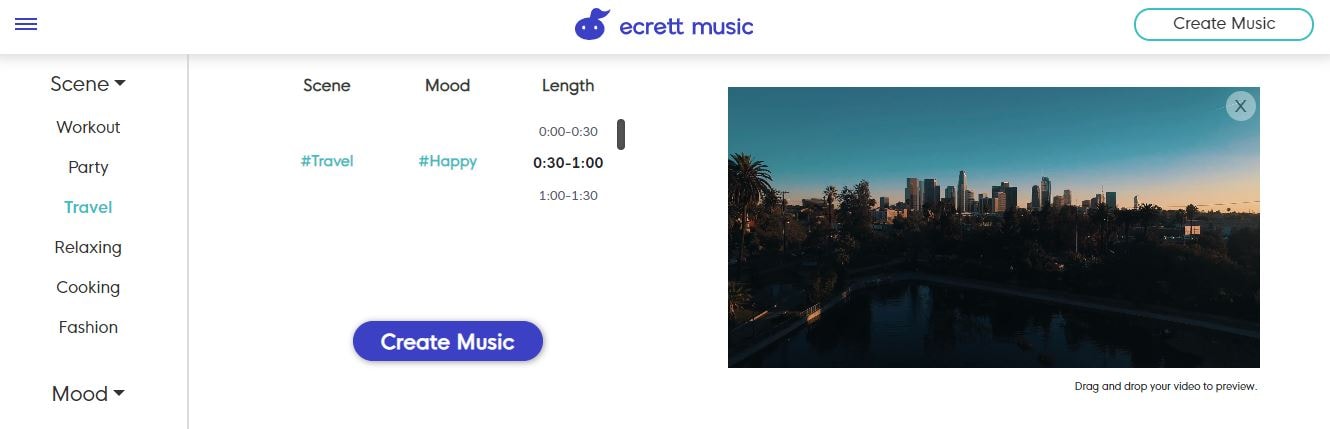
This online AI music composer makes creating stunning soundtracks for videos look easy. You just have to upload a video for which you want to generate music and select the type of scene and the mood of that scene. Party, Travel or Fashion are among the types of scenes you can choose from, while moods range from happy to serious. When done, simply click on the Create Music button, and the platform will automatically generate the soundtrack for your video. In case you are producing videos on a constant basis, you should consider purchasing one of the available subscription plans.
5. Melodrive
Price: Free
Compatibility: iOS, Windows
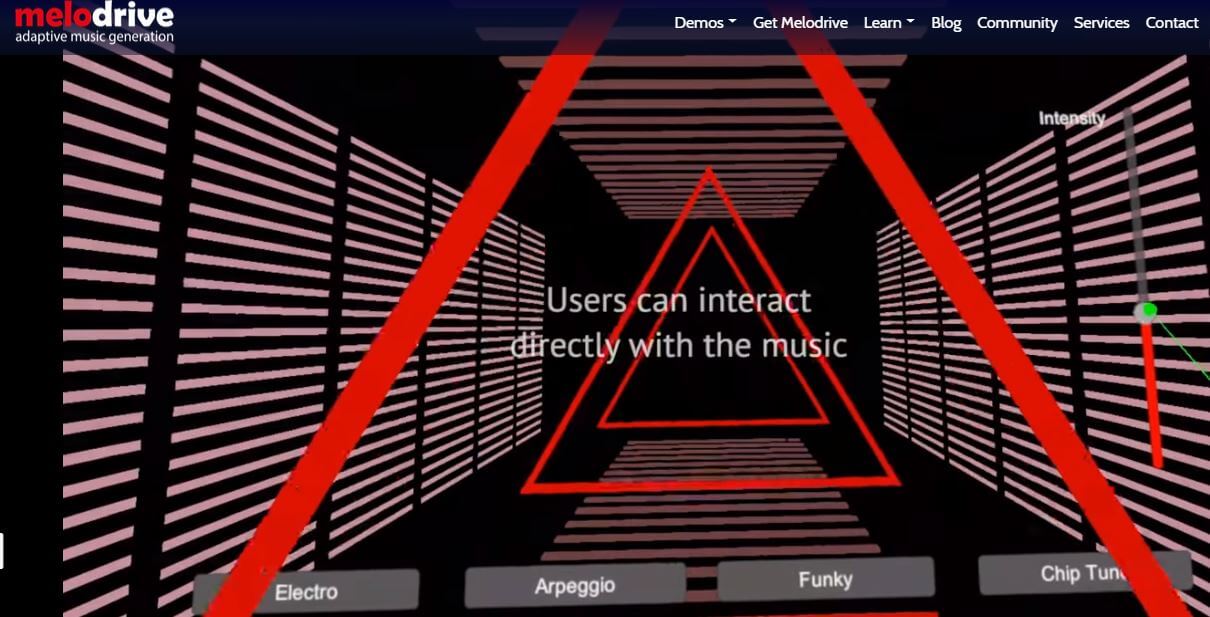
At the moment, the Lite and Indie versions of Melodrive are available for download free of charge, but the Indie version of this AI music composer still offers more options. Melodrive is one of the first AI systems that can compose emotional and unique music in real time. The AI generates music by adapting to the media environment and aims to match the mood and the style of the video. It is worth noting that Melodrive is still under development and that through time its capabilities to compose music are going to become even more refined than they already are.
6. ORB Composer
Price: Pricing plans start at $149,00
Compatibility: macOS, Windows

You can’t generate music automatically with ORB Composer, because the AI creates music based on your choices. That’s why you need to know at least the basic rules of music composition in order to be able to use the ORB Composer properly. The AI music composer comes bundled with a rich collection of chord progressions, that contains almost all chords used in popular music. This tool is aimed at artists who are interested in experimenting with the possibilities of creating music with artificial intelligence and discovering new styles of music. There are six music templates you can choose from, and you can create compositions by simply organizing different blocks of music.

Filmora AI Audio Stretcher
Wondershare Filmora - AI Audio Stretcher
• Retime any audio track to fit the duration of your video almost instantly.
• Rearrange songs without quality loss.
• Cross-platform supported - (Windows, Mac, iOS, Android)
Start Audio Stretch Start Audio Stretch Start Audio Stretch Learn More >
7. Amadeus Code
Price: Free, but the app offers in-app purchases
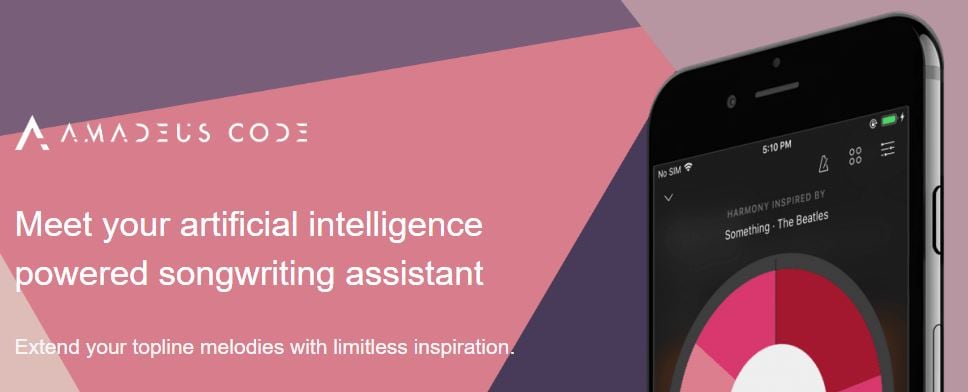
Compatibility: iOS
Both skilled musicians and music enthusiast can use this iOS-based app to create new melodies in just a few minutes. The AI engine that the Amadeus Code uses contains chord progressions of some of the most famous songs ever created and it let you use them to create new and innovative structures of music compositions. Moreover, you can use gestures to create new songs or recreate specific segments of songs you composed earlier. Even though Amadeus Code lets its users export audio and MIDI files to audio editing software, you still have to purchase all songs you want to keep.
8. Humtap
Price: Free
Compatibility: iOS
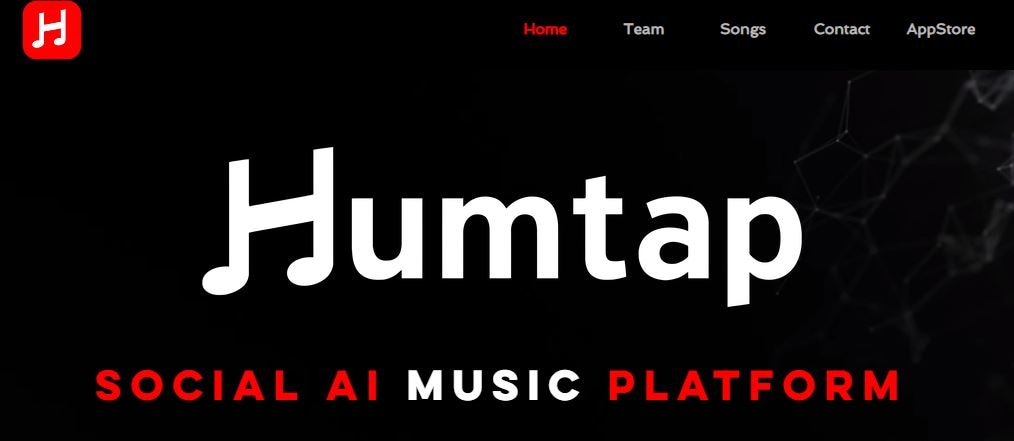
Musicians who have a tough time remembering their own ideas are going to love using Humtap because they can just hum a melody and the app will automatically generate an entire song using different instruments. What’s more, beats can be added with a single tap, and after the music is generated you can proceed to add the vocals as well. Humptap also has video making capabilities, so you can create videos for all songs you compose with this app. All tracks and videos generated with the Humtap AI music composer can be saved to your phone, but you can’t share your new creations to social media directly from the app.
9. Muzeek
Price: Free trial available, pricing plans start from $19 per month
Compatibility: macOS
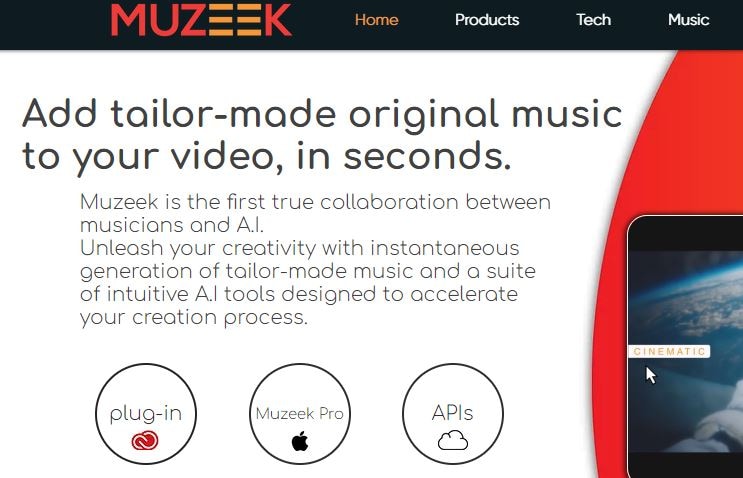
If you are in need of licensed music for the video you’re planning on sharing to social media networks, then Muzeek is one of the best choices you can make. The AI algorithm Muzeek uses analyzes the videos for which you are generating music and it creates soundtracks that perfectly fit the rhythm of the video. All content creators, including online marketing agencies or video game developers, can rely on Muzeek AI music composer to create authentic music in high quality. Moreover, Muzeek can also analyze the video’s original audio and create subtitles from it or adjust its volume automatically.
10. Brain.fm
Price: Subscription plans start from $6,95 per month
Compatibility: Android, online
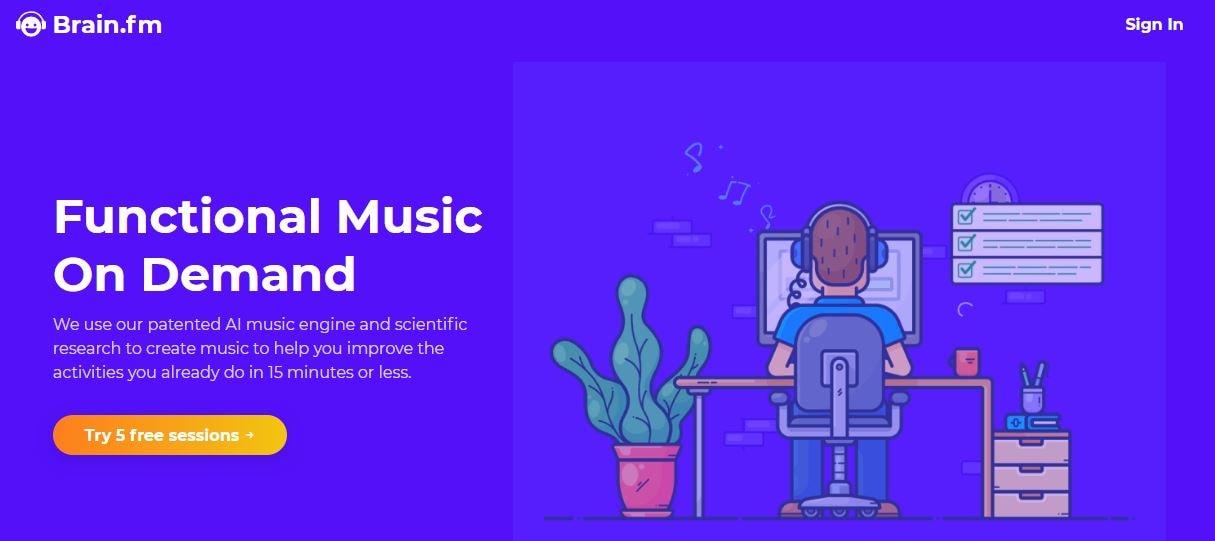
The idea that music can make our brains more productive is at the very core of what Brain.fm platform is all about. A team of scientists, musicians and engineers uses artificial intelligence to generate music designed to make your brain more productive and focused. They claim that the music created with their AI music composer achieve its effects in just ten to fifteen minutes. However, you can’t use Brain.fm to create your own music, as this platform is better suited for people who spend a lot of time at work and have a tough time maintaining their focus while performing important tasks.
Conclusion
The opportunities AI music composers offer are still not properly explored, because most of these technologies are still under development. The results AI music composers we included in this article have managed to achieve so far are impressive because each of them can produce high-quality audio files for all sorts of video content. Which AI music composer do you like to use the most? Leave a comment, and let us know.
Benjamin Arango
Benjamin Arango is a writer and a lover of all things video.
Follow @Benjamin Arango
Benjamin Arango
Mar 27, 2024• Proven solutions
Robots can’t be creative, right? A number of startups that focus on the development of artificial intelligence that is capable of composing music have proved this statement wrong. AI music composers generate original, copyright-free music you can use in your latest YouTube video or social media video ad. You don’t even have to be a sound designer or a musician to produce soundtracks for your videos with AI Music Composers, because you can upload the music that has already been recorded and create variations of it. So, let’s take a look at what AI music composers have to offer in 2024.
| 1 - Amper Music | 2 - AIVA |
|---|---|
| 3 - Jukedeck | 4 - Ecrett Music |
| 5 - Melodrive | 6 - ORB Composer |
| 7 - Amadeus Code | 8 - Humtap |
| 9 - Muzeek | 10 - Brain.fm |
Ten Best AI Music Composers You Should Know About
The AI technologies that can compose music are still relatively novel, and as time passes, they can only develop and grow further. Consequently, each of the AI music composers we featured in this article offers a different range of possibilities. Here are the ten best AI music composers you shouldn’t miss out on in 2024.
Filmora AI Music Editor
Edit Audio with AI Music Editor
Experience the power of Filmora’s AI tools and make your audio or music stand out like never before! Audio Denoise, Audio Ducking, Audio Synchronization, Audio Stretch, etc…
Try It Free Try It Free Try It Free Learn More >
1. Amper Music
Price: Available upon request
Industry professionals know just how frustrating the music licensing process can be. Amper Music is a cloud-based platform designed to simplify the process of creating soundtracks for movies and video games, as it produces AI generated algorithms that help users create music in a variety of music genres. You must first create an account on this platform, in order to be able to use the free version of Amper Music that provides only a limited amount of features. Upgrading to the pro version of Amper Music will enable you to enjoy the full potential of this rapidly growing AI Music Composer.
2. AIVA
Price: Free version available, subscription plans start from €14 p/month
Since 2016, when AIVA Technologies was founded, its team has worked on developing an AI script that can compose emotional soundtracks for ads, video games, or movies. Soon after, the AI published its first oeuvre titled ‘Opus 1 for Piano Solo and in the subsequent years, AIVA released an album and composed music for a video game. Besides enabling its users to create music from scratch, AIVA can also be used to produce variations of existing songs. The music engine that powers this AI music composer makes the production of corporate or social media videos much easier, as it eliminates the need to go through the music licensing process.
3. Jukedeck
Price: Free version available, Pricing plans start from $0.99 per download
The AI music composer developed by the Jukedeck startup resembles the Amper’s music composer because they both rely on neural networks to analyze music data, that is then used by the AI to learn how to compose original music. Each track that is available through this AI music composer can be edited, so you can change its length or its tempo. You can create music with Jukedeck for free if you decide to give all the rights to the AI composer, while both individuals and small businesses can purchase the license to use the song created with Jukedeck for just $0.99.
Note: Jukedeck has been acquired by TikTok, and we are waiting for a new Jukedeck.
![]()
A cross-platform for making videos anywhere for all creators
Why your video editing isn’t good enough? How about some creative inspo?
- 100 Million+ Users
- 150+ Countries and Regions
- 4 Million+ Social Media Followers
- 5 Million+ Stock Media for Use
* Secure Download
4. Ecrett Music
Price: Subscription plans start at $5

This online AI music composer makes creating stunning soundtracks for videos look easy. You just have to upload a video for which you want to generate music and select the type of scene and the mood of that scene. Party, Travel or Fashion are among the types of scenes you can choose from, while moods range from happy to serious. When done, simply click on the Create Music button, and the platform will automatically generate the soundtrack for your video. In case you are producing videos on a constant basis, you should consider purchasing one of the available subscription plans.
5. Melodrive
Price: Free
Compatibility: iOS, Windows
At the moment, the Lite and Indie versions of Melodrive are available for download free of charge, but the Indie version of this AI music composer still offers more options. Melodrive is one of the first AI systems that can compose emotional and unique music in real time. The AI generates music by adapting to the media environment and aims to match the mood and the style of the video. It is worth noting that Melodrive is still under development and that through time its capabilities to compose music are going to become even more refined than they already are.
6. ORB Composer
Price: Pricing plans start at $149,00
Compatibility: macOS, Windows

You can’t generate music automatically with ORB Composer, because the AI creates music based on your choices. That’s why you need to know at least the basic rules of music composition in order to be able to use the ORB Composer properly. The AI music composer comes bundled with a rich collection of chord progressions, that contains almost all chords used in popular music. This tool is aimed at artists who are interested in experimenting with the possibilities of creating music with artificial intelligence and discovering new styles of music. There are six music templates you can choose from, and you can create compositions by simply organizing different blocks of music.
Filmora AI Audio Stretcher
Wondershare Filmora - AI Audio Stretcher
• Retime any audio track to fit the duration of your video almost instantly.
• Rearrange songs without quality loss.
• Cross-platform supported - (Windows, Mac, iOS, Android)
Start Audio Stretch Start Audio Stretch Start Audio Stretch Learn More >
7. Amadeus Code
Price: Free, but the app offers in-app purchases
Compatibility: iOS
Both skilled musicians and music enthusiast can use this iOS-based app to create new melodies in just a few minutes. The AI engine that the Amadeus Code uses contains chord progressions of some of the most famous songs ever created and it let you use them to create new and innovative structures of music compositions. Moreover, you can use gestures to create new songs or recreate specific segments of songs you composed earlier. Even though Amadeus Code lets its users export audio and MIDI files to audio editing software, you still have to purchase all songs you want to keep.
8. Humtap
Price: Free
Compatibility: iOS
Musicians who have a tough time remembering their own ideas are going to love using Humtap because they can just hum a melody and the app will automatically generate an entire song using different instruments. What’s more, beats can be added with a single tap, and after the music is generated you can proceed to add the vocals as well. Humptap also has video making capabilities, so you can create videos for all songs you compose with this app. All tracks and videos generated with the Humtap AI music composer can be saved to your phone, but you can’t share your new creations to social media directly from the app.
9. Muzeek
Price: Free trial available, pricing plans start from $19 per month
Compatibility: macOS
If you are in need of licensed music for the video you’re planning on sharing to social media networks, then Muzeek is one of the best choices you can make. The AI algorithm Muzeek uses analyzes the videos for which you are generating music and it creates soundtracks that perfectly fit the rhythm of the video. All content creators, including online marketing agencies or video game developers, can rely on Muzeek AI music composer to create authentic music in high quality. Moreover, Muzeek can also analyze the video’s original audio and create subtitles from it or adjust its volume automatically.
10. Brain.fm
Price: Subscription plans start from $6,95 per month
Compatibility: Android, online
The idea that music can make our brains more productive is at the very core of what Brain.fm platform is all about. A team of scientists, musicians and engineers uses artificial intelligence to generate music designed to make your brain more productive and focused. They claim that the music created with their AI music composer achieve its effects in just ten to fifteen minutes. However, you can’t use Brain.fm to create your own music, as this platform is better suited for people who spend a lot of time at work and have a tough time maintaining their focus while performing important tasks.
Conclusion
The opportunities AI music composers offer are still not properly explored, because most of these technologies are still under development. The results AI music composers we included in this article have managed to achieve so far are impressive because each of them can produce high-quality audio files for all sorts of video content. Which AI music composer do you like to use the most? Leave a comment, and let us know.
Benjamin Arango
Benjamin Arango is a writer and a lover of all things video.
Follow @Benjamin Arango
Perfect Harmony in Post-Production: Innovative iMovie Audio Techniques for Seamless Soundscape Integration
All You Need to Know About iMovie Audio Editing

Marion Dubois
Oct 26, 2023• Proven solutions
iMovie offers a fantastic platform for video editing where you can merge multiple video clips to create something very phenomenal. Plus, it’s simply here to navigate between different scenes, edit video clips and save results directly to the digital format without making any videotape transformations.
It provides lots of things to beginners and professionals with its easy-to-use interface without any quality loss for your results even after adding lots of transitions, changes, and effects.
However, it is not accessible to master software, precisely when you’re not familiar with it, or you’re not its professional user. So today, we’d like to explore or pay attention to iMovie’s audio editing steps, tips, and tricks to help you become an iMovie master quickly.
What’s more, a practical yet professional iMovie alternative software is also advisable in this guide. So when the iMovie cannot fulfil your editing requirements, why don’t you hop on an iMovie alternative software?
Now, let’s get started!
Part 1: How to Edit Audio Clips in iMovie?
To learn how to edit audio clips in iMovie, you can use actions in the menu along with the quick shortcuts to make adjustments to your audio clips in iMovie on Mac. It’s a tip for your convenience!
Trim Audio Clips
There are a couple of options to trim an audio clip in iMovie.
#1. Trim to Playhead
You can place the playhead in your timeline. Now, trim an audio clip to that exact spot. Next, start moving the playhead and do one from the following.
- Select Modify > Trim to Playhead option in the menu bar.
- Right-click the audio clip and select the option of Trim to Playhead in the shortcut menu.
#2. Use the Clip Trimmer
You can use the Clip Trimmer to trim an exact section of the clip.
Step 1. Right-click the audio clip and select Show Clip Trimmer in the shortcut menu.
Step 2. After the Clip Trimmer shows, select a section you wish to trim by dragging the arrows right and left while holding the white lines. The area within those lines is what will get entirely deleted.
Move the entire clip but keep the trim area in place if arrows turn to a film strip icon.
Step 3. Click Close Clip Trimmer after you finish this section.
Shorten or Lengthen Audio Clips
You can easily shorten or lengthen an audio clip in iMovie. Just choose the pin in the timeline and drag one of its edges. The duration of the clip change will change as you carry. And a new course will be displayed after you finish in the upper left menu.
You can also set the clip’s duration to an exact time. Select the clip in the timeline and hit the Clip Information (small letter “i”) tab located above the Viewer. Put the value of the time you want in seconds in the Duration box on the right.
Change the Speed of an Audio Clip
You may want to speed up or slow down an audio clip while editing music in iMovie. So, here’s what you need to do!
Method 1. Click the Speed button above the Viewer. Next, select Custom in the Speed drop-down box and enter a percentage next to it. You can also set a different speed in that box if you prefer.
Method 2. Right-click the clip and select Show Speed Editor from the shortcut menu. A slider will then display at the top of the clip that you can move to change the speed.
Adjust the Volume of an Audio Clip
You can set the audio clip’s volume at higher or lower, or even mute it. Just select the clip and then do one of the following.
- Select the Volume tab above the Viewer option and move the slider to the percentage of volume. Hit the Mute button to mute the audio clip.
- Tap inside the clip, and when the two-sided arrow appears, drag up or down to adjust the volume.
Fade an Audio Clip
While editing audio in iMovie, you can also fade in or out the clip. Choose a clip in the timeline and then drag the fade handle (small circle) at either the ending or the beginning of the clip to make a fade-out or a fade-in effect.
As you drag, you will see the arcs displaying the shadow for the clips fade in or fade out.
How to Edit Audio Clips in iMovie on iOS?
The iMovie timeline is where you sort or organize all your audio clips, such as the special effects and background music. Audio clips are always present below the video clips in the timeline. To edit audio clips in iMovie on your iPhones or iPads, you can follow the guide belo
Move an Audio Clip
You can transfer the whole audio clip, except the background music, to another location.
- Touch and hold the purple or blue audio clip with your project open in the timeline until it comes over the timeline bar.
- Drag the clip to another place and release.
Adjust the Audio Clip’s Duration
Step 1. While the project is launched in the timeline, tap the audio clip (in blue or purple) or the background music clip you wish to adjust.
Step 2. Now, you can see the display of yellow trim handles. Drag them either at the end of the clip to the points where you wish the audio to start and end. If a trim handle won’t move left or right, it simply indicates there is no additional audio to work with on that clip’s end.
Step 3. Tap outside the audio clip and let the trim handles disappear.
Split an Audio Clip
There are around two options to split audio clips in iMovie. You can remove unwanted parts or adjust each section’s duration, volume, or speed while you split a clip.
Step 1. With your launched project in the timeline, scroll the timeline to the playhead’s position where you want to split the audio.
Step 2. Click the audio clip to display the inspector at the screen’s bottom.
Step 3. Now, click the Actions button, and select the Split tab.
Or, you can tap the clip (it becomes outlined in yellow), then swipe above the playhead as if you were placing your finger to slide over it.
Detach the Audio Part from a Video
You can detach the video clip’s audio to remove or edit it as a separate video clip.
Step 1. When the project is open in the timeline, select a video clip and display the inspector at the screen’s bottom.
Step 2. Tap the Actions button, then tap Detach.
Step 3. A new blue-colored audio clip will then appear below the video project. You can now move, edit, or delete the audio clip separately from its parent video clip.
Move Audio to the Foreground or Background
To ensure the sound in your video clips can listen above the background music, iMovie implies audio “ducking”. Ducking lowers the background music clips’ volume whenever there’s a video clip whose sound is playing simultaneously.
You can select which audio clips are in the foreground or the background.
Step 1. Select the timeline’s audio clip to display the inspector at the screen’s bottom.
Step 2. Hit the Actions tab and proceed with selecting the Foreground or Background.
The clip color changes to indicate whether it’s the background music (green) or foreground audio (blue or purple).
Part 2: An Easier Way to Edit Audio Clips
Windows users might be wandering for an alternative to iMovie as this software tool is only compatible with Mac and iOS devices. You will be thrilled to know that Wondershare Filmora can serve you with all synonymous and extra features more than the iMovie, and it works significantly in the Windows environment.


This latest software tool also assists users with easy video editing tricks and the intuitive interface that best serves quality editing to beginners and professionals.
Despite the basic video editing features, such as trimming, splitting, merging, cutting, and cropping, Filmora also offers various advanced editing elements that are far better than iMovie. And, with its video editing features, you can make a green screen effect, stabilize your video footage, reverse your video clip, and more.
Moreover, you can enjoy royalty-free music tracks for different themes, such as Young and Bright, Tender and Sentimental, Rock, Folk, Electronic Rock, and Hipster Folk, for selection.
All this will be available with a single program called Wondershare Filmora to take advantage of them for free. You do not have to search the background music files like a needle in a haystack. The program has nicely organized the music themes into six different folders. You can apply it for your video and make advanced editing, such as split/trim the clip, adjust the playback speed, pitch, volume, etc.
How to Edit Audio with Wondershare Filmora?
In Wondershare Filmora, you can insert background music and other files from the audio library or your computer. You can even record your voiceover using it.
Add Background Music
Filmora provides a royalty-free music library you can access or import your music within the program. You can select a song from the royalty-free audio library and use it for free.
The audio library has categorized into: YOUNG & BRIGHT, TENDER & SENTIMENTAL, ROCK, FOLK, and ELECTRONIC. The different kinds of sound effects are also available under the Sound Effects tab.
Once you find a sound effect or a song, either right-click on it and go with the Apply or drag and drop it into an audio track in the timeline.
Or, you can click the Import button above the Media Library panel to browse for audio files in your PC system. Then, select and import it into the Media Library when you find the song or other audio files you wish to add.
Once you place the song in the timeline, double-click to edit it in the Audio editing panel. You can apply fade-in or fade-out effects or adjust the pitch and volume. Filmora lets you add up to 100 audio tracks.
Split Audio Clips
Choose your audio clip and place the playhead where you want to split it, then right-click on the clip and choose the Split tab or click the Split icon right above on the toolbar.
Adjust Audio Settings
Double click on the audio clip to make adjustments to your audio. Open a panel with adjustment sliders in the timeline for pitch and volume.
Another element that you’ll find in this panel is Denoise, which is a feature that can remove background noise from your audio clips.
For a more professional audio editing experience, you can also access the Audio Equalizer from this panel. Select from presets or make manual adjustments by hitting the Customize tab.
Play it when you are done and, if you’re not happy with the results, tap the Reset button to start over.
Audio Equalizer (EQ)
All videos have plenty of sounds like speech, music, or sound effects. Changing the strength of sound waves will help you to mix these sounds within a coherent soundtrack.
Locate your audio clip in an audio track and double-click on it to open the Audio settings menu window. A drop-down menu next to the Equalizer feature will display presets such as Classic, Default, Rock’n’Roll, Techno, Sparkle, Bass, Hard Rock, Pop, Ska, Blues, Folk, Acoustic, Custom, or Country. Choose the preset that best fits your current needs and hit the OK tab to apply it.
Now, hit the Customize tab next to the drop-down bar to adjust the Audio Equalizer manually. Drag the sliders up or down and make the adjustments until you find their ideal value. Finally, hit OK and save your settings.
Besides the included music tracks and sound effects in Filmora initially, you can also find more audio files from Filmora’s effects store – Filmstock, and even get some free music and sound.
Part 3: iMovie Audio Editing Tips & Tricks
iMovie is a great video editor for Mac computers. After understanding the best alternative of iMovie sound editin g, let’s check out some tips on editing audio in iMovie best.
The explanations and screenshots below are for iMovie 10 only. However, the steps are a bit similar to older versions.
So, here we go!
1. Use Waveforms to See What You Hear
To properly edit the audio track in iMovie, you need a good pair of headphones and speakers to hear the sound, but you also need to check the sound.
You can check the sound in iMovie by considering the waveforms on each clip. If the waveforms can’t be seen, go to the View drop-down menu and choose the Show Waveforms option. The clip size for your project can also adjust to get an even better appearance for each video clip.
The waveforms will display the volume level of a clip and give you a good idea of what sections will require to turn up or down. You can also check how the levels of different clips compare to one another.
2. Audio Adjustments
With the help of Adjust tab in the top right, you can access some basic audio editing tools for changing your selected clip’s volume or changing the volume of other relative clips in the project.
The adjustment window of audio also provides basic audio equalization and noise reduction tools, along with a range of effects - from echo to robot - that will change the way people in your video sound.
3. Edit Audio with the Timeline
iMovie assists you in adjusting the audio within the clips themselves. Each pin has a volume bar, moving up and down to decrease or increase the audio level. The clips also contain Fade In and Fade Out tabs at the beginning and end, dragging to adjust the fade’s length.
By adding a short fade effect, whether in or out, the sound becomes relatively smoother and less conflicting to the ear when a new clip begins.
4. Detach the Audio
By default, iMovie keeps the video and audio sections of clips together for convenience. Yet, you want to use the video and audio sections of a clip separately sometimes.
For this purpose, choose your clip in the timeline, visit the Modify drop-down menu, and hit the Detach Audio button. You’ll now have two clips - one with the images and another with the sound.
A lot you can do with the detached audio. For instance, you could extend the audio clip to begin before the video plays, or so that it plays for a few seconds even after the video fades out. You could also cut out pieces from the audio’s middle portion while leaving the video intact.
Conclusion
Coming towards the end of the discussion, after understanding iMovie audio editingand going through an elaborated alternative of iMovie application, we decided that Wondershare Filmora sounds the best out of it. It allows you to flawlessly edit video and audio files on your desktop, with various inbuilt royalty-free music tracks to select from that can further improve your project’s presence.
Marion Dubois
Marion Dubois is a writer and a lover of all things video.
Follow @Marion Dubois
Marion Dubois
Oct 26, 2023• Proven solutions
iMovie offers a fantastic platform for video editing where you can merge multiple video clips to create something very phenomenal. Plus, it’s simply here to navigate between different scenes, edit video clips and save results directly to the digital format without making any videotape transformations.
It provides lots of things to beginners and professionals with its easy-to-use interface without any quality loss for your results even after adding lots of transitions, changes, and effects.
However, it is not accessible to master software, precisely when you’re not familiar with it, or you’re not its professional user. So today, we’d like to explore or pay attention to iMovie’s audio editing steps, tips, and tricks to help you become an iMovie master quickly.
What’s more, a practical yet professional iMovie alternative software is also advisable in this guide. So when the iMovie cannot fulfil your editing requirements, why don’t you hop on an iMovie alternative software?
Now, let’s get started!
Part 1: How to Edit Audio Clips in iMovie?
To learn how to edit audio clips in iMovie, you can use actions in the menu along with the quick shortcuts to make adjustments to your audio clips in iMovie on Mac. It’s a tip for your convenience!
Trim Audio Clips
There are a couple of options to trim an audio clip in iMovie.
#1. Trim to Playhead
You can place the playhead in your timeline. Now, trim an audio clip to that exact spot. Next, start moving the playhead and do one from the following.
- Select Modify > Trim to Playhead option in the menu bar.
- Right-click the audio clip and select the option of Trim to Playhead in the shortcut menu.
#2. Use the Clip Trimmer
You can use the Clip Trimmer to trim an exact section of the clip.
Step 1. Right-click the audio clip and select Show Clip Trimmer in the shortcut menu.
Step 2. After the Clip Trimmer shows, select a section you wish to trim by dragging the arrows right and left while holding the white lines. The area within those lines is what will get entirely deleted.
Move the entire clip but keep the trim area in place if arrows turn to a film strip icon.
Step 3. Click Close Clip Trimmer after you finish this section.
Shorten or Lengthen Audio Clips
You can easily shorten or lengthen an audio clip in iMovie. Just choose the pin in the timeline and drag one of its edges. The duration of the clip change will change as you carry. And a new course will be displayed after you finish in the upper left menu.
You can also set the clip’s duration to an exact time. Select the clip in the timeline and hit the Clip Information (small letter “i”) tab located above the Viewer. Put the value of the time you want in seconds in the Duration box on the right.
Change the Speed of an Audio Clip
You may want to speed up or slow down an audio clip while editing music in iMovie. So, here’s what you need to do!
Method 1. Click the Speed button above the Viewer. Next, select Custom in the Speed drop-down box and enter a percentage next to it. You can also set a different speed in that box if you prefer.
Method 2. Right-click the clip and select Show Speed Editor from the shortcut menu. A slider will then display at the top of the clip that you can move to change the speed.
Adjust the Volume of an Audio Clip
You can set the audio clip’s volume at higher or lower, or even mute it. Just select the clip and then do one of the following.
- Select the Volume tab above the Viewer option and move the slider to the percentage of volume. Hit the Mute button to mute the audio clip.
- Tap inside the clip, and when the two-sided arrow appears, drag up or down to adjust the volume.
Fade an Audio Clip
While editing audio in iMovie, you can also fade in or out the clip. Choose a clip in the timeline and then drag the fade handle (small circle) at either the ending or the beginning of the clip to make a fade-out or a fade-in effect.
As you drag, you will see the arcs displaying the shadow for the clips fade in or fade out.
How to Edit Audio Clips in iMovie on iOS?
The iMovie timeline is where you sort or organize all your audio clips, such as the special effects and background music. Audio clips are always present below the video clips in the timeline. To edit audio clips in iMovie on your iPhones or iPads, you can follow the guide belo
Move an Audio Clip
You can transfer the whole audio clip, except the background music, to another location.
- Touch and hold the purple or blue audio clip with your project open in the timeline until it comes over the timeline bar.
- Drag the clip to another place and release.
Adjust the Audio Clip’s Duration
Step 1. While the project is launched in the timeline, tap the audio clip (in blue or purple) or the background music clip you wish to adjust.
Step 2. Now, you can see the display of yellow trim handles. Drag them either at the end of the clip to the points where you wish the audio to start and end. If a trim handle won’t move left or right, it simply indicates there is no additional audio to work with on that clip’s end.
Step 3. Tap outside the audio clip and let the trim handles disappear.
Split an Audio Clip
There are around two options to split audio clips in iMovie. You can remove unwanted parts or adjust each section’s duration, volume, or speed while you split a clip.
Step 1. With your launched project in the timeline, scroll the timeline to the playhead’s position where you want to split the audio.
Step 2. Click the audio clip to display the inspector at the screen’s bottom.
Step 3. Now, click the Actions button, and select the Split tab.
Or, you can tap the clip (it becomes outlined in yellow), then swipe above the playhead as if you were placing your finger to slide over it.
Detach the Audio Part from a Video
You can detach the video clip’s audio to remove or edit it as a separate video clip.
Step 1. When the project is open in the timeline, select a video clip and display the inspector at the screen’s bottom.
Step 2. Tap the Actions button, then tap Detach.
Step 3. A new blue-colored audio clip will then appear below the video project. You can now move, edit, or delete the audio clip separately from its parent video clip.
Move Audio to the Foreground or Background
To ensure the sound in your video clips can listen above the background music, iMovie implies audio “ducking”. Ducking lowers the background music clips’ volume whenever there’s a video clip whose sound is playing simultaneously.
You can select which audio clips are in the foreground or the background.
Step 1. Select the timeline’s audio clip to display the inspector at the screen’s bottom.
Step 2. Hit the Actions tab and proceed with selecting the Foreground or Background.
The clip color changes to indicate whether it’s the background music (green) or foreground audio (blue or purple).
Part 2: An Easier Way to Edit Audio Clips
Windows users might be wandering for an alternative to iMovie as this software tool is only compatible with Mac and iOS devices. You will be thrilled to know that Wondershare Filmora can serve you with all synonymous and extra features more than the iMovie, and it works significantly in the Windows environment.
This latest software tool also assists users with easy video editing tricks and the intuitive interface that best serves quality editing to beginners and professionals.
Despite the basic video editing features, such as trimming, splitting, merging, cutting, and cropping, Filmora also offers various advanced editing elements that are far better than iMovie. And, with its video editing features, you can make a green screen effect, stabilize your video footage, reverse your video clip, and more.
Moreover, you can enjoy royalty-free music tracks for different themes, such as Young and Bright, Tender and Sentimental, Rock, Folk, Electronic Rock, and Hipster Folk, for selection.
All this will be available with a single program called Wondershare Filmora to take advantage of them for free. You do not have to search the background music files like a needle in a haystack. The program has nicely organized the music themes into six different folders. You can apply it for your video and make advanced editing, such as split/trim the clip, adjust the playback speed, pitch, volume, etc.
How to Edit Audio with Wondershare Filmora?
In Wondershare Filmora, you can insert background music and other files from the audio library or your computer. You can even record your voiceover using it.
Add Background Music
Filmora provides a royalty-free music library you can access or import your music within the program. You can select a song from the royalty-free audio library and use it for free.
The audio library has categorized into: YOUNG & BRIGHT, TENDER & SENTIMENTAL, ROCK, FOLK, and ELECTRONIC. The different kinds of sound effects are also available under the Sound Effects tab.
Once you find a sound effect or a song, either right-click on it and go with the Apply or drag and drop it into an audio track in the timeline.
Or, you can click the Import button above the Media Library panel to browse for audio files in your PC system. Then, select and import it into the Media Library when you find the song or other audio files you wish to add.
Once you place the song in the timeline, double-click to edit it in the Audio editing panel. You can apply fade-in or fade-out effects or adjust the pitch and volume. Filmora lets you add up to 100 audio tracks.
Split Audio Clips
Choose your audio clip and place the playhead where you want to split it, then right-click on the clip and choose the Split tab or click the Split icon right above on the toolbar.
Adjust Audio Settings
Double click on the audio clip to make adjustments to your audio. Open a panel with adjustment sliders in the timeline for pitch and volume.
Another element that you’ll find in this panel is Denoise, which is a feature that can remove background noise from your audio clips.
For a more professional audio editing experience, you can also access the Audio Equalizer from this panel. Select from presets or make manual adjustments by hitting the Customize tab.
Play it when you are done and, if you’re not happy with the results, tap the Reset button to start over.
Audio Equalizer (EQ)
All videos have plenty of sounds like speech, music, or sound effects. Changing the strength of sound waves will help you to mix these sounds within a coherent soundtrack.
Locate your audio clip in an audio track and double-click on it to open the Audio settings menu window. A drop-down menu next to the Equalizer feature will display presets such as Classic, Default, Rock’n’Roll, Techno, Sparkle, Bass, Hard Rock, Pop, Ska, Blues, Folk, Acoustic, Custom, or Country. Choose the preset that best fits your current needs and hit the OK tab to apply it.
Now, hit the Customize tab next to the drop-down bar to adjust the Audio Equalizer manually. Drag the sliders up or down and make the adjustments until you find their ideal value. Finally, hit OK and save your settings.
Besides the included music tracks and sound effects in Filmora initially, you can also find more audio files from Filmora’s effects store – Filmstock, and even get some free music and sound.
Part 3: iMovie Audio Editing Tips & Tricks
iMovie is a great video editor for Mac computers. After understanding the best alternative of iMovie sound editin g, let’s check out some tips on editing audio in iMovie best.
The explanations and screenshots below are for iMovie 10 only. However, the steps are a bit similar to older versions.
So, here we go!
1. Use Waveforms to See What You Hear
To properly edit the audio track in iMovie, you need a good pair of headphones and speakers to hear the sound, but you also need to check the sound.
You can check the sound in iMovie by considering the waveforms on each clip. If the waveforms can’t be seen, go to the View drop-down menu and choose the Show Waveforms option. The clip size for your project can also adjust to get an even better appearance for each video clip.
The waveforms will display the volume level of a clip and give you a good idea of what sections will require to turn up or down. You can also check how the levels of different clips compare to one another.
2. Audio Adjustments
With the help of Adjust tab in the top right, you can access some basic audio editing tools for changing your selected clip’s volume or changing the volume of other relative clips in the project.
The adjustment window of audio also provides basic audio equalization and noise reduction tools, along with a range of effects - from echo to robot - that will change the way people in your video sound.
3. Edit Audio with the Timeline
iMovie assists you in adjusting the audio within the clips themselves. Each pin has a volume bar, moving up and down to decrease or increase the audio level. The clips also contain Fade In and Fade Out tabs at the beginning and end, dragging to adjust the fade’s length.
By adding a short fade effect, whether in or out, the sound becomes relatively smoother and less conflicting to the ear when a new clip begins.
4. Detach the Audio
By default, iMovie keeps the video and audio sections of clips together for convenience. Yet, you want to use the video and audio sections of a clip separately sometimes.
For this purpose, choose your clip in the timeline, visit the Modify drop-down menu, and hit the Detach Audio button. You’ll now have two clips - one with the images and another with the sound.
A lot you can do with the detached audio. For instance, you could extend the audio clip to begin before the video plays, or so that it plays for a few seconds even after the video fades out. You could also cut out pieces from the audio’s middle portion while leaving the video intact.
Conclusion
Coming towards the end of the discussion, after understanding iMovie audio editingand going through an elaborated alternative of iMovie application, we decided that Wondershare Filmora sounds the best out of it. It allows you to flawlessly edit video and audio files on your desktop, with various inbuilt royalty-free music tracks to select from that can further improve your project’s presence.
Marion Dubois
Marion Dubois is a writer and a lover of all things video.
Follow @Marion Dubois
Also read:
- New Step-by-Step Guide to Embedding Tracks in KineMaster
- Transforming Voices with Technology The Best Software to Watch Out For
- Updated 2024 Approved Steps for Extracting Auditory Elements From MP4 Files
- In 2024, Unleash Your Inner Jellyfish How to Apply Clownfish Voice Changes on Fortnite and Beyond
- New 2024 Approved Discover the Ultimate List of Podcast-Friendly Free Recording Apps
- New In 2024, The Conductors Algorithm Top Ten AI Prodigies Shaping the Melodic Landscape
- Updated Leveraging Machine Learning for Clean Audio Transmission
- 2024 Approved Catalog of MP3 Sources Featuring Feline Noises
- New In 2024, Unleash Your Creative Potential with These 5 In-Demand Android Audio Editors
- Updated Superior Mac System for Fusion of Vehicle Soundscape for 2024
- New Essential Mobile Sound Editors A Guide to the Top 7 on Android
- In 2024, Discover the Leading Free Audio Modification Software of the Year
- New Evaluating Acoustic Experts A Comprehensive Listening Guide for 2024
- Audio Chop & Split in a Flash Speeding up MP3 Separation Processes
- New Best Siri Voice Generator for Windows & Mac for 2024
- Updated Mastering Sound with Adobe Audition An In-Depth Look at Its Core Components for 2024
- Updated 2024 Approved Polishing Your Projects Soundtrack Effective Methods for Removing Unwanted Audio Noise in VideoWorks Pro
- In 2024, Different Methods To Unlock Your iPhone 8 | Dr.fone
- Overview of the Best Vivo X Flip Screen Mirroring App | Dr.fone
- In 2024, 3uTools Virtual Location Not Working On Oppo A56s 5G? Fix Now | Dr.fone
- New 2024 Approved Unlock MP4 10 Best WebM to MP4 Conversion Software
- 2024 Approved Top-Rated Online Video Editors for Chromebook Users
- In 2024, Locked Out of iPhone 6s Plus? 5 Ways to get into a Locked iPhone 6s Plus | Dr.fone
- How to Unlock Disabled Apple iPhone 12 Pro Max/iPad Without Computer
- Updated Adobe Premiere Pro Must-Haves Top Plugins for Video Editors (Free & Premium) for 2024
- New How To Make a Photo Collage in Microsoft Word — Step by Step Guide
- How To Fix Unresponsive Touch Screen on Realme 12 Pro 5G | Dr.fone
- In 2024, How to Cast Xiaomi Civi 3 Disney 100th Anniversary Edition to Computer for iPhone and Android? | Dr.fone
- In 2024, Top Apps and Online Tools To Track Xiaomi Mix Fold 3 Phone With/Without IMEI Number
- How to Downgrade iPhone 6 without iTunes? | Dr.fone
- In 2024, How To Get the Apple ID Verification Code On Apple iPhone 7 Plus in the Best Ways
- Title: Updated In 2024, The 5 Highest-Rated Audio Mixers Suited to Mac Systems
- Author: Jacob
- Created at : 2024-05-05 04:07:18
- Updated at : 2024-05-06 04:07:18
- Link: https://audio-shaping.techidaily.com/updated-in-2024-the-5-highest-rated-audio-mixers-suited-to-mac-systems/
- License: This work is licensed under CC BY-NC-SA 4.0.
