
:max_bytes(150000):strip_icc():format(webp)/patch-tuesday-2625783-d6bcf232b3c64fc5958037ad31299bd9.png)
Updated Collective Echo Boom Impact
Collective Echo Boom Impact
Versatile Video Editor - Wondershare Filmora
An easy yet powerful editor
Numerous effects to choose from
Detailed tutorials provided by the official channel
If you are looking for a crowd cheering sound effect, it can be downloaded in different places online. If you want to download crowd cheering sound effects free, then you can do this on numerous websites that provide free downloads. You may also download crowd cheering sound effects mp3 by using search engines like Google and Yahoo. There is also various music downloading website that is available, where crowd cheering sound effect can be downloaded for free.
There are many different ways to find crowd cheering sound effects. You should experiment with different methods to see which one works best for you. It is important that you find crowd cheering sound effects that you can use in your own projects. By finding the crowd cheering sound effect that you want, you can download it and start working on your project right away.
In this article
01 [Ways to Download Various Sound Effects](#Part 1)
02 [Use Filmora to Add Sound Effects in Your Video](#Part 2)
Part 1 Ways to Download Various Sound Effects
The crowd cheering effect is a sound that can be used to convey the excitement and enthusiasm of a crowd scene. This sound can also be used to show approval or praise for an event. It can be used in videos, movies, and video games to create an immersive experience for the viewer or player. You can find it online on crowd sound effect libraries. Here are some ways for you to get various sound effects easily or for free –
1. Download from Some YouTube Video
A crowd cheering sound effect can be found on YouTube. It is the most reliable source because crowd cheering sound effects are included in compilations of other sound effects or audio clips. By using search engines or YouTube, you may find crowd cheering sound effects easily. Crowd cheering sound effects are also made by users in videos, and these crowd cheering sound effects are available on the site. There are several methods for downloading the audio from YouTube. One method is using YouTube to MP3 converter . Here are the steps for you to follow.
Step 1: Go to YouTube to Mp3 Converter. Copy and paste the URL of the YouTube video you want to convert in the search bar and click on ‘Go’.
Step 2: Next, click the drop-down menu and select the format for conversions, such as MP3 or M4A. With an MP3, you can also select the level of compression which can be anywhere between 64 kbps to 320 kbps.
Step 3: Once done, hit the ‘Convert’ button.

2. Make Crowd Cheering Effect by Yourself
The crowd cheering effect can be made using any digital audio workstation program. The crowd cheering effect works by mixing together crowd noise, applause, and cheers into one track or file.
- One way to do this is to go online and search for crowd cheering sound effects. There are many websites that offer crowd cheering sounds for free or for purchase.
- Another way to create the crowd cheering effect is to record crowd noise and applause yourself. This can be done by going to a live event or by recording people clapping and shouting in a crowd.
- Once you have your crowd cheering sound effect, mix it into an audio track. You can then add crowd cheering sounds to videos or movies that you are working on.
3. Soundcloud
Another option for finding sound effects is Sound Cloud. You can search for specific sound effects on Sound Cloud, or browse by category. There are a variety of different crowd sound effects on Sound Cloud, as well as crowd cheering sound effects.

4. Sound Effect Library
You can also check out a sound effect library to find crowd cheering sounds and other audio clips. There are a couple of different options for this, including Hollywood Edge and Audio Jungle.
These libraries have a variety of crowd sound effects, as well as other sound effects that you can use in your projects.
Once you’ve found the right crowd cheering sound effect for your project, it’s easy to download it and use it in your work. Just follow the instructions on the website where you found the sound effect, and you’ll be able to add the sound to your project in no time.
Using crowd cheering sound effects in your work can help your projects feel more realistic and engaging. If you’re looking for a crowd cheering sound effect, or any other type of sound effect, these are a few easy ways to find them. Try out a few different options and find the right sound effect for your project. You’ll be able to add a more immersive experience to your work with the help of sound effects.
Finding the Right Sound Effect:
When looking for a crowd cheering effect, it’s important to find one that sounds realistic and matches the tone of your project. If you’re creating a video for a sports game, for example, you’ll want to find a sound effect that is energetic and uplifting.
There are many places to find crowd cheering sound effects online. Some popular sources include free and royalty-free websites like SoundBible and SoundEffects.ca that offer crowd cheering sound effects for free download. Other online sources that sell crowd cheering sound effects include Pond5, AudioJungle etc.
Note that crowd cheering sound effects may be labeled differently on different websites, so it’s important to double-check the type of crowd cheering sound effect you’re downloading before using it in your project.
Part 2 Use Filmora to Add Sound Effects in Your Video
Filmora is a video editing software that can be used to create movies, short films, and documentaries. It offers a wide range of features, including chroma-keying, motion tracking, and green screen effects. Filmora also has a crowd cheering effect that can be used to add excitement to your videos. It’s one of the most advanced video editing software that can help you add sound effects into your videos with ease.
Features:
- It widely supports different formats.
- A choice of 300+ stunning effects for different niches.
- Powerful video editing features and intuitive user interface.
- Royalty-free music, Modern and easy to use.
- Transfer to a popular device option, upload to YouTube or burn to DVD.
Guide to Add Sound Effects to Video with Filmora:
Step 1: Go to the Filmora official website, install wonder share Filmora and lunch it. Once it’s launched, you will find a tab just below the menu bar, tap media, and click import. After this, there will be a drop-down where you can click on import media files and choose the video file. Repeat the process to pick the desired background music. You can also use build-in music tracks to add music to your video by selecting the Music tab.
For Win 7 or later (64-bit)
For macOS 10.12 or later

Step 2: Now you can navigate over the video you imported to Filmora, then tap on the sign ‘+’on it alternatively; you can drag down to the timeline the media file.
Step 3: Now edit your music by double-tapping the audio from the timeline. It will display the audio panel at the top of the screen. You can use it to set the desired equalizer, manage pitch volume and speed. You can also use the forum to fade in or fade out.

Step 4: Finally, you can now export the video that has made the desired changes by clicking ‘export’ on the toolbar to export the video. You can now save the exported in the desired format and remember to rename it directly.
Wondershare Filmora
Get started easily with Filmora’s powerful performance, intuitive interface, and countless effects!
Try It Free Try It Free Try It Free Learn More >

AI Portrait – The best feature of Wondershare Filmora for gameplay editing
The AI Portrait is a new add-on in Wondershare Filmora. It can easily remove video backgrounds without using a green screen or chroma key, allowing you to add borders, glitch effects, pixelated, noise, or segmentation video effects.

Conclusion
Crowd cheering is an exciting sound that can get your adrenaline pumping. If you want to create this effect in your videos, there are a few different ways to do it. One option is to use the crowd cheering sound effect available in video editing software like Filmora. This effect can add excitement and energy to your videos. You can find crowd cheering sound effects in different audio libraries and online. Whichever method you choose, be sure to experiment with the sound to get the desired effect.
If you are looking for a crowd cheering sound effect, it can be downloaded in different places online. If you want to download crowd cheering sound effects free, then you can do this on numerous websites that provide free downloads. You may also download crowd cheering sound effects mp3 by using search engines like Google and Yahoo. There is also various music downloading website that is available, where crowd cheering sound effect can be downloaded for free.
There are many different ways to find crowd cheering sound effects. You should experiment with different methods to see which one works best for you. It is important that you find crowd cheering sound effects that you can use in your own projects. By finding the crowd cheering sound effect that you want, you can download it and start working on your project right away.
In this article
01 [Ways to Download Various Sound Effects](#Part 1)
02 [Use Filmora to Add Sound Effects in Your Video](#Part 2)
Part 1 Ways to Download Various Sound Effects
The crowd cheering effect is a sound that can be used to convey the excitement and enthusiasm of a crowd scene. This sound can also be used to show approval or praise for an event. It can be used in videos, movies, and video games to create an immersive experience for the viewer or player. You can find it online on crowd sound effect libraries. Here are some ways for you to get various sound effects easily or for free –
1. Download from Some YouTube Video
A crowd cheering sound effect can be found on YouTube. It is the most reliable source because crowd cheering sound effects are included in compilations of other sound effects or audio clips. By using search engines or YouTube, you may find crowd cheering sound effects easily. Crowd cheering sound effects are also made by users in videos, and these crowd cheering sound effects are available on the site. There are several methods for downloading the audio from YouTube. One method is using YouTube to MP3 converter . Here are the steps for you to follow.
Step 1: Go to YouTube to Mp3 Converter. Copy and paste the URL of the YouTube video you want to convert in the search bar and click on ‘Go’.
Step 2: Next, click the drop-down menu and select the format for conversions, such as MP3 or M4A. With an MP3, you can also select the level of compression which can be anywhere between 64 kbps to 320 kbps.
Step 3: Once done, hit the ‘Convert’ button.
2. Make Crowd Cheering Effect by Yourself
The crowd cheering effect can be made using any digital audio workstation program. The crowd cheering effect works by mixing together crowd noise, applause, and cheers into one track or file.
- One way to do this is to go online and search for crowd cheering sound effects. There are many websites that offer crowd cheering sounds for free or for purchase.
- Another way to create the crowd cheering effect is to record crowd noise and applause yourself. This can be done by going to a live event or by recording people clapping and shouting in a crowd.
- Once you have your crowd cheering sound effect, mix it into an audio track. You can then add crowd cheering sounds to videos or movies that you are working on.
3. Soundcloud
Another option for finding sound effects is Sound Cloud. You can search for specific sound effects on Sound Cloud, or browse by category. There are a variety of different crowd sound effects on Sound Cloud, as well as crowd cheering sound effects.
4. Sound Effect Library
You can also check out a sound effect library to find crowd cheering sounds and other audio clips. There are a couple of different options for this, including Hollywood Edge and Audio Jungle.
These libraries have a variety of crowd sound effects, as well as other sound effects that you can use in your projects.
Once you’ve found the right crowd cheering sound effect for your project, it’s easy to download it and use it in your work. Just follow the instructions on the website where you found the sound effect, and you’ll be able to add the sound to your project in no time.
Using crowd cheering sound effects in your work can help your projects feel more realistic and engaging. If you’re looking for a crowd cheering sound effect, or any other type of sound effect, these are a few easy ways to find them. Try out a few different options and find the right sound effect for your project. You’ll be able to add a more immersive experience to your work with the help of sound effects.
Finding the Right Sound Effect:
When looking for a crowd cheering effect, it’s important to find one that sounds realistic and matches the tone of your project. If you’re creating a video for a sports game, for example, you’ll want to find a sound effect that is energetic and uplifting.
There are many places to find crowd cheering sound effects online. Some popular sources include free and royalty-free websites like SoundBible and SoundEffects.ca that offer crowd cheering sound effects for free download. Other online sources that sell crowd cheering sound effects include Pond5, AudioJungle etc.
Note that crowd cheering sound effects may be labeled differently on different websites, so it’s important to double-check the type of crowd cheering sound effect you’re downloading before using it in your project.
Part 2 Use Filmora to Add Sound Effects in Your Video
Filmora is a video editing software that can be used to create movies, short films, and documentaries. It offers a wide range of features, including chroma-keying, motion tracking, and green screen effects. Filmora also has a crowd cheering effect that can be used to add excitement to your videos. It’s one of the most advanced video editing software that can help you add sound effects into your videos with ease.
Features:
- It widely supports different formats.
- A choice of 300+ stunning effects for different niches.
- Powerful video editing features and intuitive user interface.
- Royalty-free music, Modern and easy to use.
- Transfer to a popular device option, upload to YouTube or burn to DVD.
Guide to Add Sound Effects to Video with Filmora:
Step 1: Go to the Filmora official website, install wonder share Filmora and lunch it. Once it’s launched, you will find a tab just below the menu bar, tap media, and click import. After this, there will be a drop-down where you can click on import media files and choose the video file. Repeat the process to pick the desired background music. You can also use build-in music tracks to add music to your video by selecting the Music tab.
For Win 7 or later (64-bit)
For macOS 10.12 or later
Step 2: Now you can navigate over the video you imported to Filmora, then tap on the sign ‘+’on it alternatively; you can drag down to the timeline the media file.
Step 3: Now edit your music by double-tapping the audio from the timeline. It will display the audio panel at the top of the screen. You can use it to set the desired equalizer, manage pitch volume and speed. You can also use the forum to fade in or fade out.
Step 4: Finally, you can now export the video that has made the desired changes by clicking ‘export’ on the toolbar to export the video. You can now save the exported in the desired format and remember to rename it directly.
Wondershare Filmora
Get started easily with Filmora’s powerful performance, intuitive interface, and countless effects!
Try It Free Try It Free Try It Free Learn More >
AI Portrait – The best feature of Wondershare Filmora for gameplay editing
The AI Portrait is a new add-on in Wondershare Filmora. It can easily remove video backgrounds without using a green screen or chroma key, allowing you to add borders, glitch effects, pixelated, noise, or segmentation video effects.
Conclusion
Crowd cheering is an exciting sound that can get your adrenaline pumping. If you want to create this effect in your videos, there are a few different ways to do it. One option is to use the crowd cheering sound effect available in video editing software like Filmora. This effect can add excitement and energy to your videos. You can find crowd cheering sound effects in different audio libraries and online. Whichever method you choose, be sure to experiment with the sound to get the desired effect.
Best Nature Sounds Apps for iOS and Android
Best Nature Sounds Apps for iOS and Android

Benjamin Arango
Apr 26, 2024• Proven solutions
In today’s challenging times, when stress and anxiety has become inevitable for a majority of population, there is a constant search for solutions that will enable people to live a peaceful and pleasant life. Here, the technology comes to their rescue with nature sound effects app.
These applications provide multiple sounds related to the Nature. The users just need to download any of these programs, and select the desired tone according to their choice. Such mobile software also offer numerous relaxing audios that assist in achieving a deeper level of concentration during the meditation.
10 Best Nature Sounds Apps
1. YouTube
YouTube is also one of the important apps for nature sounds where one can get almost any kind of relaxing sounds related to the Nature.
Binaural beats videos, where two different frequencies of sounds are combined to create a new frequency tone are getting highly popular among people. These are believed to help in lowering stress, anxiety and depression and increase concentration, attention, and efficiency of an individual.
It can also be helpful in attaining mental peace and serenity. The app even contains peaceful meditation sounds that ease the ability to focus and remain relaxed during the whole process. It is highly a user-friendly app and is absolutely free to download on the Android Smartphones.
2. Atmosphere: Relaxing Sounds
Compatible with Android 5.0 or up , and iOS 10.0 or later

Atmosphere is one of the best apps for nature sounds. It is custom-made to help people relieve stress and relax their mind.
The key feature of this application is that it allows users to import their personalized audios and mix them with various default acoustics available within the app itself.
The soothing sounds available here are divided into 8 different environments such as Beach, City, Park, Countryside, Home, Underwater, Forest and Oriental. Users can also mix and match the sounds between environments to produce a tailored theme.
3. Rainy Mood
Compatible with both iOS and Android OS 5.0 and up

Rainy Mood provides the most genuine rain, thunderstorm, and lightening sounds available online.
It not only relieves tension and anxiety but also helps users suffering from insomnia.
This app even contains natural white noise facility that helps in getting rid of any unwanted sounds around us.
The various rain sounds are available here in different environments such as heavy rain, tropical rain, umbrella, rain on tent, rain on porch etc. The best thing about this app is that it can work in offline mode, i.e. without any Internet connection. This eventually results in less power consumption.
4. Animal Sounds
Compatible with Android 4.1 and up

Animal Sounds is a one-stop destination for all animal lovers. The program provides the most detailed information about animals, and also contains hundreds of animal sounds and photographs from all over the globe.
The quality of audios and pictures is remarkably high and clear. The sounds here are categorized under pet animals, mammals, farm animals, bird sounds, wild animals, reptiles and amphibians.
The application also provides the facility of customized ringtones and wallpapers to its users.
5. Sleep Sounds
Compatible with Android 4.4 or later
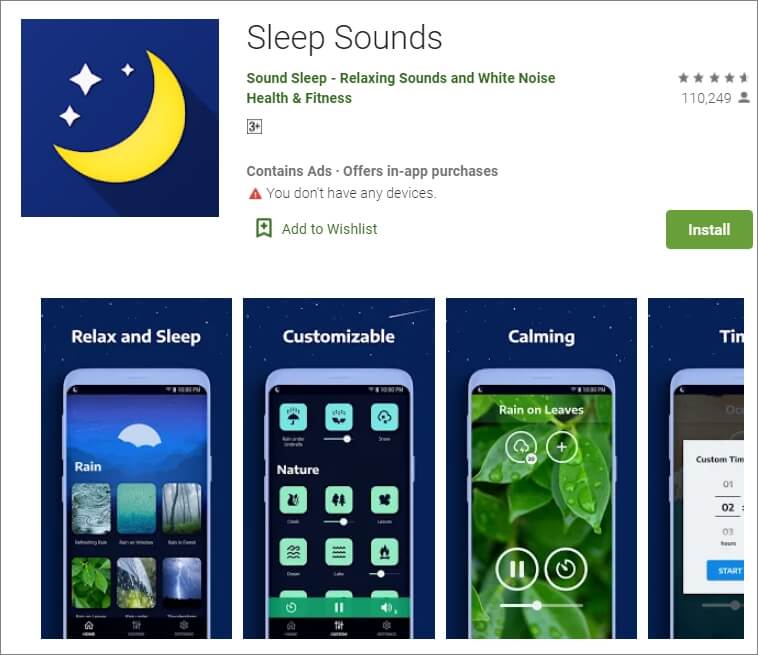
Sleep Sounds is one of the top trending apps nowadays owing to the increasing problems of insomnia and irregular sleep patterns among people. It is very helpful for an uninterrupted quality sleep.
The calm and soft music gradually tranquilizes the mind and the user eases into a good sleep. Its interface is user-friendly with beautiful images in the background.
The sounds here are categorized under rain, nature, relax, transport, noise, and white noise classes. This app also works without an Internet connection.
6.Calm
Compatible with Android and iOS 10.0 and watchOS 6.0 or later
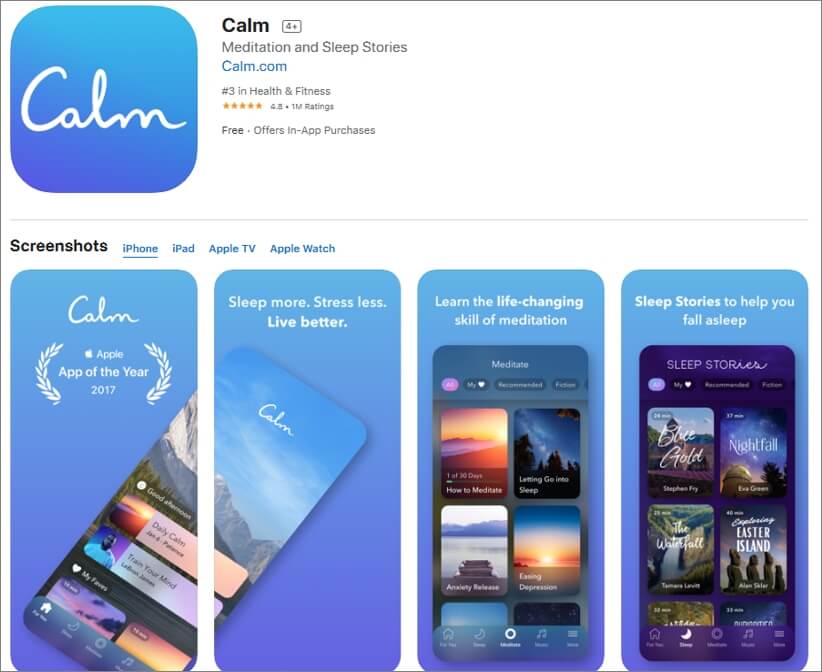
Calm is best suitable for the people who practice meditation on a daily basis. It is available for free and can be used by the beginners as well as experienced users.
The main features include guided meditation programs, breathing sessions, adult bed-time stories, masterclasses by the international coaches, etc.
Here, one can choose a personalized guide for meditation from several topics such as relationships, self-esteem, breaking habits, forgiveness, mindfulness, etc. Users can even track their daily progress on the basis of time spent by them on the app.
7. Ambience – Nature sounds: sleep and meditation
Compatible with Android 4.2 and up .
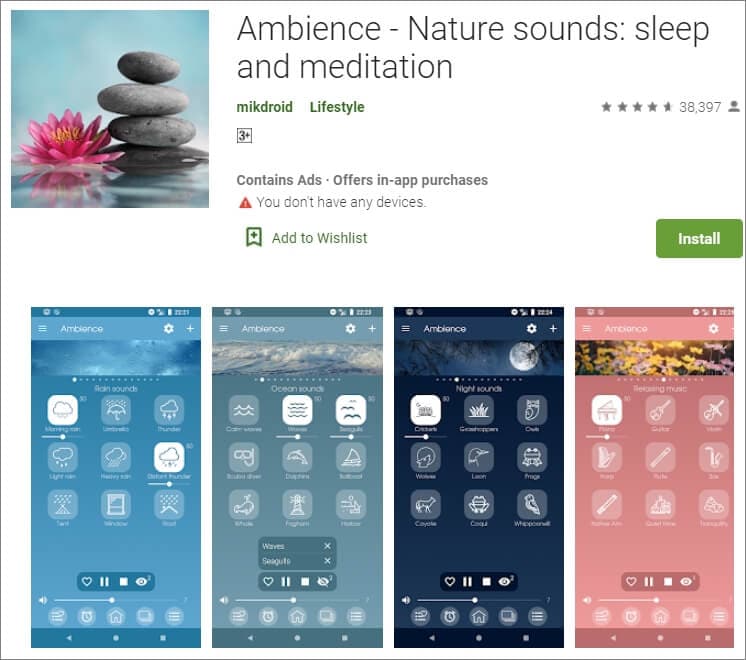
Ambience is another one of the most popular apps for nature sounds providing peace and serenity to its users through relaxing and soothing tones.
It has a very simple and clean user interface which makes it a highly demanding program. The main features include the facility of mixing maximum 10 sounds at the same time. Along with various preset mixtures of audios that are available here, users can also save their customized combinations for future use.
8. Naturespace: Sleep Relax Focus
Compatible with Android 4.0 or up and iOS 9.0 or later
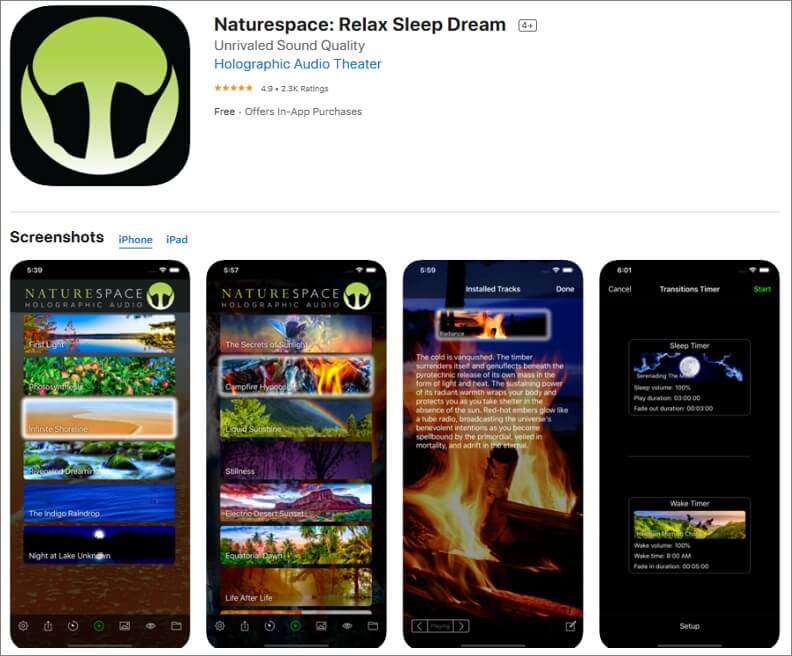
Naturespace is a unique app containing real time 3D recordings of natural places such as forests, deserts, mountains, etc. The equipment used in the program for recording the sounds are of extremely high quality, and as a result, the listening experience is out of this world.
The clarity of the sound surpasses almost every other application available in this genre of nature sound apps. It also provides the facility of sleep and wake timer to its users. The simple user interface along with earbud optimisation facility makes the software highly efficient and popular among people.
9. SimplyNoise – Free White Noise
Compatible with iOS 8.0 or later and Android
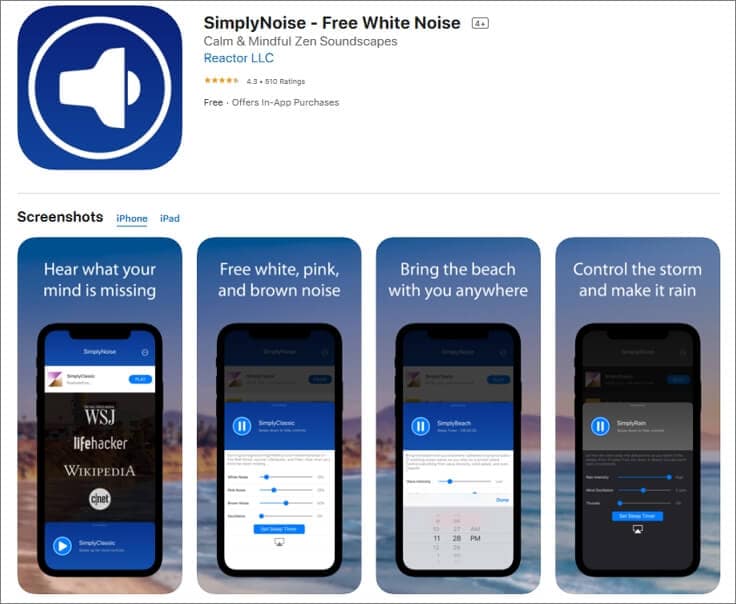
Simply Noise is one of the most basic apps for nature sounds as it provides only one acoustic without any background noises. As there are no such complexities involved, it can also be used by people who are not tech-savvy.
The categorization of sounds is done here as white noise, pink noise, and brown noise. Users can select any of these according to their requirement.
This app is best suitable for people who are unable to concentrate on a particular thing, or suffer from sleeping disorder. Sleep-timer option is also available here.
10. aSleep
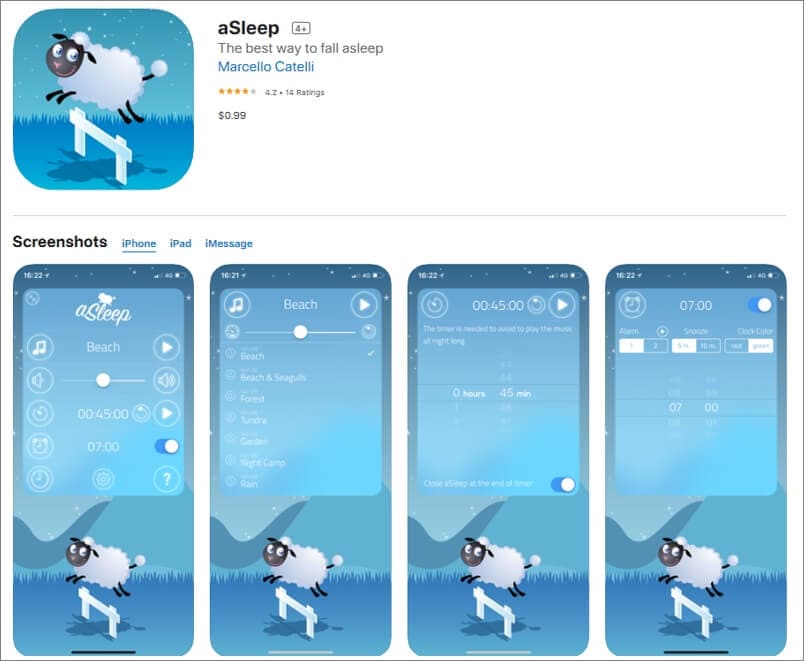
Available for iOS devices like iPhone and iPad, aSleep offers around 64 realistic stereo nature sounds to help you relax your mind and fall asleep almost instantaneously. With the built-in Timer feature, the music can be programmed to stop automatically after a certain amount of time to save your device’s battery.
Furthermore, the also works as an alarm clock that wakes you up with nature sounds at your predefined hour. The application is also good for kids as it can be used to play lullabies to help them get a tight sleep at night. And the program does all this without collecting any data from your iDevice.
What Is the Best Rain Sound App?
Among various rain sound applications available online, Rainy Mood is the most popular one that enjoys high star rating. When it comes to rain sounds, there is no match to it. It mainly includes 4 rain scenes namely Classic, Ocean, Countryside and Cafe. These genres can be customized according to different tastes and preferences.
What Are the Different Sounds of Nature?
The nature is made up of 5 basic elements which include Air, Water, Fire, Earth and Space. These components constitute various natural acoustics. Some examples are music of the rain, thunderstorm or a waterfall, wind blows, sounds of leaves and water streams, chirping of birds or grasshoppers, stridulation of insects like crickets, etc. All these sounds are beautifully incorporated in nature sound effects app.
In case that you want to add some nature sound to your video clip, you can try Wondershare Filmora, which features an audio library containing different nature sound effects as well. Download the free trial version of Filmora and have a try.


Besides adding sound to video, you can also add some elemental 2D visual effects to videos to make it cooler.
Benjamin Arango
Benjamin Arango is a writer and a lover of all things video.
Follow @Benjamin Arango
Benjamin Arango
Apr 26, 2024• Proven solutions
In today’s challenging times, when stress and anxiety has become inevitable for a majority of population, there is a constant search for solutions that will enable people to live a peaceful and pleasant life. Here, the technology comes to their rescue with nature sound effects app.
These applications provide multiple sounds related to the Nature. The users just need to download any of these programs, and select the desired tone according to their choice. Such mobile software also offer numerous relaxing audios that assist in achieving a deeper level of concentration during the meditation.
10 Best Nature Sounds Apps
1. YouTube
YouTube is also one of the important apps for nature sounds where one can get almost any kind of relaxing sounds related to the Nature.
Binaural beats videos, where two different frequencies of sounds are combined to create a new frequency tone are getting highly popular among people. These are believed to help in lowering stress, anxiety and depression and increase concentration, attention, and efficiency of an individual.
It can also be helpful in attaining mental peace and serenity. The app even contains peaceful meditation sounds that ease the ability to focus and remain relaxed during the whole process. It is highly a user-friendly app and is absolutely free to download on the Android Smartphones.
2. Atmosphere: Relaxing Sounds
Compatible with Android 5.0 or up , and iOS 10.0 or later
Atmosphere is one of the best apps for nature sounds. It is custom-made to help people relieve stress and relax their mind.
The key feature of this application is that it allows users to import their personalized audios and mix them with various default acoustics available within the app itself.
The soothing sounds available here are divided into 8 different environments such as Beach, City, Park, Countryside, Home, Underwater, Forest and Oriental. Users can also mix and match the sounds between environments to produce a tailored theme.
3. Rainy Mood
Compatible with both iOS and Android OS 5.0 and up
Rainy Mood provides the most genuine rain, thunderstorm, and lightening sounds available online.
It not only relieves tension and anxiety but also helps users suffering from insomnia.
This app even contains natural white noise facility that helps in getting rid of any unwanted sounds around us.
The various rain sounds are available here in different environments such as heavy rain, tropical rain, umbrella, rain on tent, rain on porch etc. The best thing about this app is that it can work in offline mode, i.e. without any Internet connection. This eventually results in less power consumption.
4. Animal Sounds
Compatible with Android 4.1 and up
Animal Sounds is a one-stop destination for all animal lovers. The program provides the most detailed information about animals, and also contains hundreds of animal sounds and photographs from all over the globe.
The quality of audios and pictures is remarkably high and clear. The sounds here are categorized under pet animals, mammals, farm animals, bird sounds, wild animals, reptiles and amphibians.
The application also provides the facility of customized ringtones and wallpapers to its users.
5. Sleep Sounds
Compatible with Android 4.4 or later
Sleep Sounds is one of the top trending apps nowadays owing to the increasing problems of insomnia and irregular sleep patterns among people. It is very helpful for an uninterrupted quality sleep.
The calm and soft music gradually tranquilizes the mind and the user eases into a good sleep. Its interface is user-friendly with beautiful images in the background.
The sounds here are categorized under rain, nature, relax, transport, noise, and white noise classes. This app also works without an Internet connection.
6.Calm
Compatible with Android and iOS 10.0 and watchOS 6.0 or later
Calm is best suitable for the people who practice meditation on a daily basis. It is available for free and can be used by the beginners as well as experienced users.
The main features include guided meditation programs, breathing sessions, adult bed-time stories, masterclasses by the international coaches, etc.
Here, one can choose a personalized guide for meditation from several topics such as relationships, self-esteem, breaking habits, forgiveness, mindfulness, etc. Users can even track their daily progress on the basis of time spent by them on the app.
7. Ambience – Nature sounds: sleep and meditation
Compatible with Android 4.2 and up .
Ambience is another one of the most popular apps for nature sounds providing peace and serenity to its users through relaxing and soothing tones.
It has a very simple and clean user interface which makes it a highly demanding program. The main features include the facility of mixing maximum 10 sounds at the same time. Along with various preset mixtures of audios that are available here, users can also save their customized combinations for future use.
8. Naturespace: Sleep Relax Focus
Compatible with Android 4.0 or up and iOS 9.0 or later
Naturespace is a unique app containing real time 3D recordings of natural places such as forests, deserts, mountains, etc. The equipment used in the program for recording the sounds are of extremely high quality, and as a result, the listening experience is out of this world.
The clarity of the sound surpasses almost every other application available in this genre of nature sound apps. It also provides the facility of sleep and wake timer to its users. The simple user interface along with earbud optimisation facility makes the software highly efficient and popular among people.
9. SimplyNoise – Free White Noise
Compatible with iOS 8.0 or later and Android
Simply Noise is one of the most basic apps for nature sounds as it provides only one acoustic without any background noises. As there are no such complexities involved, it can also be used by people who are not tech-savvy.
The categorization of sounds is done here as white noise, pink noise, and brown noise. Users can select any of these according to their requirement.
This app is best suitable for people who are unable to concentrate on a particular thing, or suffer from sleeping disorder. Sleep-timer option is also available here.
10. aSleep
Available for iOS devices like iPhone and iPad, aSleep offers around 64 realistic stereo nature sounds to help you relax your mind and fall asleep almost instantaneously. With the built-in Timer feature, the music can be programmed to stop automatically after a certain amount of time to save your device’s battery.
Furthermore, the also works as an alarm clock that wakes you up with nature sounds at your predefined hour. The application is also good for kids as it can be used to play lullabies to help them get a tight sleep at night. And the program does all this without collecting any data from your iDevice.
What Is the Best Rain Sound App?
Among various rain sound applications available online, Rainy Mood is the most popular one that enjoys high star rating. When it comes to rain sounds, there is no match to it. It mainly includes 4 rain scenes namely Classic, Ocean, Countryside and Cafe. These genres can be customized according to different tastes and preferences.
What Are the Different Sounds of Nature?
The nature is made up of 5 basic elements which include Air, Water, Fire, Earth and Space. These components constitute various natural acoustics. Some examples are music of the rain, thunderstorm or a waterfall, wind blows, sounds of leaves and water streams, chirping of birds or grasshoppers, stridulation of insects like crickets, etc. All these sounds are beautifully incorporated in nature sound effects app.
In case that you want to add some nature sound to your video clip, you can try Wondershare Filmora, which features an audio library containing different nature sound effects as well. Download the free trial version of Filmora and have a try.
Besides adding sound to video, you can also add some elemental 2D visual effects to videos to make it cooler.
Benjamin Arango
Benjamin Arango is a writer and a lover of all things video.
Follow @Benjamin Arango
Customizing Audio Intensity: The Ultimate Guide to Volume Management in Audacity
Audacity is a free, open access, cross-platform sound editing and recording tool. It is compatible with Windows, Mac OS X, Linux, and various other operating systems. All of these aspects have contributed to Audacity’s worldwide popularity. Audacity features an amplified effect that alters the loudness of your chosen audio and other practical tools that can change the sound in different ways.
As a result, Audacity can not only assist you in modifying the level of an audio file, but it can also help you equalize, reduce, normalize, and so on.
Yes, you have heard it right, Audacity increase volume, but the primary question is how? But don’t worry, you will get the answer after reading the article. This article will explain how you can increase or decrease the volume of a whole and a specific segment of the audio file. Let’s get started.
In this article
01 How to Increase or Decrease Volume Without Distortion and Clipping in Audacity
02 How to Increase Volume of Multiple Files in Audacity?
03 How to Increase Volume in Certain Parts of Track?
04 What’s the Difference between Normalize and Amplify?
Part 1: How to Increase or Decrease Volume Without Distortion and Clipping in Audacity
Audio clipping occurs when the audio input becomes too loud for an amplifier to produce, and the surplus signal creates distortion. When editing, you cannot add additional volume to your audio clip forever because this would result in clipping. In this case, you can use the Audacity application to emphasize your material by turning the volume up or down without distortion and clipping on a track or recording.
Learn how Audacity increase volume without distortion by following the procedure described below:
Step 1: First, download and install the Audacity software on your computer.
Step 2: Select the File from the menu above and click Open to open the audio file.

Step 3: Choose the audio track, go to the Effect menu and pick the Amplify option from the drop-down menu.

Note: You can increase or decrease the volume by double-clicking the track and using the slider under the Gain title.
Step 4: Increase or decrease the volume by sliding the slider or typing the amplification value in the text box next to it in the Amplify window as needed.

Note: Ensure that the Allow Clipping checkbox remains unchecked to avoid clipping. Moreover, keep in mind that increasing the volume to a greater extent can result in distortion.
Related: How to Change Audio Volume in Filmora
Part 2: How to Increase Volume of Multiple Files in Audacity?
Audacity is an open-source audio editing tool. It is used for various purposes, like audio recording, music creation, and audio file editing. It also allows you to increase and decrease the volume of audio files.
You may also apply the modifications to multiple files at once, rather than one at a time. Check out the instructions below to learn how to change the volume of multiple audio files:
Step 1: Select the Import option from the File menu, and then pick the Audio option. Browse to your audio files, choose all of them, and then click the Open option.

Step 2: To select all the files, press Ctrl + A, click on the Effect option in the menu bar and pick Amplify.

Step 3: Now, either enter the value in the text box next to the Amplification Decibels tab or use the slider under it. To verify the operation of increasing the volume, check the allow clipping checkbox. When you’re through with the options, click the Ok button.

Step 4: Amplification will be applied to all the tracks. Go to the File option from the above menu to export the files and then select the Export option.

If you’re running Audacity on macOS computer, you can watch the video tutorial below to apply effects to multiple files.
Part 3: How to Increase Volume in Certain Parts of Track?
The audacity software also allows you to alter a specific section of an audio file. The selection tool can assist in locating a particular area of the track. After you’ve chosen a section of the audio file, you may utilize the amplification effect to increase its loudness. Check out the instructions below to learn how you can achieve it:
Step 1: Launch the Audacity software on the computer. To open the audio file, go to the File menu and select Open. You may also open the file by dragging it.
Step 2: Ensure that the Selection tool is active now. Click and hold the mouse left-click to move from one spot on the track to another.

Step 3: After picking the part, go to the Effect option from the menu and select Amplify.

Step 4: Now, for that specific region, modify the amplification and click OK. This will only change the volume for the area you have selected.

Part 4: What’s the Difference between Normalize and Amplify?
Amplify and Normalize are two essential features of the Audacity tool. Many people think they are the same thing, they are right up to some extent, but there exists a big difference between both the features. Before discussing the differences, you need to know what the terms Normalize and Amplify imply.
Amplify
It is the quickest approach to comprehend the effect’s name if you want to know precisely what impacts are. The frequency of the vibration is enhanced to increase the amplification effect. As previously said, it raises a tiny sound.
Furthermore, because this amplification is extended to all frequencies and amplitude, the noise increases. If you choose ten sources and magnify them by ten decibels, each source will be ten decibels louder than your present sound.

Normalize
The meaning of normalizing is standardized, which is also a feature of its name. Whenever you pick an audio input and use the normalize feature, the level is adjusted automatically according to the previously indicated average volume size in Oda City.
As a result, when one sound source is normalized, there is no discernible difference between it and the amplification mechanism. Still, the effect is evident when several sound sources are performed concurrently.
By pressing Ctrl + A and selecting all ten various audio sources, you may compute the required standard of every sound source, enhance the audio input that is smaller than the normal, and create the audio signal more significant than the standard. Shrink the size of each noise source, such as the name, and normalize the sound.

Related: Best Audio Normalizers for Windows
Differences
To differentiate the meaning and impact precisely, amplification means increasing or reducing the sound, whereas normalizing means equalizing the sound. Simply defined, if you magnify ten sources by ten decibels, each of the shorter and louder noises equals ten decibels in their actual loudness.
When the ten sources are normalized, the louder sounds grow louder, conforming to the standard sound source size. Because the amplifying is done regardless, the little noises are going insane during this procedure.
Conclusion
All in all, Audacity does an excellent job at audio editing. If you simply need to modify an audio file, Audacity is a great option. For increasing and decreasing the volume of single and multiple audio files, Audacity is still one of the best bets in the market. We hope that now know how Audacity increase volume of the audio files after reading this article.
02 How to Increase Volume of Multiple Files in Audacity?
03 How to Increase Volume in Certain Parts of Track?
04 What’s the Difference between Normalize and Amplify?
Part 1: How to Increase or Decrease Volume Without Distortion and Clipping in Audacity
Audio clipping occurs when the audio input becomes too loud for an amplifier to produce, and the surplus signal creates distortion. When editing, you cannot add additional volume to your audio clip forever because this would result in clipping. In this case, you can use the Audacity application to emphasize your material by turning the volume up or down without distortion and clipping on a track or recording.
Learn how Audacity increase volume without distortion by following the procedure described below:
Step 1: First, download and install the Audacity software on your computer.
Step 2: Select the File from the menu above and click Open to open the audio file.
Step 3: Choose the audio track, go to the Effect menu and pick the Amplify option from the drop-down menu.
Note: You can increase or decrease the volume by double-clicking the track and using the slider under the Gain title.
Step 4: Increase or decrease the volume by sliding the slider or typing the amplification value in the text box next to it in the Amplify window as needed.
Note: Ensure that the Allow Clipping checkbox remains unchecked to avoid clipping. Moreover, keep in mind that increasing the volume to a greater extent can result in distortion.
Related: How to Change Audio Volume in Filmora
Part 2: How to Increase Volume of Multiple Files in Audacity?
Audacity is an open-source audio editing tool. It is used for various purposes, like audio recording, music creation, and audio file editing. It also allows you to increase and decrease the volume of audio files.
You may also apply the modifications to multiple files at once, rather than one at a time. Check out the instructions below to learn how to change the volume of multiple audio files:
Step 1: Select the Import option from the File menu, and then pick the Audio option. Browse to your audio files, choose all of them, and then click the Open option.
Step 2: To select all the files, press Ctrl + A, click on the Effect option in the menu bar and pick Amplify.
Step 3: Now, either enter the value in the text box next to the Amplification Decibels tab or use the slider under it. To verify the operation of increasing the volume, check the allow clipping checkbox. When you’re through with the options, click the Ok button.
Step 4: Amplification will be applied to all the tracks. Go to the File option from the above menu to export the files and then select the Export option.
If you’re running Audacity on macOS computer, you can watch the video tutorial below to apply effects to multiple files.
Part 3: How to Increase Volume in Certain Parts of Track?
The audacity software also allows you to alter a specific section of an audio file. The selection tool can assist in locating a particular area of the track. After you’ve chosen a section of the audio file, you may utilize the amplification effect to increase its loudness. Check out the instructions below to learn how you can achieve it:
Step 1: Launch the Audacity software on the computer. To open the audio file, go to the File menu and select Open. You may also open the file by dragging it.
Step 2: Ensure that the Selection tool is active now. Click and hold the mouse left-click to move from one spot on the track to another.
Step 3: After picking the part, go to the Effect option from the menu and select Amplify.
Step 4: Now, for that specific region, modify the amplification and click OK. This will only change the volume for the area you have selected.
Part 4: What’s the Difference between Normalize and Amplify?
Amplify and Normalize are two essential features of the Audacity tool. Many people think they are the same thing, they are right up to some extent, but there exists a big difference between both the features. Before discussing the differences, you need to know what the terms Normalize and Amplify imply.
Amplify
It is the quickest approach to comprehend the effect’s name if you want to know precisely what impacts are. The frequency of the vibration is enhanced to increase the amplification effect. As previously said, it raises a tiny sound.
Furthermore, because this amplification is extended to all frequencies and amplitude, the noise increases. If you choose ten sources and magnify them by ten decibels, each source will be ten decibels louder than your present sound.
Normalize
The meaning of normalizing is standardized, which is also a feature of its name. Whenever you pick an audio input and use the normalize feature, the level is adjusted automatically according to the previously indicated average volume size in Oda City.
As a result, when one sound source is normalized, there is no discernible difference between it and the amplification mechanism. Still, the effect is evident when several sound sources are performed concurrently.
By pressing Ctrl + A and selecting all ten various audio sources, you may compute the required standard of every sound source, enhance the audio input that is smaller than the normal, and create the audio signal more significant than the standard. Shrink the size of each noise source, such as the name, and normalize the sound.
Related: Best Audio Normalizers for Windows
Differences
To differentiate the meaning and impact precisely, amplification means increasing or reducing the sound, whereas normalizing means equalizing the sound. Simply defined, if you magnify ten sources by ten decibels, each of the shorter and louder noises equals ten decibels in their actual loudness.
When the ten sources are normalized, the louder sounds grow louder, conforming to the standard sound source size. Because the amplifying is done regardless, the little noises are going insane during this procedure.
Conclusion
All in all, Audacity does an excellent job at audio editing. If you simply need to modify an audio file, Audacity is a great option. For increasing and decreasing the volume of single and multiple audio files, Audacity is still one of the best bets in the market. We hope that now know how Audacity increase volume of the audio files after reading this article.
Also read:
- Discover the 8 Most Compelling Soundscapes for YouTube Debut Videos for 2024
- In 2024, Embark on a Complimentary Audacity Adventure Capturing Every Note
- The Ultimate List of Best Mac Audio Tagging Applications Reviewed
- Find Angry Dog Bark Effect for 2024
- New 2024 Approved Ultimate Selection Top-Rated Montage Anthems
- New In 2024, The Beginners Handbook to Implementing Plugin-Based Autotune on Audacity
- Updated 8 Must-Have Cartoon Audio Elements You Can Access Now 2023 Releases for 2024
- New In 2024, Expert Advice on Legal and Efficient Spotify Content Extraction Techniques
- Updated Comprehensive Vimeo Video Breakdown Including Aspect Ratio
- Choosing Your Perfect Speech Logger An All-Encompassing Guide to No-Monetary Options for 2024
- New Can Advanced Audio Equalization Make a Difference in Sound Quality, In 2024
- After Effects Guide to Elevating Song Visualization
- In 2024, Discover the Leading Free Audio Modification Software of the Year
- Updated In 2024, Voice Alteration Devices A Guide to Introductions, Assessments, and Substitutes
- New Instruction 1 (Same Diffits Level) Provide a List of Five Alternative Phrases that Convey Similar Meaning to Thrilling Adventure Series for Young Explorers
- New 2024 Approved Integrating AirPods with Your Desktop System
- Updated What Role Does Layering Play in Coherent Sound Production?
- Updated How to Get a Dry Sound Removing Hiss From Audio
- In 2024, Leading Audio-Based Multiplayer Conversation Software for Gamers
- New 2024 Approved Navigating Through Music Tech Top 7 DAWs for Fostering Exceptional Guitar Recordings (Updated )
- Updated In 2024, 10 Most Popular Software to Detach Audio From Video
- New Silencing the Howling Winds of Digital Footage Captured by Mobile Phones for 2024
- Acoustic Extraction Protocols Taking Sound Out of Video Footage for 2024
- Updated Harmonize Your Hearings Top Software to Extract Clean Soundscapes From Original Recordings for 2024
- Clearer Conversations at a Touch Selecting the 7 Most Advanced Voice Correction Tools for Android Users
- In 2024, Navigating Audio Tweaks Mastering Speed & Frequency Shifts Online
- In 2024, Best 3 Samsung Galaxy A05 Emulator for Mac to Run Your Wanted Android Apps | Dr.fone
- In 2024, Ultimate Guide from Xiaomi Civi 3 FRP Bypass
- New 2024 Approved Download 4K Videos in MP4 The Best Conversion Methods Revealed
- In 2024, 7 Ways to Lock Apps on Apple iPhone 8 Plus and iPad Securely | Dr.fone
- How to Fix My Vivo Y100A Location Is Wrong | Dr.fone
- A Step-by-Step Guide on Using ADB and Fastboot to Remove FRP Lock on your Lava Storm 5G
- How To Unlock Any Poco X5 Pro Phone Password Using Emergency Call
- In 2024, How to Mirror PC Screen to Itel P55 Phones? | Dr.fone
- A Step-by-Step Guide on Using ADB and Fastboot to Remove FRP Lock from your Oppo Reno 10 Pro 5G
- Updated Selected Overdub Voice with AI Virbo At Its Finest
- Updated In 2024, The Best of the Best Top 8 Video Animation Apps for Android, iOS, and iPad
- How to Transfer Data from Honor Magic 6 to Samsung Phone | Dr.fone
- Remove the Lock Screen Fingerprint Of Your Samsung Galaxy A25 5G
- Updated Alternatives to VirtualDub A Comprehensive List for 2024
- How to Change/Fake Your Vivo Y100i Power 5G Location on Viber | Dr.fone
- How to Resolve Xiaomi Redmi 12 5G Screen Not Working | Dr.fone
- In 2024, Latest Guide How To Bypass Samsung Galaxy F54 5G FRP Without Computer
- Updated Shine On Best Video Brightening Apps for Mobile and Desktop for 2024
- Updated Kapwing Slow Motion Tutorial A Beginners Guide to Slowing Down Your Videos for 2024
- 3 Best Tools to Hard Reset Itel P55 | Dr.fone
- New 2024 Approved Make a Killer Gaming Intro Best Software for PC and Mac
- New Elevate Your Storytelling How to Add Professional 3D Effects to Your Windows Videos for 2024
- iPogo will be the new iSpoofer On Vivo Y100A? | Dr.fone
- New In 2024, Best Bokeh Effects Apps
- Title: Updated Collective Echo Boom Impact
- Author: Jacob
- Created at : 2024-05-20 00:03:59
- Updated at : 2024-05-21 00:03:59
- Link: https://audio-shaping.techidaily.com/updated-collective-echo-boom-impact/
- License: This work is licensed under CC BY-NC-SA 4.0.
