
:max_bytes(150000):strip_icc():format(webp)/tclsclass-0185b3ecd41d454589d2a9984629b919.jpg)
Updated 2024 Approved The Swift Method for Rescaling Audio Playback Rates
The Swift Method for Rescaling Audio Playback Rates
If you have a music file, and you notice that it is a bit slow or fast, making the entire ambiance kind of dull or overly exciting respectively, you can change audio speed to get the track right as per your mood. However, when you make any such adjustments, some unwanted effects can be experienced, such as format limitations while exporting, changes in the pitch of the sound, etc.
That said, here, you will learn how to change audio speed with the least adverse effects using some of the most popular and highly recommended tools.
How to Change Audio Speed in Filmora
Being a lightweight and less resource-intensive post-production tool, Filmora is admired by several professionals across the globe and is many times preferred over other editing programs like Adobe Premiere Pro and Final Cut Pro X. Easy-to-understand UI and large-sized, clearly visible options and buttons are what make Filmora extremely popular among those who are new to the industry and don’t have a computer with a powerful processor, gigantic memory, and enormous GPU.
For Win 7 or later (64-bit)
For macOS 10.12 or later
You can follow the steps given below to learn how to change audio speed with Wondershare Filmora:
Step 1: Import Audio and Add to Filmora Timeline
Launch Filmora on your Windows or Mac computer, make sure that the Media icon is selected from the standard toolbar at the top, click the + icon in the Media (also referred to as Library here) window (on Mac) or anywhere in the Media window itself (on Windows) from the upper-left corner of the interface, and import the audio file that you want to manage the playback speed of. Next, drag the media file from the Library to the timeline.

Step 2: Increase or Decrease Audio Speed
Ensure that the audio track is selected in the timeline. Click the Speedometer icon from the timeline toolbar at the upper section, hover mouse to the Slow option from the menu, and click your preferred value form the submenu to reduce the sound speed. Likewise, hover the mouse to the Fast option, and choose a value from the submenu to increase it.

Note: Usually, the audio pitch wouldn’t change as long as you pick the values anywhere between 0.5x and 5x. However, if you select any option beyond this range, you may experience variations in the pitch according the value you selected.
Step 3: Set Custom Speed or Reverse the Audio
Click the Speedometer icon from above the timeline, and click Custom Speed from the menu. Use the slider to slow down (move to the left) or speed up (move to the right) the audio on the Custom Speed box. Alternatively, you can manually enter your preferred value in the available field for granular control. In addition, you can also check the Reverse Speed box to reverse the audio if need be.

Step 4: Export the Output
Click EXPORT from the top-center area of the interface, go to the Local tab on the Export box that opens next, select your preferred audio format from the Format list in the left, make necessary customizations from the right pane, and click EXPORT from the bottom-right corner of the box to export the audio with the modified speed.

How to Change the Speed of Audio with Video in Filmora
The process to change audio speed that also has a video is identical to what is explained in the previous section. The only additional step required in this case is separating the audio track from that of video.
You can learn how to get this done by following the instructions given below:
Step 1: Import File to Media Window and then Add to Timeline
Use the method explained in Step 1 of the previous section to import a file to Filmora, drag the media to the timeline, and click MATCH TO MEDIA when the Project Setting box appears and prompts for confirmation. Note: Except for the Project Setting box, the rest of the process for adding audio and video files to the timeline is the same.
Step 2: Separate Audio from Video
Select and then right-click the video track with audio in the timeline, and click Detach Audio from the context menu.

Step 3: Adjust the Audio Speed
After the audio is detached, you can select the audio track and follow the method explained in the previous section to adjust its speed as needed. As for the video, you can use the trimming and cropping options to adjust its duration and size and export the entire project as explained in Step 4 of the previous section. Note: To export the project as video, all you need to do is, choose a video format like MP4 or something similar to that when on the Export box.
How to Change Audio Speed without Changing Pitch in Audacity for Free
One of the most downloaded, used, and admired applications, Audacity, is an open-source and free audio editing software available for Windows, Mac, and Linux computers in both x32 and x64 variants. The software has all the professionals’ tools for basic to advanced sound editing to produce industry-standard outputs.
You can follow the steps given below to learn how to change audio speed with Audacity without changing the pitch of the sound:
- Launch Audacity
- Click File
- Go to Import > Audio

- Import the audio you want to speed up or slow down
- Press Ctrl + A on the keyboard to select the whole audio track
- Go to the Effect menu
- Click Change Tempo

- In the Percent Change field, enter a value with or without minus (-) to reduce or increase the tempo of the audio respectively.

- Click OK
- Go to file> Export
- Select your preferred option from the submenu to export the modified audio as needed
Note: Changing the tempo usually doesn’t change the pitch of the audio up to some extent. However, you can expect some variations in the pitch if the new tempo value is too high or too low.
Conclusion
You may want to slow down or speed up audio if the existing one is not up to the mark, and you wish to manage the ambiance with the help of the music track either while playing a video or when merely a soundtrack is to be played during some event. In either case, the best tool for all your needs is Wondershare Filmora, and if you are looking for a program dedicated to audio only, Audacity is something worth trying.
Versatile Video Editor - Wondershare Filmora
An easy yet powerful editor
Numerous effects to choose from
Detailed tutorials provided by the official channel
For Win 7 or later (64-bit)
For macOS 10.12 or later
You can follow the steps given below to learn how to change audio speed with Wondershare Filmora:
Step 1: Import Audio and Add to Filmora Timeline
Launch Filmora on your Windows or Mac computer, make sure that the Media icon is selected from the standard toolbar at the top, click the + icon in the Media (also referred to as Library here) window (on Mac) or anywhere in the Media window itself (on Windows) from the upper-left corner of the interface, and import the audio file that you want to manage the playback speed of. Next, drag the media file from the Library to the timeline.
Step 2: Increase or Decrease Audio Speed
Ensure that the audio track is selected in the timeline. Click the Speedometer icon from the timeline toolbar at the upper section, hover mouse to the Slow option from the menu, and click your preferred value form the submenu to reduce the sound speed. Likewise, hover the mouse to the Fast option, and choose a value from the submenu to increase it.
Note: Usually, the audio pitch wouldn’t change as long as you pick the values anywhere between 0.5x and 5x. However, if you select any option beyond this range, you may experience variations in the pitch according the value you selected.
Step 3: Set Custom Speed or Reverse the Audio
Click the Speedometer icon from above the timeline, and click Custom Speed from the menu. Use the slider to slow down (move to the left) or speed up (move to the right) the audio on the Custom Speed box. Alternatively, you can manually enter your preferred value in the available field for granular control. In addition, you can also check the Reverse Speed box to reverse the audio if need be.
Step 4: Export the Output
Click EXPORT from the top-center area of the interface, go to the Local tab on the Export box that opens next, select your preferred audio format from the Format list in the left, make necessary customizations from the right pane, and click EXPORT from the bottom-right corner of the box to export the audio with the modified speed.
How to Change the Speed of Audio with Video in Filmora
The process to change audio speed that also has a video is identical to what is explained in the previous section. The only additional step required in this case is separating the audio track from that of video.
You can learn how to get this done by following the instructions given below:
Step 1: Import File to Media Window and then Add to Timeline
Use the method explained in Step 1 of the previous section to import a file to Filmora, drag the media to the timeline, and click MATCH TO MEDIA when the Project Setting box appears and prompts for confirmation. Note: Except for the Project Setting box, the rest of the process for adding audio and video files to the timeline is the same.
Step 2: Separate Audio from Video
Select and then right-click the video track with audio in the timeline, and click Detach Audio from the context menu.
Step 3: Adjust the Audio Speed
After the audio is detached, you can select the audio track and follow the method explained in the previous section to adjust its speed as needed. As for the video, you can use the trimming and cropping options to adjust its duration and size and export the entire project as explained in Step 4 of the previous section. Note: To export the project as video, all you need to do is, choose a video format like MP4 or something similar to that when on the Export box.
How to Change Audio Speed without Changing Pitch in Audacity for Free
One of the most downloaded, used, and admired applications, Audacity, is an open-source and free audio editing software available for Windows, Mac, and Linux computers in both x32 and x64 variants. The software has all the professionals’ tools for basic to advanced sound editing to produce industry-standard outputs.
You can follow the steps given below to learn how to change audio speed with Audacity without changing the pitch of the sound:
- Launch Audacity
- Click File
- Go to Import > Audio
- Import the audio you want to speed up or slow down
- Press Ctrl + A on the keyboard to select the whole audio track
- Go to the Effect menu
- Click Change Tempo
- In the Percent Change field, enter a value with or without minus (-) to reduce or increase the tempo of the audio respectively.
- Click OK
- Go to file> Export
- Select your preferred option from the submenu to export the modified audio as needed
Note: Changing the tempo usually doesn’t change the pitch of the audio up to some extent. However, you can expect some variations in the pitch if the new tempo value is too high or too low.
Conclusion
You may want to slow down or speed up audio if the existing one is not up to the mark, and you wish to manage the ambiance with the help of the music track either while playing a video or when merely a soundtrack is to be played during some event. In either case, the best tool for all your needs is Wondershare Filmora, and if you are looking for a program dedicated to audio only, Audacity is something worth trying.
Versatile Video Editor - Wondershare Filmora
An easy yet powerful editor
Numerous effects to choose from
Detailed tutorials provided by the official channel
“3 Top-Ranked Online Tools for Enhancing Audio Clarity”
There are times when we download certain videos online and when we play the videos, the volume seems to be very low. Naturally, watching such videos is never going to be comfortable because you have to strain your attention to listen to the dialogues. Besides, the background sound effects will not be prominent which will make the video watching experience underwhelming. That is where an audio booster online tool is useful.
There is no need to download any video volume booster software or app as you will need such a tool occasionally. That is why a video volume booster online tool is more effective. You need to upload your video whichever has low volume and adjust the volume as per requirement. Thereafter, you can export the modified video to save it on your device storage. Here is the list of the top 4 sound booster online for videos.
2. VideoLouder
VideoLouder is free to use audio volume booster online tool. You can increase the volume of any video file that you have downloaded on your hard drive. The online tool supports video file size up to 500 MB. If you want, you can also decrease the volume of the video file. You can directly go to the website and upload the video to increase or decrease the volume. You can even select the number of decibels of sound you want to adjust. Here are the key features of VideoLouder volume booster tool.

- Increase or decrease volume for free.
- Supports different video file formats like AVI, MP4, MPEG, MOV.
- Allows setting the decibels for increase or decrease.
- Allows video file size up to 500 MB which is quite generous.
How to boost video volume online with VideoLouder?
Step 1: From your device web browser, visit <www.videolouder.com>.
Step 2: You will have to click on ‘Browse’ button and select the video file from your device storage whose volume you want to increase or decrease.
Step 3: You will have to click on Select Action and choose the option of the ‘Increase Volume’ or ‘Decrease Volume’ as per requirements.
Step 4: There is the option of ‘How many decibels (dB)?’ where you have to choose the decibel of your preference for increasing or decreasing that much decibel value of sound.
Step 5: Finally, you will have to click on ‘Upload File’ and wait patiently for the video file to get uploaded and volume to get boosted as per your settings.
Thereafter, you can save the file on your device storage and listen to the changes.
3. FileConverto
This is another legitimate MP4 volume booster online to adjust the volume of your video files. Not just MP4 files, you can upload different file formats including AVI and MOV. It is absolutely free to use and has an easy and simple user interface. However, just like other online volume boosters, it also lets you import video having a maximum size of 500 MB. Even FileConverto allows you to customize the decibels freely. Here are the features of FileConverto online tool.

- Can increase as well as decrease volume of video files.
- Ability to customize sound as per decibel requirements.
- Supports multiple video file formats apart from MP4.
- Does not require the setting up of any account.
How to Boost Video Volume Online with FileConverto?
Step 1**:** From your web browser, visit fileconverto.com/boost-video-volume
Step 2: Now click on Browse to select the video file from your device storage.
Step 3: From ‘Select desired action’ option, you will have to select ‘Increase Volume’ or ‘Decrease Volume’.
Step 4: You can set the dB accordingly from ‘How many decibels? option.
Step 5: Finally, click on Submit Now button and wait for the file to upload and volume to get adjusted.
4. Online Video Cutter Volume Booster
There is a wide collection of video editing tools available under Online Video Cutter. Volume Booster is specifically designed to increase the volume of video files. The user interface is better than most other video volume booster online tools. You can drag and drop your video file instantly on its user interface. In fact, you can even select video files from Google Drive and DropBox.
Moreover, you can also paste the URL of the video file such as from YouTube and boost its volume and thereafter, download the video file. You can also check its MP3 volume booster online for increasing or decreasing audio file volume. Here are the key features of Online Video Cutter Volume Booster tool.

- Drag and drop video file instantly.
- Upload video file from Google Drive and DropBox.
- Supports MP4, FLV, AVI, MOV, 3GP, MKV, WM and more file formats.
- Change video speed and preview the changes before downloading.
How to Boost Video Volume Online with Online Video Cutter Volume Booster**?**
Step 1: From your web browser, visit online-video-cutter.com/volume.
Step 2: Drag and drop your video file on the web interface.
Step 3: After the file is uploaded, click on Volume option. Adjust the slider at the bottom as per your requirement.
Step 4: Once done, click on Save button to save the modified video.
Bonus: Video Volume Booster Software
If you are looking for a dedicated software to boost the volume of your videos, we recommend Wondershare Filmora. A standalone software is useful when you have to boost the volume of multiple large video files. Uploading large video files online is a time-consuming as well as a heavy data-consumption process.
With Filmora, you can not only adjust the volume but also optimize various parameters of the audio in a video file. Filmora is a professional video editor and you can ever capture video through webcam as well as capture your screen video with system sound and mic audio. You can add video effects as well as audio effects during the editing phase and export the edited video files in different file formats.
Here are the steps to boost volume in Filmora.
Step 1: Download and install Filmora on your computer. Open the software and click on New Project.
For Win 7 or later (64-bit)
For macOS 10.12 or later
Step 2: Drag and drop your video file on the primary window. Thereafter, drag the video file on Video Timeline.

Step 3: Double-click on the video file to open Editing Panel. Go to Audio tab and adjust the volume and audio parameters to boost the overall volume. When done, click on Ok button.
Step 4: After adjusting, you can play the video to listen to the boosted volume. Finally, click on Export and save the edited video file to your hard drive.
The Bottom Line
Increasing the volume of a video to make the dialogues sound properly and amplify the background music is no more an issue. We have picked the best audio volume booster online where you can adjust video volume instantly. We have also recommended a professional sound booster software named Wondershare Filmora if you want to edit video volume on your computer.
How to boost video volume online with VideoLouder?
Step 1: From your device web browser, visit <www.videolouder.com>.
Step 2: You will have to click on ‘Browse’ button and select the video file from your device storage whose volume you want to increase or decrease.
Step 3: You will have to click on Select Action and choose the option of the ‘Increase Volume’ or ‘Decrease Volume’ as per requirements.
Step 4: There is the option of ‘How many decibels (dB)?’ where you have to choose the decibel of your preference for increasing or decreasing that much decibel value of sound.
Step 5: Finally, you will have to click on ‘Upload File’ and wait patiently for the video file to get uploaded and volume to get boosted as per your settings.
Thereafter, you can save the file on your device storage and listen to the changes.
3. FileConverto
This is another legitimate MP4 volume booster online to adjust the volume of your video files. Not just MP4 files, you can upload different file formats including AVI and MOV. It is absolutely free to use and has an easy and simple user interface. However, just like other online volume boosters, it also lets you import video having a maximum size of 500 MB. Even FileConverto allows you to customize the decibels freely. Here are the features of FileConverto online tool.
- Can increase as well as decrease volume of video files.
- Ability to customize sound as per decibel requirements.
- Supports multiple video file formats apart from MP4.
- Does not require the setting up of any account.
How to Boost Video Volume Online with FileConverto?
Step 1**:** From your web browser, visit fileconverto.com/boost-video-volume
Step 2: Now click on Browse to select the video file from your device storage.
Step 3: From ‘Select desired action’ option, you will have to select ‘Increase Volume’ or ‘Decrease Volume’.
Step 4: You can set the dB accordingly from ‘How many decibels? option.
Step 5: Finally, click on Submit Now button and wait for the file to upload and volume to get adjusted.
4. Online Video Cutter Volume Booster
There is a wide collection of video editing tools available under Online Video Cutter. Volume Booster is specifically designed to increase the volume of video files. The user interface is better than most other video volume booster online tools. You can drag and drop your video file instantly on its user interface. In fact, you can even select video files from Google Drive and DropBox.
Moreover, you can also paste the URL of the video file such as from YouTube and boost its volume and thereafter, download the video file. You can also check its MP3 volume booster online for increasing or decreasing audio file volume. Here are the key features of Online Video Cutter Volume Booster tool.
- Drag and drop video file instantly.
- Upload video file from Google Drive and DropBox.
- Supports MP4, FLV, AVI, MOV, 3GP, MKV, WM and more file formats.
- Change video speed and preview the changes before downloading.
How to Boost Video Volume Online with Online Video Cutter Volume Booster**?**
Step 1: From your web browser, visit online-video-cutter.com/volume.
Step 2: Drag and drop your video file on the web interface.
Step 3: After the file is uploaded, click on Volume option. Adjust the slider at the bottom as per your requirement.
Step 4: Once done, click on Save button to save the modified video.
Bonus: Video Volume Booster Software
If you are looking for a dedicated software to boost the volume of your videos, we recommend Wondershare Filmora. A standalone software is useful when you have to boost the volume of multiple large video files. Uploading large video files online is a time-consuming as well as a heavy data-consumption process.
With Filmora, you can not only adjust the volume but also optimize various parameters of the audio in a video file. Filmora is a professional video editor and you can ever capture video through webcam as well as capture your screen video with system sound and mic audio. You can add video effects as well as audio effects during the editing phase and export the edited video files in different file formats.
Here are the steps to boost volume in Filmora.
Step 1: Download and install Filmora on your computer. Open the software and click on New Project.
For Win 7 or later (64-bit)
For macOS 10.12 or later
Step 2: Drag and drop your video file on the primary window. Thereafter, drag the video file on Video Timeline.
Step 3: Double-click on the video file to open Editing Panel. Go to Audio tab and adjust the volume and audio parameters to boost the overall volume. When done, click on Ok button.
Step 4: After adjusting, you can play the video to listen to the boosted volume. Finally, click on Export and save the edited video file to your hard drive.
The Bottom Line
Increasing the volume of a video to make the dialogues sound properly and amplify the background music is no more an issue. We have picked the best audio volume booster online where you can adjust video volume instantly. We have also recommended a professional sound booster software named Wondershare Filmora if you want to edit video volume on your computer.
Essential Cartoon Noise Packs: A List of the Hottest Sounds to Enhance Your Animation
8 Best Cartoon Sound Effects You Can Download

Benjamin Arango
Mar 27, 2024• Proven solutions
The sound plays a significant role in the videos. Without the right sound effects, your videos become dull. It doesn’t create an impact to grab the attention of the viewers. Especially when it comes to attracting the attention of kids while they watch cartoons.
Are you working on a cartoon video for kids or some animated action cartoons? Use the cartoon sound effects to add more intensity and emotions to the videos. Every time creating a new sound effect for your cartoon video becomes difficult.
If you are on a strict budget, producing new content becomes almost impossible. In such situations, free cartoon sound effects are the best way to enhance your cartoon videos.
In this article, you will learn eight best cartoon sound effects that you can download and make your videos perfect.
8 Best Cartoon Sound Effects Resources
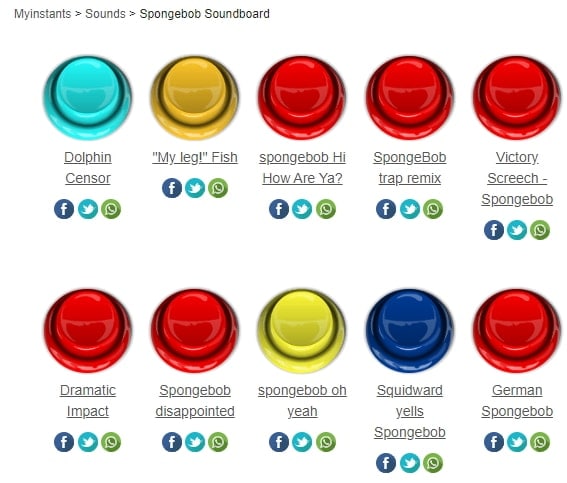
1. Spongebob Sound Effects
MyInstant’s Spongebob soundboard offers a range of cartoon sound effects that can be easily downloaded just by clicking on the Download mp3 sound effect button. You can listen to over 120 classic cartoon sound effects and download it for free. You can also copy the embed link and paste it to your website.
2. Hanna Barbera Sound Effects
From Sounddogs, Hanna Barbera sound effects library, you can find over 2200 cartoon sound effects that are divided into 4 CDs. It has almost all the legendary classic cartoon sound effects from the cartoon shows like Yogi Bear, Huckleberry Hound, the Flintstones, The Jetsons, Quick Draw McGraw, and all the rest of the gang.
You can download the mp3 cartoon sound effects completely free by clicking on the Download ID number mentioned at the right end of each link.
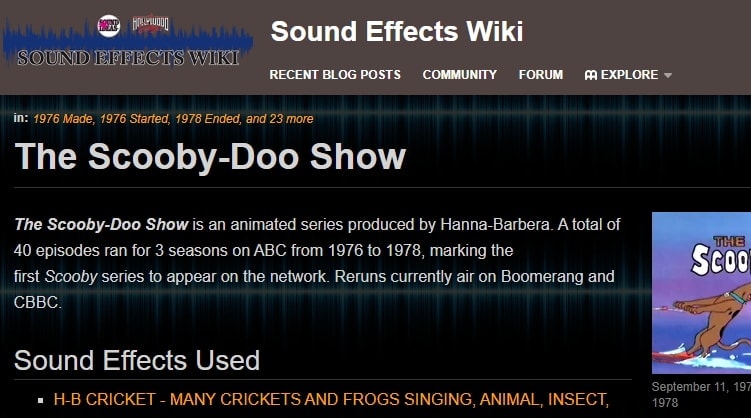
3. Scooby Doo Running Sound
Fandom’s Scooby Doo running sound effects offers all the ideas used in 40 episodes of Scooby Doo throughout the three seasons on ABC. It is over 37000 pages wiki that you can click and browse through the pages to find the right sound effect and download it for free.
4. Tom and Jerry Sound Effects
Pond5 offers 13 Tom and Jerry sound effects that you can listen by scrolling the cursor over the boxes and download the free preview of cartoon sound effects by clicking on Download Preview.
If you want to download the entire cartoon sound effect, you need to register, log in, and pay for it. There are filters like price, collections, duration, etc. to make your selection more precise.
5. Free SFX
In FreeSFX website, you can find a range of comical cartoon sound effects that includes classic effects like descend, boink, impact, pop, musical, running, rip and snap, bounce spring, slide whistle, squelch and splat, horn and loads more.
You need to log in to the website to download free cartoon sound effects.

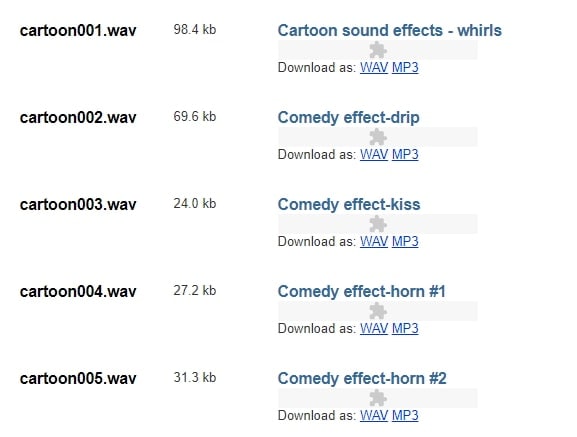
6.GRSites
With over 1980 cartoon sound effects, the GRSites is one of the best free sites for downloading both mp3 and WAV files. You can browse from a range of categories to find the best cartoon sound effects for your videos.
7. Cartoon Running Sound Effect
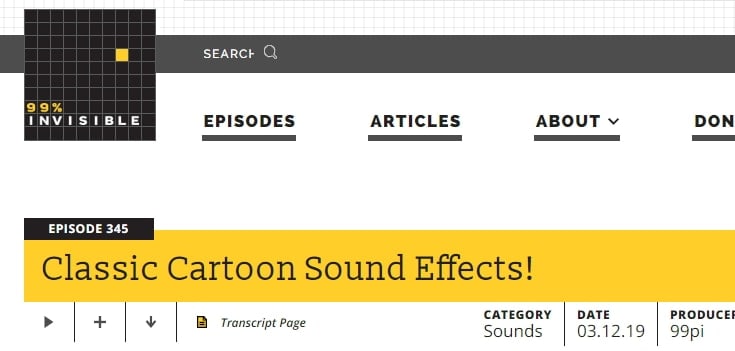
If you are looking for cartoon running sound effect, turn to Episode 345 in 99PercentInvisible. You can download the complete transcript page of around 30 minutes to use it in your video. Use the cartoon running sound effect produced by 99pi to enhance your video.
8. Big Fish Audio
The Big Fish Audio’s cartoon sound FX includes 23 free classic cartoon sound effects. The filters include a range of sound FX types, styles, format, brand, etc.
You can click on the cartoon sound effect and listen to it or add it to your playlist. But, if you wish to download the free cartoon sound effects, you need to register and pay to use the sound effect.

You may also like: How to Extract Audio from Videos on Win/Mac/Phone >>
Conclusion
Make your cartoon videos perfect with the fantastic free cartoon sound effects available for download completely free. With the range of free cartoon sound effects, you don’t need to worry about creating new sounds or expenses. You need to download the free sounds and beautifully enhance it with your creativity. There are several other sites for downloading free cartoon sound effects, but here you can check out some of the trusted ones to use.
Benjamin Arango
Benjamin Arango is a writer and a lover of all things video.
Follow @Benjamin Arango
Benjamin Arango
Mar 27, 2024• Proven solutions
The sound plays a significant role in the videos. Without the right sound effects, your videos become dull. It doesn’t create an impact to grab the attention of the viewers. Especially when it comes to attracting the attention of kids while they watch cartoons.
Are you working on a cartoon video for kids or some animated action cartoons? Use the cartoon sound effects to add more intensity and emotions to the videos. Every time creating a new sound effect for your cartoon video becomes difficult.
If you are on a strict budget, producing new content becomes almost impossible. In such situations, free cartoon sound effects are the best way to enhance your cartoon videos.
In this article, you will learn eight best cartoon sound effects that you can download and make your videos perfect.
8 Best Cartoon Sound Effects Resources
1. Spongebob Sound Effects
MyInstant’s Spongebob soundboard offers a range of cartoon sound effects that can be easily downloaded just by clicking on the Download mp3 sound effect button. You can listen to over 120 classic cartoon sound effects and download it for free. You can also copy the embed link and paste it to your website.
2. Hanna Barbera Sound Effects
From Sounddogs, Hanna Barbera sound effects library, you can find over 2200 cartoon sound effects that are divided into 4 CDs. It has almost all the legendary classic cartoon sound effects from the cartoon shows like Yogi Bear, Huckleberry Hound, the Flintstones, The Jetsons, Quick Draw McGraw, and all the rest of the gang.
You can download the mp3 cartoon sound effects completely free by clicking on the Download ID number mentioned at the right end of each link.
3. Scooby Doo Running Sound
Fandom’s Scooby Doo running sound effects offers all the ideas used in 40 episodes of Scooby Doo throughout the three seasons on ABC. It is over 37000 pages wiki that you can click and browse through the pages to find the right sound effect and download it for free.
4. Tom and Jerry Sound Effects
Pond5 offers 13 Tom and Jerry sound effects that you can listen by scrolling the cursor over the boxes and download the free preview of cartoon sound effects by clicking on Download Preview.
If you want to download the entire cartoon sound effect, you need to register, log in, and pay for it. There are filters like price, collections, duration, etc. to make your selection more precise.
5. Free SFX
In FreeSFX website, you can find a range of comical cartoon sound effects that includes classic effects like descend, boink, impact, pop, musical, running, rip and snap, bounce spring, slide whistle, squelch and splat, horn and loads more.
You need to log in to the website to download free cartoon sound effects.
6.GRSites
With over 1980 cartoon sound effects, the GRSites is one of the best free sites for downloading both mp3 and WAV files. You can browse from a range of categories to find the best cartoon sound effects for your videos.
7. Cartoon Running Sound Effect
If you are looking for cartoon running sound effect, turn to Episode 345 in 99PercentInvisible. You can download the complete transcript page of around 30 minutes to use it in your video. Use the cartoon running sound effect produced by 99pi to enhance your video.
8. Big Fish Audio
The Big Fish Audio’s cartoon sound FX includes 23 free classic cartoon sound effects. The filters include a range of sound FX types, styles, format, brand, etc.
You can click on the cartoon sound effect and listen to it or add it to your playlist. But, if you wish to download the free cartoon sound effects, you need to register and pay to use the sound effect.
You may also like: How to Extract Audio from Videos on Win/Mac/Phone >>
Conclusion
Make your cartoon videos perfect with the fantastic free cartoon sound effects available for download completely free. With the range of free cartoon sound effects, you don’t need to worry about creating new sounds or expenses. You need to download the free sounds and beautifully enhance it with your creativity. There are several other sites for downloading free cartoon sound effects, but here you can check out some of the trusted ones to use.
Benjamin Arango
Benjamin Arango is a writer and a lover of all things video.
Follow @Benjamin Arango
Also read:
- New Echoes Within Formats MP4s Guide to Effortless Audio Retrieval Techniques for 2024
- Updated 2024 Approved PluralEyes The Best Plug in to Sync Audio in Premiere Pro
- New The Pathway to Immaculate Audio Integration in Video Production for 2024
- New Elevate Your Audio Experience The Top 5 Android Editors for High-Fidelity Sounds
- New 2024 Approved Seamless Soundwave Capture Essential Techniques for Podcast Storage on Computers
- How to Add Music/ Audio to a GIF on Mac?
- Updated Vault of Unrestricted Guitar Resources Background Sounds and Artwork for 2024
- Updated Elevate Your Audio Experience Top 5 Voice Recorder Software for Phones and Tablets for 2024
- Updated Effortless Audiobook Production The Ultimate Instruction Manual for Aspiring Authors
- New 2024 Approved Elevate Your Listening Experience with 15 News-Inspired Melodies
- Updated Cutting-Edge Music Editing Software Roundup The Top 10 Compatible Apps for Windows and Mac
- 2024 Approved Ultimate Tutorial Isolating Pure Audio From the Webbed Soundscape in Audacity
- New Discovering the Elite 6 Leading Auto-Transcribing Software Solutions
- New 2024 Approved Identify the Aural Representation of a Bell Clangor
- New 2024 Approved Amplify Your Sound Mastering the Art of a High-Pitched Voice in Filmmaking
- In 2024, Audio Ducking in Adobe Premiere Pro on Win
- New A Symphony in One Merging Audio Files for a Unified Videography Narrative
- 2024 Approved Elevate Your Creative Output with These Audio Addition Methods in After Effects (Updated )
- Updated In 2024, Best Music Transcription Apps User-Endorsed Picks
- New 2024 Approved Where Can I Find Whistle Sounds Effect?
- Updated In 2024, Pinpointing the Top 8 AI-Driven Voice Processors for Windows, Mac, and Online Services
- New 2024 Approved Linux Masterclass Comparing the Best Audio Workflow Tools Available This Year
- Synching Visuals and Audio Step-by-Step Process for 2024
- New Pro Audio Tools An In-Depth Look at REAPERs Capabilities
- Updated 2024 Approved Insert Song Into iMovie Media Library
- Updated 2024 Approved Top 5 Mac-Compatible MP3 Audio Blending Tools
- Updated Mastering Podcast Production Utilizing Audacitys Features
- New Leading Voice-Over Platforms The Ultimate Guide for Digital Audio Converters for 2024
- New 2024 Approved The Ultimate Guide 7 Preeminent Mobile Applications for Clearer Phone Recordings
- Updated 2024 Approved The Ultimate Guide to Syncing Audio and Video in Adobe Premiere Pro
- How to Add Music/Audio to a GIF on Mac?
- Elite Voice Mimicry Suite - Windows & Apple Harmonization for 2024
- In 2024, 4 Most-Known Ways to Find Someone on Tinder For Apple iPhone 14 Pro by Name | Dr.fone
- The Most Useful Tips for Pokemon Go Ultra League On Tecno Pova 5 Pro | Dr.fone
- In 2024, How to Screen Mirror your Apple iPhone 12 Pro Max Display? | Dr.fone
- In 2024, Reasons why Pokémon GPS does not Work On Realme V30T? | Dr.fone
- In 2024, Where Is the Best Place to Catch Dratini On OnePlus Nord N30 5G | Dr.fone
- In 2024, The Updated Method to Bypass Infinix Smart 8 Plus FRP
- In 2024, Huawei Nova Y71 ADB Format Tool for PC vs. Other Unlocking Tools Which One is the Best?
- What Legendaries Are In Pokemon Platinum On Vivo Y27s? | Dr.fone
- In 2024, Top 12 Prominent Xiaomi 14 Ultra Fingerprint Not Working Solutions
- In 2024, How To Unlock A Found iPhone 15 Pro?
- Highlight Video Creation Top Picks for Desktop and Mobile Devices
- Updated The Ultimate List of Web-Based Audio Waveform Generators for 2024
- Does Samsung Galaxy M34 5G has native HEVC support?
- How to Unlock SIM Card on Vivo V30 Pro online without jailbreak
- In 2024, Do You Have a Loved Ones Birthday Fast Approaching, and Youre Wondering What to Do? A Birthday Photo Slideshow Is One Good Way to Celebrate the Person and Make Them Feel that They Are Loved
- Updated In 2024, From Novice to Pro Expert Advice on Choosing the Right YouTube to MP3 Converter
- Updated When It Comes to Video Editing, There Are Countless Software Options Available on the Market. However, Not All of Them Come with Useful Masking Tools. In This Article, We Will Be Discussing the Top 8 Video Editor with Useful Masking Tools for 2024
- In 2024, S Most Popular Video Editing Apps with Music Capabilities
- Updated In 2024, Top Picks Windows Movie Maker Replacements Youll Love
- In 2024, Top 5 Tracking Apps to Track Samsung Galaxy Z Flip 5 without Them Knowing | Dr.fone
- 4 Solutions to Fix Unfortunately Your App Has Stopped Error on Realme 11 Pro | Dr.fone
- Updated Free Video Cutting and Joining Apps for Android and iOS (2023 Review) for 2024
- 8 Solutions to Solve YouTube App Crashing on Honor Magic 5 | Dr.fone
- Updated The Ultimate Final Cut Pro Slideshow Tutorial for Beginners for 2024
- Updated Top-Rated Free AVI Video Rotation Tools Updated for 2024
- New 2024 Approved In This Article, We Will Take a Look at the 5 Best Alternatives to Windows Movie Maker that Help You Create Stunning Videos with Ease
- Updated 2024 Approved Make a Statement with Your Facebook Video Cover Sizing Essentials
- New Expert- The 5 Best Free WMV Video Editors
- 8 Best Apps for Screen Mirroring Samsung Galaxy A14 4G PC | Dr.fone
- Title: Updated 2024 Approved The Swift Method for Rescaling Audio Playback Rates
- Author: Jacob
- Created at : 2024-05-05 04:09:55
- Updated at : 2024-05-06 04:09:55
- Link: https://audio-shaping.techidaily.com/updated-2024-approved-the-swift-method-for-rescaling-audio-playback-rates/
- License: This work is licensed under CC BY-NC-SA 4.0.
