
:max_bytes(150000):strip_icc():format(webp)/asian-woman-talking-into-microphone-722208887-5b2a989730371300373a0447.jpg)
Updated 2024 Approved Securing Your Google Voice Chats Phone & Desktop Recording Techniques Explained
Securing Your Google Voice Chats: Phone & Desktop Recording Techniques Explained
Many people think that the call-recording feature is only helpful to deal with stalkers and obsessive exes. However, there are several other reasons as well.
Call recording features help you in numerous ways such as conducting remote interviews, keeping track of verbal agreements, and recording important meetings for later reference. A myriad of applications are available on iPhone and android.
Since most voice recording applications are expensive, Google voice turns out to be one of the best apps to record calls.

What Is Google Voice?
The Google voice recording app is available on Android and iOS app stores and enables users to record calls, send text messages, customize voicemails, and save call recording transcripts. Previously, this app required a Google Voice invite code for registration. But, now as a Gmail user, you can download and record your calls with Google Voice for free.
How to Use Google Voice
When you will register with Google voice recorder, you will receive a mobile number that connects your work phone, desk phone, mobile phone, and even VoIP lines. Using this app, you can allocate different callers on different phones. Furthermore, the application enables you to record calls and save call transcripts.
How Does Google Voice Work?
When you create a new account on Google voice, you receive a phone number for voicemails, texts, and calls. The number enables you to make international and domestic calls from your mobile devices and web browser. Google audio recorder allows users to choose their existing number. Now let’s explore some features of Google Voice:
- Call routing
- Call blocking
- Listen to voicemail before responding to a call
- Voicemail transcripts
- Google voice call recording
- Conference calling
- Choose a different ringtone for different users
- Free PC to phone calls within North America
- Free PC to PC video and voice calls
- Receive notifications
How to Record Calls with Google Voice?
Google voice is a built-in recording tool for iOS and android devices. This tool enables you to capture and record calls so that you don’t miss any important conversations. For instance, if you are taking an on-call session with your professor, you can record your calls with Google Voice and save them for later reference.
Also, you can use Google voice recording as a default application for incoming calls. However, before that, you should enable the application from Settings. Follow these steps to record your calls with Google Voice:
- Open the application and visit the homepage
- From the upper left corner choose settings
- Click on the ‘Calls’ option from the menu
- Find enable the incoming call options
- Once activated you can record your calls with Google Voice by pressing number 4 on the keypad.
How to Record a Google Voice Call on Android
Here are some steps to Google voice record call on Android:
1. Install Google Voice
Google voice is better than various paid voice recording applications that you can download from Google Play. Initially, most call recording application work fine, but after a while, the apps stop working. In this case, you can download a new app or purchase the subscription.
Therefore, make sure you record your calls with Google Voice and save t money. One drawback of Google Voice is that you can record incoming calls only. Google voice recorder doesn’t support outgoing calls.

2. Create a Google Voice Number
Now open the app and press the ‘Get Started’ tab on the landing page. This will open the ‘Manage accounts page. On this page, you have to choose your Google account to link with your new Google Voice number. After you choose an account, the app leads you to the Terms and Conditions page, where you can read the policy and Accept to proceed.

Alt Text: welcome to Google voice
A new page will open where you should choose a Google Voice number. Tap on ‘Search’ and find your city to pick a number. Also, you can choose suggested cities to get started. A list of numbers will appear on the following page. You can select any number you want to link with your Google account. Now a confirmation page will appear. On this page select the options and click ‘Next’.

Once you choose a new number, you have to verify your account with the existing number. Enter your mobile number and click on ‘Send Code’ to receive a verification code. The app’s algorithm will generate a six-digit code and send it to your existing number. Use this code to verify your identity. If the code is correct, your new Google voice recording number will activate. Now click on ‘Finish’ and you can record your calls with Google Voice.

3. Set Up Incoming Call Recordings
Still, there is a step left to record your calls. You need to go to mobile settings and enable call recording. To enable call recordings, you need to click on the menu icon and navigate to the ‘settings’ from the sidebar menu. Now select the ‘Incoming calls options’ and turn on the recordings.
4. Record Incoming Calls
After completing the setup, you can record incoming calls on your phone using Google Voice. However, every time you receive a call, you must open the dial pad and press 4 to start recording. As soon as you start recording, the caller will receive a verbal alert that notifies that the call is on recording mode. You can stop recording by pressing 4 one more time. This will also inform the user that you stopped the recording.

5. Access Recordings
You can easily check voice recordings for each call. All you need to do is open the last call details and press ‘Voicemail’. This will expand the list of recordings. Now tap on the play button and listen to the audio.
6. Save Transcripts
When you record your calls with Google Voice, the recordings will save in the app storage. However, you can save and share those recordings in your mobile phone storage by selecting the ellipsis (•••) button. You will find the button on the recording page as some options will appear on the screen. You have to choose ‘Copy transcript’ and paste it in the message or notepad. Keep in mind that you can only save transcripts of recorded calls.
Closing Word
Now that you know simple and easy steps to record your calls with Google Voice, you can grab your device and get started. The Google voice recorder is a significantly helpful app with built-in features. You can also create a video out of the recordings using a simple video editor, Wondershare Filmora .
For Win 7 or later (64-bit)
For macOS 10.12 or later
Filmora editing video empowers your story and allows you to splice multiple audio and videos. Learn how to edit audio using Filmora and transform your call recordings into something creative. Here are some benefits of using Wondershare Filmora:
- Audio equalize
- Audio enhancement
- Advanced text editing
- Video and audio controls
- Audio separation
- Audio-mixer
- Speed control
- Add background music
Versatile Video Editor - Wondershare Filmora
An easy yet powerful editor
Numerous effects to choose from
Detailed tutorials provided by the official channel
How to Record Calls with Google Voice?
Google voice is a built-in recording tool for iOS and android devices. This tool enables you to capture and record calls so that you don’t miss any important conversations. For instance, if you are taking an on-call session with your professor, you can record your calls with Google Voice and save them for later reference.
Also, you can use Google voice recording as a default application for incoming calls. However, before that, you should enable the application from Settings. Follow these steps to record your calls with Google Voice:
- Open the application and visit the homepage
- From the upper left corner choose settings
- Click on the ‘Calls’ option from the menu
- Find enable the incoming call options
- Once activated you can record your calls with Google Voice by pressing number 4 on the keypad.
How to Record a Google Voice Call on Android
Here are some steps to Google voice record call on Android:
1. Install Google Voice
Google voice is better than various paid voice recording applications that you can download from Google Play. Initially, most call recording application work fine, but after a while, the apps stop working. In this case, you can download a new app or purchase the subscription.
Therefore, make sure you record your calls with Google Voice and save t money. One drawback of Google Voice is that you can record incoming calls only. Google voice recorder doesn’t support outgoing calls.
2. Create a Google Voice Number
Now open the app and press the ‘Get Started’ tab on the landing page. This will open the ‘Manage accounts page. On this page, you have to choose your Google account to link with your new Google Voice number. After you choose an account, the app leads you to the Terms and Conditions page, where you can read the policy and Accept to proceed.
Alt Text: welcome to Google voice
A new page will open where you should choose a Google Voice number. Tap on ‘Search’ and find your city to pick a number. Also, you can choose suggested cities to get started. A list of numbers will appear on the following page. You can select any number you want to link with your Google account. Now a confirmation page will appear. On this page select the options and click ‘Next’.
Once you choose a new number, you have to verify your account with the existing number. Enter your mobile number and click on ‘Send Code’ to receive a verification code. The app’s algorithm will generate a six-digit code and send it to your existing number. Use this code to verify your identity. If the code is correct, your new Google voice recording number will activate. Now click on ‘Finish’ and you can record your calls with Google Voice.
3. Set Up Incoming Call Recordings
Still, there is a step left to record your calls. You need to go to mobile settings and enable call recording. To enable call recordings, you need to click on the menu icon and navigate to the ‘settings’ from the sidebar menu. Now select the ‘Incoming calls options’ and turn on the recordings.
4. Record Incoming Calls
After completing the setup, you can record incoming calls on your phone using Google Voice. However, every time you receive a call, you must open the dial pad and press 4 to start recording. As soon as you start recording, the caller will receive a verbal alert that notifies that the call is on recording mode. You can stop recording by pressing 4 one more time. This will also inform the user that you stopped the recording.
5. Access Recordings
You can easily check voice recordings for each call. All you need to do is open the last call details and press ‘Voicemail’. This will expand the list of recordings. Now tap on the play button and listen to the audio.
6. Save Transcripts
When you record your calls with Google Voice, the recordings will save in the app storage. However, you can save and share those recordings in your mobile phone storage by selecting the ellipsis (•••) button. You will find the button on the recording page as some options will appear on the screen. You have to choose ‘Copy transcript’ and paste it in the message or notepad. Keep in mind that you can only save transcripts of recorded calls.
Closing Word
Now that you know simple and easy steps to record your calls with Google Voice, you can grab your device and get started. The Google voice recorder is a significantly helpful app with built-in features. You can also create a video out of the recordings using a simple video editor, Wondershare Filmora .
For Win 7 or later (64-bit)
For macOS 10.12 or later
Filmora editing video empowers your story and allows you to splice multiple audio and videos. Learn how to edit audio using Filmora and transform your call recordings into something creative. Here are some benefits of using Wondershare Filmora:
- Audio equalize
- Audio enhancement
- Advanced text editing
- Video and audio controls
- Audio separation
- Audio-mixer
- Speed control
- Add background music
Versatile Video Editor - Wondershare Filmora
An easy yet powerful editor
Numerous effects to choose from
Detailed tutorials provided by the official channel
Streamlining Audio Management for Filmmakers: The Ins and Outs of Automated Ducking with Final Cut Pro X 2023
How to Do Automatic Audio Ducking in Final Cut Pro X

Benjamin Arango
Oct 26, 2023• Proven solutions
If you are working in post-production, then you might be familiar with the concept of audio ducking. In nutshell, it is a process in which the background sound of a clip is reduced and the voiceover is amplified. Therefore, with the help of sound ducking, we can focus on the dialogues without a noisy background track.
Lately, a lot of people have asked us about the process to do automatic audio ducking in Final Cut Pro X. Since it is a clip-based editing tool, it lacks a dedicated mixer to help us do FCPX audio ducking. Thankfully, there are third-party plugins and tools (like the FCPX AutoDuck) that can help us do the same. In this post, I will let you know how to do audio ducking in Final Cut Pro and its best alternative.
If you don’t want to use any plugins, see this article: How to sync in FCPX.
Part 1: How to Perform Audio Ducking in Final Cut Pro X?
If you have a video in which you have background music and a voiceover, then you can perform sound ducking in it. This will automatically enhance the quality of the voiceover and would mellow down the background music selectively. Sadly, the feature of audio ducking in Final Cut Pro has to be done manually as there are no instant automatic options in the tool presently.

Therefore, you can use any reliable third-party FCPX tool like Audified or AutoDuck to meet your requirements. For instance, let’s consider the example of FCPX AutoDuck, which is a paid macOS application. To perform FCPX audio ducking, you first have to export the music and voiceover as two dedicated files. Later, you can import them to FCPX AutoDuck to perform auto-ducking of the music.
Step 1: Export the Music Files
To perform audio ducking in Final Cut Pro, you can first launch the application on Mac and open your project. Since there is no FCPX audio ducking option, you first have to export the music files.
For this, you can just go to the main menu on Final Cut Pro and select File > Share > Master File. This will help you explore and save all the media files from Final Cut Pro.

Now, once the Master File window would be opened, you can go to the “Role” tab and select “Audio Only” as the output role. This will display a list of the background music and the voiceover file.

You can now select the files of your choice and click on the “Next” button to save them to any desired location on your Mac.
Step 2: Use FCPX AutoDuck to Do Automatic Sound Ducking
Great! Now, you can just open the FCPX AutoDuck application on your Mac via its Application or Spotlight. You can just give it a project name and drag-and-drop the speaker (voiceover) and the music files here. If you want, you can also import a filler file of your choice.

FCPX will also let you select the level of music ducking from its dedication option. There are also different options to set up things like setting up the window or pre-roll for the audio.

In the end, you can click on the “Duck” button and let FCPX AutoDuck perform automatic audio ducking on the files.
Step 3: Insert the Modified File to your Project
Once the FCPX audio ducking process is completed, it will generate an XML file. You can now just drag the XML file and drop it to your project in Final Cut Pro. Here, you can choose to select the XML file in the same project.

You can now copy the modified music clip, go to the timeline, and paste it at the starting of the video. Here, you can just mute the previous music clip and let the auto-duck audio play instead.

Part 2: The Best FCPX Alternative for Mac to Perform Automatic Audio Ducking
As you can see, it is pretty tough to do audio ducking in Final Cut Pro as there is no automatic feature in the tool. Therefore, you can consider using Wondershare Filmora for Mac to perform automatic sound ducking and save your time. It is an inbuilt feature in Filmora that would perform auto-ducking instantly, and you can also mark the level of ducking in the video.


Ideally, you can perform audio ducking on voiceover or another soundtrack in Wondershare Filmora. To perform music ducking via Wondershare Filmora on Mac, you can follow these steps:
Step 1: Import the Video Clip or Record Your Audio
To begin with, just launch Wondershare Filmora on your Mac and just drag-and-drop your media files to the application. You can also go to its menu and choose to import media files.

Once your video is imported, you can drag it to the timeline at the bottom to work on it. If you want, you can click on the voiceover icon (adjacent to the preview section) to record dialogues right away.

Apart from that, you can also import music files to your video or use the extensive range of royalty-free audio files that are available in Filmora.

Step 2: Perform Automatic Audio Ducking
Great! Now, on the timeline of Filmora, you can see your video and the music track. From here, you need to select the track that you want to amplify (like the voiceover).

Afterward, right-click the audio track and select the “Adjust Audio” option from the context menu.

This will open a dedicated Audio Mixer window on the screen. Just go to the Audio tab and enable the “Ducking” option to lower the volume of other audio tracks. You can also select the desired level for music ducking to implement.

Step 3: Export the Edited Video
That’s it! After performing audio ducking on Filmora, you can preview the results and further make the needed changes. In the end, you can click on the “Export” button and save the file in the format and resolution of your choice.

There you go! After following this guide, you can easily learn how to do audio ducking in Final Cut Pro X easily. Since there is no inbuilt FCPX audio ducking option, you can use a third-party tool like FCPX AutoDuck. Apart from that, if you are looking for a better alternative to do sound ducking, then simply use Wondershare Filmora. It is a user-friendly and resourceful application that would let you perform automatic music ducking like a pro.
Benjamin Arango
Benjamin Arango is a writer and a lover of all things video.
Follow @Benjamin Arango
Benjamin Arango
Oct 26, 2023• Proven solutions
If you are working in post-production, then you might be familiar with the concept of audio ducking. In nutshell, it is a process in which the background sound of a clip is reduced and the voiceover is amplified. Therefore, with the help of sound ducking, we can focus on the dialogues without a noisy background track.
Lately, a lot of people have asked us about the process to do automatic audio ducking in Final Cut Pro X. Since it is a clip-based editing tool, it lacks a dedicated mixer to help us do FCPX audio ducking. Thankfully, there are third-party plugins and tools (like the FCPX AutoDuck) that can help us do the same. In this post, I will let you know how to do audio ducking in Final Cut Pro and its best alternative.
If you don’t want to use any plugins, see this article: How to sync in FCPX.
Part 1: How to Perform Audio Ducking in Final Cut Pro X?
If you have a video in which you have background music and a voiceover, then you can perform sound ducking in it. This will automatically enhance the quality of the voiceover and would mellow down the background music selectively. Sadly, the feature of audio ducking in Final Cut Pro has to be done manually as there are no instant automatic options in the tool presently.
Therefore, you can use any reliable third-party FCPX tool like Audified or AutoDuck to meet your requirements. For instance, let’s consider the example of FCPX AutoDuck, which is a paid macOS application. To perform FCPX audio ducking, you first have to export the music and voiceover as two dedicated files. Later, you can import them to FCPX AutoDuck to perform auto-ducking of the music.
Step 1: Export the Music Files
To perform audio ducking in Final Cut Pro, you can first launch the application on Mac and open your project. Since there is no FCPX audio ducking option, you first have to export the music files.
For this, you can just go to the main menu on Final Cut Pro and select File > Share > Master File. This will help you explore and save all the media files from Final Cut Pro.
Now, once the Master File window would be opened, you can go to the “Role” tab and select “Audio Only” as the output role. This will display a list of the background music and the voiceover file.
You can now select the files of your choice and click on the “Next” button to save them to any desired location on your Mac.
Step 2: Use FCPX AutoDuck to Do Automatic Sound Ducking
Great! Now, you can just open the FCPX AutoDuck application on your Mac via its Application or Spotlight. You can just give it a project name and drag-and-drop the speaker (voiceover) and the music files here. If you want, you can also import a filler file of your choice.
FCPX will also let you select the level of music ducking from its dedication option. There are also different options to set up things like setting up the window or pre-roll for the audio.
In the end, you can click on the “Duck” button and let FCPX AutoDuck perform automatic audio ducking on the files.
Step 3: Insert the Modified File to your Project
Once the FCPX audio ducking process is completed, it will generate an XML file. You can now just drag the XML file and drop it to your project in Final Cut Pro. Here, you can choose to select the XML file in the same project.
You can now copy the modified music clip, go to the timeline, and paste it at the starting of the video. Here, you can just mute the previous music clip and let the auto-duck audio play instead.
Part 2: The Best FCPX Alternative for Mac to Perform Automatic Audio Ducking
As you can see, it is pretty tough to do audio ducking in Final Cut Pro as there is no automatic feature in the tool. Therefore, you can consider using Wondershare Filmora for Mac to perform automatic sound ducking and save your time. It is an inbuilt feature in Filmora that would perform auto-ducking instantly, and you can also mark the level of ducking in the video.
Ideally, you can perform audio ducking on voiceover or another soundtrack in Wondershare Filmora. To perform music ducking via Wondershare Filmora on Mac, you can follow these steps:
Step 1: Import the Video Clip or Record Your Audio
To begin with, just launch Wondershare Filmora on your Mac and just drag-and-drop your media files to the application. You can also go to its menu and choose to import media files.
Once your video is imported, you can drag it to the timeline at the bottom to work on it. If you want, you can click on the voiceover icon (adjacent to the preview section) to record dialogues right away.
Apart from that, you can also import music files to your video or use the extensive range of royalty-free audio files that are available in Filmora.
Step 2: Perform Automatic Audio Ducking
Great! Now, on the timeline of Filmora, you can see your video and the music track. From here, you need to select the track that you want to amplify (like the voiceover).
Afterward, right-click the audio track and select the “Adjust Audio” option from the context menu.
This will open a dedicated Audio Mixer window on the screen. Just go to the Audio tab and enable the “Ducking” option to lower the volume of other audio tracks. You can also select the desired level for music ducking to implement.
Step 3: Export the Edited Video
That’s it! After performing audio ducking on Filmora, you can preview the results and further make the needed changes. In the end, you can click on the “Export” button and save the file in the format and resolution of your choice.
There you go! After following this guide, you can easily learn how to do audio ducking in Final Cut Pro X easily. Since there is no inbuilt FCPX audio ducking option, you can use a third-party tool like FCPX AutoDuck. Apart from that, if you are looking for a better alternative to do sound ducking, then simply use Wondershare Filmora. It is a user-friendly and resourceful application that would let you perform automatic music ducking like a pro.
Benjamin Arango
Benjamin Arango is a writer and a lover of all things video.
Follow @Benjamin Arango
The AI Music Forerunners: Crafting Harmonies for a New Era
Top Best 10 AI Music Composers in 2024
Benjamin Arango
Mar 27, 2024• Proven solutions
Robots can’t be creative, right? A number of startups that focus on the development of artificial intelligence that is capable of composing music have proved this statement wrong. AI music composers generate original, copyright-free music you can use in your latest YouTube video or social media video ad. You don’t even have to be a sound designer or a musician to produce soundtracks for your videos with AI Music Composers, because you can upload the music that has already been recorded and create variations of it. So, let’s take a look at what AI music composers have to offer in 2024.
| 1 - Amper Music | 2 - AIVA |
|---|---|
| 3 - Jukedeck | 4 - Ecrett Music |
| 5 - Melodrive | 6 - ORB Composer |
| 7 - Amadeus Code | 8 - Humtap |
| 9 - Muzeek | 10 - Brain.fm |
Ten Best AI Music Composers You Should Know About
The AI technologies that can compose music are still relatively novel, and as time passes, they can only develop and grow further. Consequently, each of the AI music composers we featured in this article offers a different range of possibilities. Here are the ten best AI music composers you shouldn’t miss out on in 2024.

Filmora AI Music Editor
Edit Audio with AI Music Editor
Experience the power of Filmora’s AI tools and make your audio or music stand out like never before! Audio Denoise, Audio Ducking, Audio Synchronization, Audio Stretch, etc…
Try It Free Try It Free Try It Free Learn More >
1. Amper Music
Price: Available upon request
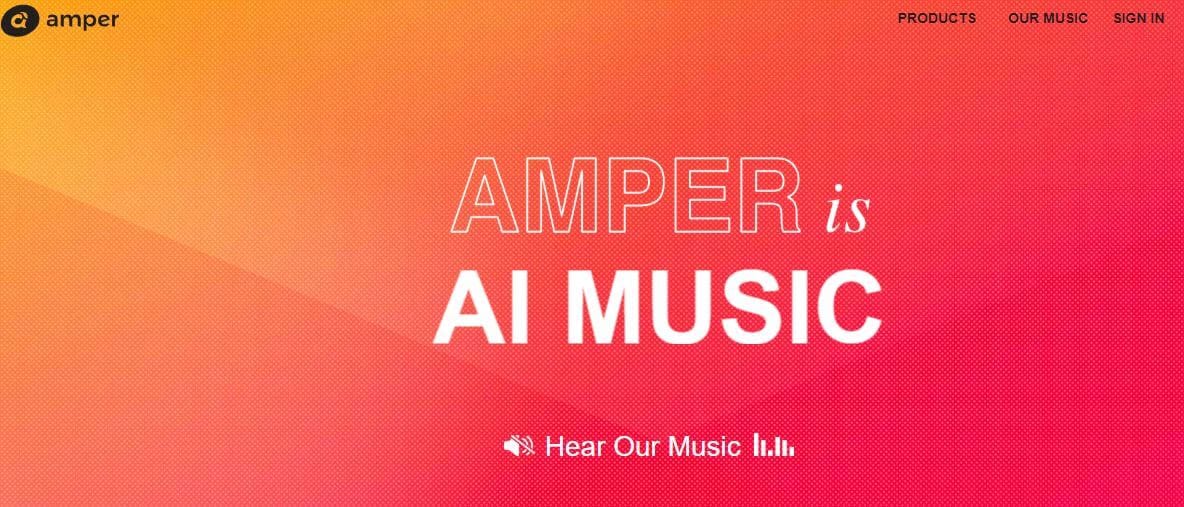
Industry professionals know just how frustrating the music licensing process can be. Amper Music is a cloud-based platform designed to simplify the process of creating soundtracks for movies and video games, as it produces AI generated algorithms that help users create music in a variety of music genres. You must first create an account on this platform, in order to be able to use the free version of Amper Music that provides only a limited amount of features. Upgrading to the pro version of Amper Music will enable you to enjoy the full potential of this rapidly growing AI Music Composer.
2. AIVA
Price: Free version available, subscription plans start from €14 p/month
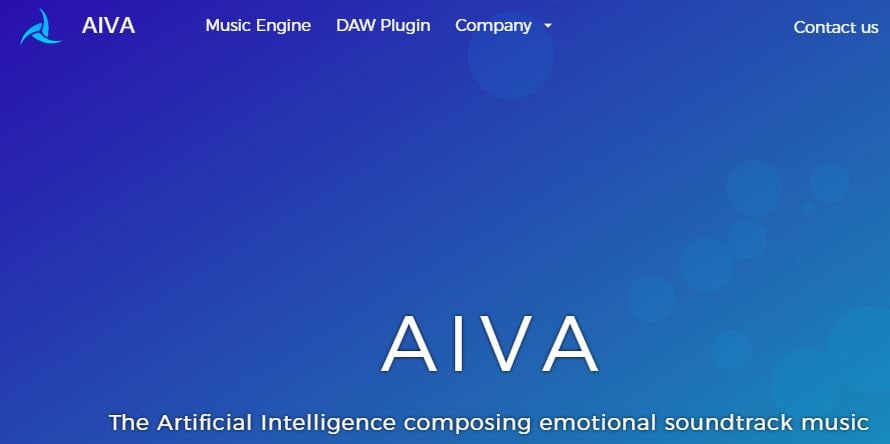
Since 2016, when AIVA Technologies was founded, its team has worked on developing an AI script that can compose emotional soundtracks for ads, video games, or movies. Soon after, the AI published its first oeuvre titled ‘Opus 1 for Piano Solo and in the subsequent years, AIVA released an album and composed music for a video game. Besides enabling its users to create music from scratch, AIVA can also be used to produce variations of existing songs. The music engine that powers this AI music composer makes the production of corporate or social media videos much easier, as it eliminates the need to go through the music licensing process.
3. Jukedeck
Price: Free version available, Pricing plans start from $0.99 per download
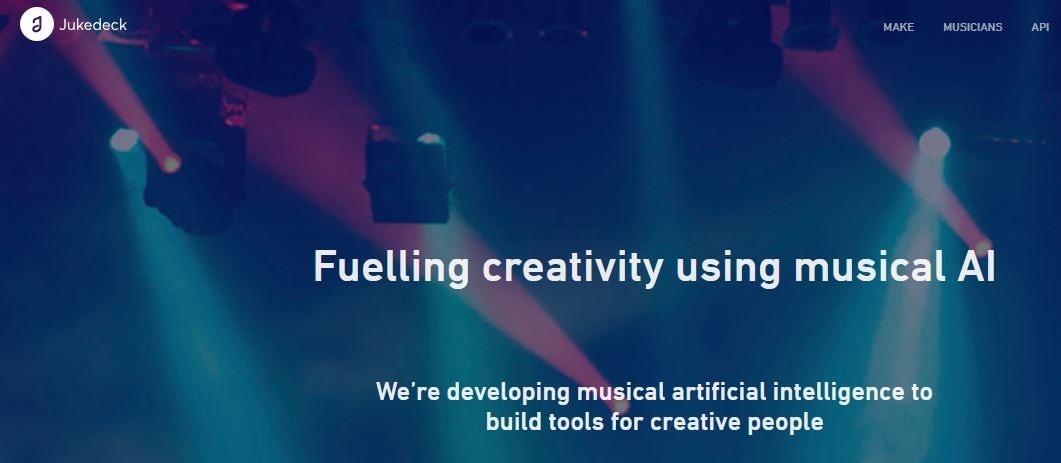
The AI music composer developed by the Jukedeck startup resembles the Amper’s music composer because they both rely on neural networks to analyze music data, that is then used by the AI to learn how to compose original music. Each track that is available through this AI music composer can be edited, so you can change its length or its tempo. You can create music with Jukedeck for free if you decide to give all the rights to the AI composer, while both individuals and small businesses can purchase the license to use the song created with Jukedeck for just $0.99.
Note: Jukedeck has been acquired by TikTok, and we are waiting for a new Jukedeck.
![]()
A cross-platform for making videos anywhere for all creators

Why your video editing isn’t good enough? How about some creative inspo?
- 100 Million+ Users
- 150+ Countries and Regions
- 4 Million+ Social Media Followers
- 5 Million+ Stock Media for Use
* Secure Download

4. Ecrett Music
Price: Subscription plans start at $5
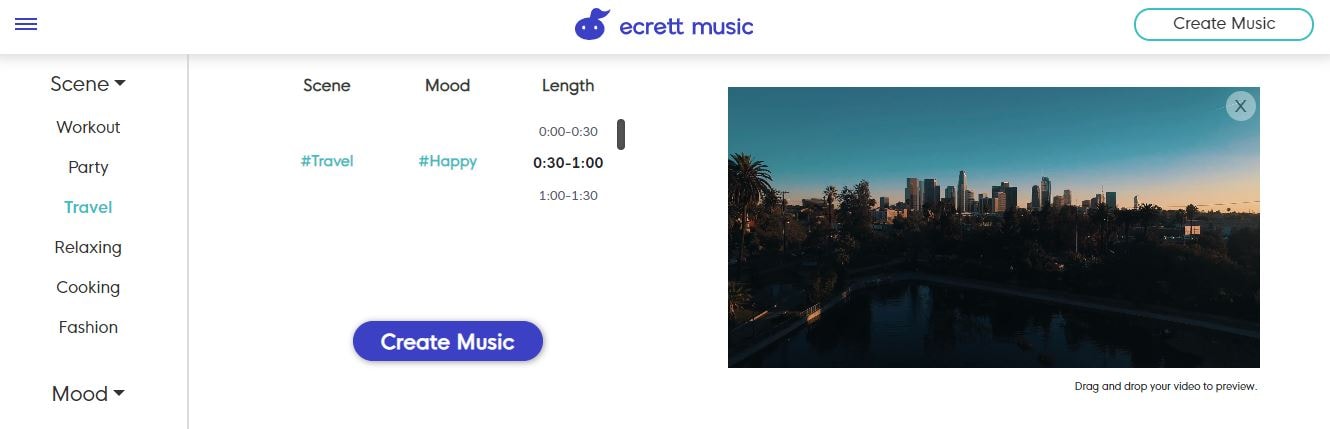
This online AI music composer makes creating stunning soundtracks for videos look easy. You just have to upload a video for which you want to generate music and select the type of scene and the mood of that scene. Party, Travel or Fashion are among the types of scenes you can choose from, while moods range from happy to serious. When done, simply click on the Create Music button, and the platform will automatically generate the soundtrack for your video. In case you are producing videos on a constant basis, you should consider purchasing one of the available subscription plans.
5. Melodrive
Price: Free
Compatibility: iOS, Windows
At the moment, the Lite and Indie versions of Melodrive are available for download free of charge, but the Indie version of this AI music composer still offers more options. Melodrive is one of the first AI systems that can compose emotional and unique music in real time. The AI generates music by adapting to the media environment and aims to match the mood and the style of the video. It is worth noting that Melodrive is still under development and that through time its capabilities to compose music are going to become even more refined than they already are.
6. ORB Composer
Price: Pricing plans start at $149,00
Compatibility: macOS, Windows

You can’t generate music automatically with ORB Composer, because the AI creates music based on your choices. That’s why you need to know at least the basic rules of music composition in order to be able to use the ORB Composer properly. The AI music composer comes bundled with a rich collection of chord progressions, that contains almost all chords used in popular music. This tool is aimed at artists who are interested in experimenting with the possibilities of creating music with artificial intelligence and discovering new styles of music. There are six music templates you can choose from, and you can create compositions by simply organizing different blocks of music.

Filmora AI Audio Stretcher
Wondershare Filmora - AI Audio Stretcher
• Retime any audio track to fit the duration of your video almost instantly.
• Rearrange songs without quality loss.
• Cross-platform supported - (Windows, Mac, iOS, Android)
Start Audio Stretch Start Audio Stretch Start Audio Stretch Learn More >
7. Amadeus Code
Price: Free, but the app offers in-app purchases
Compatibility: iOS
Both skilled musicians and music enthusiast can use this iOS-based app to create new melodies in just a few minutes. The AI engine that the Amadeus Code uses contains chord progressions of some of the most famous songs ever created and it let you use them to create new and innovative structures of music compositions. Moreover, you can use gestures to create new songs or recreate specific segments of songs you composed earlier. Even though Amadeus Code lets its users export audio and MIDI files to audio editing software, you still have to purchase all songs you want to keep.
8. Humtap
Price: Free
Compatibility: iOS
Musicians who have a tough time remembering their own ideas are going to love using Humtap because they can just hum a melody and the app will automatically generate an entire song using different instruments. What’s more, beats can be added with a single tap, and after the music is generated you can proceed to add the vocals as well. Humptap also has video making capabilities, so you can create videos for all songs you compose with this app. All tracks and videos generated with the Humtap AI music composer can be saved to your phone, but you can’t share your new creations to social media directly from the app.
9. Muzeek
Price: Free trial available, pricing plans start from $19 per month
Compatibility: macOS
If you are in need of licensed music for the video you’re planning on sharing to social media networks, then Muzeek is one of the best choices you can make. The AI algorithm Muzeek uses analyzes the videos for which you are generating music and it creates soundtracks that perfectly fit the rhythm of the video. All content creators, including online marketing agencies or video game developers, can rely on Muzeek AI music composer to create authentic music in high quality. Moreover, Muzeek can also analyze the video’s original audio and create subtitles from it or adjust its volume automatically.
10. Brain.fm
Price: Subscription plans start from $6,95 per month
Compatibility: Android, online
The idea that music can make our brains more productive is at the very core of what Brain.fm platform is all about. A team of scientists, musicians and engineers uses artificial intelligence to generate music designed to make your brain more productive and focused. They claim that the music created with their AI music composer achieve its effects in just ten to fifteen minutes. However, you can’t use Brain.fm to create your own music, as this platform is better suited for people who spend a lot of time at work and have a tough time maintaining their focus while performing important tasks.
Conclusion
The opportunities AI music composers offer are still not properly explored, because most of these technologies are still under development. The results AI music composers we included in this article have managed to achieve so far are impressive because each of them can produce high-quality audio files for all sorts of video content. Which AI music composer do you like to use the most? Leave a comment, and let us know.
Benjamin Arango
Benjamin Arango is a writer and a lover of all things video.
Follow @Benjamin Arango
Benjamin Arango
Mar 27, 2024• Proven solutions
Robots can’t be creative, right? A number of startups that focus on the development of artificial intelligence that is capable of composing music have proved this statement wrong. AI music composers generate original, copyright-free music you can use in your latest YouTube video or social media video ad. You don’t even have to be a sound designer or a musician to produce soundtracks for your videos with AI Music Composers, because you can upload the music that has already been recorded and create variations of it. So, let’s take a look at what AI music composers have to offer in 2024.
| 1 - Amper Music | 2 - AIVA |
|---|---|
| 3 - Jukedeck | 4 - Ecrett Music |
| 5 - Melodrive | 6 - ORB Composer |
| 7 - Amadeus Code | 8 - Humtap |
| 9 - Muzeek | 10 - Brain.fm |
Ten Best AI Music Composers You Should Know About
The AI technologies that can compose music are still relatively novel, and as time passes, they can only develop and grow further. Consequently, each of the AI music composers we featured in this article offers a different range of possibilities. Here are the ten best AI music composers you shouldn’t miss out on in 2024.
Filmora AI Music Editor
Edit Audio with AI Music Editor
Experience the power of Filmora’s AI tools and make your audio or music stand out like never before! Audio Denoise, Audio Ducking, Audio Synchronization, Audio Stretch, etc…
Try It Free Try It Free Try It Free Learn More >
1. Amper Music
Price: Available upon request
Industry professionals know just how frustrating the music licensing process can be. Amper Music is a cloud-based platform designed to simplify the process of creating soundtracks for movies and video games, as it produces AI generated algorithms that help users create music in a variety of music genres. You must first create an account on this platform, in order to be able to use the free version of Amper Music that provides only a limited amount of features. Upgrading to the pro version of Amper Music will enable you to enjoy the full potential of this rapidly growing AI Music Composer.
2. AIVA
Price: Free version available, subscription plans start from €14 p/month
Since 2016, when AIVA Technologies was founded, its team has worked on developing an AI script that can compose emotional soundtracks for ads, video games, or movies. Soon after, the AI published its first oeuvre titled ‘Opus 1 for Piano Solo and in the subsequent years, AIVA released an album and composed music for a video game. Besides enabling its users to create music from scratch, AIVA can also be used to produce variations of existing songs. The music engine that powers this AI music composer makes the production of corporate or social media videos much easier, as it eliminates the need to go through the music licensing process.
3. Jukedeck
Price: Free version available, Pricing plans start from $0.99 per download
The AI music composer developed by the Jukedeck startup resembles the Amper’s music composer because they both rely on neural networks to analyze music data, that is then used by the AI to learn how to compose original music. Each track that is available through this AI music composer can be edited, so you can change its length or its tempo. You can create music with Jukedeck for free if you decide to give all the rights to the AI composer, while both individuals and small businesses can purchase the license to use the song created with Jukedeck for just $0.99.
Note: Jukedeck has been acquired by TikTok, and we are waiting for a new Jukedeck.
![]()
A cross-platform for making videos anywhere for all creators
Why your video editing isn’t good enough? How about some creative inspo?
- 100 Million+ Users
- 150+ Countries and Regions
- 4 Million+ Social Media Followers
- 5 Million+ Stock Media for Use
* Secure Download
4. Ecrett Music
Price: Subscription plans start at $5

This online AI music composer makes creating stunning soundtracks for videos look easy. You just have to upload a video for which you want to generate music and select the type of scene and the mood of that scene. Party, Travel or Fashion are among the types of scenes you can choose from, while moods range from happy to serious. When done, simply click on the Create Music button, and the platform will automatically generate the soundtrack for your video. In case you are producing videos on a constant basis, you should consider purchasing one of the available subscription plans.
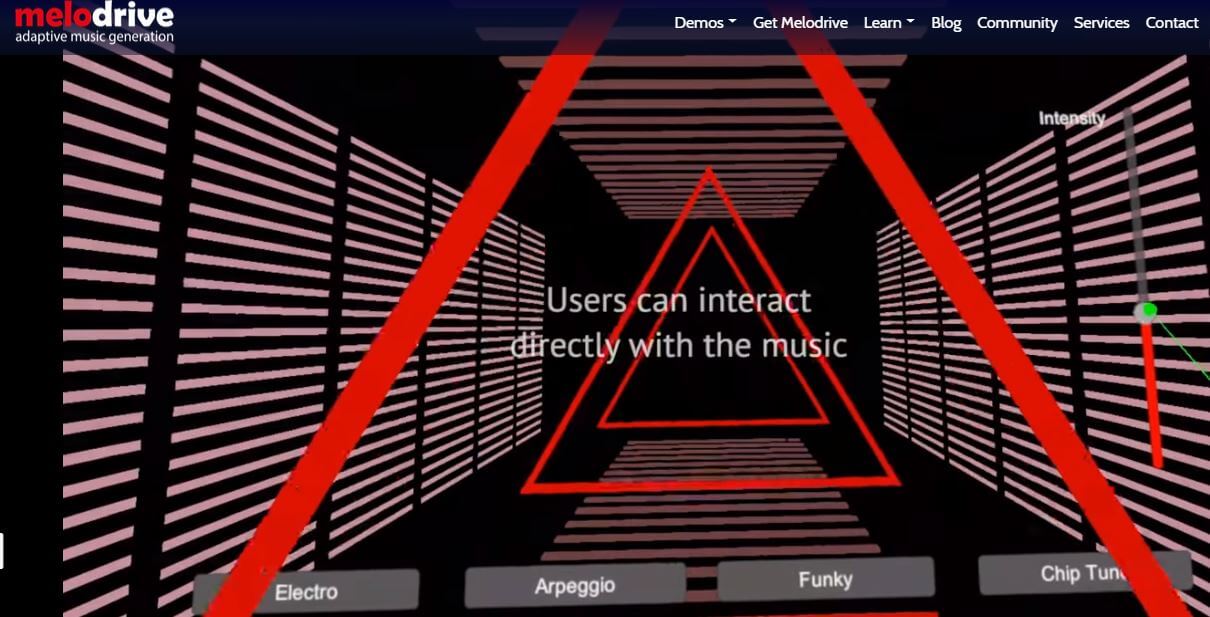
5. Melodrive
Price: Free
Compatibility: iOS, Windows
At the moment, the Lite and Indie versions of Melodrive are available for download free of charge, but the Indie version of this AI music composer still offers more options. Melodrive is one of the first AI systems that can compose emotional and unique music in real time. The AI generates music by adapting to the media environment and aims to match the mood and the style of the video. It is worth noting that Melodrive is still under development and that through time its capabilities to compose music are going to become even more refined than they already are.
6. ORB Composer
Price: Pricing plans start at $149,00
Compatibility: macOS, Windows

You can’t generate music automatically with ORB Composer, because the AI creates music based on your choices. That’s why you need to know at least the basic rules of music composition in order to be able to use the ORB Composer properly. The AI music composer comes bundled with a rich collection of chord progressions, that contains almost all chords used in popular music. This tool is aimed at artists who are interested in experimenting with the possibilities of creating music with artificial intelligence and discovering new styles of music. There are six music templates you can choose from, and you can create compositions by simply organizing different blocks of music.
Filmora AI Audio Stretcher
Wondershare Filmora - AI Audio Stretcher
• Retime any audio track to fit the duration of your video almost instantly.
• Rearrange songs without quality loss.
• Cross-platform supported - (Windows, Mac, iOS, Android)
Start Audio Stretch Start Audio Stretch Start Audio Stretch Learn More >
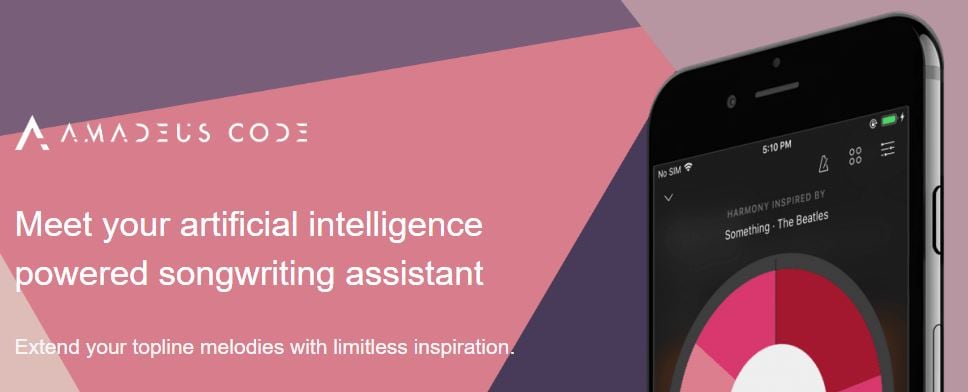
7. Amadeus Code
Price: Free, but the app offers in-app purchases
Compatibility: iOS
Both skilled musicians and music enthusiast can use this iOS-based app to create new melodies in just a few minutes. The AI engine that the Amadeus Code uses contains chord progressions of some of the most famous songs ever created and it let you use them to create new and innovative structures of music compositions. Moreover, you can use gestures to create new songs or recreate specific segments of songs you composed earlier. Even though Amadeus Code lets its users export audio and MIDI files to audio editing software, you still have to purchase all songs you want to keep.
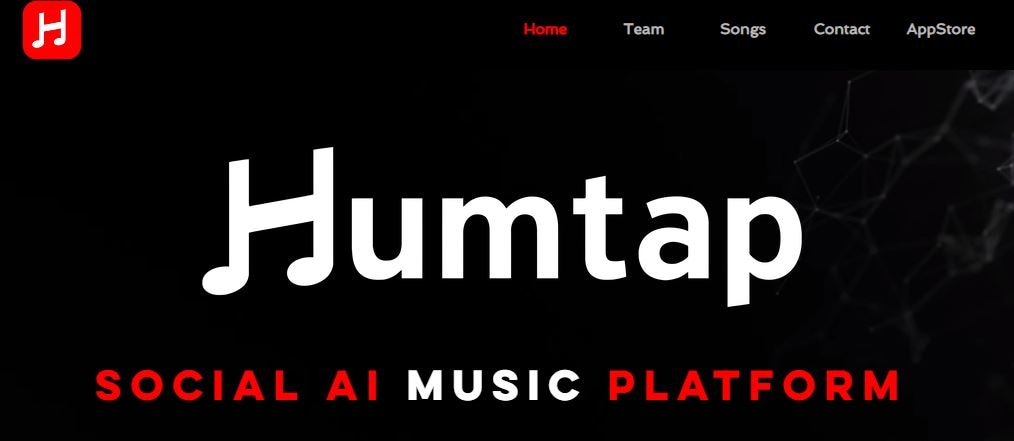
8. Humtap
Price: Free
Compatibility: iOS
Musicians who have a tough time remembering their own ideas are going to love using Humtap because they can just hum a melody and the app will automatically generate an entire song using different instruments. What’s more, beats can be added with a single tap, and after the music is generated you can proceed to add the vocals as well. Humptap also has video making capabilities, so you can create videos for all songs you compose with this app. All tracks and videos generated with the Humtap AI music composer can be saved to your phone, but you can’t share your new creations to social media directly from the app.
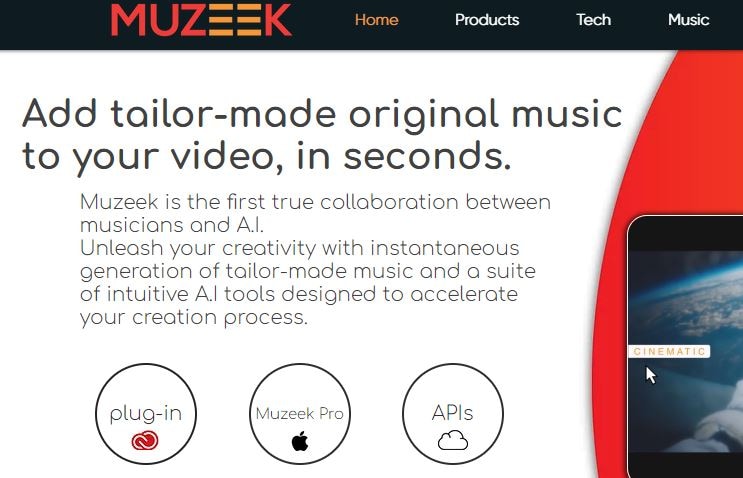
9. Muzeek
Price: Free trial available, pricing plans start from $19 per month
Compatibility: macOS
If you are in need of licensed music for the video you’re planning on sharing to social media networks, then Muzeek is one of the best choices you can make. The AI algorithm Muzeek uses analyzes the videos for which you are generating music and it creates soundtracks that perfectly fit the rhythm of the video. All content creators, including online marketing agencies or video game developers, can rely on Muzeek AI music composer to create authentic music in high quality. Moreover, Muzeek can also analyze the video’s original audio and create subtitles from it or adjust its volume automatically.
10. Brain.fm
Price: Subscription plans start from $6,95 per month
Compatibility: Android, online
The idea that music can make our brains more productive is at the very core of what Brain.fm platform is all about. A team of scientists, musicians and engineers uses artificial intelligence to generate music designed to make your brain more productive and focused. They claim that the music created with their AI music composer achieve its effects in just ten to fifteen minutes. However, you can’t use Brain.fm to create your own music, as this platform is better suited for people who spend a lot of time at work and have a tough time maintaining their focus while performing important tasks.
Conclusion
The opportunities AI music composers offer are still not properly explored, because most of these technologies are still under development. The results AI music composers we included in this article have managed to achieve so far are impressive because each of them can produce high-quality audio files for all sorts of video content. Which AI music composer do you like to use the most? Leave a comment, and let us know.
Benjamin Arango
Benjamin Arango is a writer and a lover of all things video.
Follow @Benjamin Arango
Benjamin Arango
Mar 27, 2024• Proven solutions
Robots can’t be creative, right? A number of startups that focus on the development of artificial intelligence that is capable of composing music have proved this statement wrong. AI music composers generate original, copyright-free music you can use in your latest YouTube video or social media video ad. You don’t even have to be a sound designer or a musician to produce soundtracks for your videos with AI Music Composers, because you can upload the music that has already been recorded and create variations of it. So, let’s take a look at what AI music composers have to offer in 2024.
| 1 - Amper Music | 2 - AIVA |
|---|---|
| 3 - Jukedeck | 4 - Ecrett Music |
| 5 - Melodrive | 6 - ORB Composer |
| 7 - Amadeus Code | 8 - Humtap |
| 9 - Muzeek | 10 - Brain.fm |
Ten Best AI Music Composers You Should Know About
The AI technologies that can compose music are still relatively novel, and as time passes, they can only develop and grow further. Consequently, each of the AI music composers we featured in this article offers a different range of possibilities. Here are the ten best AI music composers you shouldn’t miss out on in 2024.
Filmora AI Music Editor
Edit Audio with AI Music Editor
Experience the power of Filmora’s AI tools and make your audio or music stand out like never before! Audio Denoise, Audio Ducking, Audio Synchronization, Audio Stretch, etc…
Try It Free Try It Free Try It Free Learn More >
1. Amper Music
Price: Available upon request
Industry professionals know just how frustrating the music licensing process can be. Amper Music is a cloud-based platform designed to simplify the process of creating soundtracks for movies and video games, as it produces AI generated algorithms that help users create music in a variety of music genres. You must first create an account on this platform, in order to be able to use the free version of Amper Music that provides only a limited amount of features. Upgrading to the pro version of Amper Music will enable you to enjoy the full potential of this rapidly growing AI Music Composer.
2. AIVA
Price: Free version available, subscription plans start from €14 p/month
Since 2016, when AIVA Technologies was founded, its team has worked on developing an AI script that can compose emotional soundtracks for ads, video games, or movies. Soon after, the AI published its first oeuvre titled ‘Opus 1 for Piano Solo and in the subsequent years, AIVA released an album and composed music for a video game. Besides enabling its users to create music from scratch, AIVA can also be used to produce variations of existing songs. The music engine that powers this AI music composer makes the production of corporate or social media videos much easier, as it eliminates the need to go through the music licensing process.
3. Jukedeck
Price: Free version available, Pricing plans start from $0.99 per download
The AI music composer developed by the Jukedeck startup resembles the Amper’s music composer because they both rely on neural networks to analyze music data, that is then used by the AI to learn how to compose original music. Each track that is available through this AI music composer can be edited, so you can change its length or its tempo. You can create music with Jukedeck for free if you decide to give all the rights to the AI composer, while both individuals and small businesses can purchase the license to use the song created with Jukedeck for just $0.99.
Note: Jukedeck has been acquired by TikTok, and we are waiting for a new Jukedeck.
![]()
A cross-platform for making videos anywhere for all creators
Why your video editing isn’t good enough? How about some creative inspo?
- 100 Million+ Users
- 150+ Countries and Regions
- 4 Million+ Social Media Followers
- 5 Million+ Stock Media for Use
* Secure Download
4. Ecrett Music
Price: Subscription plans start at $5

This online AI music composer makes creating stunning soundtracks for videos look easy. You just have to upload a video for which you want to generate music and select the type of scene and the mood of that scene. Party, Travel or Fashion are among the types of scenes you can choose from, while moods range from happy to serious. When done, simply click on the Create Music button, and the platform will automatically generate the soundtrack for your video. In case you are producing videos on a constant basis, you should consider purchasing one of the available subscription plans.
5. Melodrive
Price: Free
Compatibility: iOS, Windows
At the moment, the Lite and Indie versions of Melodrive are available for download free of charge, but the Indie version of this AI music composer still offers more options. Melodrive is one of the first AI systems that can compose emotional and unique music in real time. The AI generates music by adapting to the media environment and aims to match the mood and the style of the video. It is worth noting that Melodrive is still under development and that through time its capabilities to compose music are going to become even more refined than they already are.
6. ORB Composer
Price: Pricing plans start at $149,00
Compatibility: macOS, Windows

You can’t generate music automatically with ORB Composer, because the AI creates music based on your choices. That’s why you need to know at least the basic rules of music composition in order to be able to use the ORB Composer properly. The AI music composer comes bundled with a rich collection of chord progressions, that contains almost all chords used in popular music. This tool is aimed at artists who are interested in experimenting with the possibilities of creating music with artificial intelligence and discovering new styles of music. There are six music templates you can choose from, and you can create compositions by simply organizing different blocks of music.
Filmora AI Audio Stretcher
Wondershare Filmora - AI Audio Stretcher
• Retime any audio track to fit the duration of your video almost instantly.
• Rearrange songs without quality loss.
• Cross-platform supported - (Windows, Mac, iOS, Android)
Start Audio Stretch Start Audio Stretch Start Audio Stretch Learn More >
7. Amadeus Code
Price: Free, but the app offers in-app purchases
Compatibility: iOS
Both skilled musicians and music enthusiast can use this iOS-based app to create new melodies in just a few minutes. The AI engine that the Amadeus Code uses contains chord progressions of some of the most famous songs ever created and it let you use them to create new and innovative structures of music compositions. Moreover, you can use gestures to create new songs or recreate specific segments of songs you composed earlier. Even though Amadeus Code lets its users export audio and MIDI files to audio editing software, you still have to purchase all songs you want to keep.
8. Humtap
Price: Free
Compatibility: iOS
Musicians who have a tough time remembering their own ideas are going to love using Humtap because they can just hum a melody and the app will automatically generate an entire song using different instruments. What’s more, beats can be added with a single tap, and after the music is generated you can proceed to add the vocals as well. Humptap also has video making capabilities, so you can create videos for all songs you compose with this app. All tracks and videos generated with the Humtap AI music composer can be saved to your phone, but you can’t share your new creations to social media directly from the app.
9. Muzeek
Price: Free trial available, pricing plans start from $19 per month
Compatibility: macOS
If you are in need of licensed music for the video you’re planning on sharing to social media networks, then Muzeek is one of the best choices you can make. The AI algorithm Muzeek uses analyzes the videos for which you are generating music and it creates soundtracks that perfectly fit the rhythm of the video. All content creators, including online marketing agencies or video game developers, can rely on Muzeek AI music composer to create authentic music in high quality. Moreover, Muzeek can also analyze the video’s original audio and create subtitles from it or adjust its volume automatically.
10. Brain.fm
Price: Subscription plans start from $6,95 per month
Compatibility: Android, online
The idea that music can make our brains more productive is at the very core of what Brain.fm platform is all about. A team of scientists, musicians and engineers uses artificial intelligence to generate music designed to make your brain more productive and focused. They claim that the music created with their AI music composer achieve its effects in just ten to fifteen minutes. However, you can’t use Brain.fm to create your own music, as this platform is better suited for people who spend a lot of time at work and have a tough time maintaining their focus while performing important tasks.
Conclusion
The opportunities AI music composers offer are still not properly explored, because most of these technologies are still under development. The results AI music composers we included in this article have managed to achieve so far are impressive because each of them can produce high-quality audio files for all sorts of video content. Which AI music composer do you like to use the most? Leave a comment, and let us know.
Benjamin Arango
Benjamin Arango is a writer and a lover of all things video.
Follow @Benjamin Arango
Also read:
- New A Symphony in One Merging Audio Files for a Unified Videography Narrative
- Updated Exploring Advanced Methods to Distill Sound From Visual Clips Innovations for 2024
- New Top 10+ Best Free Online Audio Cutters for 2024
- Updated Bringing High-Quality Sound to Your Fingers on the Keyboard Audacity Installation for Ubuntu Users
- New Best Value MP3 Enhancement and Cutting Utility on a Mac for 2024
- New IMovie Basics for New Users How to Seamlessly Add Sounds and Music
- Starting Out in Audio-Visual Filmmaking on a Budget
- Updated 2024 Approved Cease iPhones Acoustic Level Modulation
- New 2024 Approved Transforming Vocal Landscapes A Methodical Approach to Swapping Video Audio Tracks (Part 1)
- New Comprehensive Guide to Attaching Audios in Magix Movie Editor 2023 for 2024
- New Zero-Cost Conversion Wizardry A Comprehensive Guide to Turning Video Into Audio
- New 2024 Approved Beatmaking Breakdown Top 8 Digital Audio Workstations (DAWs) For Mac & PC Enthusiasts
- Add Audio to Video in Premiere Pro
- Updated Discover the Top 8 iOS Audio Production Tools for Your iPad & iPhone
- In 2024, Streamlining Your Audio Setup Efficiently Manage M4A Files on Android
- New 2024 Approved Harmonizing Vision & Sound Discover the Most Trusted Applications for Adding Music to Visual Narratives
- New 2024 Approved Mastering Vocal Depth Techniques for a Powerful Tone in Filmora
- Updated A Deep Dive Into Adobe Audition Understanding Its Impact on Audio Editing
- Updated The Elite Sound & Vision Mixer Compendium
- 2024 Approved Pioneering Audio-Visual Integration Generating Waveforms & Introducing Dynamic Animations with Premiere Pro
- Updated The Complete Tutorial on Utilizing Vocaroo for Audio Preservation for 2024
- New The Zen of Zoom A No-Nonsense Guide for Muting Audio on Computer/Mobile Devices for 2024
- Updated FREE Top 10 Best Websites to Download Sound Clips for Videos for 2024
- 2024 Approved Top 7 Strategies for Capturing Sound on Your Chromebook
- Updated In 2024, Find Scream Sound Effect
- In 2024, Acoustic Extraction Protocols Taking Sound Out of Video Footage
- In 2024, 6 Ways to Convert Video to Audio for FREE
- The Ultimate Apowersoft Auditory Recording Guide, Complete with 4 Other Options
- Updated In 2024, Elevate Your Audio Altering Speech Pitch with Audacity
- Unlock Apple ID without Phone Number On iPhone 15 Pro
- How to Get and Use Pokemon Go Promo Codes On OnePlus 11R | Dr.fone
- Guide on How To Remove Apple ID From Apple iPhone XR
- Transform Your Videos Top Free and Paid Android Video Editing Apps
- In 2024, Life360 Circle Everything You Need to Know On Realme 12 5G | Dr.fone
- New Unleash Creativity Best Free Video Effects Apps for Mobile Devices
- All Must-Knows to Use Fake GPS GO Location Spoofer On Honor X50 GT | Dr.fone
- In 2024, FRP Hijacker by Hagard Download and Bypass your Oppo Reno 11 5G FRP Locks
- In 2024, The Best iSpoofer Alternative to Try On Vivo S17 Pro | Dr.fone
- How to Repair corrupt MP4 and MOV files of 14 Ultra using Video Repair Utility on Windows?
- In 2024, Top-Notch Solutions for Disabled Apple ID From iPhone X Making It Possible
- Fix Cannot Paste the Data Error in Microsoft Excel 2010 | Stellar
- How to Successfully Bypass iCloud Activation Lock on iPhone 11
- 5 Easy Ways to Change Location on YouTube TV On Samsung Galaxy A23 5G | Dr.fone
- Updated In 2024, Ultimate Guide to Text Tracking Software 2023 Edition
- In 2024, What Pokémon Evolve with A Dawn Stone For Honor Play 7T? | Dr.fone
- How to restore wiped music on Redmi 12
- The Best iSpoofer Alternative to Try On Sony Xperia 1 V | Dr.fone
- Best Methods for Vivo V27 Pro Wont Turn On | Dr.fone
- Title: Updated 2024 Approved Securing Your Google Voice Chats Phone & Desktop Recording Techniques Explained
- Author: Jacob
- Created at : 2024-05-05 04:04:44
- Updated at : 2024-05-06 04:04:44
- Link: https://audio-shaping.techidaily.com/updated-2024-approved-securing-your-google-voice-chats-phone-and-desktop-recording-techniques-explained/
- License: This work is licensed under CC BY-NC-SA 4.0.
