
:max_bytes(150000):strip_icc():format(webp)/youtube-s-free-streaming-movies-and-tv-shows-1357439-ddbc3cf482e24a539c67009c07310ae1.png)
Updated 2024 Approved How to Detach Audio From Video in Premiere Pro?
How to Detach Audio From Video in Premiere Pro?
Are you into the creative industry? Do you need to detach audio from a video? Are you a fan of Premiere Pro?
With the media industry progressing, advanced features are on the rise. Each upgrade is for the creator’s ease. The well-developed functions limit the stress at the workplace. Don’t you agree? The media production needs to detach audio from video. It is essential to censor audio out or eliminate unwanted background noise.
Most often, audio has to be detached for B-roll. One can detach audio Premiere Pro effortlessly. The article covers the procedure to extract and separate audio from a video. We shall also have a preview of Filmora. So, what are we waiting for? Let us commence this!
In this article
01 How Can You Extract, Separate, or Detach Audio from Video? [Premiere Pro]
02 Tips to Detach or Remove Audio From Video in Filmora
Part 1: How Can You Extract, Separate, or Detach Audio from Video? [Premiere Pro]
Premiere Pro detaches audio flawlessly. Adobe Premiere Pro is a video editing software. With creative tools, a flexible interface, and powerful capabilities, Premiere Pro turns your raw footage into something extraordinary. It enables you to perform color grading, color correction, and transitions effectively. The largest toolset has made life bearable for creators.
Additionally, Adobe Premiere Pro has an excellent range of collaboration tools. There are learning tools to guide the beginner towards a successful process. These tutorials have assisted the user in performing basic operations productively. The refined video editing tools have created a revolution in the market. The Auto Reframe feature changes the crop selection by keeping the attention where it is due.
Are you invested in detaching the audio process? Worry no more as we have got you. Premiere Pro doesn’t leave its users empty-handed. Audio extraction and separation both would be included in this section.
Audio Extraction Process
The audio extraction procedure is a great way to lubricate the editing process. The audio is extracted to add new audio master clips in this phenomenon. The channel mapping, duration, gain, speed, and footage adjustment are applied to the extracted clips. The original content remains preserved.
Before detaching audio, let us shift our focus to extracting it. So, are you with us? Follow the step-by-step below to extract audio from the video.
Step 1: Launching Premiere Pro
Open Adobe Premiere Pro. Press ‘New Project’ from the interface that appears. The default settings are good to go. However, make sure that the output location is appropriate. Hit ‘OK.’

Step 2: Importing the Clips
Now, click on ‘Media Browser’ from the middle panel. Import the targeted video clips to initiate the process. Select the videos whose audio has to be extracted. Head to the ‘Clip’ section and choose ‘Audio Options.’ Hit ‘Extract Audio’ afterward.

Step 3: File Extraction
In a couple of seconds, Premiere Pro creates duplicate audio files. The original video clips are not affected in any way. Moving on, let us move on to export the extracted audio clips.

Step 4: Exporting Process
Mark in and out points on your sequence for the session you wish to export. Mute the rest of the tracks. Now, navigate to the ‘File,’ press ‘Export,’ and then ‘Media.’ For encoding format, choose between MP3 and WAV form audio based on the original file format. Choose the output location. Hit ‘Export,’ and you are done.

Audio Detaching Process
Similarly, audio separation is another way to access a part of the audio. It permits you to use any audio section and make necessary edits to it. To detach audio in Premiere Pro, kindly follow the guidelines below.
Step 1: Importing the Media Files
Launch Premiere Pro from your computer. The interface opens up in seconds. The user is recommended to browse the targeted video with attached audio. Add it to the timeline of the Premiere Pro.

Step 2: Unlinking Process
After that, right-click on the clip. Choose ‘Unlink’ from the list of options that appear. The user can easily select and edit both the audio and video content. However, you can also separate audio using another faster process.

Step 3: Deleting Process
Hold down the ALT key from your keyboard and click on the audio clip to do this more effectively. Use the ‘Delete’ button and get rid of it once and for all. Now, make necessary edits, and you are done for the day!

Part 2: Tips to Detach or Remove Audio From Video in Filmora
Wondershare Filmora needs no introduction. Filmora has always had something refined to offer in a world full of video editors. Wouldn’t you agree? A content creator needs a video editing tool with an interactive interface with balanced functions.
Filmora knows different tricks to keep creative professionals invested in it. From keyframing to motion tracking and green screen to color matching, Wondershare Filmora wouldn’t disappoint you. The optimized GPU detection brings productivity to work. As far as audio editing is concerned, Filmora has advanced tools on the go.
The audio equalizer and audio mixer fine-tune the music and adjust the audio of separate tracks, respectively. You can split audio, adjust the audio volume, and perform audio ducking. The creative creators can also add a voiceover and trim the clips. The original audio of the video can also be replaced technically. Isn’t that the whole dream?
In short, Filmora has everything under one platform. There is no need to download extensive video editors for each functionality.
Moving on to the section, we shall discuss the procedure to detach or remove audio using this exceptional tool. So, let us try this!
For Win 7 or later (64-bit)
For macOS 10.12 or later
Step 1: Browsing the Video
Download Wondershare Filmora in your system. Launch it as soon as the process is concluded. Import the targeted video files into the program. Drag the video from the library onto the timeline.

Step 2: Removing Audio
To remove the audio, right-click on the video file from the timeline. Click on ‘Detach audio’ from the options that appear. The audio file is separated from the video file. It is displayed in another track below the video track.

Step 3: Final Process
Now, the user is free to make edits to the audio and perform modifications as deemed necessary. Delete the separated audio track if you wish to add a new voiceover or audio in the background. You can do so by clicking on the trash button above the timeline.

Conclusion
The raw videos undergo treatment to look ravishing. Don’t you think? Without the needed editing, these videos wouldn’t stand anywhere. After the original audio is detached, a better message is expressed to replace it with promising content.
The article introduced Premiere Pro. Moreover, how to detach audio from video Premiere Pro was also discussed in detail. If you want to extract audio from video, this write-up will help you. Wondershare Filmora is a video editing software with great tools to get the trick done in seconds.
Versatile Video Editor - Wondershare Filmora
An easy yet powerful editor
Numerous effects to choose from
Detailed tutorials provided by the official channel
02 Tips to Detach or Remove Audio From Video in Filmora
Part 1: How Can You Extract, Separate, or Detach Audio from Video? [Premiere Pro]
Premiere Pro detaches audio flawlessly. Adobe Premiere Pro is a video editing software. With creative tools, a flexible interface, and powerful capabilities, Premiere Pro turns your raw footage into something extraordinary. It enables you to perform color grading, color correction, and transitions effectively. The largest toolset has made life bearable for creators.
Additionally, Adobe Premiere Pro has an excellent range of collaboration tools. There are learning tools to guide the beginner towards a successful process. These tutorials have assisted the user in performing basic operations productively. The refined video editing tools have created a revolution in the market. The Auto Reframe feature changes the crop selection by keeping the attention where it is due.
Are you invested in detaching the audio process? Worry no more as we have got you. Premiere Pro doesn’t leave its users empty-handed. Audio extraction and separation both would be included in this section.
Audio Extraction Process
The audio extraction procedure is a great way to lubricate the editing process. The audio is extracted to add new audio master clips in this phenomenon. The channel mapping, duration, gain, speed, and footage adjustment are applied to the extracted clips. The original content remains preserved.
Before detaching audio, let us shift our focus to extracting it. So, are you with us? Follow the step-by-step below to extract audio from the video.
Step 1: Launching Premiere Pro
Open Adobe Premiere Pro. Press ‘New Project’ from the interface that appears. The default settings are good to go. However, make sure that the output location is appropriate. Hit ‘OK.’
Step 2: Importing the Clips
Now, click on ‘Media Browser’ from the middle panel. Import the targeted video clips to initiate the process. Select the videos whose audio has to be extracted. Head to the ‘Clip’ section and choose ‘Audio Options.’ Hit ‘Extract Audio’ afterward.
Step 3: File Extraction
In a couple of seconds, Premiere Pro creates duplicate audio files. The original video clips are not affected in any way. Moving on, let us move on to export the extracted audio clips.
Step 4: Exporting Process
Mark in and out points on your sequence for the session you wish to export. Mute the rest of the tracks. Now, navigate to the ‘File,’ press ‘Export,’ and then ‘Media.’ For encoding format, choose between MP3 and WAV form audio based on the original file format. Choose the output location. Hit ‘Export,’ and you are done.
Audio Detaching Process
Similarly, audio separation is another way to access a part of the audio. It permits you to use any audio section and make necessary edits to it. To detach audio in Premiere Pro, kindly follow the guidelines below.
Step 1: Importing the Media Files
Launch Premiere Pro from your computer. The interface opens up in seconds. The user is recommended to browse the targeted video with attached audio. Add it to the timeline of the Premiere Pro.
Step 2: Unlinking Process
After that, right-click on the clip. Choose ‘Unlink’ from the list of options that appear. The user can easily select and edit both the audio and video content. However, you can also separate audio using another faster process.
Step 3: Deleting Process
Hold down the ALT key from your keyboard and click on the audio clip to do this more effectively. Use the ‘Delete’ button and get rid of it once and for all. Now, make necessary edits, and you are done for the day!
Part 2: Tips to Detach or Remove Audio From Video in Filmora
Wondershare Filmora needs no introduction. Filmora has always had something refined to offer in a world full of video editors. Wouldn’t you agree? A content creator needs a video editing tool with an interactive interface with balanced functions.
Filmora knows different tricks to keep creative professionals invested in it. From keyframing to motion tracking and green screen to color matching, Wondershare Filmora wouldn’t disappoint you. The optimized GPU detection brings productivity to work. As far as audio editing is concerned, Filmora has advanced tools on the go.
The audio equalizer and audio mixer fine-tune the music and adjust the audio of separate tracks, respectively. You can split audio, adjust the audio volume, and perform audio ducking. The creative creators can also add a voiceover and trim the clips. The original audio of the video can also be replaced technically. Isn’t that the whole dream?
In short, Filmora has everything under one platform. There is no need to download extensive video editors for each functionality.
Moving on to the section, we shall discuss the procedure to detach or remove audio using this exceptional tool. So, let us try this!
For Win 7 or later (64-bit)
For macOS 10.12 or later
Step 1: Browsing the Video
Download Wondershare Filmora in your system. Launch it as soon as the process is concluded. Import the targeted video files into the program. Drag the video from the library onto the timeline.
Step 2: Removing Audio
To remove the audio, right-click on the video file from the timeline. Click on ‘Detach audio’ from the options that appear. The audio file is separated from the video file. It is displayed in another track below the video track.
Step 3: Final Process
Now, the user is free to make edits to the audio and perform modifications as deemed necessary. Delete the separated audio track if you wish to add a new voiceover or audio in the background. You can do so by clicking on the trash button above the timeline.
Conclusion
The raw videos undergo treatment to look ravishing. Don’t you think? Without the needed editing, these videos wouldn’t stand anywhere. After the original audio is detached, a better message is expressed to replace it with promising content.
The article introduced Premiere Pro. Moreover, how to detach audio from video Premiere Pro was also discussed in detail. If you want to extract audio from video, this write-up will help you. Wondershare Filmora is a video editing software with great tools to get the trick done in seconds.
Versatile Video Editor - Wondershare Filmora
An easy yet powerful editor
Numerous effects to choose from
Detailed tutorials provided by the official channel
8 Best Cartoon Sound Effects You Can Download
8 Best Cartoon Sound Effects You Can Download

Benjamin Arango
Mar 27, 2024• Proven solutions
The sound plays a significant role in the videos. Without the right sound effects, your videos become dull. It doesn’t create an impact to grab the attention of the viewers. Especially when it comes to attracting the attention of kids while they watch cartoons.
Are you working on a cartoon video for kids or some animated action cartoons? Use the cartoon sound effects to add more intensity and emotions to the videos. Every time creating a new sound effect for your cartoon video becomes difficult.
If you are on a strict budget, producing new content becomes almost impossible. In such situations, free cartoon sound effects are the best way to enhance your cartoon videos.
In this article, you will learn eight best cartoon sound effects that you can download and make your videos perfect.
8 Best Cartoon Sound Effects Resources
1. Spongebob Sound Effects
MyInstant’s Spongebob soundboard offers a range of cartoon sound effects that can be easily downloaded just by clicking on the Download mp3 sound effect button. You can listen to over 120 classic cartoon sound effects and download it for free. You can also copy the embed link and paste it to your website.
2. Hanna Barbera Sound Effects
From Sounddogs, Hanna Barbera sound effects library, you can find over 2200 cartoon sound effects that are divided into 4 CDs. It has almost all the legendary classic cartoon sound effects from the cartoon shows like Yogi Bear, Huckleberry Hound, the Flintstones, The Jetsons, Quick Draw McGraw, and all the rest of the gang.
You can download the mp3 cartoon sound effects completely free by clicking on the Download ID number mentioned at the right end of each link.
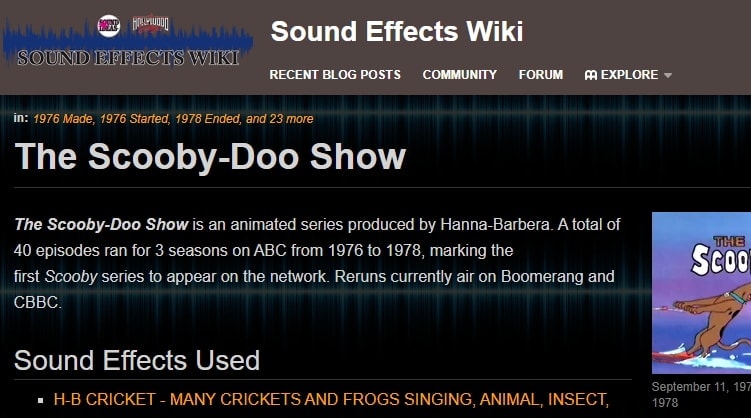
3. Scooby Doo Running Sound
Fandom’s Scooby Doo running sound effects offers all the ideas used in 40 episodes of Scooby Doo throughout the three seasons on ABC. It is over 37000 pages wiki that you can click and browse through the pages to find the right sound effect and download it for free.
4. Tom and Jerry Sound Effects
Pond5 offers 13 Tom and Jerry sound effects that you can listen by scrolling the cursor over the boxes and download the free preview of cartoon sound effects by clicking on Download Preview.
If you want to download the entire cartoon sound effect, you need to register, log in, and pay for it. There are filters like price, collections, duration, etc. to make your selection more precise.
5. Free SFX
In FreeSFX website, you can find a range of comical cartoon sound effects that includes classic effects like descend, boink, impact, pop, musical, running, rip and snap, bounce spring, slide whistle, squelch and splat, horn and loads more.
You need to log in to the website to download free cartoon sound effects.

6.GRSites
With over 1980 cartoon sound effects, the GRSites is one of the best free sites for downloading both mp3 and WAV files. You can browse from a range of categories to find the best cartoon sound effects for your videos.
7. Cartoon Running Sound Effect
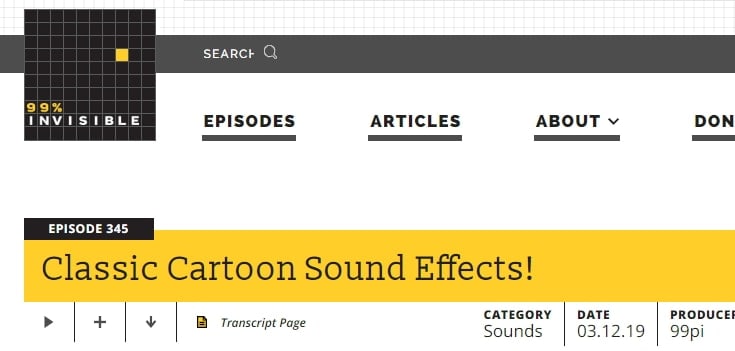
If you are looking for cartoon running sound effect, turn to Episode 345 in 99PercentInvisible. You can download the complete transcript page of around 30 minutes to use it in your video. Use the cartoon running sound effect produced by 99pi to enhance your video.
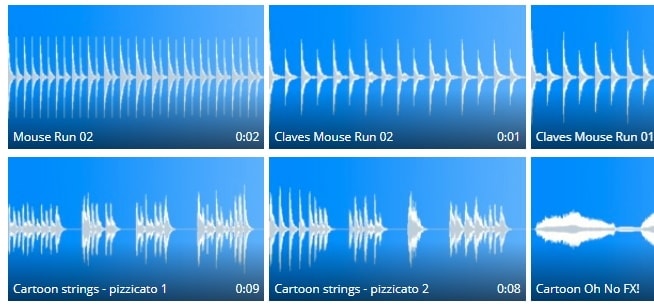
8. Big Fish Audio
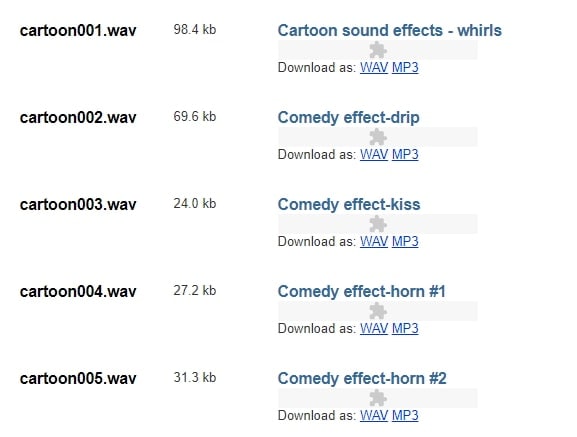
The Big Fish Audio’s cartoon sound FX includes 23 free classic cartoon sound effects. The filters include a range of sound FX types, styles, format, brand, etc.
You can click on the cartoon sound effect and listen to it or add it to your playlist. But, if you wish to download the free cartoon sound effects, you need to register and pay to use the sound effect.

You may also like: How to Extract Audio from Videos on Win/Mac/Phone >>
Conclusion
Make your cartoon videos perfect with the fantastic free cartoon sound effects available for download completely free. With the range of free cartoon sound effects, you don’t need to worry about creating new sounds or expenses. You need to download the free sounds and beautifully enhance it with your creativity. There are several other sites for downloading free cartoon sound effects, but here you can check out some of the trusted ones to use.
Benjamin Arango
Benjamin Arango is a writer and a lover of all things video.
Follow @Benjamin Arango
Benjamin Arango
Mar 27, 2024• Proven solutions
The sound plays a significant role in the videos. Without the right sound effects, your videos become dull. It doesn’t create an impact to grab the attention of the viewers. Especially when it comes to attracting the attention of kids while they watch cartoons.
Are you working on a cartoon video for kids or some animated action cartoons? Use the cartoon sound effects to add more intensity and emotions to the videos. Every time creating a new sound effect for your cartoon video becomes difficult.
If you are on a strict budget, producing new content becomes almost impossible. In such situations, free cartoon sound effects are the best way to enhance your cartoon videos.
In this article, you will learn eight best cartoon sound effects that you can download and make your videos perfect.
8 Best Cartoon Sound Effects Resources
1. Spongebob Sound Effects
MyInstant’s Spongebob soundboard offers a range of cartoon sound effects that can be easily downloaded just by clicking on the Download mp3 sound effect button. You can listen to over 120 classic cartoon sound effects and download it for free. You can also copy the embed link and paste it to your website.
2. Hanna Barbera Sound Effects
From Sounddogs, Hanna Barbera sound effects library, you can find over 2200 cartoon sound effects that are divided into 4 CDs. It has almost all the legendary classic cartoon sound effects from the cartoon shows like Yogi Bear, Huckleberry Hound, the Flintstones, The Jetsons, Quick Draw McGraw, and all the rest of the gang.
You can download the mp3 cartoon sound effects completely free by clicking on the Download ID number mentioned at the right end of each link.
3. Scooby Doo Running Sound
Fandom’s Scooby Doo running sound effects offers all the ideas used in 40 episodes of Scooby Doo throughout the three seasons on ABC. It is over 37000 pages wiki that you can click and browse through the pages to find the right sound effect and download it for free.
4. Tom and Jerry Sound Effects
Pond5 offers 13 Tom and Jerry sound effects that you can listen by scrolling the cursor over the boxes and download the free preview of cartoon sound effects by clicking on Download Preview.
If you want to download the entire cartoon sound effect, you need to register, log in, and pay for it. There are filters like price, collections, duration, etc. to make your selection more precise.
5. Free SFX
In FreeSFX website, you can find a range of comical cartoon sound effects that includes classic effects like descend, boink, impact, pop, musical, running, rip and snap, bounce spring, slide whistle, squelch and splat, horn and loads more.
You need to log in to the website to download free cartoon sound effects.
6.GRSites
With over 1980 cartoon sound effects, the GRSites is one of the best free sites for downloading both mp3 and WAV files. You can browse from a range of categories to find the best cartoon sound effects for your videos.
7. Cartoon Running Sound Effect
If you are looking for cartoon running sound effect, turn to Episode 345 in 99PercentInvisible. You can download the complete transcript page of around 30 minutes to use it in your video. Use the cartoon running sound effect produced by 99pi to enhance your video.
8. Big Fish Audio
The Big Fish Audio’s cartoon sound FX includes 23 free classic cartoon sound effects. The filters include a range of sound FX types, styles, format, brand, etc.
You can click on the cartoon sound effect and listen to it or add it to your playlist. But, if you wish to download the free cartoon sound effects, you need to register and pay to use the sound effect.
You may also like: How to Extract Audio from Videos on Win/Mac/Phone >>
Conclusion
Make your cartoon videos perfect with the fantastic free cartoon sound effects available for download completely free. With the range of free cartoon sound effects, you don’t need to worry about creating new sounds or expenses. You need to download the free sounds and beautifully enhance it with your creativity. There are several other sites for downloading free cartoon sound effects, but here you can check out some of the trusted ones to use.
Benjamin Arango
Benjamin Arango is a writer and a lover of all things video.
Follow @Benjamin Arango
The Alluring World of High-Quality Sound Editing Software: Advantages, Disadvantages, and Competitive Insights (2024 Update)
Audio editors are generally referred to as Digital Audio Workstation, DAW. They provide you with digital tools to edit, record, and also produce audio files. Most audio editors are used to create podcasts and mix different audio files.
Internet is full of different audio editors, but the case in the study is about Beautiful Audio Editor. To know more about this editor and to learn about its steps, read the article below.
In this article
01 What Is Beautiful Audio Editor?
02 Beautiful Audio Editor: Key Features, Pros & Cons
03 How to Use Beautiful Audio Editor?
04 Best Alternatives for Beautiful Audio Editor
Part 1. What Is Beautiful Audio Editor?
For an online editor, Beautiful Audio Editor is the best choice, and this is because the editor is feature-rich. This editor works well on both Chrome and Firefox browsers. Beautiful Audio Editor is great for the fact that it offers excellent options of frequency effects. Importantly, the audio editor allows you to save the files on Google Drive.

Do you know the best part of Beautiful Audio Editor? The editor supports multi-track editing and allows you to adjust and manage every track level. With this editor, try and move from complete silence to 6 decibels higher than the actual level. Do you know what wonders this can do? For smooth fade-ins and fade-outs, this is very helpful.
Part 2. Beautiful Audio Editor: Key Features, Pros & Cons
With Beautiful Audio Editor, you can edit amazing audio files, make stunning mixes and crazy podcasts. This online, easy-to-use editor has a lot of features to offer. Do you know what they are? Let’s increase your knowledge and share some key features of Beautiful Audio Editor:
· Editing Features
This is a multi-track audio editor that supports adjusting every level of each track. With Beautiful Audio Editor, try to alter volume and pan. Along with this, options like Move, Split, Duplicate and Delete sections of the audio file are also offered.
· Recording
Do you think Beautiful Audio Editor is just an editor? You are wrong if you think so. This is because the editor is not only great for editing but try and record with this fantastic tool. You can record through your microphone and get high-quality recordings.
· Effects
Beautiful Audio Editor provides a wide range of effects that can modify and transform your audio file. For instance, you get effects like Gain, Dynamic Compression, Reverb, Low/High pass filters. Along with all this, you can also speed up or slow down the audio.
· Customized Effects
Which audio editor offers customized effects? Beautiful Audio Editor does! With Volume Envelopes, you can create custom Fade Ins and Fade Outs. Moreover, the editor also provides features like dragging the effects, zooming, etc.
2.1. Pros & Cons of Beautiful Audio Editor
Do you have any idea about the benefits that you get from Beautiful Audio Editor? If you don’t, let’s enlighten you with this editor’s pros and cons.
Benefits
- You can export files both in 16-bit WAV and also in 128-bit MP3 format from Beautiful AudioEditor.
- This audio editor is free to use. You don’t even have to register for editing audio, just open Chrome or Firefox and start the work.
- Your edited audio files are saved both online and offline. You can either save files on Google Drive or else save local files.
- Beautiful Audio Editorenables you to create audio envelopes. Moreover, you can apply dozens of audio effects while editing.
Drawback
- A significant drawback of this editor is that it crashes if the project is over 300MB or 45mins. This is not reliable for high stake projects.
Part 3. How to Use Beautiful Audio Editor?
Have you ever used this editor before? As we mentioned in the introduction, we would introduce the steps to use Beautiful Audio Editor, so here we are. Are you ready to learn about its step-by-step guidelines? Let’s get started!
Step 1: To start the editing, open the online editor. A timeline screen will appear in front of you; head to the ‘File’ tab and click on it from the top menu bar. From the sub-menu, select the ‘Import local sound file’ option to import the file from your device.

Step 2: For splitting the audio, drag the play head to the point from where you want to split. Next to the toolbar, click on the ‘Split’ icon. This will split the audio into 2 parts, and you can split as much as you want to. By using the ‘Remove’ icon from the toolbar, you can also remove the extra audio part.

Step 3: For adding Fade to your audio, move to the line under the timeline. Now, select a start and an endpoint on the line and drag it downwards for Fade Out. In comparison, push it upwards for Fade In.

Step 4: For adjusting the Volume or the Gain, move to the bottom left corner. You will see a ‘Gain’ option, hit on it to open its tab on the right side of the screen, and then adjust the ‘Gain’ by moving the slider.

Step 5: You can also rename your file by double-clicking on it. Lastly, to save the file, tap on the ‘File’ tab and select the ‘Save project to a local file for later load’ option. After this, download the file to your preferred location.

Part 4. Best Alternatives for Beautiful Audio Editor
We have something for you if Beautiful Audio Editor has failed to impress you. The following section of this article will share the best alternatives with its readers. Let’s begin!
1. TwistedWave
Do you know how amazing this alternative is? TwistedWave is an online, easy-to-use audio editor. The interface of this editor is very clean and simple to understand. Moreover, you get a long list of effects from TwistedWave, for instance, Reverse, Graphic EQ, Fade in and Fade out, Amplify, Normalize, and others.
The best part about this audio editor is that you can easily send files to SoundCloud and also Google Drive. Likewise, you can upload files from both Google Drive and SoundCloud.

2. Bear Audio Editor
Moving on to discuss Bear Audio Editor, which can trim, cut, and also convert music files. Interestingly, you can avail all these amazing features online and free, without even downloading any software. This editor offers you options like Fade In and Out, Mute, Pitch and Volume Adjustment, etc.
You can also combine different music files, ringtones, etc., to make your perfect mix. Bear Audio Editor supports MP3, OGG, and WAV input formats. Whereas OGG, WMA, WAV, MP3, and M4R are output-supported formats.

3. Sodaphonic
Do you want to edit a file from Dropbox? Try Sodaphonic audio editor. You can not only open files from Dropbox but also import them from Google Drive. This online editor offers diverse options that include Louder, Quieter, Silence, Normalize, Bleep it, Reverse, and much more than this.
Other than this, you get different editing options, including Delete, Trim, Cut, Copy, etc. This editor also allows access to a microphone for recording.

Last Words
Beautiful Audio Editor, like its name, is beautiful and equally amazing to use. The online editor offers a lot of features, and interestingly, it’s free. The article discussed great details about Beautiful Audio Editor along with its guideline. What if we share another audio editor? Try Wondershare Filmora Audio Editor, the easy-to-use, drag-and-drop software.
You can modify your audio files to the next level with Filmora . Its advanced audio editing features are unmatched, like Audio Equalizer, Audio Denoise, Detach Audio from Video, and so much more. You can also add Voiceovers, replace original audio from video, add background music, etc.
Wondershare Filmora
Get started easily with Filmora’s powerful performance, intuitive interface, and countless effects!
Try It Free Try It Free Try It Free Learn More >

02 Beautiful Audio Editor: Key Features, Pros & Cons
03 How to Use Beautiful Audio Editor?
04 Best Alternatives for Beautiful Audio Editor
Part 1. What Is Beautiful Audio Editor?
For an online editor, Beautiful Audio Editor is the best choice, and this is because the editor is feature-rich. This editor works well on both Chrome and Firefox browsers. Beautiful Audio Editor is great for the fact that it offers excellent options of frequency effects. Importantly, the audio editor allows you to save the files on Google Drive.
Do you know the best part of Beautiful Audio Editor? The editor supports multi-track editing and allows you to adjust and manage every track level. With this editor, try and move from complete silence to 6 decibels higher than the actual level. Do you know what wonders this can do? For smooth fade-ins and fade-outs, this is very helpful.
Part 2. Beautiful Audio Editor: Key Features, Pros & Cons
With Beautiful Audio Editor, you can edit amazing audio files, make stunning mixes and crazy podcasts. This online, easy-to-use editor has a lot of features to offer. Do you know what they are? Let’s increase your knowledge and share some key features of Beautiful Audio Editor:
· Editing Features
This is a multi-track audio editor that supports adjusting every level of each track. With Beautiful Audio Editor, try to alter volume and pan. Along with this, options like Move, Split, Duplicate and Delete sections of the audio file are also offered.
· Recording
Do you think Beautiful Audio Editor is just an editor? You are wrong if you think so. This is because the editor is not only great for editing but try and record with this fantastic tool. You can record through your microphone and get high-quality recordings.
· Effects
Beautiful Audio Editor provides a wide range of effects that can modify and transform your audio file. For instance, you get effects like Gain, Dynamic Compression, Reverb, Low/High pass filters. Along with all this, you can also speed up or slow down the audio.
· Customized Effects
Which audio editor offers customized effects? Beautiful Audio Editor does! With Volume Envelopes, you can create custom Fade Ins and Fade Outs. Moreover, the editor also provides features like dragging the effects, zooming, etc.
2.1. Pros & Cons of Beautiful Audio Editor
Do you have any idea about the benefits that you get from Beautiful Audio Editor? If you don’t, let’s enlighten you with this editor’s pros and cons.
Benefits
- You can export files both in 16-bit WAV and also in 128-bit MP3 format from Beautiful AudioEditor.
- This audio editor is free to use. You don’t even have to register for editing audio, just open Chrome or Firefox and start the work.
- Your edited audio files are saved both online and offline. You can either save files on Google Drive or else save local files.
- Beautiful Audio Editorenables you to create audio envelopes. Moreover, you can apply dozens of audio effects while editing.
Drawback
- A significant drawback of this editor is that it crashes if the project is over 300MB or 45mins. This is not reliable for high stake projects.
Part 3. How to Use Beautiful Audio Editor?
Have you ever used this editor before? As we mentioned in the introduction, we would introduce the steps to use Beautiful Audio Editor, so here we are. Are you ready to learn about its step-by-step guidelines? Let’s get started!
Step 1: To start the editing, open the online editor. A timeline screen will appear in front of you; head to the ‘File’ tab and click on it from the top menu bar. From the sub-menu, select the ‘Import local sound file’ option to import the file from your device.
Step 2: For splitting the audio, drag the play head to the point from where you want to split. Next to the toolbar, click on the ‘Split’ icon. This will split the audio into 2 parts, and you can split as much as you want to. By using the ‘Remove’ icon from the toolbar, you can also remove the extra audio part.
Step 3: For adding Fade to your audio, move to the line under the timeline. Now, select a start and an endpoint on the line and drag it downwards for Fade Out. In comparison, push it upwards for Fade In.
Step 4: For adjusting the Volume or the Gain, move to the bottom left corner. You will see a ‘Gain’ option, hit on it to open its tab on the right side of the screen, and then adjust the ‘Gain’ by moving the slider.
Step 5: You can also rename your file by double-clicking on it. Lastly, to save the file, tap on the ‘File’ tab and select the ‘Save project to a local file for later load’ option. After this, download the file to your preferred location.
Part 4. Best Alternatives for Beautiful Audio Editor
We have something for you if Beautiful Audio Editor has failed to impress you. The following section of this article will share the best alternatives with its readers. Let’s begin!
1. TwistedWave
Do you know how amazing this alternative is? TwistedWave is an online, easy-to-use audio editor. The interface of this editor is very clean and simple to understand. Moreover, you get a long list of effects from TwistedWave, for instance, Reverse, Graphic EQ, Fade in and Fade out, Amplify, Normalize, and others.
The best part about this audio editor is that you can easily send files to SoundCloud and also Google Drive. Likewise, you can upload files from both Google Drive and SoundCloud.
2. Bear Audio Editor
Moving on to discuss Bear Audio Editor, which can trim, cut, and also convert music files. Interestingly, you can avail all these amazing features online and free, without even downloading any software. This editor offers you options like Fade In and Out, Mute, Pitch and Volume Adjustment, etc.
You can also combine different music files, ringtones, etc., to make your perfect mix. Bear Audio Editor supports MP3, OGG, and WAV input formats. Whereas OGG, WMA, WAV, MP3, and M4R are output-supported formats.
3. Sodaphonic
Do you want to edit a file from Dropbox? Try Sodaphonic audio editor. You can not only open files from Dropbox but also import them from Google Drive. This online editor offers diverse options that include Louder, Quieter, Silence, Normalize, Bleep it, Reverse, and much more than this.
Other than this, you get different editing options, including Delete, Trim, Cut, Copy, etc. This editor also allows access to a microphone for recording.
Last Words
Beautiful Audio Editor, like its name, is beautiful and equally amazing to use. The online editor offers a lot of features, and interestingly, it’s free. The article discussed great details about Beautiful Audio Editor along with its guideline. What if we share another audio editor? Try Wondershare Filmora Audio Editor, the easy-to-use, drag-and-drop software.
You can modify your audio files to the next level with Filmora . Its advanced audio editing features are unmatched, like Audio Equalizer, Audio Denoise, Detach Audio from Video, and so much more. You can also add Voiceovers, replace original audio from video, add background music, etc.
Wondershare Filmora
Get started easily with Filmora’s powerful performance, intuitive interface, and countless effects!
Try It Free Try It Free Try It Free Learn More >
Also read:
- Hunt for Console Game Acoustics
- New In 2024, Hush the Hubbub Innovative Methods for Diminishing Noise in Microphones
- New Crafting a Timeless Collection The Top 15 Rock Songs for 2024
- Updated In 2024, Digital De-Drumming Guide Simplifying the Silencing of Percussion in Music Files
- Updated Redefining Star Sounds In-Depth Look at the Latest Vocal Changing Devices & Methods
- New Harmonic Reduction Lowering Beat Rate Without Shifting Pitch Spectrum
- Updated In 2024, Essential Audio Workstation Applications on Chrome OS for Aspiring Musicians
- 2024 Approved Ultimate Tutorial Isolating Pure Audio From the Webbed Soundscape in Audacity
- New Cheerful Audio Ambiance for Yearly Celebration Visual Production, 2024
- New In 2024, Elevate Your Audio Crafting Skills 6 Simple Steps for Erasing Vocals in Adobe Audition
- New Exuberant Audio Landscape for Anniversary Video Project, 2024
- New Harmony in Transition 15 Masterful Scores Enhancing Diverse Video Styles for 2024
- How to Locate and Apply a Kakáring Noise Effect for 2024
- Best Songs Logging Top Tools for Quickly Preserving Your Cherished Tunes for 2024
- The Essential Guide to Adding Soundtracks to Windows GIFs
- New In 2024, The Cacophony Compendium Discovering the Top 8 Websites to Access an Array of Superior Free Sound Effects
- 2024 Approved 10 Charming Voice Alteration Methods to Lighten Up Telephone Dialogues
- Locating Chilling Sonic Elements for Films for 2024
- New Strategies for Minimizing Large-Scale Video and Audio Data for 2024
- Updated Top 5 Innovative Vocal Transformers for Google Meet The Future of Online Communication
- New 5 Leading Video Volume Boosters Online for Optimal Sound Experience
- New Streamlining Creativity Top 10 Plugin Essentials for Efficient Media Production
- New How to Enhance Your MKV-2023 File with Audio Content
- New The Ultimate Collection of Poignant Music for Reflective Moments for 2024
- Updated The Insiders Path to High-Quality Unobtrusive Musical Pairings for Media Creation for 2024
- 2024 Approved Decoding the Language of Rhythm and Flow in Rap Music
- New Essential URLs for Obtaining Free, Legal Birdsong Archives in MP3
- Updated 2024 Approved Hunting Down Vintage-Inspired Brushstroke Audio Assets
- Updated Omegle Explored Understanding the Platform, Its Community Dynamics & Safety Protocols
- New Soundtrack Sanctuary The Finest Websites Offering Free Audio Selections for Filmmakers for 2024
- 2024 Approved Harmony Extractor Purify Your Medias Acoustic Environment
- New 2024 Approved The Comprehensive Tutorial on Detaching Audible Elements From Video Clips
- New Mastering Sound A Guide to Advanced Editing Techniques with Sony Vegas for 2024
- Updated Integrating Lame Library Into Audacity for Advanced Audio Editing for 2024
- Experts Choice The Finest 10 Android Applications for High-Fidelity Voice Saving
- 2024 Approved Top Free DJ Beats Downloads Site
- Updated The Ultimate Guide to Premium Audio Voice-Reduction Apps & Online Services
- In 2024, Funny Noise Finder A Directory of Humorous Audio Elements
- Updated 2024 Approved Adobe After Effects Sound Design Incorporating Audio Into Your Animations
- Updated 2024 Approved Freeware Harmonies to Accentuate Photo Stories
- New Tutorial Guide How to Add Music to KineMaster for 2024
- What Is AI Influencer, In 2024
- How to Come up With the Best Pokemon Team On Xiaomi 13 Ultra? | Dr.fone
- Updated 2024 Approved Video Editing Made Easy Top Auto-Reframe Software Options
- Why Does My Lenovo ThinkPhone Keep Turning Off By Itself? 6 Fixes Are Here | Dr.fone
- In 2024, How to Change Location On Facebook Dating for your Samsung Galaxy S23+ | Dr.fone
- A Complete Guide To OEM Unlocking on Google Pixel Fold
- In 2024, Hassle-Free Ways to Remove FRP Lock on Xiaomi 14 Prowith/without a PC
- How to unlock iPhone 7 Plus screen lock without Passcode?
- 4 Most-Known Ways to Find Someone on Tinder For Xiaomi Redmi K70 by Name | Dr.fone
- How to Come up With the Best Pokemon Team On OnePlus Nord 3 5G? | Dr.fone
- New 2024 Approved Free Game Downloads The Top 10+ Sites You Need
- In 2024, Top 5 Car Locator Apps for Samsung Galaxy S23 Tactical Edition | Dr.fone
- In 2024, 10 Free Location Spoofers to Fake GPS Location on your Poco M6 Pro 4G | Dr.fone
- In 2024, Downloading SamFw FRP Tool 3.0 for Infinix Note 30 VIP Racing Edition
- In 2024, 4 Ways to Unlock iPhone SE to Use USB Accessories Without Passcode
- In 2024, How To Remove or Bypass Knox Enrollment Service On Poco C65
- Fixing Persistent Pandora Crashes on Oppo A78 5G | Dr.fone
- New Best 10 Hindi Video Translators with Step-by-Step Guidance for 2024
- 9 Best Free Android Monitoring Apps to Monitor Phone Remotely For your Honor X50i+ | Dr.fone
- How to Change Oppo A56s 5G Location on Skout | Dr.fone
- How to Reset a Honor X8b Phone That Is Locked | Dr.fone
- CatchEmAll Celebrate National Pokémon Day with Virtual Location On Oppo A59 5G | Dr.fone
- How to Rescue Lost Pictures from Nubia ?
- In 2024, Does find my friends work on Apple iPhone X | Dr.fone
- In 2024, How to Change Location On Facebook Dating for your Realme Note 50 | Dr.fone
- In 2024, Pattern Locks Are Unsafe Secure Your Vivo V27e Phone Now with These Tips
- Title: Updated 2024 Approved How to Detach Audio From Video in Premiere Pro?
- Author: Jacob
- Created at : 2024-05-05 03:50:45
- Updated at : 2024-05-06 03:50:45
- Link: https://audio-shaping.techidaily.com/updated-2024-approved-how-to-detach-audio-from-video-in-premiere-pro/
- License: This work is licensed under CC BY-NC-SA 4.0.
