
:max_bytes(150000):strip_icc():format(webp)/full-frame-shot-of-speakers-1138109687-33289baddc314b44ae87abc2fc8060cd-e7bccad6d81244509ed97ddf557f89e4.jpg)
New The Musicians Manual to Individualizing Sound Files for 2024
“The Musician’s Manual to Individualizing Sound Files”
You often come across audio files that we like and enjoy. An uncertain situation usually occurs when you love a small part of the audio, but the complete audio is not per your level. If you encounter any such situation, what will you do? Spend hours to find another audio? Or suffice with what you have got?
What if we give you a third option. How about splitting the audio into smaller parts? Well, this sounds a lot better than the other options. The only thing you need is a good Audio Splitter for doing this. You don’t even have to worry about this because we are about to guide you on how to split audio files. We will share an MP3 splitter online and the steps for both Windows and Mac.
In this article
01 How to Split Audio Files on Windows and Mac?
02 How to Split Audio/MP3 File Online?
Part 1. How to Split Audio Files on Windows and Mac?
Whenever you think about audio editing, Wondershare Filmora is associated with that as the best software. The audio editor is perfect and compatible with both Windows and Mac. Wondershare Filmora never ceases to impress its users with its stunning features.
The audio editor Filmora offers a wide range of features. You can add your favorite background music to your videos and change your ordinary video. Moreover, features like trimming, cutting, adjusting audio are also available.
Wondershare Filmora also offers professional editing features such as its Audio Equalizer EQ, Audio Mixer, and also Audio Denoise feature. An exciting thing about Filmora audio editor is its Detach Audio feature. With this, you can Detach Audio from a video.
For Win 7 or later (64-bit)
For macOS 10.12 or later
Another handy feature that you get from Filmora is Audio Splitter. With this, users can split audio files and extract the part that they like while deleting the other part. If you want to learn about splitting audio files on Windows and Mac with Filmora, then follow the steps below.
Step 1: Creating Project
To split audio files, you firstly need to open Wondershare Filmora on your respective device. Then, you need to create a new project so that you can get started. The next step demands you to import the audio file to Filmora.

Step 2: Importing Audio File
This could be done by moving to the ‘File’ tab from the top panel. A menu will appear on the screen from which you should select ‘Import Files.’ Then a popup menu will show up, simply hit the ‘Import Media Files’ option.

Step 3: Drag onto Timeline
You can locate the file from your respective device and import it to Filmora. Once the file has been imported successfully, you now have to drag and drop it onto the timeline to start splitting it.

Step 4: Split Audio
Now comes the fun part. Once the audio file is on the timeline, you will see a play head. You need to drag the play head to the point where you want to split the audio. You will see a scissor option after dragging the play head; hit that to split audio into two parts.

Step 5: Edit the Separated Audio
You can delete the audio that you don’t want by selecting it and pressing the ‘Delete’ button on the keyboard. In comparison, you can edit the other part of the audio. For this, double click on the audio in the timeline to open Audio Editing Window.

Step 6: Exporting File
Once you have edited the file and are satisfied, it is ready to be exported. For this, hit the ‘Export’ button, select the output format and save it on your device.

Split Audio after Detaching from Video
As we have mentioned, sometimes you like a sound, but it is part of a video. Do you know a way to get that audio from a video? Well, yes, with Filmora, you can get your favorite audio even from videos and then split it.
This could be done by using its ‘Detach Audio from Video’ feature. What this feature does is that it separates the audio from video and displays both the files separately on the timeline. You can delete the video file by selecting it and pressing ‘Delete.’ Whereas, by following the above-mentioned steps, you can then split the audio easily with the Filmora MP3 splitter.

Final Words
To learn about splitting audio, nothing is better than this article. We have discussed in detail about MP3 splitter online. Also, we talked about Wondershare Filmora audio splitter, the best option for all Windows and Mac users.
Wondershare Filmora
Get started easily with Filmora’s powerful performance, intuitive interface, and countless effects!
Try It Free Try It Free Try It Free Learn More >

02 How to Split Audio/MP3 File Online?
Part 1. How to Split Audio Files on Windows and Mac?
Whenever you think about audio editing, Wondershare Filmora is associated with that as the best software. The audio editor is perfect and compatible with both Windows and Mac. Wondershare Filmora never ceases to impress its users with its stunning features.
The audio editor Filmora offers a wide range of features. You can add your favorite background music to your videos and change your ordinary video. Moreover, features like trimming, cutting, adjusting audio are also available.
Wondershare Filmora also offers professional editing features such as its Audio Equalizer EQ, Audio Mixer, and also Audio Denoise feature. An exciting thing about Filmora audio editor is its Detach Audio feature. With this, you can Detach Audio from a video.
For Win 7 or later (64-bit)
For macOS 10.12 or later
Another handy feature that you get from Filmora is Audio Splitter. With this, users can split audio files and extract the part that they like while deleting the other part. If you want to learn about splitting audio files on Windows and Mac with Filmora, then follow the steps below.
Step 1: Creating Project
To split audio files, you firstly need to open Wondershare Filmora on your respective device. Then, you need to create a new project so that you can get started. The next step demands you to import the audio file to Filmora.
Step 2: Importing Audio File
This could be done by moving to the ‘File’ tab from the top panel. A menu will appear on the screen from which you should select ‘Import Files.’ Then a popup menu will show up, simply hit the ‘Import Media Files’ option.
Step 3: Drag onto Timeline
You can locate the file from your respective device and import it to Filmora. Once the file has been imported successfully, you now have to drag and drop it onto the timeline to start splitting it.
Step 4: Split Audio
Now comes the fun part. Once the audio file is on the timeline, you will see a play head. You need to drag the play head to the point where you want to split the audio. You will see a scissor option after dragging the play head; hit that to split audio into two parts.
Step 5: Edit the Separated Audio
You can delete the audio that you don’t want by selecting it and pressing the ‘Delete’ button on the keyboard. In comparison, you can edit the other part of the audio. For this, double click on the audio in the timeline to open Audio Editing Window.
Step 6: Exporting File
Once you have edited the file and are satisfied, it is ready to be exported. For this, hit the ‘Export’ button, select the output format and save it on your device.
Split Audio after Detaching from Video
As we have mentioned, sometimes you like a sound, but it is part of a video. Do you know a way to get that audio from a video? Well, yes, with Filmora, you can get your favorite audio even from videos and then split it.
This could be done by using its ‘Detach Audio from Video’ feature. What this feature does is that it separates the audio from video and displays both the files separately on the timeline. You can delete the video file by selecting it and pressing ‘Delete.’ Whereas, by following the above-mentioned steps, you can then split the audio easily with the Filmora MP3 splitter.
Final Words
To learn about splitting audio, nothing is better than this article. We have discussed in detail about MP3 splitter online. Also, we talked about Wondershare Filmora audio splitter, the best option for all Windows and Mac users.
Wondershare Filmora
Get started easily with Filmora’s powerful performance, intuitive interface, and countless effects!
Try It Free Try It Free Try It Free Learn More >
Synthetic Soundscape Pioneers: Unveiling the Top AI Composers
Top Best 10 AI Music Composers in 2024

Benjamin Arango
Mar 27, 2024• Proven solutions
Robots can’t be creative, right? A number of startups that focus on the development of artificial intelligence that is capable of composing music have proved this statement wrong. AI music composers generate original, copyright-free music you can use in your latest YouTube video or social media video ad. You don’t even have to be a sound designer or a musician to produce soundtracks for your videos with AI Music Composers, because you can upload the music that has already been recorded and create variations of it. So, let’s take a look at what AI music composers have to offer in 2024.
| 1 - Amper Music | 2 - AIVA |
|---|---|
| 3 - Jukedeck | 4 - Ecrett Music |
| 5 - Melodrive | 6 - ORB Composer |
| 7 - Amadeus Code | 8 - Humtap |
| 9 - Muzeek | 10 - Brain.fm |
Ten Best AI Music Composers You Should Know About
The AI technologies that can compose music are still relatively novel, and as time passes, they can only develop and grow further. Consequently, each of the AI music composers we featured in this article offers a different range of possibilities. Here are the ten best AI music composers you shouldn’t miss out on in 2024.

Filmora AI Music Editor
Edit Audio with AI Music Editor
Experience the power of Filmora’s AI tools and make your audio or music stand out like never before! Audio Denoise, Audio Ducking, Audio Synchronization, Audio Stretch, etc…
Try It Free Try It Free Try It Free Learn More >
1. Amper Music
Price: Available upon request
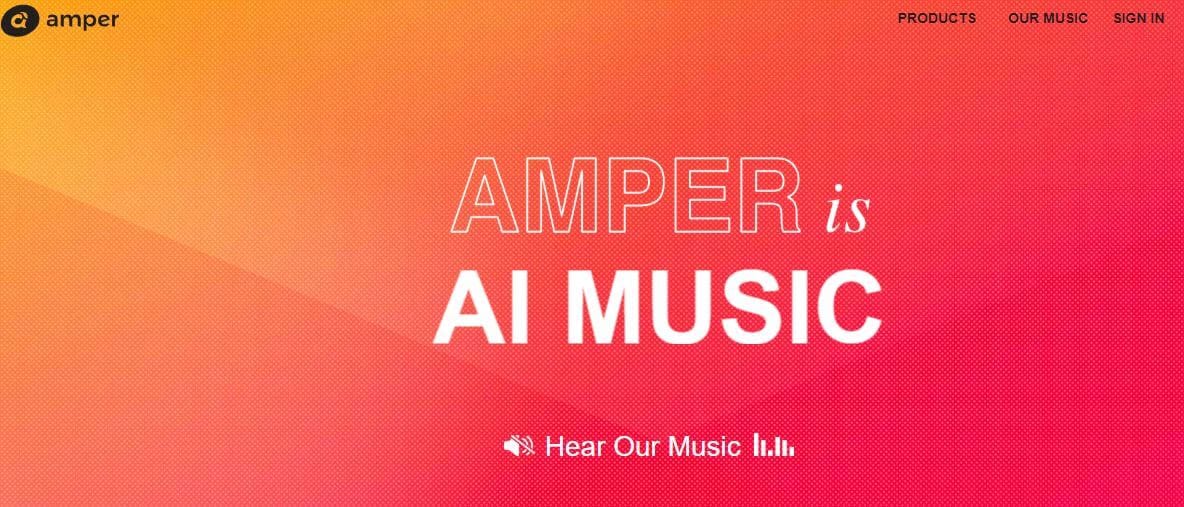
Industry professionals know just how frustrating the music licensing process can be. Amper Music is a cloud-based platform designed to simplify the process of creating soundtracks for movies and video games, as it produces AI generated algorithms that help users create music in a variety of music genres. You must first create an account on this platform, in order to be able to use the free version of Amper Music that provides only a limited amount of features. Upgrading to the pro version of Amper Music will enable you to enjoy the full potential of this rapidly growing AI Music Composer.
2. AIVA
Price: Free version available, subscription plans start from €14 p/month
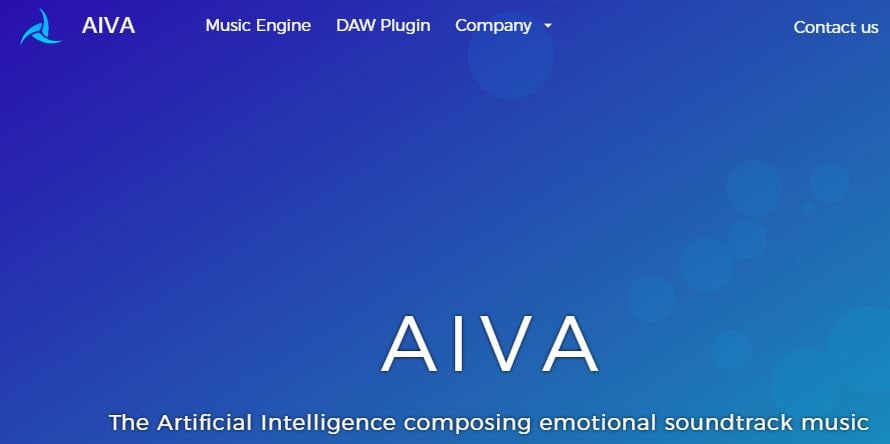
Since 2016, when AIVA Technologies was founded, its team has worked on developing an AI script that can compose emotional soundtracks for ads, video games, or movies. Soon after, the AI published its first oeuvre titled ‘Opus 1 for Piano Solo and in the subsequent years, AIVA released an album and composed music for a video game. Besides enabling its users to create music from scratch, AIVA can also be used to produce variations of existing songs. The music engine that powers this AI music composer makes the production of corporate or social media videos much easier, as it eliminates the need to go through the music licensing process.
3. Jukedeck
Price: Free version available, Pricing plans start from $0.99 per download
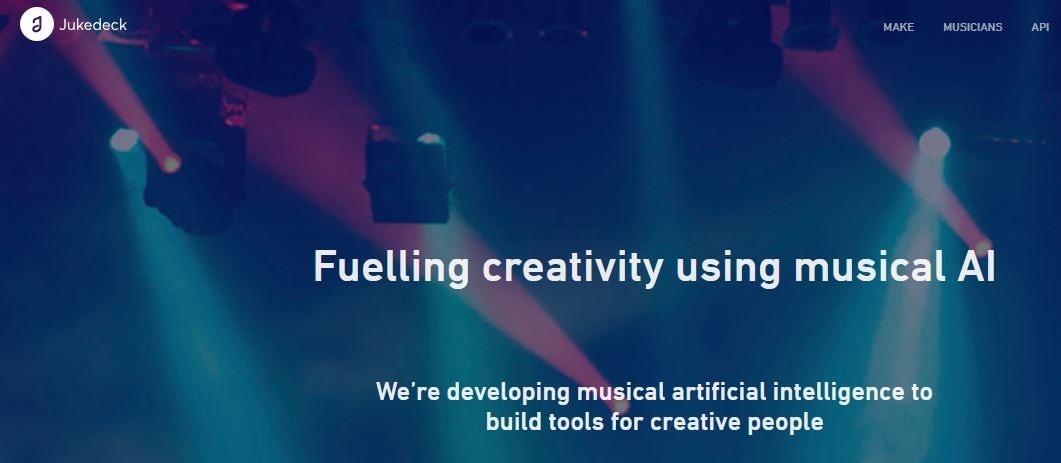
The AI music composer developed by the Jukedeck startup resembles the Amper’s music composer because they both rely on neural networks to analyze music data, that is then used by the AI to learn how to compose original music. Each track that is available through this AI music composer can be edited, so you can change its length or its tempo. You can create music with Jukedeck for free if you decide to give all the rights to the AI composer, while both individuals and small businesses can purchase the license to use the song created with Jukedeck for just $0.99.
Note: Jukedeck has been acquired by TikTok, and we are waiting for a new Jukedeck.
![]()
A cross-platform for making videos anywhere for all creators

Why your video editing isn’t good enough? How about some creative inspo?
- 100 Million+ Users
- 150+ Countries and Regions
- 4 Million+ Social Media Followers
- 5 Million+ Stock Media for Use
* Secure Download

4. Ecrett Music
Price: Subscription plans start at $5
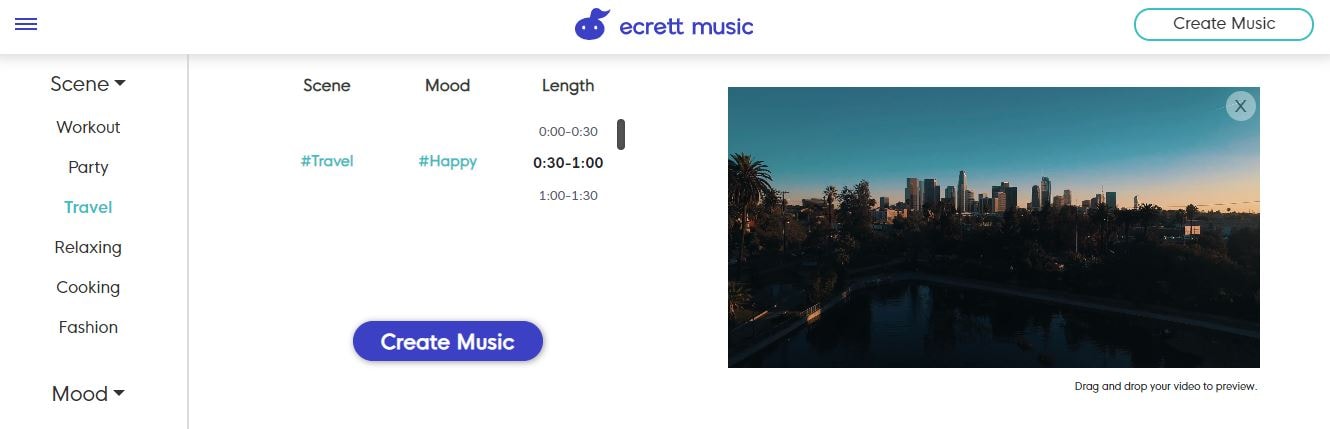
This online AI music composer makes creating stunning soundtracks for videos look easy. You just have to upload a video for which you want to generate music and select the type of scene and the mood of that scene. Party, Travel or Fashion are among the types of scenes you can choose from, while moods range from happy to serious. When done, simply click on the Create Music button, and the platform will automatically generate the soundtrack for your video. In case you are producing videos on a constant basis, you should consider purchasing one of the available subscription plans.
5. Melodrive
Price: Free
Compatibility: iOS, Windows
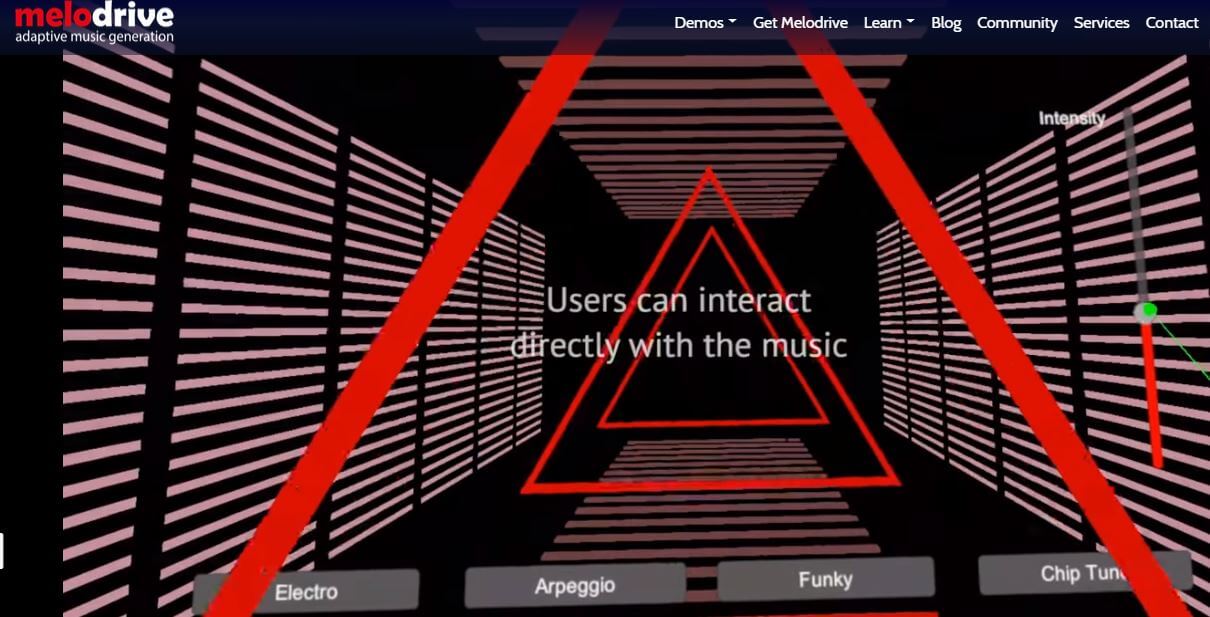
At the moment, the Lite and Indie versions of Melodrive are available for download free of charge, but the Indie version of this AI music composer still offers more options. Melodrive is one of the first AI systems that can compose emotional and unique music in real time. The AI generates music by adapting to the media environment and aims to match the mood and the style of the video. It is worth noting that Melodrive is still under development and that through time its capabilities to compose music are going to become even more refined than they already are.
6. ORB Composer
Price: Pricing plans start at $149,00
Compatibility: macOS, Windows

You can’t generate music automatically with ORB Composer, because the AI creates music based on your choices. That’s why you need to know at least the basic rules of music composition in order to be able to use the ORB Composer properly. The AI music composer comes bundled with a rich collection of chord progressions, that contains almost all chords used in popular music. This tool is aimed at artists who are interested in experimenting with the possibilities of creating music with artificial intelligence and discovering new styles of music. There are six music templates you can choose from, and you can create compositions by simply organizing different blocks of music.
Filmora AI Audio Stretcher
Wondershare Filmora - AI Audio Stretcher
• Retime any audio track to fit the duration of your video almost instantly.
• Rearrange songs without quality loss.
• Cross-platform supported - (Windows, Mac, iOS, Android)
Start Audio Stretch Start Audio Stretch Start Audio Stretch Learn More >
7. Amadeus Code
Price: Free, but the app offers in-app purchases
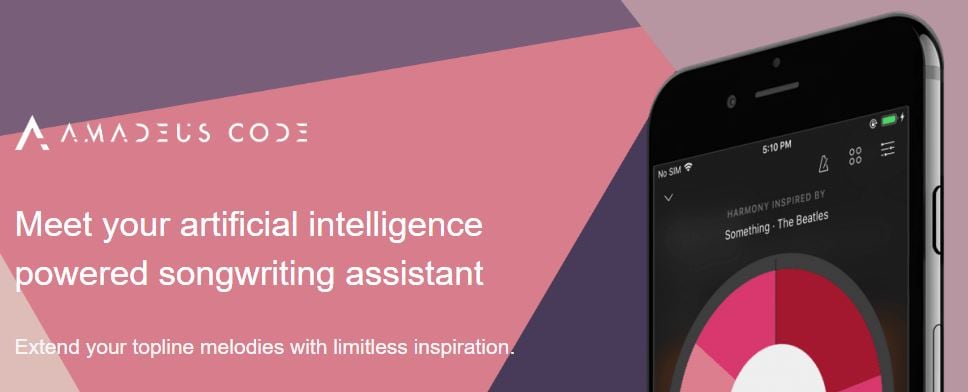
Compatibility: iOS
Both skilled musicians and music enthusiast can use this iOS-based app to create new melodies in just a few minutes. The AI engine that the Amadeus Code uses contains chord progressions of some of the most famous songs ever created and it let you use them to create new and innovative structures of music compositions. Moreover, you can use gestures to create new songs or recreate specific segments of songs you composed earlier. Even though Amadeus Code lets its users export audio and MIDI files to audio editing software, you still have to purchase all songs you want to keep.
8. Humtap
Price: Free
Compatibility: iOS
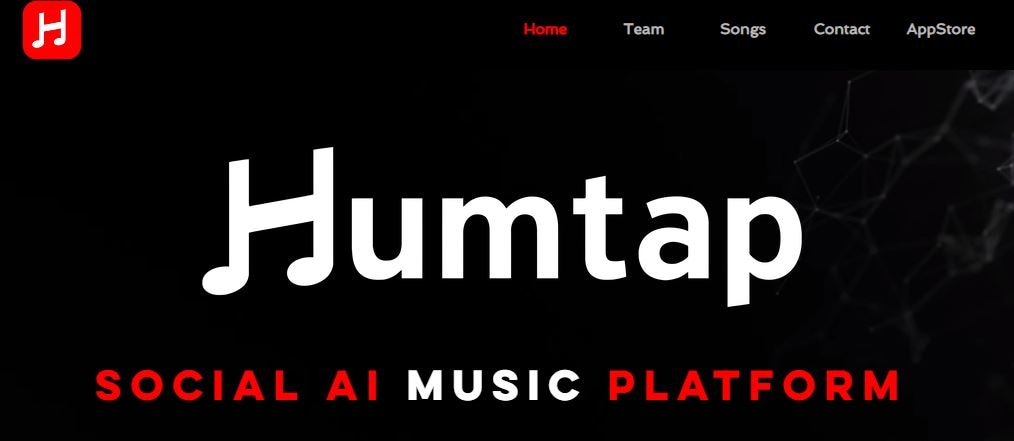
Musicians who have a tough time remembering their own ideas are going to love using Humtap because they can just hum a melody and the app will automatically generate an entire song using different instruments. What’s more, beats can be added with a single tap, and after the music is generated you can proceed to add the vocals as well. Humptap also has video making capabilities, so you can create videos for all songs you compose with this app. All tracks and videos generated with the Humtap AI music composer can be saved to your phone, but you can’t share your new creations to social media directly from the app.
9. Muzeek
Price: Free trial available, pricing plans start from $19 per month
Compatibility: macOS
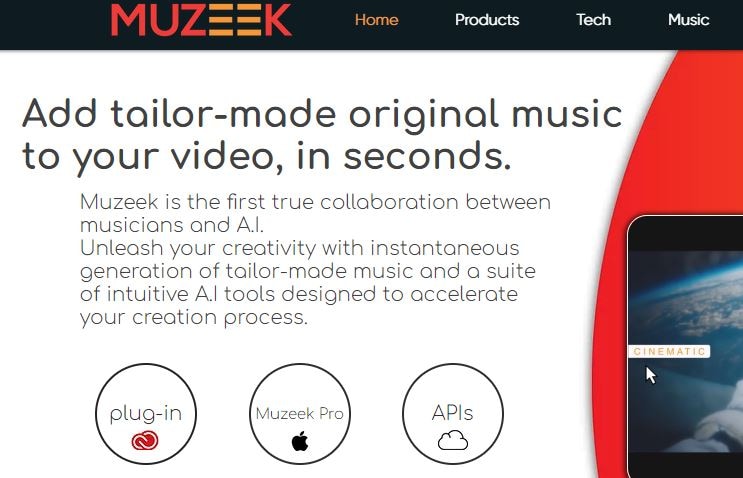
If you are in need of licensed music for the video you’re planning on sharing to social media networks, then Muzeek is one of the best choices you can make. The AI algorithm Muzeek uses analyzes the videos for which you are generating music and it creates soundtracks that perfectly fit the rhythm of the video. All content creators, including online marketing agencies or video game developers, can rely on Muzeek AI music composer to create authentic music in high quality. Moreover, Muzeek can also analyze the video’s original audio and create subtitles from it or adjust its volume automatically.
10. Brain.fm
Price: Subscription plans start from $6,95 per month
Compatibility: Android, online
The idea that music can make our brains more productive is at the very core of what Brain.fm platform is all about. A team of scientists, musicians and engineers uses artificial intelligence to generate music designed to make your brain more productive and focused. They claim that the music created with their AI music composer achieve its effects in just ten to fifteen minutes. However, you can’t use Brain.fm to create your own music, as this platform is better suited for people who spend a lot of time at work and have a tough time maintaining their focus while performing important tasks.
Conclusion
The opportunities AI music composers offer are still not properly explored, because most of these technologies are still under development. The results AI music composers we included in this article have managed to achieve so far are impressive because each of them can produce high-quality audio files for all sorts of video content. Which AI music composer do you like to use the most? Leave a comment, and let us know.
Benjamin Arango
Benjamin Arango is a writer and a lover of all things video.
Follow @Benjamin Arango
Benjamin Arango
Mar 27, 2024• Proven solutions
Robots can’t be creative, right? A number of startups that focus on the development of artificial intelligence that is capable of composing music have proved this statement wrong. AI music composers generate original, copyright-free music you can use in your latest YouTube video or social media video ad. You don’t even have to be a sound designer or a musician to produce soundtracks for your videos with AI Music Composers, because you can upload the music that has already been recorded and create variations of it. So, let’s take a look at what AI music composers have to offer in 2024.
| 1 - Amper Music | 2 - AIVA |
|---|---|
| 3 - Jukedeck | 4 - Ecrett Music |
| 5 - Melodrive | 6 - ORB Composer |
| 7 - Amadeus Code | 8 - Humtap |
| 9 - Muzeek | 10 - Brain.fm |
Ten Best AI Music Composers You Should Know About
The AI technologies that can compose music are still relatively novel, and as time passes, they can only develop and grow further. Consequently, each of the AI music composers we featured in this article offers a different range of possibilities. Here are the ten best AI music composers you shouldn’t miss out on in 2024.
Filmora AI Music Editor
Edit Audio with AI Music Editor
Experience the power of Filmora’s AI tools and make your audio or music stand out like never before! Audio Denoise, Audio Ducking, Audio Synchronization, Audio Stretch, etc…
Try It Free Try It Free Try It Free Learn More >
1. Amper Music
Price: Available upon request
Industry professionals know just how frustrating the music licensing process can be. Amper Music is a cloud-based platform designed to simplify the process of creating soundtracks for movies and video games, as it produces AI generated algorithms that help users create music in a variety of music genres. You must first create an account on this platform, in order to be able to use the free version of Amper Music that provides only a limited amount of features. Upgrading to the pro version of Amper Music will enable you to enjoy the full potential of this rapidly growing AI Music Composer.
2. AIVA
Price: Free version available, subscription plans start from €14 p/month
Since 2016, when AIVA Technologies was founded, its team has worked on developing an AI script that can compose emotional soundtracks for ads, video games, or movies. Soon after, the AI published its first oeuvre titled ‘Opus 1 for Piano Solo and in the subsequent years, AIVA released an album and composed music for a video game. Besides enabling its users to create music from scratch, AIVA can also be used to produce variations of existing songs. The music engine that powers this AI music composer makes the production of corporate or social media videos much easier, as it eliminates the need to go through the music licensing process.
3. Jukedeck
Price: Free version available, Pricing plans start from $0.99 per download
The AI music composer developed by the Jukedeck startup resembles the Amper’s music composer because they both rely on neural networks to analyze music data, that is then used by the AI to learn how to compose original music. Each track that is available through this AI music composer can be edited, so you can change its length or its tempo. You can create music with Jukedeck for free if you decide to give all the rights to the AI composer, while both individuals and small businesses can purchase the license to use the song created with Jukedeck for just $0.99.
Note: Jukedeck has been acquired by TikTok, and we are waiting for a new Jukedeck.
![]()
A cross-platform for making videos anywhere for all creators
Why your video editing isn’t good enough? How about some creative inspo?
- 100 Million+ Users
- 150+ Countries and Regions
- 4 Million+ Social Media Followers
- 5 Million+ Stock Media for Use
* Secure Download
4. Ecrett Music
Price: Subscription plans start at $5

This online AI music composer makes creating stunning soundtracks for videos look easy. You just have to upload a video for which you want to generate music and select the type of scene and the mood of that scene. Party, Travel or Fashion are among the types of scenes you can choose from, while moods range from happy to serious. When done, simply click on the Create Music button, and the platform will automatically generate the soundtrack for your video. In case you are producing videos on a constant basis, you should consider purchasing one of the available subscription plans.
5. Melodrive
Price: Free
Compatibility: iOS, Windows
At the moment, the Lite and Indie versions of Melodrive are available for download free of charge, but the Indie version of this AI music composer still offers more options. Melodrive is one of the first AI systems that can compose emotional and unique music in real time. The AI generates music by adapting to the media environment and aims to match the mood and the style of the video. It is worth noting that Melodrive is still under development and that through time its capabilities to compose music are going to become even more refined than they already are.
6. ORB Composer
Price: Pricing plans start at $149,00
Compatibility: macOS, Windows

You can’t generate music automatically with ORB Composer, because the AI creates music based on your choices. That’s why you need to know at least the basic rules of music composition in order to be able to use the ORB Composer properly. The AI music composer comes bundled with a rich collection of chord progressions, that contains almost all chords used in popular music. This tool is aimed at artists who are interested in experimenting with the possibilities of creating music with artificial intelligence and discovering new styles of music. There are six music templates you can choose from, and you can create compositions by simply organizing different blocks of music.
Filmora AI Audio Stretcher
Wondershare Filmora - AI Audio Stretcher
• Retime any audio track to fit the duration of your video almost instantly.
• Rearrange songs without quality loss.
• Cross-platform supported - (Windows, Mac, iOS, Android)
Start Audio Stretch Start Audio Stretch Start Audio Stretch Learn More >
7. Amadeus Code
Price: Free, but the app offers in-app purchases
Compatibility: iOS
Both skilled musicians and music enthusiast can use this iOS-based app to create new melodies in just a few minutes. The AI engine that the Amadeus Code uses contains chord progressions of some of the most famous songs ever created and it let you use them to create new and innovative structures of music compositions. Moreover, you can use gestures to create new songs or recreate specific segments of songs you composed earlier. Even though Amadeus Code lets its users export audio and MIDI files to audio editing software, you still have to purchase all songs you want to keep.
8. Humtap
Price: Free
Compatibility: iOS
Musicians who have a tough time remembering their own ideas are going to love using Humtap because they can just hum a melody and the app will automatically generate an entire song using different instruments. What’s more, beats can be added with a single tap, and after the music is generated you can proceed to add the vocals as well. Humptap also has video making capabilities, so you can create videos for all songs you compose with this app. All tracks and videos generated with the Humtap AI music composer can be saved to your phone, but you can’t share your new creations to social media directly from the app.
9. Muzeek
Price: Free trial available, pricing plans start from $19 per month
Compatibility: macOS
If you are in need of licensed music for the video you’re planning on sharing to social media networks, then Muzeek is one of the best choices you can make. The AI algorithm Muzeek uses analyzes the videos for which you are generating music and it creates soundtracks that perfectly fit the rhythm of the video. All content creators, including online marketing agencies or video game developers, can rely on Muzeek AI music composer to create authentic music in high quality. Moreover, Muzeek can also analyze the video’s original audio and create subtitles from it or adjust its volume automatically.
10. Brain.fm
Price: Subscription plans start from $6,95 per month
Compatibility: Android, online
The idea that music can make our brains more productive is at the very core of what Brain.fm platform is all about. A team of scientists, musicians and engineers uses artificial intelligence to generate music designed to make your brain more productive and focused. They claim that the music created with their AI music composer achieve its effects in just ten to fifteen minutes. However, you can’t use Brain.fm to create your own music, as this platform is better suited for people who spend a lot of time at work and have a tough time maintaining their focus while performing important tasks.
Conclusion
The opportunities AI music composers offer are still not properly explored, because most of these technologies are still under development. The results AI music composers we included in this article have managed to achieve so far are impressive because each of them can produce high-quality audio files for all sorts of video content. Which AI music composer do you like to use the most? Leave a comment, and let us know.
Benjamin Arango
Benjamin Arango is a writer and a lover of all things video.
Follow @Benjamin Arango
“Creating Sonic Brilliance with Adobe Audition : Reviewing Tools and Techniques for Producers”
What can be more useful than audio editing on a single platform? There is software that will solve this problem under the name of ‘Adobe Audition.’ This Adobe audio editor has got all the facilities that you might need while editing audio. The audio might be edited for professional purposes or random fun sessions.
Do you want to know more about this particular Adobe voice editor? Continue reading this article to enhance your knowledge of this specific editor.
In this article
01 What Is Adobe Audio Editor?
02 Key Features of Adobe Auditionos
03 Pros and Cons of Adobe Audio Editor-Adobe Audition
04 How Do You Edit Audio in Adobe Audition?
Part 1. What Is Adobe Audio Editor?
Adobe developed ‘Audition ,’ an Adobe audio editor that is a powerful platform that you can use for making significant changes in audio files. Audition is an editor for mastering audio editing for different purposes. You can use this Adobe voice editor to control the audio you want to edit, and it can remove the background noises.
This Adobe audio editor has an intuitive interface that attracts users. It has a straightforward way of editing that helps beginner-level users a lot. You can edit single track and also multi-tracks and use tons of plug-ins as they are supported by this Adobe voice editor.

Part 2. Key Features of Adobe Audition
This Adobe audio editor is a very famous editor among both beginners and professionals. It is loaded with amazing features and editing options. You can completely transform your audio files with Adobe Audition. Let’s share some of the key features of this Adobe voice editor.
· Audio Restoration
The biggest factor that attracts users is the AI Audio Restoration feature of Adobe Audition. This is not just an editor; it can automatically restore your damaged files. Moreover, the sound sampling tool also helps remove sounds like crack, rumble, etc.
· Spectral Analysis
Do you know that this Adobe voice editor offers spectral analysis? With this feature, you can look at the audio but in frequency. In addition to this, you can also select the unwanted part of the audio and easily remove it.
· Essential Sounds
For adding effects on Adobe Audition, this is the best option. Users can easily access this feature and assign a category like SFX, Music, Ambience, and Dialogue. After selecting a category, you get different effects like; In a large Room, From Outside, Podcast Voice, Make Distant, etc.
· Envelopes
What are envelopes in this Adobe audio editor? Each track has lines running through them in Adobe Audition. With these, you can control the volume the ability of the pan. Moreover, you can also have control over the EQ envelope.
Part 3. Pros and Cons of Adobe Audio Editor-Adobe Audition
There are a lot of audio editors available in the world that you can use. There is always some downside to any product you use, as nothing is perfect. In this section, we are discussing the pros and cons of Adobe Audition, Adobe Audio Editor.
Pros
- Have you used any software that allows the user to have AI recovery? Adobe Audition has given AI recovery access to users with ease.
- You must have used noise reduction in other software. The quality of the noise reduction services provided by this editor is among the top-notch service providers available.
- Have you used 100+ effects for audios? Audition provides 100+ audio effects. They can be edited on individual clips or over the whole track.
- Moreover, background noises like hum crackle can be reduced using AI tools, while sounds like barking dogs or cars passing by can be removed by Spectral Frequency Display.
Con
- Adobe voice editor has inconvenient subscription options. For example, you can buy Adobe Audition for 20.99$ per month; on the other hand; you can have all the Adobe applications for 52.99$ per month.
Part 4. How Do You Edit Audio in Adobe Audition?
This Adobe audio editor is an impressive audio editing software. You get different and unique editing options that are very useful for creating great audio files. If you are looking for steps to edit in Adobe Audition, this section is for you.
1. Adobe Audition Workflow for Beginner
Are you a beginner? Let’s share some basic details about Adobe Audition. You can start by recording the audio, and once done; you can pause it. The waveform view of the recording will appear on the screen. Furthermore, you have a Files option in the top left corner where all the files appear. Just below this, you get the Media Browser tab, where you can browse the media files from your device.
Do you know something about the Effects Rack? This part of the interface allows you to add and save effects for editing. If you record things and make notes, the Markers tab is great for noting things along the timeline. For adding audio effects, the Essential Sound section will be visible on the right side of the screen.
2. Getting Started with Audition Audio Mixing
Mixing files is always fun, but what about mixing files with Adobe voice editor? Let’s share the steps for this mixing purpose.
Step 1: Start by importing all the media files you plan to mix. Next, head to the Multitrack option from the top left corner to mix multiple tracks. Then, you have to drag and drop the audio files on the timeline.

Step 2: Now, listen to the audio files and analyze the volumes. If you need to adjust the volume, select the tracks, and from the sub-menu, hit on ‘Match Clip Loudness.’

Step 3: If you wish to add effects to the tracks, head to the ‘Effects Rack’ section. There you can get options like Amplify, Compression, etc.

Step 4: While mixing files with Adobe, you can also edit and add volume envelope points. Select the audio file, right-click on it, and look for the Remix option for smart mixing.

3. How Can You Apply Effects in Adobe Audition ?
If you have successfully mixed the files, we should discuss audio effects. So, let’s get started.
Step 1: For adding effects, start by heading to the Windows tab. From the submenu, select the Effects Rack option. Or else, you can also access Effect racks from the left screen pane. Remember, you can add effects in both forms, either its Waveform timeline or Multitrack.

Step 2: After this, it’s time to add your favorite effect; for that, hit the side arrow in front of every effect number. A list of offered effects will appear; you can select an effect of your choice.

Step 3: After adding an effect, the effect will be added to the list in the effect rack. Secondly, a window appears on the screen, it’s the Effect Control Box, to customize and adjust the settings of the added effect.

Step 4: This exceptional Adobe audio editor offers different presets that could be used instead of using the default effect. Moreover, you can also add the effect to the preset section after adjusting the Effect Control Box. You can also turn off or turn on individual effects by pressing the button along every option in Effect Rack.

4. How to Do Noise Reduction & Restoration in Adobe Audition
You might have recorded a great podcast or voiceover, but when you check it, you are devastated. This is because there is a lot of background noise, disturbing the file quality. Try Noise Reduction in Adobe voice editor by following these steps.
Step 1: Start by importing the audio file to Adobe Audition. Then, carefully listen and analyze the file. This is because you have to identify the part where you get the extra noise to work on it.

Step 2: After the part has been identified, let’s move further and head to the Effects tab. From the submenu, hover on the Noise Reduction/ Restoration option. Now, select the Capture Noise Print option; this feature finds all the highlighted part information.

Step 3: Next step demands you to open the Effects tab. Once that is done, go to the Noise Reduction / Restoration option. Further, select the Noise Reduction Process.

Step 4: This will open a pop-up window for Noise Reduction Control where you can adjust things. This Adobe voice editor allows you to adjust Noise reduction by using the slider. For detailed editing, open Advanced options like Smoothing, etc.

Final Thoughts
Adobe Audition is a known and stunning Adobe audio editor. For you to learn everything, we discussed Adobe Audition in detail. The article talked about its features, pros, cons, and various ways to edit files with this Adobe voice editor. An equally amazing audio editor is Filmora Audio Editor. An amazing, all-in-one audio editor.
Filmora offers a list of basic as well as advanced editing options. Wondershare Filmora is easy to download and quite simple to use. Users who have multiple uses of the software across the video along the audio should consider using this tool.
Wondershare Filmora
Get started easily with Filmora’s powerful performance, intuitive interface, and countless effects!
Try It Free Try It Free Try It Free Learn More >
02 Key Features of Adobe Auditionos
03 Pros and Cons of Adobe Audio Editor-Adobe Audition
04 How Do You Edit Audio in Adobe Audition?
Part 1. What Is Adobe Audio Editor?
Adobe developed ‘Audition ,’ an Adobe audio editor that is a powerful platform that you can use for making significant changes in audio files. Audition is an editor for mastering audio editing for different purposes. You can use this Adobe voice editor to control the audio you want to edit, and it can remove the background noises.
This Adobe audio editor has an intuitive interface that attracts users. It has a straightforward way of editing that helps beginner-level users a lot. You can edit single track and also multi-tracks and use tons of plug-ins as they are supported by this Adobe voice editor.
Part 2. Key Features of Adobe Audition
This Adobe audio editor is a very famous editor among both beginners and professionals. It is loaded with amazing features and editing options. You can completely transform your audio files with Adobe Audition. Let’s share some of the key features of this Adobe voice editor.
· Audio Restoration
The biggest factor that attracts users is the AI Audio Restoration feature of Adobe Audition. This is not just an editor; it can automatically restore your damaged files. Moreover, the sound sampling tool also helps remove sounds like crack, rumble, etc.
· Spectral Analysis
Do you know that this Adobe voice editor offers spectral analysis? With this feature, you can look at the audio but in frequency. In addition to this, you can also select the unwanted part of the audio and easily remove it.
· Essential Sounds
For adding effects on Adobe Audition, this is the best option. Users can easily access this feature and assign a category like SFX, Music, Ambience, and Dialogue. After selecting a category, you get different effects like; In a large Room, From Outside, Podcast Voice, Make Distant, etc.
· Envelopes
What are envelopes in this Adobe audio editor? Each track has lines running through them in Adobe Audition. With these, you can control the volume the ability of the pan. Moreover, you can also have control over the EQ envelope.
Part 3. Pros and Cons of Adobe Audio Editor-Adobe Audition
There are a lot of audio editors available in the world that you can use. There is always some downside to any product you use, as nothing is perfect. In this section, we are discussing the pros and cons of Adobe Audition, Adobe Audio Editor.
Pros
- Have you used any software that allows the user to have AI recovery? Adobe Audition has given AI recovery access to users with ease.
- You must have used noise reduction in other software. The quality of the noise reduction services provided by this editor is among the top-notch service providers available.
- Have you used 100+ effects for audios? Audition provides 100+ audio effects. They can be edited on individual clips or over the whole track.
- Moreover, background noises like hum crackle can be reduced using AI tools, while sounds like barking dogs or cars passing by can be removed by Spectral Frequency Display.
Con
- Adobe voice editor has inconvenient subscription options. For example, you can buy Adobe Audition for 20.99$ per month; on the other hand; you can have all the Adobe applications for 52.99$ per month.
Part 4. How Do You Edit Audio in Adobe Audition?
This Adobe audio editor is an impressive audio editing software. You get different and unique editing options that are very useful for creating great audio files. If you are looking for steps to edit in Adobe Audition, this section is for you.
1. Adobe Audition Workflow for Beginner
Are you a beginner? Let’s share some basic details about Adobe Audition. You can start by recording the audio, and once done; you can pause it. The waveform view of the recording will appear on the screen. Furthermore, you have a Files option in the top left corner where all the files appear. Just below this, you get the Media Browser tab, where you can browse the media files from your device.
Do you know something about the Effects Rack? This part of the interface allows you to add and save effects for editing. If you record things and make notes, the Markers tab is great for noting things along the timeline. For adding audio effects, the Essential Sound section will be visible on the right side of the screen.
2. Getting Started with Audition Audio Mixing
Mixing files is always fun, but what about mixing files with Adobe voice editor? Let’s share the steps for this mixing purpose.
Step 1: Start by importing all the media files you plan to mix. Next, head to the Multitrack option from the top left corner to mix multiple tracks. Then, you have to drag and drop the audio files on the timeline.
Step 2: Now, listen to the audio files and analyze the volumes. If you need to adjust the volume, select the tracks, and from the sub-menu, hit on ‘Match Clip Loudness.’
Step 3: If you wish to add effects to the tracks, head to the ‘Effects Rack’ section. There you can get options like Amplify, Compression, etc.
Step 4: While mixing files with Adobe, you can also edit and add volume envelope points. Select the audio file, right-click on it, and look for the Remix option for smart mixing.
3. How Can You Apply Effects in Adobe Audition ?
If you have successfully mixed the files, we should discuss audio effects. So, let’s get started.
Step 1: For adding effects, start by heading to the Windows tab. From the submenu, select the Effects Rack option. Or else, you can also access Effect racks from the left screen pane. Remember, you can add effects in both forms, either its Waveform timeline or Multitrack.
Step 2: After this, it’s time to add your favorite effect; for that, hit the side arrow in front of every effect number. A list of offered effects will appear; you can select an effect of your choice.
Step 3: After adding an effect, the effect will be added to the list in the effect rack. Secondly, a window appears on the screen, it’s the Effect Control Box, to customize and adjust the settings of the added effect.
Step 4: This exceptional Adobe audio editor offers different presets that could be used instead of using the default effect. Moreover, you can also add the effect to the preset section after adjusting the Effect Control Box. You can also turn off or turn on individual effects by pressing the button along every option in Effect Rack.
4. How to Do Noise Reduction & Restoration in Adobe Audition
You might have recorded a great podcast or voiceover, but when you check it, you are devastated. This is because there is a lot of background noise, disturbing the file quality. Try Noise Reduction in Adobe voice editor by following these steps.
Step 1: Start by importing the audio file to Adobe Audition. Then, carefully listen and analyze the file. This is because you have to identify the part where you get the extra noise to work on it.
Step 2: After the part has been identified, let’s move further and head to the Effects tab. From the submenu, hover on the Noise Reduction/ Restoration option. Now, select the Capture Noise Print option; this feature finds all the highlighted part information.
Step 3: Next step demands you to open the Effects tab. Once that is done, go to the Noise Reduction / Restoration option. Further, select the Noise Reduction Process.
Step 4: This will open a pop-up window for Noise Reduction Control where you can adjust things. This Adobe voice editor allows you to adjust Noise reduction by using the slider. For detailed editing, open Advanced options like Smoothing, etc.
Final Thoughts
Adobe Audition is a known and stunning Adobe audio editor. For you to learn everything, we discussed Adobe Audition in detail. The article talked about its features, pros, cons, and various ways to edit files with this Adobe voice editor. An equally amazing audio editor is Filmora Audio Editor. An amazing, all-in-one audio editor.
Filmora offers a list of basic as well as advanced editing options. Wondershare Filmora is easy to download and quite simple to use. Users who have multiple uses of the software across the video along the audio should consider using this tool.
Wondershare Filmora
Get started easily with Filmora’s powerful performance, intuitive interface, and countless effects!
Try It Free Try It Free Try It Free Learn More >
Also read:
- New Top Picks Compiling a Collection of Gratis Tracks for Filmmaking
- 5 Best MP3 Cutters Online
- In 2024, Find Laughing Sound Effect
- In 2024, The Art of Sonic Depth Incorporating Virtual Reverberation Into Your Windows-Based Audio Projects
- In 2024, From Stage to Studio Advanced Methods for Altering Celebrity Vocals
- New In 2024, Finding High-Quality Monstrous Soundscapes
- Updated Unveiling the Top 8 Sonic Signatures for YouTube Creators Opening Moments
- New From Silence to Symphony Adding Soundtracks to KineMaster for 2024
- New 2024 Approved Essential Top Ten Gratis Global Audio Equalization Tools
- 2024 Approved How to Change Audio Speed and Pitch in Adobe Rush
- Updated In 2024, How to Change Audio Speed and Pitch in Adobe Rush
- New 2024 Approved 10 Essential Marketing Podcasts for Navigating Social Networking Landscapes
- New 2024 Approved MultilocAudioLink Seamless Sound Alignment for Multiple Projects with Premiere Pro
- New In 2024, Podcast to MP3 Maximizing Efficiency in Audio File Transfer
- 2024 Approved The Insiders Guide to Preserving Your Spotify Collection in Local Formats
- In 2024, The Art of Auditory Transformation Replacing Audio in Videos Step by Step
- New Clearing the Clutter Streamlined Methods for Reducing Ambient Noise in Audio Editing Software (Audacity & FilmoraPro)
- New In 2024, Important Elements in Assembling Your Go-To Online Source for High-Quality YouTube Sounds
- New Preserving Melody Methods to Decelerate Sound Waves without Modifying Frequency Range
- In 2024, Navigating the Path to Customized Sound Audacity for Voice Modification
- Updated Prime Audio Cleansing App Elevate the Quality of Your Videos
- New Auditory Alchemy Top 15 Montage Soundtracks Adapting to Varying Visual Media for 2024
- New 2024 Approved Tranquility Through Technology Simplifying Sound Suppression with Adobe Premiere Pro
- Updated Ultimate 3 Auditory Enhancement Devices for MP3 Files
- New Demystifying the Functionality of Googles Audio Streaming Feature Podcast Edition
- New 2024 Approved The Essential List of Top 10 Gratis Audio Capture Software Tailored for Modern Podcasters
- New 2024 Approved Steps to Quieten Ambient Soundtracks in Films
- Updated Exploring Advanced Methods to Distill Sound From Visual Clips Innovations for 2024
- New In 2024, Best 9 AI Voice Generators That Will Save Your Day
- New In 2024, Exploring the Capabilities of Adobe Audition for Professional Audio Editing
- Updated In 2024, Revamp Your Sound Engineering Installing and Configuring Lame MP3 Encoder for Audacity
- New The Complete Lexis Audio Editor Experience Critiques, Advanced Features, and Tutorials for 2024
- New In 2024, 8 Best iOS DAW for iPad and iPhone
- Updated The Ultimate List of BGM Audio Archives for 2024
- Updated The Process of Purging Audio Content in the Latest AVI Codec for 2024
- In 2024, Seamless Transition Exploring the Best Free Online & Offline Audio Conversion Software
- Updated Celestial Sound Shift Exploring the Features, User Manuals & Alternatives for Star Voice Transformation
- Updated 15 Cinematic Royalty Free Piano Music for Film and Videos
- Updated Where Can I Find Applause Sound Effect?
- Achieving Pristine Audio Quality Tips to Eradicate Distorted Sounds in Visual Media
- In 2024, The Audio Editors Handbook Reducing Ambient Noise in iMovie Projects
- Updated Sophisticated Acoustic Complement to Visual Content for 2024
- Updated In 2024, Audiophiles Blueprint Top Tools and Practices to Minimize External Sound Interference (On & Off)
- Updated Elevating Your Sound Experience The Top 10 Alternatives to Audacity Across Computers and Tablets
- New Essential Websites to Foster New Relationships Online Safely
- Updated Free Digital Compilation of Guitar Ambiance Imagery and Song Selections for 2024
- New The Sounds of Silence No More Three Fresh Strategies for Adding Audio to Videos for 2024
- Updated 2024 Approved A Symphony of Effects Discovering Vendors for Premium Podcast Audio
- Updated Refinement Through Removal Advanced Techniques for Enhancing Music Clarity in Adobe Audition for 2024
- How to Fix iPhone XR Passcode not Working?
- How To Do Motorola Edge 40 Neo Screen Sharing | Dr.fone
- Complete guide for recovering pictures files on Tecno .
- New In 2024, Top List of Best VHS Video Effect Makers
- In 2024, Can I Remove the Apple Watch Activation Lock By iPhone 13 mini without the Previous Owner?
- Prevent Cross-Site Tracking on Xiaomi 13T Pro and Browser | Dr.fone
- How to Transfer Data from Vivo Y200e 5G to Other Android Devices? | Dr.fone
- Complete Tutorial to Use GPS Joystick to Fake GPS Location On Xiaomi Redmi Note 12R | Dr.fone
- MP4 Video Repair Tool - Repair corrupt, damaged, unplayable video files of Oppo
- Updated Optimize Your View Amazon Prime Video Aspect Ratio Hacks
- New Discover the Top 10 Android Video Editing Apps Free and Paid for 2024
- Tips and Tricks for Setting Up your Xiaomi Redmi K70E Phone Pattern Lock
- What is Geo-Blocking and How to Bypass it On Apple iPhone 12 Pro? | Dr.fone
- Updated In 2024, MTS Video Editing Made Easy Top 5 Software Solutions
- New 2024 Approved MacBook Users Learn How to Download and Install Videoleap
- Updated After Effects VS Adobe Premiere, 9 Differences Tell You Which One Is Better?
- In 2024, How To Change Infinix Note 30 Pro Lock Screen Password?
- In 2024, How does the stardust trade cost In pokemon go On OnePlus Nord N30 5G? | Dr.fone
- Disable screen lock on Realme 11 Pro
- Updated A Roster of 8 Top Color Match Generators for 2024
- Hassle-Free Ways to Remove FRP Lock from Oppo Reno 10 5G Phones with/without a PC
- In 2024, How to Transfer Data from Huawei Nova Y71 to Other Android Devices? | Dr.fone
- How to Transfer Data from OnePlus Nord CE 3 5G to Samsung Phone | Dr.fone
- How to Unlock Apple iPhone SE (2022) Without Passcode? | Dr.fone
- How Can I Catch the Regional Pokémon without Traveling On Tecno Pova 5 | Dr.fone
- Cool Video Editor How to Add Cool Effects to Video for 2024
- In 2024, Top 5 Tracking Apps to Track Vivo Y78 5G without Them Knowing | Dr.fone
- In 2024, Recommended Best Applications for Mirroring Your Realme 12 Pro+ 5G Screen | Dr.fone
- About Oppo Reno 11 5G FRP Bypass
- Guide How To Unbrick a Bricked Vivo Y27 5G Phone | Dr.fone
- In 2024, New Multiple Ways How To Remove iCloud Activation Lock On your iPhone 14 Pro Max
- A Step-by-Step Guide on Using ADB and Fastboot to Remove FRP Lock from your Nokia
- Title: New The Musicians Manual to Individualizing Sound Files for 2024
- Author: Jacob
- Created at : 2024-05-05 04:09:13
- Updated at : 2024-05-06 04:09:13
- Link: https://audio-shaping.techidaily.com/new-the-musicians-manual-to-individualizing-sound-files-for-2024/
- License: This work is licensed under CC BY-NC-SA 4.0.
