
:max_bytes(150000):strip_icc():format(webp)/GettyImages-971165690-1e0af1d9299f4fdba1225c2d20c739f2.jpg)
New Sonic Treasure Trove The Ultimate Collection of Websites for Free Audio Files
“Sonic Treasure Trove: The Ultimate Collection of Websites for Free Audio Files “
FREE Top 10 Best Websites to Download Sound Clips for Videos

Liza Brown
Mar 27, 2024• Proven solutions


Are you working on animation , video, game, music, or maybe some other media file? Sound is a vital factor for all. It is the effect of the sound that can make or break a project.
But it can be difficult to find perfect and quality free sound clips. There are thousands of software for creating excellent videos, adding sounds , titles, overlays, tracks, and more. But what if you don’t wish to create a piece for just jazzing up your already existing video?
Free sound clips are great resources to download for videos if you don’t want to create sound effects.
Many people want to know the source of high-quality free audio for videos. These free sound samples are easy to find on the Internet.
In this article, you will get to know the 10 best websites to download free sound clips.
10 Best Free Sound Samples to Use
1. Freesound
Licensed under the Creative Commons License , the Freesound comprises of a large sound database. You can choose from the huge collection of sounds and decide which one is free and which sound needs attribution.
You can ensure if the sound can be used in commercial products or not. If you are not a professional and just need free sound samples for personal use, you may use free sound download from any site. The features of Freesound include-
- You can search for sounds or browse by tags or geotags
- The pack feature helps you to find a bunch of similar sounds very easily
- Preview the sound without logging in
- For downloading the sound, you need to log in
- Add your audio samples to contribute to the database
- You get 5 free sound clips download
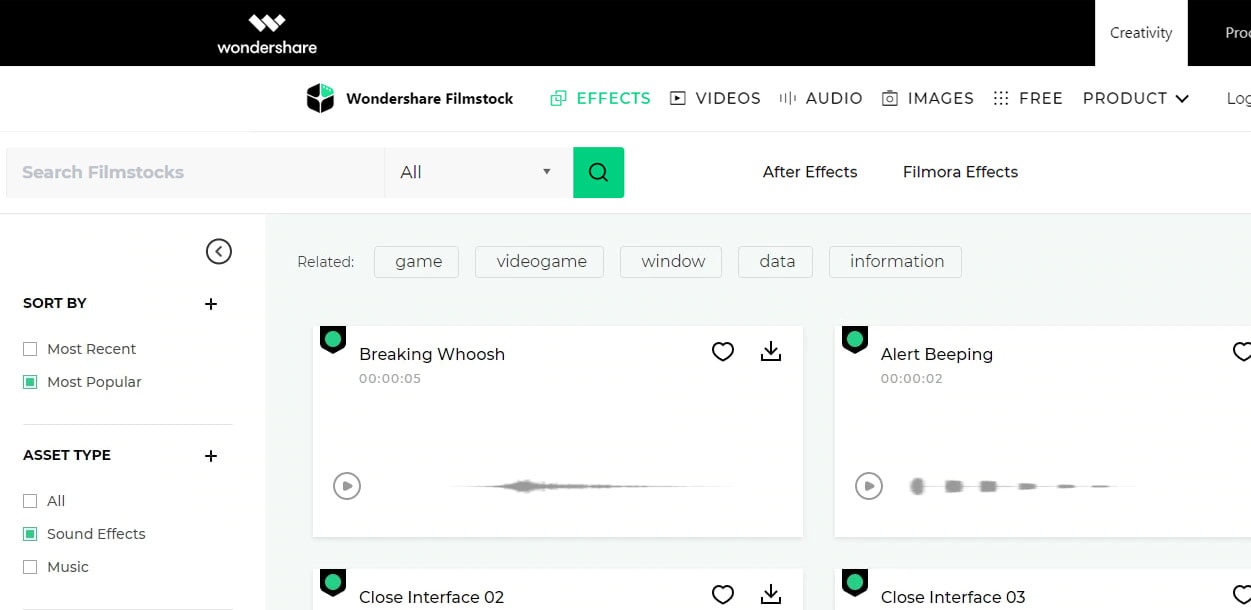
2. Filmstock
Filmstock from the house of Wondershare is one of the greatest libraries for free sound clips.
Any budget filmmaker would love to have this invaluable resource not just for free audio clips for videos but also for royalty-free sound clips.
You can bring your cinematic video to life from the Filmstock free-stuff one-stop-shop. The features of Filmstock include-
- Royalty-free video effects, audio, and stock media
- There are genres like science fiction, sci-fi, ufo, technology games
- Huge selection of curated quality stock images
- Filmstock library is continuously updated
- No attribution required for any project on Filmstock
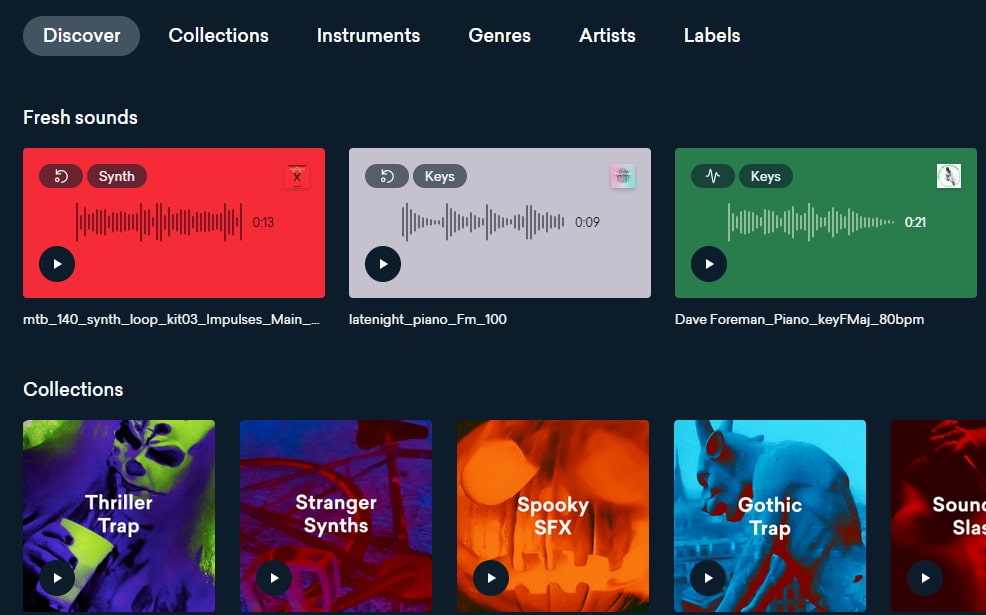
3. Landr
With a simple interface, Landr offers the best loops, packs, and samples to you. Make use of powerful Artificial Intelligence (AI) and you can spend lesser time searching and browsing. The features of Landr includes-
- You can browse free sound clips from the various collection of instruments
- Quickly find the right sound from the millions of free sound samples
- Get access to Selector tool powered by AI to make your browsing session faster
- Nourish your ideas with the curated collection and smart browsing
- The filter sounds by instrument, mood, BPM or key
- Go pro with your sampling
- Royalty-free sounds from today’s best artists, producers, and labels
4. Audio Micro
Audio Micro is one of the best tools for downloading horror-based free sound clips. Once you register with Audio Micro, you can easily download free audio clips for videos.
For downloading sound for commercial uses like TV or mass reproduction, you must be a paid subscriber. The features of Audio Micro are-
- Get access to the collection of royalty-free music and 2000 free good quality sound effects
- High-quality audio content for commercial use, available at competitive prices without any hidden cost
- Research, locate, purchase, and download stock audio
- Easy and fast search option with free sound collection visible from the navigation bar on the homepage
5. Audio Blocks
It is an intuitive platform to download loops, sound effects, and music. It has a low-cost subscription model and the content is constantly updated based on the search results. The features of Audio Blocks are-
- Unlimited royalty-free audio
- Loop, sound effects, and music download
- Low-cost subscription offers more content at a nominal price
- There are flexible plans for every budget
- Use content multiple times for commercial and personal projects
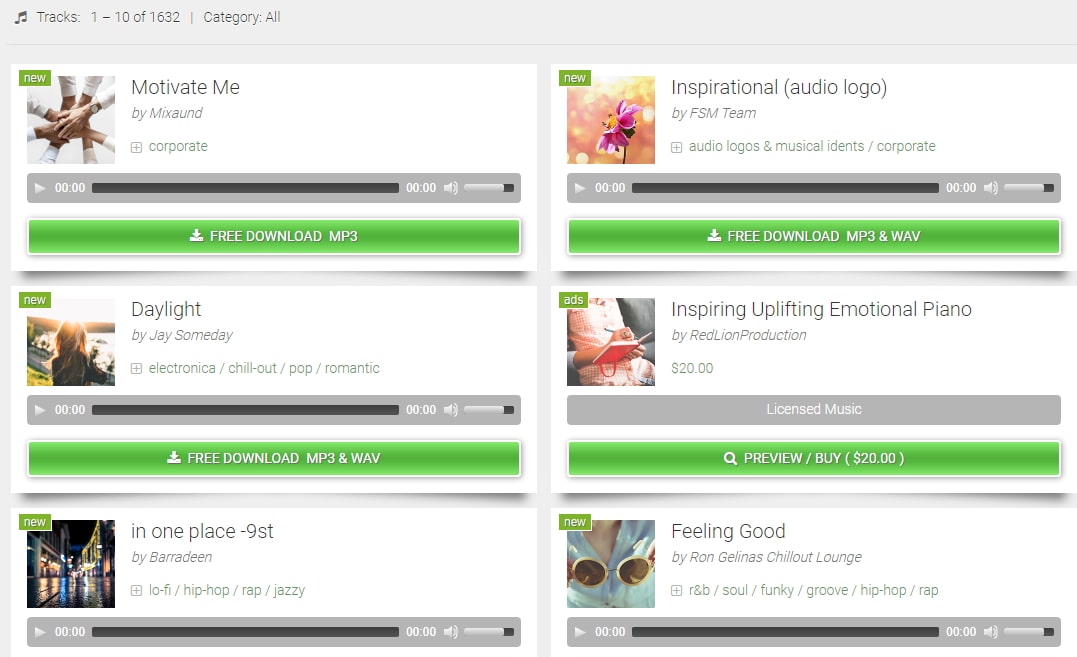
6. Free Stock Music
Whether YouTube project or your personal Vlog, Free Stock Music offers royalty-free music for a range of media platforms.
For any non-copyrighted sound clips free download, always feel free to reach Free Stock Music. The features are-
- Free access to non-copyrighted music
- Just put the attribution in credits to use the sound clips
- Unlimited royalty-free music in all moods, lengths, tempos, and categories
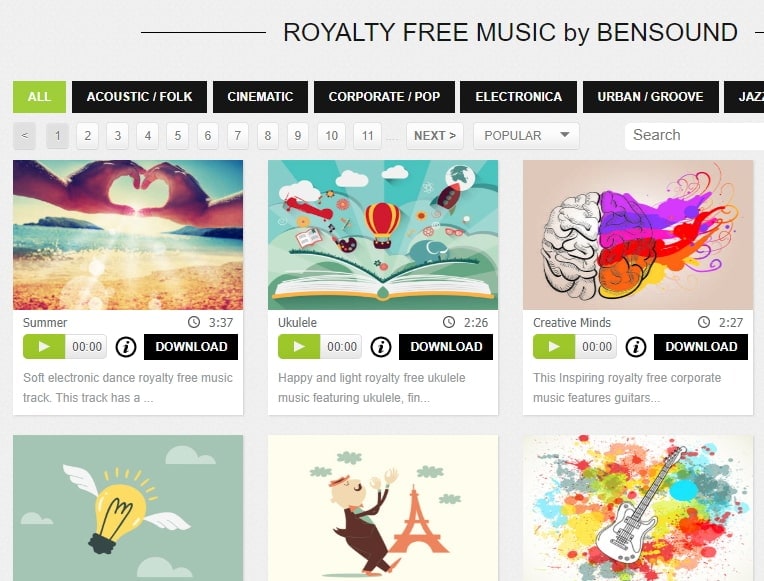
7. Bensound
Available under the Creative Common License, Bensound is used for multimedia projects like web applications or videos.
You can use the free tracks available with Bensound stock music in the various website background score, animations, web adverts, slideshows, etc. The features of Bensound include-
- Royalty-free stock music in various genres like electronica, urban, cinematic, jazz, rock, etc.
- Download free sound clips from the huge collection and add attributions in credits
- If you don’t wish to give credits and use the high-quality premium tracks, get the Bensound Pro License
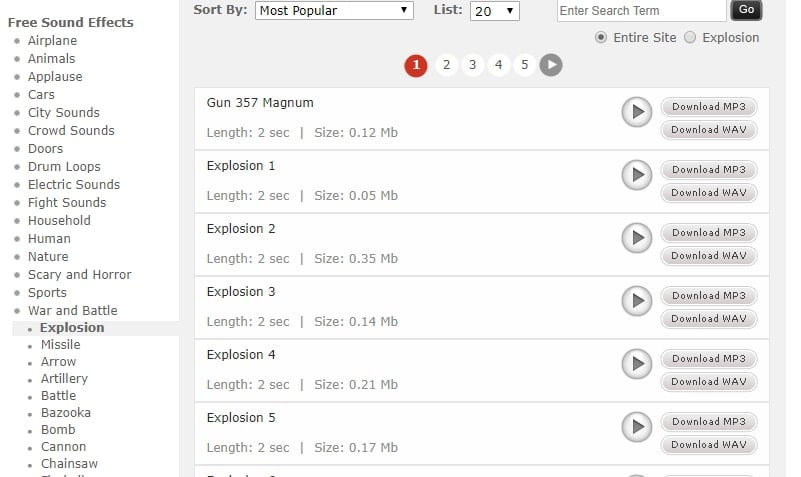
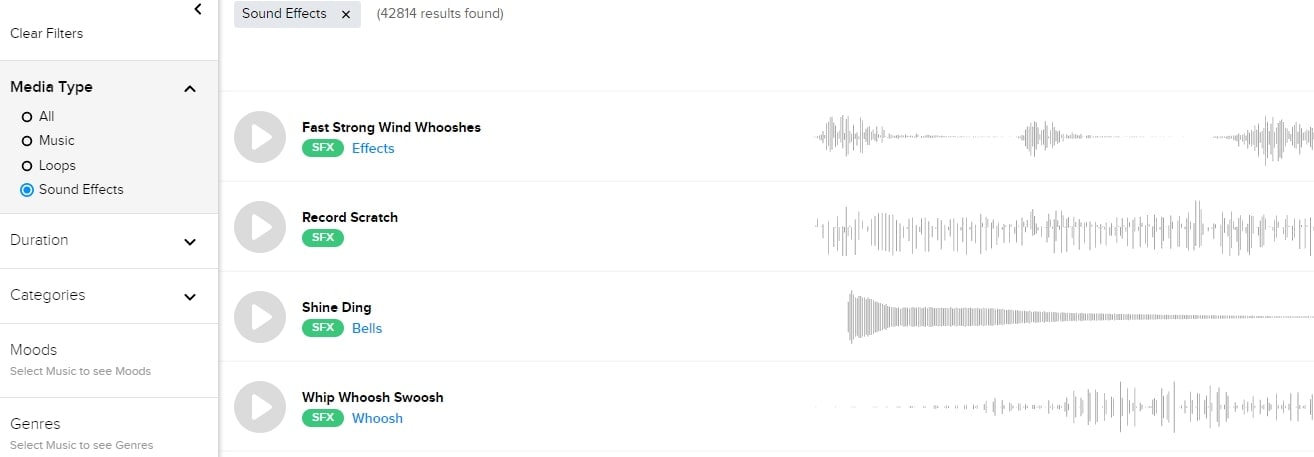
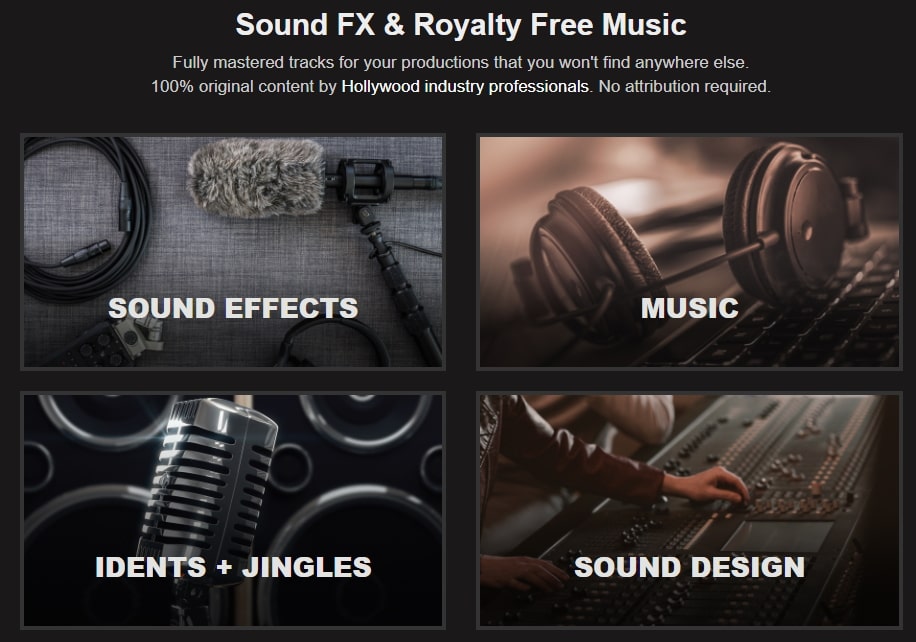
8. Sounds Crate
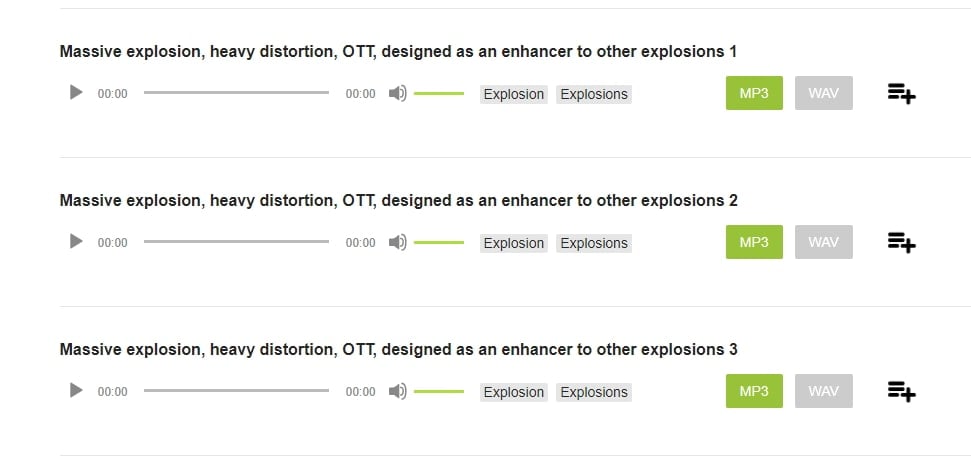
Are you looking for the best soundtrack for your video? Sounds Crate offers some of the best royalty-free music and sound FX.
With the tracks completely mastered for your production, Sound Crate offers 100% quality content created by industry professionals from Hollywood. The Sound Crate features include-
- Sound FX for electricity, gun, explosion, weapons, sci-fi, vehicles, movements, etc.
- Royalty-free music in diverse genres
- You can also use idents for corporate, news jingles, holiday idents, etc.
- Download and use the royalty-free sound clips easily
- Over 10000 plus HD assets
- No attribution required
- Browse from unlimited music, sound effects, etc.
9. ZapSlat
Do your audio and video editing projects need some cool soundtracks to jazz it up? Look no further. ZapSlat is one of the best free sound download sites to make your project successful. The features of ZapSlat are-
- Comprises over 54,000 professional free sound effects and royalty-free music files
- Variety of free sound effect packs
- Download royalty-free music from a variety of genres
10. Sound Bible
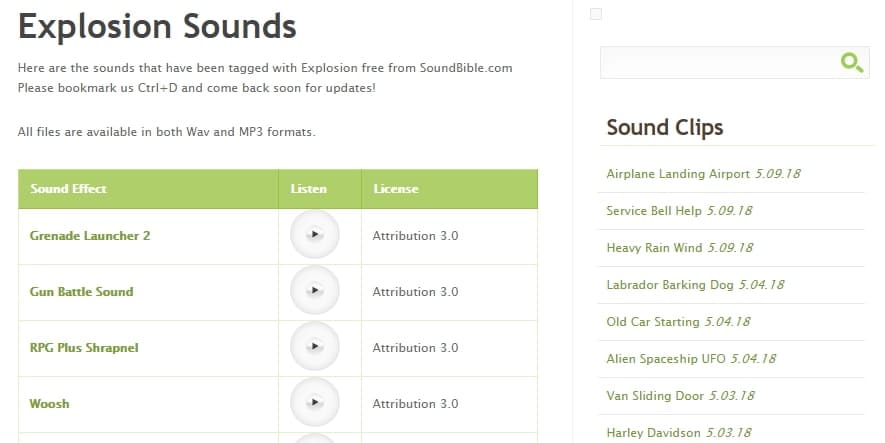
Choose the best from 2000 free sound clips licensed under Creative Commons. To use the sound effect for commercial video, you can select from the royalty-free sounds. The features of SoundBible are-
- Download free sound clips without logging in or creating an account
- 2000 free sounds
- Copyright-free sound resources are weekly updated
Conclusion
Now that you know the best 10 free sound clip download sites, make use of it in your videos. Without worrying about the expense, you can use these sites to download free sound clips.
Liza Brown
Liza Brown is a writer and a lover of all things video.
Follow @Liza Brown
Liza Brown
Mar 27, 2024• Proven solutions
Are you working on animation , video, game, music, or maybe some other media file? Sound is a vital factor for all. It is the effect of the sound that can make or break a project.
But it can be difficult to find perfect and quality free sound clips. There are thousands of software for creating excellent videos, adding sounds , titles, overlays, tracks, and more. But what if you don’t wish to create a piece for just jazzing up your already existing video?
Free sound clips are great resources to download for videos if you don’t want to create sound effects.
Many people want to know the source of high-quality free audio for videos. These free sound samples are easy to find on the Internet.
In this article, you will get to know the 10 best websites to download free sound clips.
10 Best Free Sound Samples to Use
1. Freesound
Licensed under the Creative Commons License , the Freesound comprises of a large sound database. You can choose from the huge collection of sounds and decide which one is free and which sound needs attribution.
You can ensure if the sound can be used in commercial products or not. If you are not a professional and just need free sound samples for personal use, you may use free sound download from any site. The features of Freesound include-
- You can search for sounds or browse by tags or geotags
- The pack feature helps you to find a bunch of similar sounds very easily
- Preview the sound without logging in
- For downloading the sound, you need to log in
- Add your audio samples to contribute to the database
- You get 5 free sound clips download
2. Filmstock
Filmstock from the house of Wondershare is one of the greatest libraries for free sound clips.
Any budget filmmaker would love to have this invaluable resource not just for free audio clips for videos but also for royalty-free sound clips.
You can bring your cinematic video to life from the Filmstock free-stuff one-stop-shop. The features of Filmstock include-
- Royalty-free video effects, audio, and stock media
- There are genres like science fiction, sci-fi, ufo, technology games
- Huge selection of curated quality stock images
- Filmstock library is continuously updated
- No attribution required for any project on Filmstock
3. Landr
With a simple interface, Landr offers the best loops, packs, and samples to you. Make use of powerful Artificial Intelligence (AI) and you can spend lesser time searching and browsing. The features of Landr includes-
- You can browse free sound clips from the various collection of instruments
- Quickly find the right sound from the millions of free sound samples
- Get access to Selector tool powered by AI to make your browsing session faster
- Nourish your ideas with the curated collection and smart browsing
- The filter sounds by instrument, mood, BPM or key
- Go pro with your sampling
- Royalty-free sounds from today’s best artists, producers, and labels
4. Audio Micro
Audio Micro is one of the best tools for downloading horror-based free sound clips. Once you register with Audio Micro, you can easily download free audio clips for videos.
For downloading sound for commercial uses like TV or mass reproduction, you must be a paid subscriber. The features of Audio Micro are-
- Get access to the collection of royalty-free music and 2000 free good quality sound effects
- High-quality audio content for commercial use, available at competitive prices without any hidden cost
- Research, locate, purchase, and download stock audio
- Easy and fast search option with free sound collection visible from the navigation bar on the homepage
5. Audio Blocks
It is an intuitive platform to download loops, sound effects, and music. It has a low-cost subscription model and the content is constantly updated based on the search results. The features of Audio Blocks are-
- Unlimited royalty-free audio
- Loop, sound effects, and music download
- Low-cost subscription offers more content at a nominal price
- There are flexible plans for every budget
- Use content multiple times for commercial and personal projects
6. Free Stock Music
Whether YouTube project or your personal Vlog, Free Stock Music offers royalty-free music for a range of media platforms.
For any non-copyrighted sound clips free download, always feel free to reach Free Stock Music. The features are-
- Free access to non-copyrighted music
- Just put the attribution in credits to use the sound clips
- Unlimited royalty-free music in all moods, lengths, tempos, and categories
7. Bensound
Available under the Creative Common License, Bensound is used for multimedia projects like web applications or videos.
You can use the free tracks available with Bensound stock music in the various website background score, animations, web adverts, slideshows, etc. The features of Bensound include-
- Royalty-free stock music in various genres like electronica, urban, cinematic, jazz, rock, etc.
- Download free sound clips from the huge collection and add attributions in credits
- If you don’t wish to give credits and use the high-quality premium tracks, get the Bensound Pro License
8. Sounds Crate
Are you looking for the best soundtrack for your video? Sounds Crate offers some of the best royalty-free music and sound FX.
With the tracks completely mastered for your production, Sound Crate offers 100% quality content created by industry professionals from Hollywood. The Sound Crate features include-
- Sound FX for electricity, gun, explosion, weapons, sci-fi, vehicles, movements, etc.
- Royalty-free music in diverse genres
- You can also use idents for corporate, news jingles, holiday idents, etc.
- Download and use the royalty-free sound clips easily
- Over 10000 plus HD assets
- No attribution required
- Browse from unlimited music, sound effects, etc.
9. ZapSlat
Do your audio and video editing projects need some cool soundtracks to jazz it up? Look no further. ZapSlat is one of the best free sound download sites to make your project successful. The features of ZapSlat are-
- Comprises over 54,000 professional free sound effects and royalty-free music files
- Variety of free sound effect packs
- Download royalty-free music from a variety of genres
10. Sound Bible
Choose the best from 2000 free sound clips licensed under Creative Commons. To use the sound effect for commercial video, you can select from the royalty-free sounds. The features of SoundBible are-
- Download free sound clips without logging in or creating an account
- 2000 free sounds
- Copyright-free sound resources are weekly updated
Conclusion
Now that you know the best 10 free sound clip download sites, make use of it in your videos. Without worrying about the expense, you can use these sites to download free sound clips.
Liza Brown
Liza Brown is a writer and a lover of all things video.
Follow @Liza Brown
Achieving Optimal Sound Levels with Audacity’s Volume Slider
Audacity is a free, open access, cross-platform sound editing and recording tool. It is compatible with Windows, Mac OS X, Linux, and various other operating systems. All of these aspects have contributed to Audacity’s worldwide popularity. Audacity features an amplified effect that alters the loudness of your chosen audio and other practical tools that can change the sound in different ways.
As a result, Audacity can not only assist you in modifying the level of an audio file, but it can also help you equalize, reduce, normalize, and so on.
Yes, you have heard it right, Audacity increase volume, but the primary question is how? But don’t worry, you will get the answer after reading the article. This article will explain how you can increase or decrease the volume of a whole and a specific segment of the audio file. Let’s get started.
In this article
01 How to Increase or Decrease Volume Without Distortion and Clipping in Audacity
02 How to Increase Volume of Multiple Files in Audacity?
03 How to Increase Volume in Certain Parts of Track?
04 What’s the Difference between Normalize and Amplify?
Part 1: How to Increase or Decrease Volume Without Distortion and Clipping in Audacity
Audio clipping occurs when the audio input becomes too loud for an amplifier to produce, and the surplus signal creates distortion. When editing, you cannot add additional volume to your audio clip forever because this would result in clipping. In this case, you can use the Audacity application to emphasize your material by turning the volume up or down without distortion and clipping on a track or recording.
Learn how Audacity increase volume without distortion by following the procedure described below:
Step 1: First, download and install the Audacity software on your computer.
Step 2: Select the File from the menu above and click Open to open the audio file.

Step 3: Choose the audio track, go to the Effect menu and pick the Amplify option from the drop-down menu.

Note: You can increase or decrease the volume by double-clicking the track and using the slider under the Gain title.
Step 4: Increase or decrease the volume by sliding the slider or typing the amplification value in the text box next to it in the Amplify window as needed.

Note: Ensure that the Allow Clipping checkbox remains unchecked to avoid clipping. Moreover, keep in mind that increasing the volume to a greater extent can result in distortion.
Related: How to Change Audio Volume in Filmora
Part 2: How to Increase Volume of Multiple Files in Audacity?
Audacity is an open-source audio editing tool. It is used for various purposes, like audio recording, music creation, and audio file editing. It also allows you to increase and decrease the volume of audio files.
You may also apply the modifications to multiple files at once, rather than one at a time. Check out the instructions below to learn how to change the volume of multiple audio files:
Step 1: Select the Import option from the File menu, and then pick the Audio option. Browse to your audio files, choose all of them, and then click the Open option.

Step 2: To select all the files, press Ctrl + A, click on the Effect option in the menu bar and pick Amplify.

Step 3: Now, either enter the value in the text box next to the Amplification Decibels tab or use the slider under it. To verify the operation of increasing the volume, check the allow clipping checkbox. When you’re through with the options, click the Ok button.

Step 4: Amplification will be applied to all the tracks. Go to the File option from the above menu to export the files and then select the Export option.

If you’re running Audacity on macOS computer, you can watch the video tutorial below to apply effects to multiple files.
Part 3: How to Increase Volume in Certain Parts of Track?
The audacity software also allows you to alter a specific section of an audio file. The selection tool can assist in locating a particular area of the track. After you’ve chosen a section of the audio file, you may utilize the amplification effect to increase its loudness. Check out the instructions below to learn how you can achieve it:
Step 1: Launch the Audacity software on the computer. To open the audio file, go to the File menu and select Open. You may also open the file by dragging it.
Step 2: Ensure that the Selection tool is active now. Click and hold the mouse left-click to move from one spot on the track to another.

Step 3: After picking the part, go to the Effect option from the menu and select Amplify.

Step 4: Now, for that specific region, modify the amplification and click OK. This will only change the volume for the area you have selected.

Part 4: What’s the Difference between Normalize and Amplify?
Amplify and Normalize are two essential features of the Audacity tool. Many people think they are the same thing, they are right up to some extent, but there exists a big difference between both the features. Before discussing the differences, you need to know what the terms Normalize and Amplify imply.
Amplify
It is the quickest approach to comprehend the effect’s name if you want to know precisely what impacts are. The frequency of the vibration is enhanced to increase the amplification effect. As previously said, it raises a tiny sound.
Furthermore, because this amplification is extended to all frequencies and amplitude, the noise increases. If you choose ten sources and magnify them by ten decibels, each source will be ten decibels louder than your present sound.

Normalize
The meaning of normalizing is standardized, which is also a feature of its name. Whenever you pick an audio input and use the normalize feature, the level is adjusted automatically according to the previously indicated average volume size in Oda City.
As a result, when one sound source is normalized, there is no discernible difference between it and the amplification mechanism. Still, the effect is evident when several sound sources are performed concurrently.
By pressing Ctrl + A and selecting all ten various audio sources, you may compute the required standard of every sound source, enhance the audio input that is smaller than the normal, and create the audio signal more significant than the standard. Shrink the size of each noise source, such as the name, and normalize the sound.

Related: Best Audio Normalizers for Windows
Differences
To differentiate the meaning and impact precisely, amplification means increasing or reducing the sound, whereas normalizing means equalizing the sound. Simply defined, if you magnify ten sources by ten decibels, each of the shorter and louder noises equals ten decibels in their actual loudness.
When the ten sources are normalized, the louder sounds grow louder, conforming to the standard sound source size. Because the amplifying is done regardless, the little noises are going insane during this procedure.
Conclusion
All in all, Audacity does an excellent job at audio editing. If you simply need to modify an audio file, Audacity is a great option. For increasing and decreasing the volume of single and multiple audio files, Audacity is still one of the best bets in the market. We hope that now know how Audacity increase volume of the audio files after reading this article.
02 How to Increase Volume of Multiple Files in Audacity?
03 How to Increase Volume in Certain Parts of Track?
04 What’s the Difference between Normalize and Amplify?
Part 1: How to Increase or Decrease Volume Without Distortion and Clipping in Audacity
Audio clipping occurs when the audio input becomes too loud for an amplifier to produce, and the surplus signal creates distortion. When editing, you cannot add additional volume to your audio clip forever because this would result in clipping. In this case, you can use the Audacity application to emphasize your material by turning the volume up or down without distortion and clipping on a track or recording.
Learn how Audacity increase volume without distortion by following the procedure described below:
Step 1: First, download and install the Audacity software on your computer.
Step 2: Select the File from the menu above and click Open to open the audio file.
Step 3: Choose the audio track, go to the Effect menu and pick the Amplify option from the drop-down menu.
Note: You can increase or decrease the volume by double-clicking the track and using the slider under the Gain title.
Step 4: Increase or decrease the volume by sliding the slider or typing the amplification value in the text box next to it in the Amplify window as needed.
Note: Ensure that the Allow Clipping checkbox remains unchecked to avoid clipping. Moreover, keep in mind that increasing the volume to a greater extent can result in distortion.
Related: How to Change Audio Volume in Filmora
Part 2: How to Increase Volume of Multiple Files in Audacity?
Audacity is an open-source audio editing tool. It is used for various purposes, like audio recording, music creation, and audio file editing. It also allows you to increase and decrease the volume of audio files.
You may also apply the modifications to multiple files at once, rather than one at a time. Check out the instructions below to learn how to change the volume of multiple audio files:
Step 1: Select the Import option from the File menu, and then pick the Audio option. Browse to your audio files, choose all of them, and then click the Open option.
Step 2: To select all the files, press Ctrl + A, click on the Effect option in the menu bar and pick Amplify.
Step 3: Now, either enter the value in the text box next to the Amplification Decibels tab or use the slider under it. To verify the operation of increasing the volume, check the allow clipping checkbox. When you’re through with the options, click the Ok button.
Step 4: Amplification will be applied to all the tracks. Go to the File option from the above menu to export the files and then select the Export option.
If you’re running Audacity on macOS computer, you can watch the video tutorial below to apply effects to multiple files.
Part 3: How to Increase Volume in Certain Parts of Track?
The audacity software also allows you to alter a specific section of an audio file. The selection tool can assist in locating a particular area of the track. After you’ve chosen a section of the audio file, you may utilize the amplification effect to increase its loudness. Check out the instructions below to learn how you can achieve it:
Step 1: Launch the Audacity software on the computer. To open the audio file, go to the File menu and select Open. You may also open the file by dragging it.
Step 2: Ensure that the Selection tool is active now. Click and hold the mouse left-click to move from one spot on the track to another.
Step 3: After picking the part, go to the Effect option from the menu and select Amplify.
Step 4: Now, for that specific region, modify the amplification and click OK. This will only change the volume for the area you have selected.
Part 4: What’s the Difference between Normalize and Amplify?
Amplify and Normalize are two essential features of the Audacity tool. Many people think they are the same thing, they are right up to some extent, but there exists a big difference between both the features. Before discussing the differences, you need to know what the terms Normalize and Amplify imply.
Amplify
It is the quickest approach to comprehend the effect’s name if you want to know precisely what impacts are. The frequency of the vibration is enhanced to increase the amplification effect. As previously said, it raises a tiny sound.
Furthermore, because this amplification is extended to all frequencies and amplitude, the noise increases. If you choose ten sources and magnify them by ten decibels, each source will be ten decibels louder than your present sound.
Normalize
The meaning of normalizing is standardized, which is also a feature of its name. Whenever you pick an audio input and use the normalize feature, the level is adjusted automatically according to the previously indicated average volume size in Oda City.
As a result, when one sound source is normalized, there is no discernible difference between it and the amplification mechanism. Still, the effect is evident when several sound sources are performed concurrently.
By pressing Ctrl + A and selecting all ten various audio sources, you may compute the required standard of every sound source, enhance the audio input that is smaller than the normal, and create the audio signal more significant than the standard. Shrink the size of each noise source, such as the name, and normalize the sound.
Related: Best Audio Normalizers for Windows
Differences
To differentiate the meaning and impact precisely, amplification means increasing or reducing the sound, whereas normalizing means equalizing the sound. Simply defined, if you magnify ten sources by ten decibels, each of the shorter and louder noises equals ten decibels in their actual loudness.
When the ten sources are normalized, the louder sounds grow louder, conforming to the standard sound source size. Because the amplifying is done regardless, the little noises are going insane during this procedure.
Conclusion
All in all, Audacity does an excellent job at audio editing. If you simply need to modify an audio file, Audacity is a great option. For increasing and decreasing the volume of single and multiple audio files, Audacity is still one of the best bets in the market. We hope that now know how Audacity increase volume of the audio files after reading this article.
How to Add Audio to Video in Android
Applications for Adding Audio to Video in Android

Shanoon Cox
Mar 27, 2024• Proven solutions
Smartphone manufacturers are always trying to find ways to improve the cameras on their Android to make them the best ones on the market. Now there are applications that are starting to find their way onto the Android market so users can edit these videos and photos taken by their phones, turning their phones into so much more than they ever thought possible. With all of these choices on the market, it can be difficult to choose which ones are the best options. This is especially true if you are looking for options that can add audio and voice overs to your videos.
Despite adding audio files to your videos on mobile device, we suggest you try the desktop video editing tool, Wondershare Filmora , to do the task. This desktop software supports almost any audio format. And it allows you to trim, cut, fade in or fade out the audio. Besides, there are so many hand picked effects available, such like Audio Mixer and Audio Equalizer for make your videos better.
For Win 7 or later (64-bit)
 Secure Download
For macOS 10.14 or later
Secure Download
Click here to get Filmora for PC by email
or Try Filmora App for mobile >>>
download filmora app for ios ](https://app.adjust.com/b0k9hf2%5F4bsu85t ) download filmora app for android ](https://app.adjust.com/b0k9hf2%5F4bsu85t )
See how to add audio to videos with Wondershare Filmora >>
Applications for Adding Audio to Video in Android
1. Filmora for Android
One of the highest recommended applications is Filmora for Android . This application is especially perfect for those who are looking for an app that can not only deliver some amazing results but is also very easy to use.
This application has most of the editing features you would need from a PC editor. Basic editing functionalities such as trimming, merging, duplicating, adding audio or voice overs, music to video etc are all available in this excellent Android video editor. Other than that, you will get dozens of video effects from this app, things like video overlays, filters, animated text effects, sound effects are all free. One most appealing feature of this app is the themes, with which you can spice your video up by applying any of its built-in video themes. Video editing can’t just be easier. Exporting video is also a breeze, you can either save your final video to the Android device, or directly upload them to any of those popular social media networks such as Youtube, Vimeo, Facebook and more! Check out the video below to get a quick overview of this app:
Most important of all, it’s totally free without any limitations or watermarks. Download a free version below:


2. KineMaster Pro

If you are looking for an editing application with a bit more substance to it, than KineMaster Pro is your best option. There is a lot more substance found in this application that you may not be able to find elsewhere. Not only is the end product amazing, but it has a very well-designed user interface. The UI has a drag and drop interface that is really easy to use. You can adjust the video so that you get an amazing quality picture on your video, as well as offering a variety of templates so that you can really get a great video. One of the greatest features is that this app can support multiple audio tracks and allows the user to overlap these tracks. You can also include voiceover tracks as well. One downside to this app is that it is only available for certain Android phones. If your phone is not one of the supported devices, you will not be able to see it in the Google Play Store. You can get this for free, but it will watermark your videos if you do not have the pro version.
3. Video Maker Pro Free

This is a bare-bones application that is very reminiscent of the original Google Movie Studio app. There is no real ability for any in-depth video editing in this app, which is one of its downsides. It can support a single track, but it is unable to support more layers than that. You can choose between a music track or a voiceover track but not both. It is easy to use and free with ads. This is a good option if you just want something basic and no-frills to mess around with.
4. VidTrim

This application is less for actual editing but can be very useful if you are merely looking to manipulate videos. It is very easy to use, but there are limited features to this application which may not be what you are looking for. You are able to add audio tracks to the video but as a result of the limited editing features, you cannot place them in any particular spot. There is a free and a pro version that does not have ads. If you want something very basic and easy to use, this is a great choice.
5. WeVideo

This is not an app for people who want some serious video editing abilities. This application is more specialized for those people who want to share the videos on their social media accounts. It is a cloud-based application with a long process time that users may be annoyed with. There are very limited features available with this application. You can add in one of their ready-to-use songs for your videos but this will create a theme that will dictate how the rest of the video looks. Essentially, there really is little customization you can get with this. There is a free version, which does watermark the video, or a premium option that comes with a monthly fee.
Shanoon Cox
Shanoon Cox is a writer and a lover of all things video.
Follow @Shanoon Cox
Shanoon Cox
Mar 27, 2024• Proven solutions
Smartphone manufacturers are always trying to find ways to improve the cameras on their Android to make them the best ones on the market. Now there are applications that are starting to find their way onto the Android market so users can edit these videos and photos taken by their phones, turning their phones into so much more than they ever thought possible. With all of these choices on the market, it can be difficult to choose which ones are the best options. This is especially true if you are looking for options that can add audio and voice overs to your videos.
Despite adding audio files to your videos on mobile device, we suggest you try the desktop video editing tool, Wondershare Filmora , to do the task. This desktop software supports almost any audio format. And it allows you to trim, cut, fade in or fade out the audio. Besides, there are so many hand picked effects available, such like Audio Mixer and Audio Equalizer for make your videos better.
For Win 7 or later (64-bit)
Secure Download
For macOS 10.14 or later
Secure Download
Click here to get Filmora for PC by email
or Try Filmora App for mobile >>>
download filmora app for ios ](https://app.adjust.com/b0k9hf2%5F4bsu85t ) download filmora app for android ](https://app.adjust.com/b0k9hf2%5F4bsu85t )
See how to add audio to videos with Wondershare Filmora >>
Applications for Adding Audio to Video in Android
1. Filmora for Android
One of the highest recommended applications is Filmora for Android . This application is especially perfect for those who are looking for an app that can not only deliver some amazing results but is also very easy to use.
This application has most of the editing features you would need from a PC editor. Basic editing functionalities such as trimming, merging, duplicating, adding audio or voice overs, music to video etc are all available in this excellent Android video editor. Other than that, you will get dozens of video effects from this app, things like video overlays, filters, animated text effects, sound effects are all free. One most appealing feature of this app is the themes, with which you can spice your video up by applying any of its built-in video themes. Video editing can’t just be easier. Exporting video is also a breeze, you can either save your final video to the Android device, or directly upload them to any of those popular social media networks such as Youtube, Vimeo, Facebook and more! Check out the video below to get a quick overview of this app:
Most important of all, it’s totally free without any limitations or watermarks. Download a free version below:
2. KineMaster Pro
If you are looking for an editing application with a bit more substance to it, than KineMaster Pro is your best option. There is a lot more substance found in this application that you may not be able to find elsewhere. Not only is the end product amazing, but it has a very well-designed user interface. The UI has a drag and drop interface that is really easy to use. You can adjust the video so that you get an amazing quality picture on your video, as well as offering a variety of templates so that you can really get a great video. One of the greatest features is that this app can support multiple audio tracks and allows the user to overlap these tracks. You can also include voiceover tracks as well. One downside to this app is that it is only available for certain Android phones. If your phone is not one of the supported devices, you will not be able to see it in the Google Play Store. You can get this for free, but it will watermark your videos if you do not have the pro version.
3. Video Maker Pro Free
This is a bare-bones application that is very reminiscent of the original Google Movie Studio app. There is no real ability for any in-depth video editing in this app, which is one of its downsides. It can support a single track, but it is unable to support more layers than that. You can choose between a music track or a voiceover track but not both. It is easy to use and free with ads. This is a good option if you just want something basic and no-frills to mess around with.
4. VidTrim
This application is less for actual editing but can be very useful if you are merely looking to manipulate videos. It is very easy to use, but there are limited features to this application which may not be what you are looking for. You are able to add audio tracks to the video but as a result of the limited editing features, you cannot place them in any particular spot. There is a free and a pro version that does not have ads. If you want something very basic and easy to use, this is a great choice.
5. WeVideo
This is not an app for people who want some serious video editing abilities. This application is more specialized for those people who want to share the videos on their social media accounts. It is a cloud-based application with a long process time that users may be annoyed with. There are very limited features available with this application. You can add in one of their ready-to-use songs for your videos but this will create a theme that will dictate how the rest of the video looks. Essentially, there really is little customization you can get with this. There is a free version, which does watermark the video, or a premium option that comes with a monthly fee.
Shanoon Cox
Shanoon Cox is a writer and a lover of all things video.
Follow @Shanoon Cox
Also read:
- New Separating Sound The Leading Software Solutions for Isolating Audio From Videos for 2024
- Melodic Ensemble for Festive Video Chronicle, To Be Released
- Updated Step-by-Step to Free Digital Sound Logging The Audacity Way
- New 2024 Approved Beyond Default Modifying Siris Voice Across Apple Ecosystems
- Updated 2024 Approved Methods to Manipulate Amplitude in MP3, WAV, and MPEG Files
- Updated Expert Apowersoft Audio Trapping Session & 4 Innovative Substitutes
- New Unveiling Popular Melancholic Tunes for 2024
- Exploring Portable Audio Modifiers A Guide to Voice-Changing Devices
- Harmonizing Sounds with Imagery Professional Strategies to Boost Your Videography
- Updated Elevating Your Videos Atmosphere with Exemplary Instrumental Soundscape
- Updated In 2024, Top Voice Harmonizing Tools to Enhance Live Performances Online
- 2024 Approved The Must-Know Elements for Mastering with TwistedWave Editor
- New In 2024, 15 Melodic Matchmakers Tailoring Audio to Each Videos Characteristic Mood
- New Crafting the Perfect Sound Changing Your Voice in Audacity for 2024
- Updated In 2024, Unearth Brushstroke Sonic Imprints
- Updated In 2024, The Ultimate Tutorial for Audacitys PC Microphone Recording
- 2024 Approved Beat Blend Benders A Curated List of Highest-Rated Audio-Synchronization Editors, 2023
- New 2024 Approved The Art of Acoustic Correction Multiple Strategies for Overcoming Distorted Sound Phenomena
- New In 2024, Best Recommendations for Music Video Editors
- New AI Voice Manipulation Techniques for Authentic and Natural Sound Replication for 2024
- Updated Innovative Audio Editing Solutions Unveiling the Top 10 Tools for Windows/Mac Enthusiasts
- Leaderboard The Four Premier Music Editors Tailored to macOS
- In 2024, Setting Up and Disabling Audacity for Enhanced Sound Editing on Your Chromebook
- New 2024 Approved Where Can I Find Brush Sound Effect?
- Step-by-Step Guide to Extracting and Editing Audio in Adobe Premiere Pro for 2024
- New Understanding the Basics of YouTubes Audio Archives
- 2024 Approved Smoother Soundscapes Advanced Techniques for Noise Reduction in Adobe Premiere Pro Videos
- Fusing Sight and Sound Tips for Merging Audio Elements with Visual Content
- New How to Create Mute Video Sequences
- New 15 Top Newsroom Ambiance Tracks Compilation for 2024
- Updated Elevate Your Creative Output with These Audio Addition Methods in After Effects (Updated )
- Updated Exploring Audio Resources for Video Game Creators
- 2024 Approved 5 Superior Equalizers and Compressors Revolutionizing Live Transmission
- New Perfecting Silence in Your Movies Advanced Background Noise Reduction Methods for Mac Users
- New In 2024, Winning the Acoustic Illusion Techniques for Adding Delay and Echo via Web-Based Audio Tools
- New In 2024, Capturing the Essence of Cricket Soundscape
- How to Transfer Videos from Vivo V27e to iPad | Dr.fone
- Updated No-Cost Video Watermark Solutions Our Top 5 Recommendations for 2024
- How to Hide/Fake Snapchat Location on Your Samsung Galaxy S23 | Dr.fone
- App Wont Open on Your Infinix Zero 5G 2023 Turbo? Here Are All Fixes | Dr.fone
- Can I use iTools gpx file to catch the rare Pokemon On OnePlus Nord 3 5G | Dr.fone
- In 2024, Free Video Enhancement Tools to Reduce Shaky Footage
- How to Transfer Music from OnePlus Ace 3 to iPod | Dr.fone
- Universal Unlock Pattern for Nubia Red Magic 8S Pro
- Catch or Beat Sleeping Snorlax on Pokemon Go For Nokia 130 Music | Dr.fone
- How to Fix It Sony Xperia 10 V Wont Turn On | Dr.fone
- 3 Things You Must Know about Fake Snapchat Location On Oppo A59 5G | Dr.fone
- 2024 Approved Learn How to Extract Sound From Video Using the Different Online and Software Tools. Details About Their Features, Pros/Cons, and More Are Given
- How to Unlock Poco X5 Phone with Broken Screen
- Updated Gaming on a Budget Top 10 Free Game Download Platforms for PC and Android
- In 2024, How Do I Stop Someone From Tracking My Samsung Galaxy M34? | Dr.fone
- How to Fix Error 495 While Download/Updating Android Apps On Xiaomi Civi 3 | Dr.fone
- Updated What You Need Is User-Friendly Ways to Put Together Film While Helping You Add Fancy Creative Effects and Perfect for Sharing. Well Show You 3 Easy Steps
- In 2024, Does Airplane Mode Turn off GPS Location On Nokia C300? | Dr.fone
- In 2024, 5 Techniques to Transfer Data from Motorola Moto G34 5G to iPhone 15/14/13/12 | Dr.fone
- In 2024, Unlocking Apple iPhone 8 Passcode without a Computer
- Top 15 Apps To Hack WiFi Password On Vivo V30
- Updated 2024 Approved OpenCV Object Tracking The Complete Guide
- How To Stream Anything From Vivo Y200 to Apple TV | Dr.fone
- Title: New Sonic Treasure Trove The Ultimate Collection of Websites for Free Audio Files
- Author: Jacob
- Created at : 2024-05-20 00:04:24
- Updated at : 2024-05-21 00:04:24
- Link: https://audio-shaping.techidaily.com/new-sonic-treasure-trove-the-ultimate-collection-of-websites-for-free-audio-files/
- License: This work is licensed under CC BY-NC-SA 4.0.
