
:max_bytes(150000):strip_icc():format(webp)/GettyImages-839864362-59c51d1daf5d3a0010919ae9.jpg)
New In 2024, Transform Your Tone Vocal Editing Techniques Using Audacity
Transform Your Tone: Vocal Editing Techniques Using Audacity
What does free open source audio software mean? Audacity voice changer is the answer. Along with being free, it is a cross-platform software, which means that it can be used with different software packages. Audacity is easy to use multi-track audio editing and recording software.
It has a simple and clean-looking interface for better user understandability. Audacity has plug-in support for multiple audio formats like LV2, AU, and VST. We will further discuss Audacity as an audio voice changer, and how to use the software under various conditions will also be discussed in the article.
In this article
01 How Can You Use Voice Changer in Audacity?
02 How to Change Pitch in Audacity?
03 How to Change Male Voice to Female Voice with Audacity?
04 How to Create Robot Voice in Audacity?
Part 1. How Can You Use Voice Changer in Audacity?
Voice changers are also commonly referred to as voice enhancers, which can completely change and transform your voice. You can pull pranks on friends with voice changers if you are bored. If you want to hide your identity, you can modify your voice and do that. With voice changers, you can change the tone and the pitch of your voice and add various voice effects.
Voice changer comes with a wide range of sound effects ranging from baby sound, kid, male, female, monster, demon, animal sounds, and a lot more than this. Some great voice changers include AV Voice Changer , MorphVOX Voice Changer , Voicemod , Clownfish Voice Changer , and others. Do you know that these voice changers can be used with Audacity? Let’s tell you how.
Step 1: If you are interested in using a voice changer in Audacity, start by downloading your favorite voice changer to your PC. Once done, install it and after successful installation, launch it.

Step 2: As we have mentioned earlier that you are offered various voice effects in voice changers, so after launching it, select your preferred voice effect, whether it be a baby voice, animal voice, or celebrity voice.

Step 3: On the other side, launch Audacity on your PC. Once it opens, you will see the top menu; just below that, a microphone icon will be seen. Tap on that icon so that the drop-down menu appears, there select the name of your voice changer.

Part 2. How to Change Pitch in Audacity?
Audacity, the audio voice changer, offers a ‘Change Pitch’ feature with which you can change the pitch of the audio without damaging its tempo. You can separately change the speed. With this feature, you can also adjust and play with the frequency and semitones.
The audio editor also features to estimate the starting pitch; for instance, if A3 is a quiet note, followed by a large and loud note like C4, Audacity will detect C4. In case both notes have the same volume, Audacity will detect A3. With Audacity, you also get the ‘To’ and ‘From’ controls if you plan to change the pitch manually. To learn more about changing pitch, follow the steps below:
Step 1: For changing pitch in Audacity, start by launching the software. After launching, you can either record the audio or else, from the ‘File’ section, you can also ‘Open’ any file from your device.

Step 2: Audacity lets you change the pitch of a whole file or else for a small portion as well. Now, to change the pitch of a small portion, click and drag the mouse along the recording. Or else, click on the name of the track to select it completely.

Step 3: After this, head over to the top menu and click on the ‘Effect’ section. A drop-down menu list will appear, locate and select the ‘Change Pitch’ option. You can either use the sliders to adjust the pitch or else write the percentage to change.

Step 4: You can preview the file and check how it sounds once done. When you are satisfied, hit the ‘OK’ button to save the changes. You can also adjust the Speed and Tempo of the track.

Part 3. How to Change Male Voice to Female Voice with Audacity?
The most fun voice transformation is from low pitch to higher pitch. In general, modifying the male voice to a female voice, as the male pitch has a negative value and changing it to a positive pitch, modifies your voice to a female voice. What else could be better to use than the amazing Audacity voice changer? Let’s share the steps that will help you change your male voice to female.
Step 1: First, start by opening the Audacity audio editor. Once it has launched successfully, you should import the audio file. You can record audio with Audacity. Along with this, you can also import files from your device from the ‘File’ section, followed by the ‘Open’ option.

Step 2: After your audio track is visible on the timeline, you have to select the part of the file that you want to edit. You can easily select it by clicking and dragging the mouse. If not this, you can also work with the whole track; for this, simply click on the track name to select it.

Step 3: After you are satisfied with the selection, head to the top menu and select the ‘Effects’ options. A drop-down list appears after this, and you have to look for the ‘Change Pitch’ option and select it.

Step 4: Normally, you can adjust the pitch by taking help from the sliders, but you can also change the pitch manually by adding a percentage. The male pitch originally will have a negative value; change it and set a positive value. You can keep changing until you are satisfied.

Step 5: Lastly, don’t forget to save the changes by hitting the ‘OK’ button at the button and saving the file to your respective device.

Part 4. How to Create Robot Voice in Audacity?
As we have mentioned, Audacity is an audio voice changer, so you must know that Audacity also can change your voice into a robotic voice. Among the different voices, the robot voice sounds interesting, and it’s fun to create. If you are excited to learn to create robot voice in Audacity, follow the guiding steps shared below:
Step 1: For creating an extraordinary robotic voice, start by launching Audacity on your device. After it opens, it’s time to record your voice to create a robot voice. Or else, head to the ‘File’ tab and import your audio file from your device to Audacity from the ‘Open’ option.

Step 2: After this, to start the editing, you need a stereo track on the timeline. For doing this, navigate ‘Tracks’ from the top menu and click on it. Next, hover on the ‘Add New’ option to open its sub-menu. You will see the ‘Stereo Track’ option, select it, and copy-paste the audio file in the new section.

Step 3: Let’s start with the fun part, the editing and adjusting different features. Start by opening the ‘Effects’ tab, and from the long list of options, select ‘Echo.’ There, you can enter the ‘Delay Time’ and change other fields as well.

Step 4: Preview the audio and move on to the next setting. Open the ‘Effects’ section and look for the ‘Change Pitch’ option. You can change and adjust the pitch according to your desire and preview the file again.

Step 5: For creating a robot voice, you can also set the tempo. For that, head to the ‘Change Tempo’ option under the ‘Effects’ section and set the value to minus. Keep adjusting the different effects until you get your perfect robot voice.

Bottom Line
Audacity is not only a great audio editor; it is also a stunning audio voice changer. The software comes with a lot of effects that can completely transform your voice to an unrecognizable level. You can sound like a robot, male, female, and whatever you want with Audacity voice changer. Do you know any video editor that offers sound effects?
If you don’t know, let us introduce Wondershare Filmora Video Editor . This wonderous software is loaded with many editing features to create the best videos. Not only trim, cut, crop, but the software also offers you features like split-screen, chroma key background, keyframing, color match, motion tracking, and whatnot.
Apart from this, this video editor is a hub for cool sound effects and editing elements from its media library, Filmstock. You get a wide range of sound effects, titles, transitions, and many more elements.
For Win 7 or later (64-bit)
For macOS 10.12 or later
02 How to Change Pitch in Audacity?
03 How to Change Male Voice to Female Voice with Audacity?
04 How to Create Robot Voice in Audacity?
Part 1. How Can You Use Voice Changer in Audacity?
Voice changers are also commonly referred to as voice enhancers, which can completely change and transform your voice. You can pull pranks on friends with voice changers if you are bored. If you want to hide your identity, you can modify your voice and do that. With voice changers, you can change the tone and the pitch of your voice and add various voice effects.
Voice changer comes with a wide range of sound effects ranging from baby sound, kid, male, female, monster, demon, animal sounds, and a lot more than this. Some great voice changers include AV Voice Changer , MorphVOX Voice Changer , Voicemod , Clownfish Voice Changer , and others. Do you know that these voice changers can be used with Audacity? Let’s tell you how.
Step 1: If you are interested in using a voice changer in Audacity, start by downloading your favorite voice changer to your PC. Once done, install it and after successful installation, launch it.
Step 2: As we have mentioned earlier that you are offered various voice effects in voice changers, so after launching it, select your preferred voice effect, whether it be a baby voice, animal voice, or celebrity voice.
Step 3: On the other side, launch Audacity on your PC. Once it opens, you will see the top menu; just below that, a microphone icon will be seen. Tap on that icon so that the drop-down menu appears, there select the name of your voice changer.
Part 2. How to Change Pitch in Audacity?
Audacity, the audio voice changer, offers a ‘Change Pitch’ feature with which you can change the pitch of the audio without damaging its tempo. You can separately change the speed. With this feature, you can also adjust and play with the frequency and semitones.
The audio editor also features to estimate the starting pitch; for instance, if A3 is a quiet note, followed by a large and loud note like C4, Audacity will detect C4. In case both notes have the same volume, Audacity will detect A3. With Audacity, you also get the ‘To’ and ‘From’ controls if you plan to change the pitch manually. To learn more about changing pitch, follow the steps below:
Step 1: For changing pitch in Audacity, start by launching the software. After launching, you can either record the audio or else, from the ‘File’ section, you can also ‘Open’ any file from your device.
Step 2: Audacity lets you change the pitch of a whole file or else for a small portion as well. Now, to change the pitch of a small portion, click and drag the mouse along the recording. Or else, click on the name of the track to select it completely.
Step 3: After this, head over to the top menu and click on the ‘Effect’ section. A drop-down menu list will appear, locate and select the ‘Change Pitch’ option. You can either use the sliders to adjust the pitch or else write the percentage to change.
Step 4: You can preview the file and check how it sounds once done. When you are satisfied, hit the ‘OK’ button to save the changes. You can also adjust the Speed and Tempo of the track.
Part 3. How to Change Male Voice to Female Voice with Audacity?
The most fun voice transformation is from low pitch to higher pitch. In general, modifying the male voice to a female voice, as the male pitch has a negative value and changing it to a positive pitch, modifies your voice to a female voice. What else could be better to use than the amazing Audacity voice changer? Let’s share the steps that will help you change your male voice to female.
Step 1: First, start by opening the Audacity audio editor. Once it has launched successfully, you should import the audio file. You can record audio with Audacity. Along with this, you can also import files from your device from the ‘File’ section, followed by the ‘Open’ option.
Step 2: After your audio track is visible on the timeline, you have to select the part of the file that you want to edit. You can easily select it by clicking and dragging the mouse. If not this, you can also work with the whole track; for this, simply click on the track name to select it.
Step 3: After you are satisfied with the selection, head to the top menu and select the ‘Effects’ options. A drop-down list appears after this, and you have to look for the ‘Change Pitch’ option and select it.
Step 4: Normally, you can adjust the pitch by taking help from the sliders, but you can also change the pitch manually by adding a percentage. The male pitch originally will have a negative value; change it and set a positive value. You can keep changing until you are satisfied.
Step 5: Lastly, don’t forget to save the changes by hitting the ‘OK’ button at the button and saving the file to your respective device.
Part 4. How to Create Robot Voice in Audacity?
As we have mentioned, Audacity is an audio voice changer, so you must know that Audacity also can change your voice into a robotic voice. Among the different voices, the robot voice sounds interesting, and it’s fun to create. If you are excited to learn to create robot voice in Audacity, follow the guiding steps shared below:
Step 1: For creating an extraordinary robotic voice, start by launching Audacity on your device. After it opens, it’s time to record your voice to create a robot voice. Or else, head to the ‘File’ tab and import your audio file from your device to Audacity from the ‘Open’ option.
Step 2: After this, to start the editing, you need a stereo track on the timeline. For doing this, navigate ‘Tracks’ from the top menu and click on it. Next, hover on the ‘Add New’ option to open its sub-menu. You will see the ‘Stereo Track’ option, select it, and copy-paste the audio file in the new section.
Step 3: Let’s start with the fun part, the editing and adjusting different features. Start by opening the ‘Effects’ tab, and from the long list of options, select ‘Echo.’ There, you can enter the ‘Delay Time’ and change other fields as well.
Step 4: Preview the audio and move on to the next setting. Open the ‘Effects’ section and look for the ‘Change Pitch’ option. You can change and adjust the pitch according to your desire and preview the file again.
Step 5: For creating a robot voice, you can also set the tempo. For that, head to the ‘Change Tempo’ option under the ‘Effects’ section and set the value to minus. Keep adjusting the different effects until you get your perfect robot voice.
Bottom Line
Audacity is not only a great audio editor; it is also a stunning audio voice changer. The software comes with a lot of effects that can completely transform your voice to an unrecognizable level. You can sound like a robot, male, female, and whatever you want with Audacity voice changer. Do you know any video editor that offers sound effects?
If you don’t know, let us introduce Wondershare Filmora Video Editor . This wonderous software is loaded with many editing features to create the best videos. Not only trim, cut, crop, but the software also offers you features like split-screen, chroma key background, keyframing, color match, motion tracking, and whatnot.
Apart from this, this video editor is a hub for cool sound effects and editing elements from its media library, Filmstock. You get a wide range of sound effects, titles, transitions, and many more elements.
For Win 7 or later (64-bit)
For macOS 10.12 or later
Soundscape Synthesis: Techniques for Customizing Timestamps and Soundscapes in Final Cut Pro X [2023 Guide]
How to Add and Modify Audio Keyframes in Final Cut Pro X

Benjamin Arango
Aug 18, 2022• Proven solutions
Are you familiar with audio keyframing? So, what is this audio keyframing? Does this term appear new for you? It won’t anymore as we are here to explain. In the world of animation, knowing about keyframes is more critical. Have you ever noticed certain scenes while watching a movie that would reflect different audio volume in other video clips? It is all because of this process of keyframing that allows you to change the parameter values in a video clip. A keyframe on the clip specifies the start and end of the changes that occur in the frames, images, or drawings.
Filmmaking, hand-drawn animation, and short movies are critical applications where keyframing finds the place, especially in changing positions, scaling subjects, and customizing opacity. Although the concept might seem in-depth and confusing, implementing such keyframes isn’t a hassle as you think if you have a handy video editor. Today, let’s look at one such software, Final Cut Pro X, which is the popular tool for Mac at present in keyframing. With no delay, scroll down to add and edit audio keyframes in FCPX at ease.
Part 1: How to Add Audio Keyframes in Final Cut Pro X?
So, how to precisely add the Final Cut Pro keyframes? This session will reveal the answer as we have given a step-by-step guide.
Step 1: Launch and open the Final Cut Pro X software on your Mac device. Select the video clip in the timeline or select a video from the location.
Now, choose “Clip > Show Audio Animation”, or you can also press Ctrl + A.
Step 2: You will now see various automation options to change the audio of the clips.
To add keyframes, you have to hold or press option-K to create a keyframe on the horizontal effect control that will result in a white diamond depicting the created keyframes.
Step 3: Apart from the Audio Animator tool, you can create a Final Cut Pro audio keyframe with the range selection tool. To do so, on the video timeline, you need to sue the keyframe shortcut Final Cut Pro, which is to hold down R.
Hold the R key down, and on the timeline, click the spot where you need to begin the keyframing, drag the mouse pointer to the area where the keyframing should end. It will mark a range with a diamond.
That is the way you can add a fcpx audio keyframe, and is it easy?
Part 2: How to Modify Audio Keyframes in Final Cut Pro X?
Now that you have successfully created or added audio keyframes fcpx, do you wish to adjust or modify them, like changing the volume or any other enhancements? Yes, Final Cut Pro X offers adjustments. Learn how to do it from here.
Step 1: Usually, users follow the same way in the keyframe to change the volume per your requirement on the “Volume and Pan” segment.
You can slide the volume pointer as needed, or from the inverted triangle next to the option, you can choose the “Reset Parameter” option to reset the changes.
Step 2: You can configure the Pan option of the keyframe and FCPX that offers multiples ones like stereo left/right, basic surround, create space, and so on.
Step 3: To adjust the audio animation editor’s keyframes, you can drag the diamond to the left/right to change the keyframe position.
If you want to alter the effect’s parameter value, you can drag the keyframe up or down.
There is one more option by which you can edit the final cut pro audio keyframe. If you click the “Final Cut Pro” option on the top and choose the editing option, it will show you various options to adjust the keyframes like reference waveforms, transitions, etc.
With access to the in-built options offered by Final Cut Pro X, you can easily adjust the created or added fcpx audio keyframe at ease.
Part 3: FAQs about Audio Keyframing in Final Cut Pro X?
1. Will changing the “Show reference waveform” checkbox on the editing window’s audio aspect affect the fcpx audio keyframe?
No. A tick over the “Shoe reference waveforms” checkbox will only make changes over the timeline waveform representation. However, no change will occur on the keyframe unless the duration or still images get altered.
2. Can I add keyframes across a selected area automatically?
Yes, with the Range Selection tool’s assistance, you can add keyframes over a selected range automatically. To do so, execute the “Clip > Audio Animation > select an effect > disclosure button.” From the tools pop-up menu with the mouse icon, choose the option, “Range Selection.”
3. Despite Audio animation, is there any other option to adjust the fcpx keyframe?
Yes. To access many different effects in the Final Cut Pro X software, you can change the parameter values of sole keyframes using Audio Inspector.
4. Is viewing a single effect at a time in the Audio Animation editor is possible in FCPX?
Yes. If you have applied multiple effects to a clip and need to preserve a screen space, you can collapse the Audio Animation editor to view one impact at a time. Tapping the “Solo Animation” option from the Click Menu can execute this task.
5. Can I delete the created Final Cut Pro audio keyframe?
Sure. To delete an audio keyframe, select the keyframe, and press the “Shift + Delete” option. Now, navigate to the Audio Inspector, and hit the “Keyframe” button.
Conclusion
I am sure you are excited to know that working with the Final Cut Pro keyframe is easier than you have imagined. Yes, it is, and I hope with the ultimate guide on how to add keyframe Final Cut Pro X along with specific FAQs regarding fcpx audio keyframe, we have put a full-stop to your queries. So, with no delay, get started to make your video by audio keyframes on Final Cut Pro X!
Benjamin Arango
Benjamin Arango is a writer and a lover of all things video.
Follow @Benjamin Arango
Benjamin Arango
Aug 18, 2022• Proven solutions
Are you familiar with audio keyframing? So, what is this audio keyframing? Does this term appear new for you? It won’t anymore as we are here to explain. In the world of animation, knowing about keyframes is more critical. Have you ever noticed certain scenes while watching a movie that would reflect different audio volume in other video clips? It is all because of this process of keyframing that allows you to change the parameter values in a video clip. A keyframe on the clip specifies the start and end of the changes that occur in the frames, images, or drawings.
Filmmaking, hand-drawn animation, and short movies are critical applications where keyframing finds the place, especially in changing positions, scaling subjects, and customizing opacity. Although the concept might seem in-depth and confusing, implementing such keyframes isn’t a hassle as you think if you have a handy video editor. Today, let’s look at one such software, Final Cut Pro X, which is the popular tool for Mac at present in keyframing. With no delay, scroll down to add and edit audio keyframes in FCPX at ease.
Part 1: How to Add Audio Keyframes in Final Cut Pro X?
So, how to precisely add the Final Cut Pro keyframes? This session will reveal the answer as we have given a step-by-step guide.
Step 1: Launch and open the Final Cut Pro X software on your Mac device. Select the video clip in the timeline or select a video from the location.
Now, choose “Clip > Show Audio Animation”, or you can also press Ctrl + A.
Step 2: You will now see various automation options to change the audio of the clips.
To add keyframes, you have to hold or press option-K to create a keyframe on the horizontal effect control that will result in a white diamond depicting the created keyframes.
Step 3: Apart from the Audio Animator tool, you can create a Final Cut Pro audio keyframe with the range selection tool. To do so, on the video timeline, you need to sue the keyframe shortcut Final Cut Pro, which is to hold down R.
Hold the R key down, and on the timeline, click the spot where you need to begin the keyframing, drag the mouse pointer to the area where the keyframing should end. It will mark a range with a diamond.
That is the way you can add a fcpx audio keyframe, and is it easy?
Part 2: How to Modify Audio Keyframes in Final Cut Pro X?
Now that you have successfully created or added audio keyframes fcpx, do you wish to adjust or modify them, like changing the volume or any other enhancements? Yes, Final Cut Pro X offers adjustments. Learn how to do it from here.
Step 1: Usually, users follow the same way in the keyframe to change the volume per your requirement on the “Volume and Pan” segment.
You can slide the volume pointer as needed, or from the inverted triangle next to the option, you can choose the “Reset Parameter” option to reset the changes.
Step 2: You can configure the Pan option of the keyframe and FCPX that offers multiples ones like stereo left/right, basic surround, create space, and so on.
Step 3: To adjust the audio animation editor’s keyframes, you can drag the diamond to the left/right to change the keyframe position.
If you want to alter the effect’s parameter value, you can drag the keyframe up or down.
There is one more option by which you can edit the final cut pro audio keyframe. If you click the “Final Cut Pro” option on the top and choose the editing option, it will show you various options to adjust the keyframes like reference waveforms, transitions, etc.
With access to the in-built options offered by Final Cut Pro X, you can easily adjust the created or added fcpx audio keyframe at ease.
Part 3: FAQs about Audio Keyframing in Final Cut Pro X?
1. Will changing the “Show reference waveform” checkbox on the editing window’s audio aspect affect the fcpx audio keyframe?
No. A tick over the “Shoe reference waveforms” checkbox will only make changes over the timeline waveform representation. However, no change will occur on the keyframe unless the duration or still images get altered.
2. Can I add keyframes across a selected area automatically?
Yes, with the Range Selection tool’s assistance, you can add keyframes over a selected range automatically. To do so, execute the “Clip > Audio Animation > select an effect > disclosure button.” From the tools pop-up menu with the mouse icon, choose the option, “Range Selection.”
3. Despite Audio animation, is there any other option to adjust the fcpx keyframe?
Yes. To access many different effects in the Final Cut Pro X software, you can change the parameter values of sole keyframes using Audio Inspector.
4. Is viewing a single effect at a time in the Audio Animation editor is possible in FCPX?
Yes. If you have applied multiple effects to a clip and need to preserve a screen space, you can collapse the Audio Animation editor to view one impact at a time. Tapping the “Solo Animation” option from the Click Menu can execute this task.
5. Can I delete the created Final Cut Pro audio keyframe?
Sure. To delete an audio keyframe, select the keyframe, and press the “Shift + Delete” option. Now, navigate to the Audio Inspector, and hit the “Keyframe” button.
Conclusion
I am sure you are excited to know that working with the Final Cut Pro keyframe is easier than you have imagined. Yes, it is, and I hope with the ultimate guide on how to add keyframe Final Cut Pro X along with specific FAQs regarding fcpx audio keyframe, we have put a full-stop to your queries. So, with no delay, get started to make your video by audio keyframes on Final Cut Pro X!
Benjamin Arango
Benjamin Arango is a writer and a lover of all things video.
Follow @Benjamin Arango
Exploring Leading Free Mobile Audio Capture Solutions for Android
10 Best Voice Recording Apps for Android Devices [Free Included]
Benjamin Arango
Mar 27, 2024• Proven solutions
Memorizing every bit of information you need to perform your daily or weekly tasks becomes increasingly difficult as your workload rises. Students, journalists, and professionals from a wide array of industries can benefit from making audio notes or even recording entire conversations with their Smartphones.
A simple Android voice recorder can make this task easy since you can just tap on the Record button and create an audio note in seconds. However, with so many voice recorder apps for Android devices out there, finding the one best suited for your needs can be more complicated than it seems. So, in this article, we are going to help you discover some best free voice recorder for an Android device you are currently using.
Want to record voiceover and audio on iPhone? Check 10 Best Voice Recorder Apps for iPhones >>
10 Best Free Voice Recording Apps for Android Devices
Recording audio is no longer a highly technical process since now you can create an audio note or record an interview with an Android phone and a voice recorder app. The question is which voice recording app should you install on your device. So, let’s take a look at some of the most potent Android voice recorders you can find at Google Play Store.
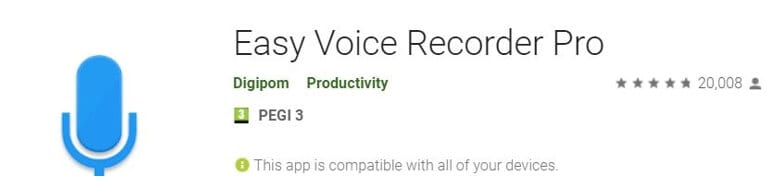
1. Easy Voice Recorder Pro
Price: $3.99
Supported OS: Varies with the device
Best for: Students, musicians, and businessmen
App in Google Play
As the app’s name suggests making recordings for a broad range of purposes is easy. All you need to do is launch the app and start a new audio recording session. Easy Voice Recorder Pro doesn’t limit the duration of your recordings, and it also allows you to compress the recorded audio . That is perfect if you need to record long lectures or conversations. Besides, you can connect an external microphone with the app in case you want to increase the quality of the sound you are recording. The app also lets you store your recordings on Dropbox or Google Drive, while it also offers the possibility to send recordings via email.
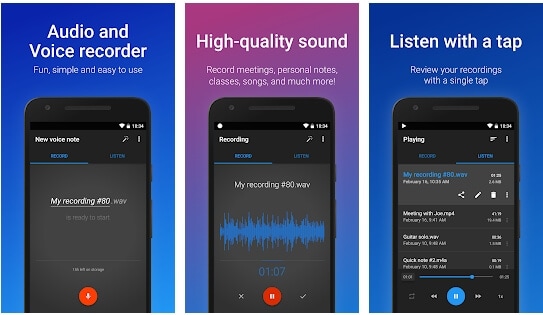
Easy Voice Recorder Pro Interface
Pros
- Allows users to manage and organize their recordings effortlessly
- Supports all standard output audio file formats
- Offers the option to record in stereo
- Recordings made with this app can be used as the ringtone
Cons
- Ads can be frustrating
- Limited basic audio editing tools
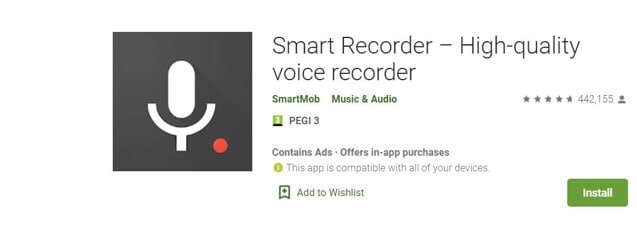
2. Smart Recorder – High-quality voice recorder
Price: Free, but contains ads and offers in-app purchases
Supported OS: Varies with the device
Best for: Students, musicians, and businessmen
App in Google Play
Capturing high-quality audio recordings effortlessly is the ultimate goal of all Android users who want to use voice recorders. As one of the best free voice recorders for Android, Smart Recorder app has a plethora of features that enable users to make high-quality audio recordings even in imperfect conditions. Options like Live Audio Spectrum Analyzer, microphone gain calibration or automatic and manual sensitivity control in Skip Silence mode are just a few reasons why this app has over 10 million installs. However, you should keep in mind that you cannot create audio files that are larger than 2 GB with this app.
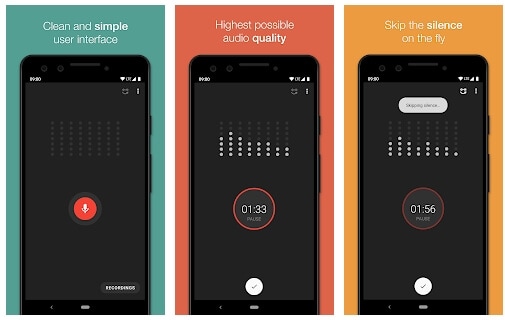
Smart Recorder – High-quality voice recorder Interface
Pros
- Provides full control over the audio recording process
- Equipped with the Wave Lock feature that prevents the device from going into the sleep mode
- Features a live audio spectrum analyzer
- Preserves battery life
Cons
- No phone call recording options
- Limited file-sharing capabilities
3. RecForge II Audio Recorder
Price: Free, but contains ads
Supported OS: Android 4.0 and up
Best for: Musicians
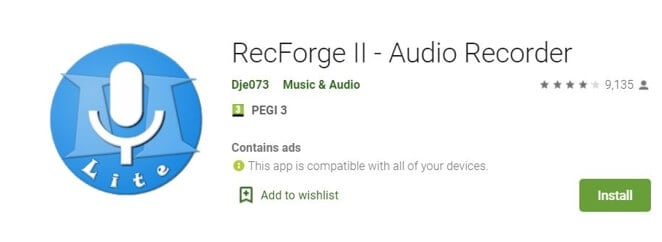
RecForge-audio-recorder App in Google Play
If you are looking for an Android voice recorder that allows you to customize bit rates, sample rates, choose codecs or record in mono or stereo mode, then you should consider installing RecForge II Audio Recorder on your device. The app allows you to schedule recordings, connect different types of external microphones or adjust the gain manually. In addition, you can also adjust the pitch , tempo and the playback rate of all audio files you record and edit with this app. RecForge II Audio Recorder continues working even while you are using other apps, and it keeps the battery consumption at the very minimum.
Pros
- Supports nearly all common audio file formats
- Offers a versatile set of audio editing tools
- Excellent file-sharing capabilities
- Allows users to increase the audio quality by disabling Automatic Gain Control
Cons
- The maximum duration of a recording is limited for some file formats
- Can be too complicated for inexperienced users
4. Hi-Q MP3 Voice Recorder
Price: Free
Supported OS: Varies with the device
Best for: Students, general use
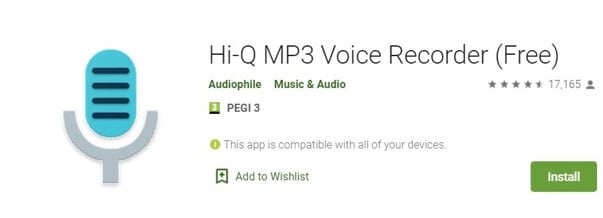
Hi-Q MP3 Voice Recorder App in Google Play
You don’t need any previous audio recording experience to record long lectures, interviews and all other types of voice recordings with Hi-Q MP3 Voice Recorder. The free version of the app limits the maximum duration of a recording you can make to just 10 minutes. That is why you must upgrade to the Pro version of Hi-Q MP3 Voice Recorder if you want to capture hours of material directly from your phone. The best part is that all versions of the app automatically upload recordings to Google Drive or Dropbox which frees up space on your device.
Pros
- Intuitive and modernly designed interface
- Simple audio recording session setup
- Customizable audio quality
- Excellent file management capabilities
Cons
- Recording with external microphones is not an option
- The free version of the app limits the maximum duration of recordings
5. Voice Recorder
Price: Free, but contains ads
Supported OS: Android 4.1 and up
Best for: Students, musicians, and businessmen
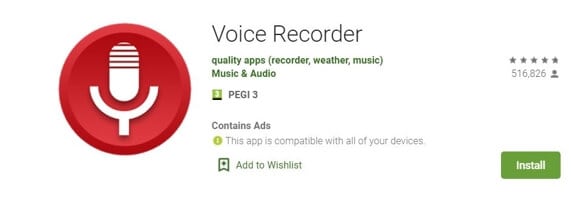
Voice Recorder App in Google Play
If you are looking for an app you can use to record an interview, a business meeting or a lecture, then Voice Recorder may be one of your best options. You can record audio files without any restrictions and visualize the sounds with the Audio Spectrum Analyzer. The app continues recording from the background even while the phone’s screen is off which preserves battery life and enables you to perform other tasks while the recording session is in progress. Voice Recorder offers a broad range of file-sharing capabilities so that you can easily send your audio recordings via SMS, email and the Messenger app or share them on Facebook and WhatsApp.
Pros
- Available for free to all Android users
- Stopping, pausing or resuming a recording session is easy
- Allows users to adjust the sample rate
- Offers the microphone gain calibration tool
Cons
- Audio recordings can only be saved in two different file formats
- Doesn’t provide audio editing options
6. Music Maker JAM
Price: Free, but contains ads and offers in-app purchases
Supported OS: Varies with the device
Best for: Musicians
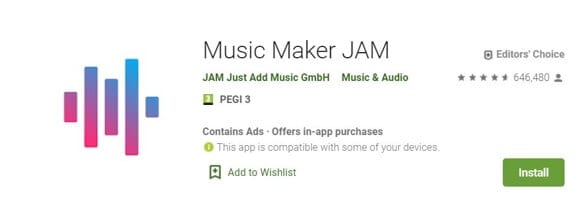
Music Maker JAM App in Google Play
With the selection of 300 mix packs, Music Maker JAM is one of the best android apps for aspiring musicians who want to compose their music even while they are on the go. You can choose from a variety of samples, audio loops and beats to create your next song or record live performances with the app’s 8-channel mixer. Music Maker JAM also enables you to record vocals, adjust the tempo of the audio files or apply effects to all recordings you edit with this app. Once your recording is ready, you can upload it to SoundCloud directly from the app or post it on Facebook and other social networks.
Pros
- Shake your Android phone to remix a song
- The app lets you choose from more than 300 mix packs
- Supports multi-channel recording
- Offers advanced audio editing options
Cons
- Music Maker JAM is not primarily a voice recorder
- No support for external microphones
7. LectureNotes
Price: Free
Supported OS: Android 3.0 and up
Best for: Students
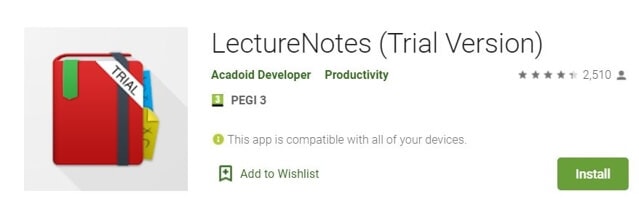
LectureNotes App in Google Play
In case you take notes often, then this app can be an excellent choice for you as it allows you to use a stylus to create notes. However, the trial version limits the number of notebooks to just two, and neither of the notebooks can have more than eight pages. Moreover, if you would like to utilize the app’s voice recording features, you must install LectureRecordings plugin on your device. To capture videos, you must first install the LectureVideos plugin. Another disappointing thing is that you won’t be able to adjust the settings for your audio recording sessions or edit the recording you create with this app.
Pros
- An efficient tool for creating hand-written notes
- The app can be used while your Android phone is offline
- Allows users to export PDF files
- Compatible with OneNote and Evernote apps
Cons
- Underwhelming voice recording options
- You must install a plugin to record audio files
8. ASR Voice Recorder
Price: Free, but contains ads
Supported OS: Android 5.0 and up
Best for: Journalists, musicians, students

ASR Voice Recorder App in Google Play
A brief look at the list of features this app offers, you will find this is a well-rounded voice recorder because it offers all the tools you are going to need to create high-quality recordings. You can choose from a variety of file formats, add notes to recordings at recording or control the playback speed of all audio files you listen to in AVR Voice Recorder. You can also skip silences, connect a headset microphone to the app via Bluetooth or arrange your voice recordings in any way you want. The app lets you upload your audio files to Dropbox, Google Drive, and other file-hosting platforms.
Pros
- Provides excellent audio recording options for free
- Allows users to save recordings in different file formats
- Equipped with an audio playback controller
- Sharing multiple files is easy
Cons
- Offers only basic audio editing tools
- No audio transcription options
9. Call Recorder
Price: Free, but contains ads
Supported OS: Android 4.0 and up
Best for: Marketing professionals
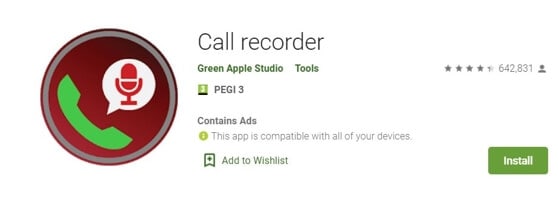
Call Recorder App in Google Play
If you would like to record all incoming and outgoing calls on your device, the Call Recorder app is one of the best options you have at your disposal. Besides recording all calls from whitelisted numbers automatically, this app also allows you to choose from a variety of different recording modes. Furthermore, Call Recorder lets you blacklist numbers from which you don’t want to receive calls and enables you to organize your recordings efficiently. All files created with this app can be sent via Skype, SMS, Dropbox and other messaging services, which makes Call Recorder app a perfect choice for marketing professionals.
Pros
- No previous experience required to start using the app
- Records an unlimited number of phone calls
- Simple audio file management
- Offers several recording modes
Cons
- No voice recording options
- Doesn’t provide audio editing tools
10. Otter Voice Meeting Notes
Price: Free, but offers in-app purchases
Supported OS: Android 5.0 and up
Best for: Large teams of professionals
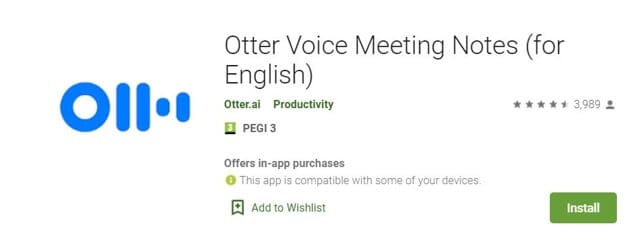
Otter Voice Meeting Notes App in Google Play
Besides being a powerful voice recorder, Otter Voice Meeting Notes is a collaborative tool that enables multiple team members to highlight and edit the transcripts this app generates in real-time. In addition to recording business meetings, you can also use Otter Voice Meeting Notes to record interviews, webinars or podcasts . Starting a new recording session takes only a second since you just have to tap on the Record button to capture the voices of all speakers in the room. What’s more, the app lets you add photos or slides to transcripts while the recording session is still in progress.
Pros
- Makes collaboration on a single transcript easier
- The app’s AI identifies different speakers automatically after the initial training
- Allows users to export MP3 audio files
- Compatible with the Call Recorder app
Cons
- In-app purchases are expensive
- Audio editing tools could be better
You may also like: 10 Best Free Discord Voice Changers
Conclusion
Creating an audio note or recording an entire interview with an Android device has never been easier. Each of the voice recorder apps we featured in this article enables you to create high-quality audio files you can share via email or store on the cloud.
Which of these Android voice recorders you are going to choose depends on a broad spectrum of factors, which range from the context in which you want to make the recording toaudio editing tools you want to use to process the audio files you created.
We’ve summarized the essential information in the table below. Hope that will help you to determine. What is your favorite Android voice recorder? Leave a comment and let us know.
| Voice recorder app | Price | Supported OS | User Rating | Best for |
|---|---|---|---|---|
| Easy Voice Recorder Pro | $3.99 | Varies with the device | 4.8 | Students, musicians, and businessmen |
| Smart Recorder – High-quality voice recorder | Free, but contains ads and offers in-app purchases | Varies with the device | 4.7 | Students, musicians, and businessmen |
| RecForge II Audio Recorder | Free, but contains ads | Android 4.0 and up | 4.0 | Musicians |
| Hi-Q MP3 Voice Recorder | Free | Varies with the device | 4.5 | Students |
| Voice Recorder | Free, but contains ads | Android 4.1 and up | 4.8 | Students, musicians, and businessmen |
| Music Maker JAM | Free, but contains ads and offers in-app purchases | Varies with the device | 4.6 | Musicians |
| LectureNotes | Free | Android 3.0 and up | 4.3 | Students |
| ASR Voice Recorder | Free, but contains ads | Android 5.0 and up | 4.4 | Journalists, musicians, students |
| Call Recorder | Free, but contains ads | Android 4.0 and up | 4.3 | Marketing professionals |
| Otter Voice Meeting Notes | Free, but offers in-app purchases | Android 5.0 and up | 4.5 | Large teams of professionals |
Benjamin Arango
Benjamin Arango is a writer and a lover of all things video.
Follow @Benjamin Arango
Benjamin Arango
Mar 27, 2024• Proven solutions
Memorizing every bit of information you need to perform your daily or weekly tasks becomes increasingly difficult as your workload rises. Students, journalists, and professionals from a wide array of industries can benefit from making audio notes or even recording entire conversations with their Smartphones.
A simple Android voice recorder can make this task easy since you can just tap on the Record button and create an audio note in seconds. However, with so many voice recorder apps for Android devices out there, finding the one best suited for your needs can be more complicated than it seems. So, in this article, we are going to help you discover some best free voice recorder for an Android device you are currently using.
Want to record voiceover and audio on iPhone? Check 10 Best Voice Recorder Apps for iPhones >>
10 Best Free Voice Recording Apps for Android Devices
Recording audio is no longer a highly technical process since now you can create an audio note or record an interview with an Android phone and a voice recorder app. The question is which voice recording app should you install on your device. So, let’s take a look at some of the most potent Android voice recorders you can find at Google Play Store.
1. Easy Voice Recorder Pro
Price: $3.99
Supported OS: Varies with the device
Best for: Students, musicians, and businessmen
App in Google Play
As the app’s name suggests making recordings for a broad range of purposes is easy. All you need to do is launch the app and start a new audio recording session. Easy Voice Recorder Pro doesn’t limit the duration of your recordings, and it also allows you to compress the recorded audio . That is perfect if you need to record long lectures or conversations. Besides, you can connect an external microphone with the app in case you want to increase the quality of the sound you are recording. The app also lets you store your recordings on Dropbox or Google Drive, while it also offers the possibility to send recordings via email.
Easy Voice Recorder Pro Interface
Pros
- Allows users to manage and organize their recordings effortlessly
- Supports all standard output audio file formats
- Offers the option to record in stereo
- Recordings made with this app can be used as the ringtone
Cons
- Ads can be frustrating
- Limited basic audio editing tools
2. Smart Recorder – High-quality voice recorder
Price: Free, but contains ads and offers in-app purchases
Supported OS: Varies with the device
Best for: Students, musicians, and businessmen
App in Google Play
Capturing high-quality audio recordings effortlessly is the ultimate goal of all Android users who want to use voice recorders. As one of the best free voice recorders for Android, Smart Recorder app has a plethora of features that enable users to make high-quality audio recordings even in imperfect conditions. Options like Live Audio Spectrum Analyzer, microphone gain calibration or automatic and manual sensitivity control in Skip Silence mode are just a few reasons why this app has over 10 million installs. However, you should keep in mind that you cannot create audio files that are larger than 2 GB with this app.
Smart Recorder – High-quality voice recorder Interface
Pros
- Provides full control over the audio recording process
- Equipped with the Wave Lock feature that prevents the device from going into the sleep mode
- Features a live audio spectrum analyzer
- Preserves battery life
Cons
- No phone call recording options
- Limited file-sharing capabilities
3. RecForge II Audio Recorder
Price: Free, but contains ads
Supported OS: Android 4.0 and up
Best for: Musicians
RecForge-audio-recorder App in Google Play
If you are looking for an Android voice recorder that allows you to customize bit rates, sample rates, choose codecs or record in mono or stereo mode, then you should consider installing RecForge II Audio Recorder on your device. The app allows you to schedule recordings, connect different types of external microphones or adjust the gain manually. In addition, you can also adjust the pitch , tempo and the playback rate of all audio files you record and edit with this app. RecForge II Audio Recorder continues working even while you are using other apps, and it keeps the battery consumption at the very minimum.
Pros
- Supports nearly all common audio file formats
- Offers a versatile set of audio editing tools
- Excellent file-sharing capabilities
- Allows users to increase the audio quality by disabling Automatic Gain Control
Cons
- The maximum duration of a recording is limited for some file formats
- Can be too complicated for inexperienced users
4. Hi-Q MP3 Voice Recorder
Price: Free
Supported OS: Varies with the device
Best for: Students, general use
Hi-Q MP3 Voice Recorder App in Google Play
You don’t need any previous audio recording experience to record long lectures, interviews and all other types of voice recordings with Hi-Q MP3 Voice Recorder. The free version of the app limits the maximum duration of a recording you can make to just 10 minutes. That is why you must upgrade to the Pro version of Hi-Q MP3 Voice Recorder if you want to capture hours of material directly from your phone. The best part is that all versions of the app automatically upload recordings to Google Drive or Dropbox which frees up space on your device.
Pros
- Intuitive and modernly designed interface
- Simple audio recording session setup
- Customizable audio quality
- Excellent file management capabilities
Cons
- Recording with external microphones is not an option
- The free version of the app limits the maximum duration of recordings
5. Voice Recorder
Price: Free, but contains ads
Supported OS: Android 4.1 and up
Best for: Students, musicians, and businessmen
Voice Recorder App in Google Play
If you are looking for an app you can use to record an interview, a business meeting or a lecture, then Voice Recorder may be one of your best options. You can record audio files without any restrictions and visualize the sounds with the Audio Spectrum Analyzer. The app continues recording from the background even while the phone’s screen is off which preserves battery life and enables you to perform other tasks while the recording session is in progress. Voice Recorder offers a broad range of file-sharing capabilities so that you can easily send your audio recordings via SMS, email and the Messenger app or share them on Facebook and WhatsApp.
Pros
- Available for free to all Android users
- Stopping, pausing or resuming a recording session is easy
- Allows users to adjust the sample rate
- Offers the microphone gain calibration tool
Cons
- Audio recordings can only be saved in two different file formats
- Doesn’t provide audio editing options
6. Music Maker JAM
Price: Free, but contains ads and offers in-app purchases
Supported OS: Varies with the device
Best for: Musicians
Music Maker JAM App in Google Play
With the selection of 300 mix packs, Music Maker JAM is one of the best android apps for aspiring musicians who want to compose their music even while they are on the go. You can choose from a variety of samples, audio loops and beats to create your next song or record live performances with the app’s 8-channel mixer. Music Maker JAM also enables you to record vocals, adjust the tempo of the audio files or apply effects to all recordings you edit with this app. Once your recording is ready, you can upload it to SoundCloud directly from the app or post it on Facebook and other social networks.
Pros
- Shake your Android phone to remix a song
- The app lets you choose from more than 300 mix packs
- Supports multi-channel recording
- Offers advanced audio editing options
Cons
- Music Maker JAM is not primarily a voice recorder
- No support for external microphones
7. LectureNotes
Price: Free
Supported OS: Android 3.0 and up
Best for: Students
LectureNotes App in Google Play
In case you take notes often, then this app can be an excellent choice for you as it allows you to use a stylus to create notes. However, the trial version limits the number of notebooks to just two, and neither of the notebooks can have more than eight pages. Moreover, if you would like to utilize the app’s voice recording features, you must install LectureRecordings plugin on your device. To capture videos, you must first install the LectureVideos plugin. Another disappointing thing is that you won’t be able to adjust the settings for your audio recording sessions or edit the recording you create with this app.
Pros
- An efficient tool for creating hand-written notes
- The app can be used while your Android phone is offline
- Allows users to export PDF files
- Compatible with OneNote and Evernote apps
Cons
- Underwhelming voice recording options
- You must install a plugin to record audio files
8. ASR Voice Recorder
Price: Free, but contains ads
Supported OS: Android 5.0 and up
Best for: Journalists, musicians, students
ASR Voice Recorder App in Google Play
A brief look at the list of features this app offers, you will find this is a well-rounded voice recorder because it offers all the tools you are going to need to create high-quality recordings. You can choose from a variety of file formats, add notes to recordings at recording or control the playback speed of all audio files you listen to in AVR Voice Recorder. You can also skip silences, connect a headset microphone to the app via Bluetooth or arrange your voice recordings in any way you want. The app lets you upload your audio files to Dropbox, Google Drive, and other file-hosting platforms.
Pros
- Provides excellent audio recording options for free
- Allows users to save recordings in different file formats
- Equipped with an audio playback controller
- Sharing multiple files is easy
Cons
- Offers only basic audio editing tools
- No audio transcription options
9. Call Recorder
Price: Free, but contains ads
Supported OS: Android 4.0 and up
Best for: Marketing professionals
Call Recorder App in Google Play
If you would like to record all incoming and outgoing calls on your device, the Call Recorder app is one of the best options you have at your disposal. Besides recording all calls from whitelisted numbers automatically, this app also allows you to choose from a variety of different recording modes. Furthermore, Call Recorder lets you blacklist numbers from which you don’t want to receive calls and enables you to organize your recordings efficiently. All files created with this app can be sent via Skype, SMS, Dropbox and other messaging services, which makes Call Recorder app a perfect choice for marketing professionals.
Pros
- No previous experience required to start using the app
- Records an unlimited number of phone calls
- Simple audio file management
- Offers several recording modes
Cons
- No voice recording options
- Doesn’t provide audio editing tools
10. Otter Voice Meeting Notes
Price: Free, but offers in-app purchases
Supported OS: Android 5.0 and up
Best for: Large teams of professionals
Otter Voice Meeting Notes App in Google Play
Besides being a powerful voice recorder, Otter Voice Meeting Notes is a collaborative tool that enables multiple team members to highlight and edit the transcripts this app generates in real-time. In addition to recording business meetings, you can also use Otter Voice Meeting Notes to record interviews, webinars or podcasts . Starting a new recording session takes only a second since you just have to tap on the Record button to capture the voices of all speakers in the room. What’s more, the app lets you add photos or slides to transcripts while the recording session is still in progress.
Pros
- Makes collaboration on a single transcript easier
- The app’s AI identifies different speakers automatically after the initial training
- Allows users to export MP3 audio files
- Compatible with the Call Recorder app
Cons
- In-app purchases are expensive
- Audio editing tools could be better
You may also like: 10 Best Free Discord Voice Changers
Conclusion
Creating an audio note or recording an entire interview with an Android device has never been easier. Each of the voice recorder apps we featured in this article enables you to create high-quality audio files you can share via email or store on the cloud.
Which of these Android voice recorders you are going to choose depends on a broad spectrum of factors, which range from the context in which you want to make the recording toaudio editing tools you want to use to process the audio files you created.
We’ve summarized the essential information in the table below. Hope that will help you to determine. What is your favorite Android voice recorder? Leave a comment and let us know.
| Voice recorder app | Price | Supported OS | User Rating | Best for |
|---|---|---|---|---|
| Easy Voice Recorder Pro | $3.99 | Varies with the device | 4.8 | Students, musicians, and businessmen |
| Smart Recorder – High-quality voice recorder | Free, but contains ads and offers in-app purchases | Varies with the device | 4.7 | Students, musicians, and businessmen |
| RecForge II Audio Recorder | Free, but contains ads | Android 4.0 and up | 4.0 | Musicians |
| Hi-Q MP3 Voice Recorder | Free | Varies with the device | 4.5 | Students |
| Voice Recorder | Free, but contains ads | Android 4.1 and up | 4.8 | Students, musicians, and businessmen |
| Music Maker JAM | Free, but contains ads and offers in-app purchases | Varies with the device | 4.6 | Musicians |
| LectureNotes | Free | Android 3.0 and up | 4.3 | Students |
| ASR Voice Recorder | Free, but contains ads | Android 5.0 and up | 4.4 | Journalists, musicians, students |
| Call Recorder | Free, but contains ads | Android 4.0 and up | 4.3 | Marketing professionals |
| Otter Voice Meeting Notes | Free, but offers in-app purchases | Android 5.0 and up | 4.5 | Large teams of professionals |
Benjamin Arango
Benjamin Arango is a writer and a lover of all things video.
Follow @Benjamin Arango
Also read:
- New 2024 Approved Top-Tier Tempo Tune Videography Tools
- 2024 Approved Advanced Strategies to Exclude Percussion From Digital Song Archives
- 2024 Approved Becoming a Savvy Sound Stealer Proven Strategies to Download, Save, and Access Your Favorite Podcasts on Computers
- New In 2024, Enthusiastic Appreciation Audio Creator
- 2024 Approved Exploring the Latest Mood-Aligned Symphonies
- Updated In 2024, Incorporate Music Into Your Videos at No Cost
- In 2024, Preserving Melody Methods to Decelerate Sound Waves without Modifying Frequency Range
- New In 2024, Embed Audio Clip in iMovie Editing Interface
- Updated In 2024, Innovative Text-to-Speech Solutions Dominating the Market
- 2024 Approved Sonic Palette An Intensive Look at AVS Editors Features, User Reviews, and Alternate Choices in Audio Editing
- 2024 Approved Step-By-Step Guide for Aspiring Filmmakers Incorporating Audio with iMovie
- In 2024, Useful Tips How Can You Use Voxal Voice Changer on Discord?
- Updated The Ultimate Strategy for Fusing Audio with Video Content (Updated ) for 2024
- New In 2024, Innovative Platforms to Connect Visually Videochat Alternatives to Omegle
- Updated 2024 Approved The Most Effective Speech-to-Text Applications Compatible with Windows The Ultimate Selection
- Locating Authentic Bell Ringing Audio Samples
- 2024 Approved Visualizing the Vibes The Crème De La Crème of Music Animation Experiences
- 2024 Approved Mac Voice Recording Made Simple Essential Steps for Crystal Clear Recordings
- New The Truth About Digital Studios Separating Myths From DAW Reality for 2024
- Harmonizing Your Library The Best Places to Stream and Save Background Music
- Updated In 2024, Exploring the Crème De La Crème of Distorted Audio Technology Tools
- New Leveraging Free Tools to Blend Music with Web Videos for 2024
- Updated 2024 Approved Best Affordable Web Platforms for Equalizing Auditory Content
- The Editors Guide to Beat Matching Seamless Integration of Music and Motion in FCPX for 2024
- Updated DJ Audio Editor Software Review
- New 2024 Approved Instant Silence Muting Zoom Sound From Your Computer or Smartphone
- New In 2024, Unbeatable Vocal Talent Generators Essential Apps to Explore Online & On Desktops
- New 2024 Approved Mastering MP3 Conversion Essential Techniques for Podcasts
- New Muting TikTok Audio Made Easy A Comprehensive Guide to Sound Management
- New 2024 Approved Essential Tips for YouTube Audio Library You Wont Miss
- How to Detach Audio From Video in Premiere Pro?
- Updated 2024 Approved Pro Video Editors Choice 10 Invaluable Plugins for Seamless Cutting and Trimming
- Elevate Your Game Experience A Selection Process for Immersive Vocal Transformation Technology
- Quickly Remove Google FRP Lock on Poco M6 Pro 4G
- New 2024 Approved From Cluttered to Cleared A Beginners Guide to Freeing Up Space for FCPX
- Do You Want to Enable the Motion Blur Effect While Playing Dying Light 2? Read This Article to Find Out How to Use Dying Light 2 Motion Blur for a Great Gaming Experience
- Top 6 Apps/Services to Trace Any Realme Narzo 60x 5G Location By Mobile Number | Dr.fone
- Is your Nokia C12 Pro working too slow? Heres how you can hard reset it | Dr.fone
- In 2024, 6 Ways To Transfer Contacts From Infinix Zero 5G 2023 Turbo to iPhone | Dr.fone
- In 2024, All About iPhone 11 Pro Max Unlock Chip You Need to Know
- The Ultimate List 8 Best Photo Viewers for Windows 10 Users for 2024
- How to Unlock Poco X6 Pro Phone Password Without Factory Reset?
- 4 Methods to Turn off Life 360 On Lenovo ThinkPhone without Anyone Knowing | Dr.fone
- In 2024, How to Delete iCloud Account with or without Password from your iPhone SE/Windows/Mac
- How to Factory Reset Xiaomi Redmi K70E in 5 Easy Ways | Dr.fone
- Top IMEI Unlokers for Apple iPhone 6s and Android Phones
- How to Fix Apple iPhone SE (2022) Passcode not Working? | Dr.fone
- Talkshoplive Reviews & Pro Tips Is This the Live Commerce Tool You Need for 2024
- 6 Ways to Change Spotify Location On Your Honor 90 | Dr.fone
- In 2024, How to Fake Snapchat Location on Motorola G24 Power | Dr.fone
- The Ultimate Guide to Ken Burns Effect in Final Cut Pro Tips, Tricks, and Best Practices
- Updated Best Timecode Converter Apps and Websites for Video Editors for 2024
- Updated Best 10 AI Script Writers to Choose for 2024
- New How to Edit A Time Lapse Video on iPhone?
- New 2024 Approved Turn Any Video Into a Live Photo with These Top-Rated Apps
- Expert Roundup The Best OGG Converters Revealed for 2024
- In 2024, 5 Ways To Teach You To Transfer Files from Gionee F3 Pro to Other Android Devices Easily | Dr.fone
- How to recover old music from your Samsung Galaxy A15 4G
- New The Glitch Filter Is Similar to an Error or a Distorted Effect in the Video. The Article Enables the Users to Get the VHS Filter in One of Their Travel Videos and Instagram Accounts
- 3 Ways to Unlock iPhone 7 without Passcode or Face ID | Dr.fone
- In 2024, Top 5 Car Locator Apps for Vivo X90S | Dr.fone
- In 2024, Ultimate Guide to Catch the Regional-Located Pokemon For Realme GT Neo 5 | Dr.fone
- In 2024, How To Change Xiaomi Redmi Note 12 5G Lock Screen Clock in Seconds
- Best Ways on How to Unlock/Bypass/Swipe/Remove Vivo Y56 5G Fingerprint Lock
- How To Get the Apple ID Verification Code From Apple iPhone 8 in the Best Ways
- Unlock iPhone X Without Passcode Easily
- Title: New In 2024, Transform Your Tone Vocal Editing Techniques Using Audacity
- Author: Jacob
- Created at : 2024-05-05 04:12:57
- Updated at : 2024-05-06 04:12:57
- Link: https://audio-shaping.techidaily.com/new-in-2024-transform-your-tone-vocal-editing-techniques-using-audacity/
- License: This work is licensed under CC BY-NC-SA 4.0.
