
:max_bytes(150000):strip_icc():format(webp)/samsungtvhomepage-58f0d708245a4140bb4bbad8ea0cfc26.jpg)
New Echoes of Error A Guide to Reestablishing Auditory Integrity Using Diverse Methods
Echoes of Error: A Guide to Reestablishing Auditory Integrity Using Diverse Methods
Create High-Quality Video - Wondershare Filmora
An easy and powerful YouTube video editor
Numerous video and audio effects to choose from
Detailed tutorials are provided by the official channel
So you’re all set: you’ve sat down, grabbed your microphone, fired up your recording software, and started pouring out the content of your mind. Once finished, you listen back to the recording, thinking you’re about to hear the silky-smooth undertones of your voice resonating through your ears, but something odd occurs — it sounds terrible. Distorted audio is very unwelcoming since you want the sound to be natural. This guide will explain how to fix distorted audio using various methods.
In this article
01 What Causes Distorted Audio?
02 How To Fix Distorted Audio Using Different Methods
What Causes Distorted Audio?
Distorted audio is the main culprit in ruined audio clips. Here are some of the causes of distorted sound.
1. Recording Environment
Not recording dialogue and voice-over in a studio can cause distorted audio. However, audio quality can be out of control if you conduct an onsite interview. Getting a meaningful and cinematic shot should come first. If you do not use a studio-quality microphone that comes with directional controls, you’ll likely have distorted audio. You might want to go for a unidirectional stereo channel if you want boom movements to be undetectable.
When a cheap, low-quality microphone is moving, you’ll hear the unsteadiness in your recording, leading to distorted audio. Recording audio in an echo chamber or an overly large room can also result in distorted audio.
2. Touching the Mic While Recording
If you hand the microphone to someone who does not know how to use it, they might hold it too loosely or close. Microphones feature sensitive parts that should not be dropped, shaken, or breathed on. When you are interviewing people unfamiliar with industry standards, you should hold the microphone, not the person you are interviewing. The mic is not within the range of 6” to 12 “ away from the speaker, this could lead to distorted audio.
3. Using the Wrong Mic
A reliable mic comes with audio controls and captures room tone and timbre. It should be portable, compact, and have a wind sleeve. In outdoor situations where ADR is not an option, you might want to use a wind sleeve.
Podcast showrunners and content creators often use Blue Yeti mics connected to a soundboard. While these are cheaper options, they can cause distorted audio. Content creators who are not stationary should purchase a lavalier, and wireless is a more high-end and expensive option.
4. Positioning Your Microphones Incorrectly
You have to be careful if you’ll be mounting a mic on your DSLR. Filming events with a one-mic setup is a promise to record everything you hear again. You’ll inevitably film some moments at a distance and leave the audio compromised to distortion.
5. Faulty Equipment
Your equipment can fail in different ways. For instance, your effects processor can fail, meaning that you won’t hear any sound passing through it. It can also fail, and you end up hearing a distorted sound passing out of the processor. Essentially, this might or might not be linked to the component’s capability of handling the signal as much as the busted internals result.
How To Fix Distorted Audio Using Different Methods
You can fix distorted audio using various methods. They include:
Method 1: How To Fix Distorted Audio in Audacity
Audacity is the bread and butter for individuals who adore a crisp audio quality. Audacity helps users finetune various attributes of their recordings. It is a free and intuitive software suite suitable for newbies and individuals who don’t interact with computers. With that in mind, here is how to fix distorted audio using Audacity.
- Open the audio file by dragging and dropping it into Audacity.
- Select the distorted part and click on the Effect option. Then, select Noise Reduction.


- The Noise Reduction window will open.

- Now, click on Noise Profile, and Audacity will know what to filter out.
- Next, select the entire audio and open the Noise Reduction Window again ( Effect > Noise Reduction ). Then, set the values to suit your preferences.
- Hit preview to check the audio, then the Click OK button.
If the audio is still distorted, apply the filter again. Don’t overdo the process numerous times to ensure your audio is not degraded, making the voice sound robotic and tinny.
Now, use compression to your advantage. If compression confuses you, think of it as a tool that adjusts your audio for the listener’s benefit. Compression not only quiets the background minutiae that creeps into your recording, but it also boosts your voice and gives it a full, captivating resonance.
- To start the compression process, select your audio track, press CTRL + A, click “Effect” and then click “Compressor.”

- Adjust the values in the compressor to meet your needs and make your voice “pop” from the background.
- Once you have set the values, hit the Preview button to check the audio. Then, click on OK.
That is how to fix distorted audio using Audacity.
You May Be Interested In
How To Fix Distorted Audio in Garageband
Garageband is one of the most popular audio recording software available. Though you can use it for various purposes, it is mainly intended to be used to create music. However, many people have the problem of distorted audio files, making production difficult when trying to perfect a project. To learn how to fix distorted audio in Garageband, follow the steps below:
- Launch GarageBand, then open your audio file. Once your audio file finishes loading, select the audio file from which you want to remove distortion by clicking it.
- Click on the “i” symbol encapsulated in a blue circle positioned on the lower-right portion of your screen. This icon sits in the middle of two other icons: a set of notes and an eye.
- Select the “Real Instrument” tab located on the top right side of your screen. You’ll see two tabs: Master Tracks and Real Instrument.
- Click the Edit tab to activate it, and a list of effects will pop up.
- Select Distortion from the list, and you’ll see a drop-down menu.
- Next, select the None option to remove distortion.
If you have distorted audio due to poor recording quality, navigate to the Real Instrument”Edit menu and select AULowpass from the boxes available. Doing this will remove frequencies above a certain range, and this will fix the distorted audio.
Method 3: How To Fix Distorted Audio in Windows 10
Several actions can cause problems or distort sound on your Windows 10 application. Some of the common causes include:
- When upgrading your computer from an older version to a new one
- In case your computer gets corrupted with a virus
- If your computer or device doesn’t the right sound drivers
So how do you fix distorted audio in Windows 10? There are several ways you can fix distorted audio in Windows 10. Here is how to fix distorted audio using some of the best ways.
1. Reinstall drivers
- Right-click the start button and choose device manager.
- Navigate through sound, video, and game controllers.
- Click on the Details tab.
- Select hardware Ids from the drop-down menu.

- Copy and first the first value of drivers in your browser and search the internet.

- Open the official site and download the correct driver。
- Install and restart your PC。
2. Update drivers
- Right-click on the start button.
- Scroll to the sound, video, and game controllers option.
- Right-click on the sound device and select uninstall the device.

- Restart your PC after the uninstall process is finished.
- Open the device manager.
- Select and click on the scan for hardware changes option.

Windows will automatically install a new version of sound drivers
3. Run Windows Audio Troubleshooter
- To use this method, open Start and click the cog-like icon. This will open the Settings app.
- Select Update & security.
- Choose Troubleshoot in the left pane.
- Expand the Playing Audio by clicking it.
- Hit the Run the troubleshooter button, then follow the further instructions.

4. Take Exclusive Control of Your Device Option by Disabling Allow Applications
- Navigate to the notification area and right-click on the sound icon. Open Playback devices.
- Next, right-click on the default Playback Device, then open Properties.
- Choose the Advanced tab option.
- Navigate to the Exclusive mode section and check the box that says disable Allow applications to control your device.

When it comes to editing or performing audio editing in the video, Wondershare Filmora is a powerful video editing software that can help you with reducing the voiceover volume, mute the audio in the video, or cut, copy, paste or insert your audio files. Learn more about the audio editing features of Filmora from the below video & download Filmora to try!
For Win 7 or later (64-bit)
For macOS 10.12 or later
Conclusion
● Whether you’re an amateur audio enthusiast or produce a podcast with thousands of listeners, the quality of your audio can “make or break” your results. When your audience is listening to an audio recording, the last thing they want to notice or hear is a distortion because it is very distracting. When recording, it is almost impossible to find an environment that removes audio distortion without access to a recording studio. Luckily, you can use the above methods to fix distorted audio and make it look professional.
So you’re all set: you’ve sat down, grabbed your microphone, fired up your recording software, and started pouring out the content of your mind. Once finished, you listen back to the recording, thinking you’re about to hear the silky-smooth undertones of your voice resonating through your ears, but something odd occurs — it sounds terrible. Distorted audio is very unwelcoming since you want the sound to be natural. This guide will explain how to fix distorted audio using various methods.
In this article
01 What Causes Distorted Audio?
02 How To Fix Distorted Audio Using Different Methods
What Causes Distorted Audio?
Distorted audio is the main culprit in ruined audio clips. Here are some of the causes of distorted sound.
1. Recording Environment
Not recording dialogue and voice-over in a studio can cause distorted audio. However, audio quality can be out of control if you conduct an onsite interview. Getting a meaningful and cinematic shot should come first. If you do not use a studio-quality microphone that comes with directional controls, you’ll likely have distorted audio. You might want to go for a unidirectional stereo channel if you want boom movements to be undetectable.
When a cheap, low-quality microphone is moving, you’ll hear the unsteadiness in your recording, leading to distorted audio. Recording audio in an echo chamber or an overly large room can also result in distorted audio.
2. Touching the Mic While Recording
If you hand the microphone to someone who does not know how to use it, they might hold it too loosely or close. Microphones feature sensitive parts that should not be dropped, shaken, or breathed on. When you are interviewing people unfamiliar with industry standards, you should hold the microphone, not the person you are interviewing. The mic is not within the range of 6” to 12 “ away from the speaker, this could lead to distorted audio.
3. Using the Wrong Mic
A reliable mic comes with audio controls and captures room tone and timbre. It should be portable, compact, and have a wind sleeve. In outdoor situations where ADR is not an option, you might want to use a wind sleeve.
Podcast showrunners and content creators often use Blue Yeti mics connected to a soundboard. While these are cheaper options, they can cause distorted audio. Content creators who are not stationary should purchase a lavalier, and wireless is a more high-end and expensive option.
4. Positioning Your Microphones Incorrectly
You have to be careful if you’ll be mounting a mic on your DSLR. Filming events with a one-mic setup is a promise to record everything you hear again. You’ll inevitably film some moments at a distance and leave the audio compromised to distortion.
5. Faulty Equipment
Your equipment can fail in different ways. For instance, your effects processor can fail, meaning that you won’t hear any sound passing through it. It can also fail, and you end up hearing a distorted sound passing out of the processor. Essentially, this might or might not be linked to the component’s capability of handling the signal as much as the busted internals result.
How To Fix Distorted Audio Using Different Methods
You can fix distorted audio using various methods. They include:
Method 1: How To Fix Distorted Audio in Audacity
Audacity is the bread and butter for individuals who adore a crisp audio quality. Audacity helps users finetune various attributes of their recordings. It is a free and intuitive software suite suitable for newbies and individuals who don’t interact with computers. With that in mind, here is how to fix distorted audio using Audacity.
- Open the audio file by dragging and dropping it into Audacity.
- Select the distorted part and click on the Effect option. Then, select Noise Reduction.
- The Noise Reduction window will open.
- Now, click on Noise Profile, and Audacity will know what to filter out.
- Next, select the entire audio and open the Noise Reduction Window again ( Effect > Noise Reduction ). Then, set the values to suit your preferences.
- Hit preview to check the audio, then the Click OK button.
If the audio is still distorted, apply the filter again. Don’t overdo the process numerous times to ensure your audio is not degraded, making the voice sound robotic and tinny.
Now, use compression to your advantage. If compression confuses you, think of it as a tool that adjusts your audio for the listener’s benefit. Compression not only quiets the background minutiae that creeps into your recording, but it also boosts your voice and gives it a full, captivating resonance.
- To start the compression process, select your audio track, press CTRL + A, click “Effect” and then click “Compressor.”
- Adjust the values in the compressor to meet your needs and make your voice “pop” from the background.
- Once you have set the values, hit the Preview button to check the audio. Then, click on OK.
That is how to fix distorted audio using Audacity.
You May Be Interested In
How To Fix Distorted Audio in Garageband
Garageband is one of the most popular audio recording software available. Though you can use it for various purposes, it is mainly intended to be used to create music. However, many people have the problem of distorted audio files, making production difficult when trying to perfect a project. To learn how to fix distorted audio in Garageband, follow the steps below:
- Launch GarageBand, then open your audio file. Once your audio file finishes loading, select the audio file from which you want to remove distortion by clicking it.
- Click on the “i” symbol encapsulated in a blue circle positioned on the lower-right portion of your screen. This icon sits in the middle of two other icons: a set of notes and an eye.
- Select the “Real Instrument” tab located on the top right side of your screen. You’ll see two tabs: Master Tracks and Real Instrument.
- Click the Edit tab to activate it, and a list of effects will pop up.
- Select Distortion from the list, and you’ll see a drop-down menu.
- Next, select the None option to remove distortion.
If you have distorted audio due to poor recording quality, navigate to the Real Instrument”Edit menu and select AULowpass from the boxes available. Doing this will remove frequencies above a certain range, and this will fix the distorted audio.
Method 3: How To Fix Distorted Audio in Windows 10
Several actions can cause problems or distort sound on your Windows 10 application. Some of the common causes include:
- When upgrading your computer from an older version to a new one
- In case your computer gets corrupted with a virus
- If your computer or device doesn’t the right sound drivers
So how do you fix distorted audio in Windows 10? There are several ways you can fix distorted audio in Windows 10. Here is how to fix distorted audio using some of the best ways.
1. Reinstall drivers
- Right-click the start button and choose device manager.
- Navigate through sound, video, and game controllers.
- Click on the Details tab.
- Select hardware Ids from the drop-down menu.
- Copy and first the first value of drivers in your browser and search the internet.
- Open the official site and download the correct driver。
- Install and restart your PC。
2. Update drivers
- Right-click on the start button.
- Scroll to the sound, video, and game controllers option.
- Right-click on the sound device and select uninstall the device.
- Restart your PC after the uninstall process is finished.
- Open the device manager.
- Select and click on the scan for hardware changes option.
Windows will automatically install a new version of sound drivers
3. Run Windows Audio Troubleshooter
- To use this method, open Start and click the cog-like icon. This will open the Settings app.
- Select Update & security.
- Choose Troubleshoot in the left pane.
- Expand the Playing Audio by clicking it.
- Hit the Run the troubleshooter button, then follow the further instructions.
4. Take Exclusive Control of Your Device Option by Disabling Allow Applications
- Navigate to the notification area and right-click on the sound icon. Open Playback devices.
- Next, right-click on the default Playback Device, then open Properties.
- Choose the Advanced tab option.
- Navigate to the Exclusive mode section and check the box that says disable Allow applications to control your device.
When it comes to editing or performing audio editing in the video, Wondershare Filmora is a powerful video editing software that can help you with reducing the voiceover volume, mute the audio in the video, or cut, copy, paste or insert your audio files. Learn more about the audio editing features of Filmora from the below video & download Filmora to try!
For Win 7 or later (64-bit)
For macOS 10.12 or later
Conclusion
● Whether you’re an amateur audio enthusiast or produce a podcast with thousands of listeners, the quality of your audio can “make or break” your results. When your audience is listening to an audio recording, the last thing they want to notice or hear is a distortion because it is very distracting. When recording, it is almost impossible to find an environment that removes audio distortion without access to a recording studio. Luckily, you can use the above methods to fix distorted audio and make it look professional.
PolyTuneHub: Syncing Audio Across Scenes in Adobe Premiere Pro with Precision [New 2023 Features]
PluralEyes: The Best Plug in to Sync Audio in Premiere Pro

Benjamin Arango
Mar 27, 2024• Proven solutions
Have you ever found the situation stressful when you need to sync audio in Premiere Pro? Well you are not merely one who find this task challenging. However, with the help of PluralEyes , this task can be simplified. PluralEyes is an outstanding third-party plug-in helpful in syncing audio. If you have started pondering over how to use it in Premiere Pro, we shall help you learn the same. The article today will be discussing about making your work easier by using PluralEyes. Let us begin without further ado.
Part 1: What is PluralEyes
PluraEyes is a plug-in from Red Giant that aims to ease the task of audio/video synchronization. With its user-friendly interface, it easily imports, syncs and edits the clips in a matter of minutes. Being helpful for all operating systems and supportive to all host apps, PlularEyes can be counted as the most appropriate tool when it comes to fast audio syncing. It has the ability to carefully scrutinize the clip and then make use of the best syncing options. There are various scenarios when you can work with PluralEyes like events including weddings , conference, music videos etc. It just maximizes the workflow and has faster setup with less complications and more efficiency.
Part 2: How to Use PluralEyes in Premiere Pro
Step 1: Import Video and Audio Files
To begin with, all you need is adding your video clip to the computer. Simply import the footage on your PC followed by opening Premiere Pro. Past it, customize the sequence settings as per your needs. Now, drag the footage and the preferred audio into the timeline. Next, you need to make sure of arranging the multiple cameras to their own level and keep the audio at bottom level. Also, keep the footage in back to back format.

Step 2: Click Open using PluralEyes
In order to open PluralEyes, head to “Window” and pick out the “Extensions” option. Now, select “PluralEyes”. By doing this, you will receive a small PluralEyes window in Premiere Pro. In case there are multiple timelines opened please ensure to select the one to be worked with.

Step 3: Start Syncing Audio
Subsequently, PluralEyes will begin to scan the footage and audio file you imported. Prior to syncing, you are supposed to wait till PluralEyes scans the files. After the scanning gets completed, get start with syncing. Now, the files will begin to get arranged and matched simultaneously. Followed by this, hit on “export” and you will see the fresh timeline that is synced, opened in Premiere Pro.

Conclusion
Using PluralEyes is the best choice if you want to get your audio/video synced in an accurate way. We have demonstrated how this tool works and how you can sync audio in Premiere Pro via PluaralEyes. Now, by the end of the topic, we hope that you are well acquainted with the know-how of PluralEyes and the steps involved in audio syncing. You can now work on your clips without any complications. Thank you for reading this and do share your views with us.
Benjamin Arango
Benjamin Arango is a writer and a lover of all things video.
Follow @Benjamin Arango
Benjamin Arango
Mar 27, 2024• Proven solutions
Have you ever found the situation stressful when you need to sync audio in Premiere Pro? Well you are not merely one who find this task challenging. However, with the help of PluralEyes , this task can be simplified. PluralEyes is an outstanding third-party plug-in helpful in syncing audio. If you have started pondering over how to use it in Premiere Pro, we shall help you learn the same. The article today will be discussing about making your work easier by using PluralEyes. Let us begin without further ado.
Part 1: What is PluralEyes
PluraEyes is a plug-in from Red Giant that aims to ease the task of audio/video synchronization. With its user-friendly interface, it easily imports, syncs and edits the clips in a matter of minutes. Being helpful for all operating systems and supportive to all host apps, PlularEyes can be counted as the most appropriate tool when it comes to fast audio syncing. It has the ability to carefully scrutinize the clip and then make use of the best syncing options. There are various scenarios when you can work with PluralEyes like events including weddings , conference, music videos etc. It just maximizes the workflow and has faster setup with less complications and more efficiency.
Part 2: How to Use PluralEyes in Premiere Pro
Step 1: Import Video and Audio Files
To begin with, all you need is adding your video clip to the computer. Simply import the footage on your PC followed by opening Premiere Pro. Past it, customize the sequence settings as per your needs. Now, drag the footage and the preferred audio into the timeline. Next, you need to make sure of arranging the multiple cameras to their own level and keep the audio at bottom level. Also, keep the footage in back to back format.
Step 2: Click Open using PluralEyes
In order to open PluralEyes, head to “Window” and pick out the “Extensions” option. Now, select “PluralEyes”. By doing this, you will receive a small PluralEyes window in Premiere Pro. In case there are multiple timelines opened please ensure to select the one to be worked with.
Step 3: Start Syncing Audio
Subsequently, PluralEyes will begin to scan the footage and audio file you imported. Prior to syncing, you are supposed to wait till PluralEyes scans the files. After the scanning gets completed, get start with syncing. Now, the files will begin to get arranged and matched simultaneously. Followed by this, hit on “export” and you will see the fresh timeline that is synced, opened in Premiere Pro.
Conclusion
Using PluralEyes is the best choice if you want to get your audio/video synced in an accurate way. We have demonstrated how this tool works and how you can sync audio in Premiere Pro via PluaralEyes. Now, by the end of the topic, we hope that you are well acquainted with the know-how of PluralEyes and the steps involved in audio syncing. You can now work on your clips without any complications. Thank you for reading this and do share your views with us.
Benjamin Arango
Benjamin Arango is a writer and a lover of all things video.
Follow @Benjamin Arango
“Mastering Gender Transformation in Voice: The Essential Male to Female Software Collection”
If you’ve been searching for the best android and iOS voice-changing apps around the internet, you’re on the right spot. Voice-changing applications are always fun. They’re handy when you’re pulling a prank on a friend, or you want some amazing effects to test your voice. Thus, we provide you with all the best male to female voice changer apps in the list below.
Record & Edit Voice Fast before Changing Voice
Before changing your voice from male to female, I suggest you edit your voice first. Filmora is an easy-to-use yet powerful video editor helping you quickly edit voice no matter your voice or the audio extracted from videos. Explore Filmora’s audio editing features and get ready for changing voice!
For Win 7 or later (64-bit)
For macOS 10.12 or later


Part 1: Changing Voice Online for Free with Media.io
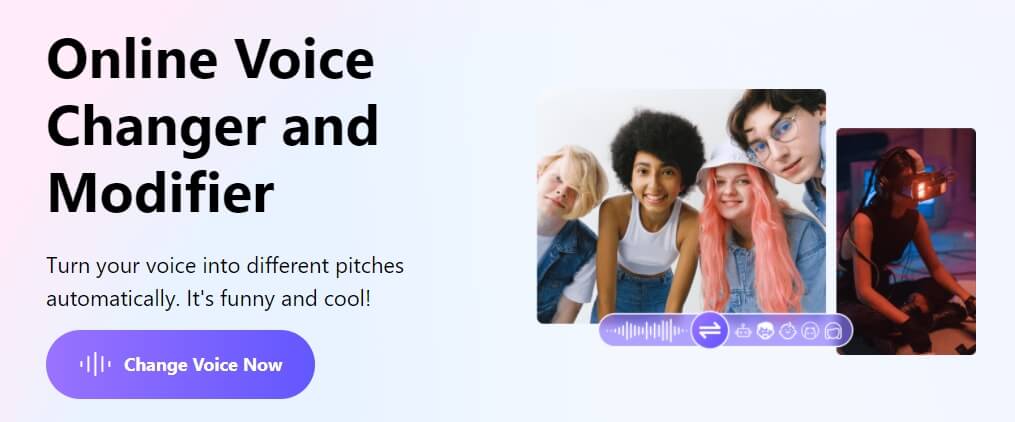
If you want to change voice without downloading and installing any app on your mobile phone, you can try some online solutions. Media.io is an all-in-one online video toolkit that allows you to edit, convert and compress video, audio and image files easily. The online voice changer from Media.io can transform your voice to a male voice, female voice, child voice, robot voice, and Donald Duck voice. If you wish to have voice filters, you won’t have any problems in the future with the Media.io voice changer.

This online voice changer works best on the Chrome browser, so you can utilize it whether using a Windows, Mac, Linux, or Chromebook device. As a result, you can deceive your family or friends by speaking in another people’s voice rather than your own. Doesn’t that sound like fun?
![]()
A cross-platform for making videos anywhere for all creators

Why your video editing isn’t good enough? How about some creative inspo?
- 100 Million+ Users
- 150+ Countries and Regions
- 4 Million+ Social Media Followers
- 5 Million+ Stock Media for Use
* Secure Download

Part 2: Best Male to Female Voice Changer Apps for iPhone and Android
- Girls Voice Changer
- Voice Changer Voice Recorder Editor & Effect
- VoiceFX
- Voice Changer
- Voice Changer - Audio effects
- Magic Call App
- Voice Changer and Sound Recorder
- Super Voice Editor
- Voice Changer with Effects
- Voice Changer - Girls Voice changer Male to Female
1. Girls Voice Changer
Available for: Android, iOS
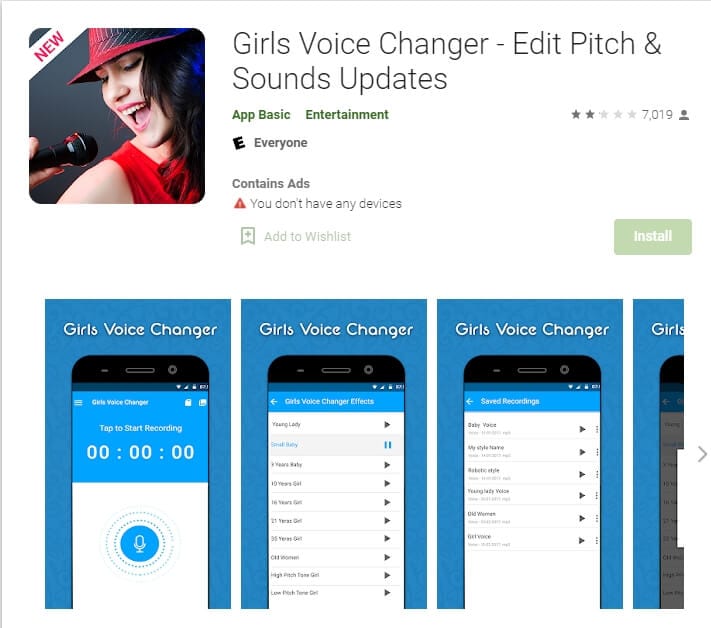
This girl voice changer app is highly portable and easy for any user to use comfortably. It is specifically more popular for changing male voice to female and for pitch adjustments. It’s completely free, so download on your android if you have a storage of about 8MB ready, and start using it!
This male-to-female voice changer app has several options in the library. Though the pitch adjustments are easy to make, some users have informed a lack of performance on very high-pitched settings. However, the smoothness of an android application also depends on how much space is readily available in the device. So next time you’re bored at a part, you have the perfect partner!
2. Voice Changer Voice Recorder Editor & Effect
Available for: Android
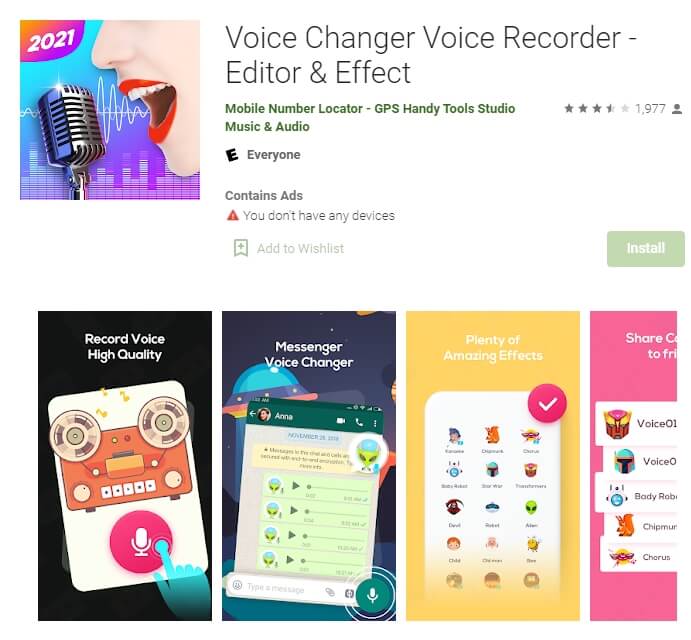
This voice changer application is for multi-purpose. Yes, you can use it as a girl voice changer smoothly and with ease. But apart from male to female voice changing, The “voice changer - voice editor application” can also be used to autotune your voice.
Now autotune is a big feature that every singer uses to make their voices tuned perfectly. With this app, you can also do the same to record your music or have fun while you are bored. The application is pretty to use and can be used as a girl voice changer not only for entertainment but also if you’re practicing. Many people who wish to seek a career in background voices might find this useful.
3. VoiceFX
Available for: Android

The VoiceFX application is filled with a lot of exciting options and features. If you are looking for an app that is more than just a male-to-female voice changer app, the voice fx is highly recommended.
You can also convert your voice into a robot or even an animal from male to female voice. Yes, you read it right. You can turn your manly voice into any of the fictional cartoons you want. This one’s a very easy and efficient way of filming a video with added effects or developing a mini-game with different voice characters. If you haven’t forgotten, there was a very big trend of converting famous music into chipmunk voices. With this app, you can convert your favorite songs into a chipmunk addition song without any problem.
4. Voice Changer
Available for: Android

The voice changer is a very famous male-to-female voice changer app. With over 10 million downloads on the google play store, the voice changer is highly recommended for users who have fun changing their voices from male to female. Compared to other voice changer applications, The Voice changer app has a very elegant and sleek design that makes it very easy to use.
Apart from the male to female voice change option, There are more than 50 other options that you can enjoy. Furthermore, you can share your creations with your friends through Bluetooth or other social media.
5. Voice Changer - Audio effects
Available for: Android

There are a lot of girl voice changer applications on the google play store. But not all of them are up to the mark. The Voice changer - audio effects is another highly recommended voice changer application.
The Voice Changer - Audio effects have a lot of other things to offer as well. Converting your voice from a male to a female has never been easier. Not only can you convert your voice into a girl, but you can also modify it. Furthermore, you can talk to your friends on the phone while you use the voice changer application. Moreover, the voices of animals and robots can also be an alternative to the female voice if you ever get bored of it.
6. Magic Call App
Available for: Android

The magic call is a real-time voice changer app that you can use for changing your voice during a call specifically. It is a really fun app which you can use with your friends to prank even your family!
This is a perfect option for people looking for a real-time girl voice changer app. The main purpose of this application is real-time calls. The magic call is ideal specifically for a male-to-female voice modification. And you can operate this application easily in call durations.
All you have to do is open the voice changer app and dial your call. Apart from Female voice, you can also convert your voice into a cartoon or an animal.
7. Voice Changer and Sound Recorder
Available for: iOS

If you are an iPhone user, then you must know that finding a voice changer on the apple store is like digging a diamond from the ground.
The Voice changer and sound recorder application is found exclusively on the apple store for people who love girl voice changer apps. It is a live call voice changer app, which means converting your voice from a male to a female in between the call. Furthermore, you can even add background voices such as traffic and echo to make your call even funnier. If you are looking for an excuse to get off from your call, then this application has got your back.
8. Super Voice Editor
Available for: Android
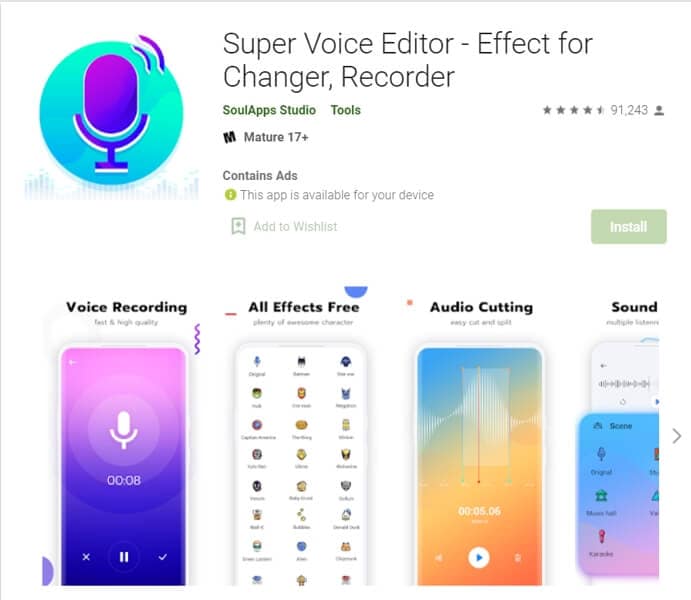
This one is a fun application for people searching for a voice changer app male to female. Not only can you record the audio that you edit, but also use it in real-time! Amazing right? Super voice editor enables you to add effects to your voice while you’re on a call as well. This feature means, next time you’re pulling a prank on the birthday boy, he won’t ever know! Sound like the wonder woman or dexter from his laboratory. The Super-Voice editor is perfect for kids playing in the house and even teenagers looking for something interesting. The SoulApps studio has made it easy for you to sound like your dream faces on the screen. With an MP3 cutter and Ringtone maker, this girl voice changer app is pure creativity.
9. Voice Changer with Effects
Available for: Android

Our list of girl voice changers, Voice changer with effects, is a very practical application that we highly recommend to our users.
With over 50 million downloads on google play, Voice changer with effects is highly suited for anyone looking for more than just a male-to-female voice changer. It has over 40 plus options such as helium, chipmunk, zombie, alien, and many more. With this application, you can even import a favorite audio clip of yours, and then you can easily convert it into a voice you like. If you want to modify your ringtone to an audio clip you just converted, then there is no better application than this one.
10. Voice Changer - Girls Voice changer Male to Female
Available for: Android

If you are looking for a girl voice changer app solely, this application perfectly fits you. The application is specifically designed only to change your voice from a male to a female. Although this application does provide options apart from female voice conversions, those features don’t function ideally. However, if you want a girl voice changer, you won’t have any trouble.
You can use this application while you are on a call. Hence, you can fool your family or friends by using a girl voice instead of your own. We recommend this as an average application that would fit your needs sufficiently.
In conclusion, you have now gone through the list of the perfect options for your android or iOS. Therefore, now you must be ready to choose the best girl voice changer app. So head on to your play store and search for your favorite app right now!
For Win 7 or later (64-bit)
For macOS 10.12 or later
Part 1: Changing Voice Online for Free with Media.io
If you want to change voice without downloading and installing any app on your mobile phone, you can try some online solutions. Media.io is an all-in-one online video toolkit that allows you to edit, convert and compress video, audio and image files easily. The online voice changer from Media.io can transform your voice to a male voice, female voice, child voice, robot voice, and Donald Duck voice. If you wish to have voice filters, you won’t have any problems in the future with the Media.io voice changer.
This online voice changer works best on the Chrome browser, so you can utilize it whether using a Windows, Mac, Linux, or Chromebook device. As a result, you can deceive your family or friends by speaking in another people’s voice rather than your own. Doesn’t that sound like fun?
![]()
A cross-platform for making videos anywhere for all creators
Why your video editing isn’t good enough? How about some creative inspo?
- 100 Million+ Users
- 150+ Countries and Regions
- 4 Million+ Social Media Followers
- 5 Million+ Stock Media for Use
* Secure Download
Part 2: Best Male to Female Voice Changer Apps for iPhone and Android
- Girls Voice Changer
- Voice Changer Voice Recorder Editor & Effect
- VoiceFX
- Voice Changer
- Voice Changer - Audio effects
- Magic Call App
- Voice Changer and Sound Recorder
- Super Voice Editor
- Voice Changer with Effects
- Voice Changer - Girls Voice changer Male to Female
1. Girls Voice Changer
Available for: Android, iOS
This girl voice changer app is highly portable and easy for any user to use comfortably. It is specifically more popular for changing male voice to female and for pitch adjustments. It’s completely free, so download on your android if you have a storage of about 8MB ready, and start using it!
This male-to-female voice changer app has several options in the library. Though the pitch adjustments are easy to make, some users have informed a lack of performance on very high-pitched settings. However, the smoothness of an android application also depends on how much space is readily available in the device. So next time you’re bored at a part, you have the perfect partner!
2. Voice Changer Voice Recorder Editor & Effect
Available for: Android
This voice changer application is for multi-purpose. Yes, you can use it as a girl voice changer smoothly and with ease. But apart from male to female voice changing, The “voice changer - voice editor application” can also be used to autotune your voice.
Now autotune is a big feature that every singer uses to make their voices tuned perfectly. With this app, you can also do the same to record your music or have fun while you are bored. The application is pretty to use and can be used as a girl voice changer not only for entertainment but also if you’re practicing. Many people who wish to seek a career in background voices might find this useful.
3. VoiceFX
Available for: Android
The VoiceFX application is filled with a lot of exciting options and features. If you are looking for an app that is more than just a male-to-female voice changer app, the voice fx is highly recommended.
You can also convert your voice into a robot or even an animal from male to female voice. Yes, you read it right. You can turn your manly voice into any of the fictional cartoons you want. This one’s a very easy and efficient way of filming a video with added effects or developing a mini-game with different voice characters. If you haven’t forgotten, there was a very big trend of converting famous music into chipmunk voices. With this app, you can convert your favorite songs into a chipmunk addition song without any problem.
4. Voice Changer
Available for: Android
The voice changer is a very famous male-to-female voice changer app. With over 10 million downloads on the google play store, the voice changer is highly recommended for users who have fun changing their voices from male to female. Compared to other voice changer applications, The Voice changer app has a very elegant and sleek design that makes it very easy to use.
Apart from the male to female voice change option, There are more than 50 other options that you can enjoy. Furthermore, you can share your creations with your friends through Bluetooth or other social media.
5. Voice Changer - Audio effects
Available for: Android
There are a lot of girl voice changer applications on the google play store. But not all of them are up to the mark. The Voice changer - audio effects is another highly recommended voice changer application.
The Voice Changer - Audio effects have a lot of other things to offer as well. Converting your voice from a male to a female has never been easier. Not only can you convert your voice into a girl, but you can also modify it. Furthermore, you can talk to your friends on the phone while you use the voice changer application. Moreover, the voices of animals and robots can also be an alternative to the female voice if you ever get bored of it.
6. Magic Call App
Available for: Android
The magic call is a real-time voice changer app that you can use for changing your voice during a call specifically. It is a really fun app which you can use with your friends to prank even your family!
This is a perfect option for people looking for a real-time girl voice changer app. The main purpose of this application is real-time calls. The magic call is ideal specifically for a male-to-female voice modification. And you can operate this application easily in call durations.
All you have to do is open the voice changer app and dial your call. Apart from Female voice, you can also convert your voice into a cartoon or an animal.
7. Voice Changer and Sound Recorder
Available for: iOS
If you are an iPhone user, then you must know that finding a voice changer on the apple store is like digging a diamond from the ground.
The Voice changer and sound recorder application is found exclusively on the apple store for people who love girl voice changer apps. It is a live call voice changer app, which means converting your voice from a male to a female in between the call. Furthermore, you can even add background voices such as traffic and echo to make your call even funnier. If you are looking for an excuse to get off from your call, then this application has got your back.
8. Super Voice Editor
Available for: Android
This one is a fun application for people searching for a voice changer app male to female. Not only can you record the audio that you edit, but also use it in real-time! Amazing right? Super voice editor enables you to add effects to your voice while you’re on a call as well. This feature means, next time you’re pulling a prank on the birthday boy, he won’t ever know! Sound like the wonder woman or dexter from his laboratory. The Super-Voice editor is perfect for kids playing in the house and even teenagers looking for something interesting. The SoulApps studio has made it easy for you to sound like your dream faces on the screen. With an MP3 cutter and Ringtone maker, this girl voice changer app is pure creativity.
9. Voice Changer with Effects
Available for: Android
Our list of girl voice changers, Voice changer with effects, is a very practical application that we highly recommend to our users.
With over 50 million downloads on google play, Voice changer with effects is highly suited for anyone looking for more than just a male-to-female voice changer. It has over 40 plus options such as helium, chipmunk, zombie, alien, and many more. With this application, you can even import a favorite audio clip of yours, and then you can easily convert it into a voice you like. If you want to modify your ringtone to an audio clip you just converted, then there is no better application than this one.
10. Voice Changer - Girls Voice changer Male to Female
Available for: Android
If you are looking for a girl voice changer app solely, this application perfectly fits you. The application is specifically designed only to change your voice from a male to a female. Although this application does provide options apart from female voice conversions, those features don’t function ideally. However, if you want a girl voice changer, you won’t have any trouble.
You can use this application while you are on a call. Hence, you can fool your family or friends by using a girl voice instead of your own. We recommend this as an average application that would fit your needs sufficiently.
In conclusion, you have now gone through the list of the perfect options for your android or iOS. Therefore, now you must be ready to choose the best girl voice changer app. So head on to your play store and search for your favorite app right now!
Also read:
- Updated In 2024, Mastering Sound Integration Adding Audio to Your AE Projects
- Capturing Every Word on Your Desktop – Leading Free Voice Capture Programs for 2024
- New In 2024, The Best Free Audio Editors on Android A Comprehensive Roundup of 7 Titles
- Updated Alternatives and Step by Step Guide for Apowersoft Audio Recorder
- New Perfect Pacing Strategies for Cutting Extra Audio in Your iMovie Projects Across Apple Ecosystems
- New The Cambridge Audio CXU Odyssey - A Critical Look at Its Performance
- Zoom Sound Off Disabling Video Chat Volume on All Devices
- New Discover the Best Sound Recording Applications for PC Users (Top 10)
- Updated Mastering Audio Extraction Removing Sound Tracks From Video on iOS Devices for 2024
- Updated Best Voice-Over Generators That You Should Try Online & Desktop
- Updated Free Voice Recording Top 8 Apps Leading the Digital Audio Revolution
- New 2024 Approved How to Record Computer Audio and Voice Audio with Audacity for Free?
- New 2024 Approved Achieving Silence on TikTok Strategies to Mute Unwanted Sound Effects
- Updated In 2024, Mastering Audio Book Publishing with Ease A Modern Guide
- Ensuring Consistent Acoustic Output How to Calibrate Volumes in VLC Media Center for 2024
- The Essential List of Leading Guitar Soundtrack Editing Tools
- Updated In 2024, The Ultimate Guide 7 Preeminent Mobile Applications for Clearer Phone Recordings
- Updated Revolutionize Your Listening Habits The Best Voice Recording Tools to Download Now for 2024
- New Resonant Harmony A Comprehensive List of Voice-Enhancing Apps for All Audiences and Budgets
- Updated In 2024, Tranquil Trimming Tactics The Ultimate Guide to Quiet Video Enhancement Using Premiere Pro
- When Can I Implement Side-Chain Compression for Enhanced Clarity, In 2024
- From Raw Footage to Final Cut The Essential Plugin Lineup for Video Editors
- Updated 10 Premium Multitrack Audio Editors That Outshine Audacity for 2024
- Pioneering the Sound of Anime Leading Desktop & Mobile Voice Transformation Tools for 2024
- Mastering Silence in Audio A Step-by-Step Guide for Removing Voices From Videos for 2024
- New Mastering the Art of Fishy Tones A Guide to Using Discords Clownfish Vocal Effect
- Updated 2024 Approved Mastering Your Soundtrack A Methodical Approach to Choosing a Digital Audio Recorder Beyond Apowersoft
- Updated 2024 Approved 5 Innovative Voice Altering Apps for Zoom Sessions That Add Humor to Discussions
- New Proven Strategies for Selecting Elite Sound Engineers in Modern Filmmaking
- Updated The Premier Selection of Cost-Free Online DAW Software Users
- Updated Peak Happiness Uprising in Crowds for 2024
- Updated Task Distribution Amongst Crew Members for Successful Shootings for 2024
- New Audiobook Authoring Made Accessible Your Ultimate Guide to Production in the Year 2023 for 2024
- Audio Spectral Masterpieces 8 Premium Templates to Transform Your Video Auditory Experience
- Updated 2024 Approved Macs Most Powerful Video Editor for Pros Adobe Premiere Pro
- How to Upgrade Apple iPhone X without iTunes? | Dr.fone
- Complete guide for recovering music files on Vivo Y27 5G
- Easily Unlock Your Xiaomi Civi 3 Device SIM
- In 2024, Which Pokémon can Evolve with a Moon Stone For Honor X9a? | Dr.fone
- Stellar Data Recovery for iPhone 14 Plus failed to recognize my iPhone. How to fix it? | Stellar
- New How to Rotate AVI in Vertical/Portrait Orientation Windows, Mac,Android, iPhone & Online for 2024
- Super Easy Ways To Deal with OnePlus Nord N30 SE Unresponsive Screen | Dr.fone
- In 2024, How To Use Special Features - Virtual Location On Apple iPhone SE (2020)? | Dr.fone
- Can't play MP4 files on Moto G14
- New 2024 Approved Free and Fabulous Top MOV Movie Editors
- In 2024, How to Hide/Fake Snapchat Location on Your Samsung Galaxy M34 5G | Dr.fone
- Updated In 2024, Lip Sync Your Way to Fame Top-Rated Apps for Creators
- In 2024, How to Hide/Fake Snapchat Location on Your Motorola Moto G24 | Dr.fone
- In 2024, How To Remove Flashlight From Apple iPhone 7 Plus Lock Screen | Dr.fone
- How to Recover Deleted Photos from Android Gallery App on P55+
- Convert Photo to Cartoon Style for 2024
- Disable screen lock on Poco X6 Pro
- Latest Guide How To Bypass ZTE Nubia Z60 Ultra FRP Without Computer
- How to Intercept Text Messages on Honor X50 GT | Dr.fone
- Title: New Echoes of Error A Guide to Reestablishing Auditory Integrity Using Diverse Methods
- Author: Jacob
- Created at : 2024-05-20 00:04:03
- Updated at : 2024-05-21 00:04:03
- Link: https://audio-shaping.techidaily.com/new-echoes-of-error-a-guide-to-reestablishing-auditory-integrity-using-diverse-methods/
- License: This work is licensed under CC BY-NC-SA 4.0.
