
:max_bytes(150000):strip_icc():format(webp)/18-Hidden-Snapchat-Features-efa75dca521e4cf6bb321dc960276deb.jpg)
New Discover the Best Android Speech-to-Text Programs with No Monthly Fees
Discover the Best Android Speech-to-Text Programs with No Monthly Fees
10 Best Voice Recording Apps for Android Devices [Free Included]

Benjamin Arango
Mar 27, 2024• Proven solutions
Memorizing every bit of information you need to perform your daily or weekly tasks becomes increasingly difficult as your workload rises. Students, journalists, and professionals from a wide array of industries can benefit from making audio notes or even recording entire conversations with their Smartphones.
A simple Android voice recorder can make this task easy since you can just tap on the Record button and create an audio note in seconds. However, with so many voice recorder apps for Android devices out there, finding the one best suited for your needs can be more complicated than it seems. So, in this article, we are going to help you discover some best free voice recorder for an Android device you are currently using.
Want to record voiceover and audio on iPhone? Check 10 Best Voice Recorder Apps for iPhones >>
10 Best Free Voice Recording Apps for Android Devices
Recording audio is no longer a highly technical process since now you can create an audio note or record an interview with an Android phone and a voice recorder app. The question is which voice recording app should you install on your device. So, let’s take a look at some of the most potent Android voice recorders you can find at Google Play Store.
1. Easy Voice Recorder Pro
Price: $3.99
Supported OS: Varies with the device
Best for: Students, musicians, and businessmen

App in Google Play
As the app’s name suggests making recordings for a broad range of purposes is easy. All you need to do is launch the app and start a new audio recording session. Easy Voice Recorder Pro doesn’t limit the duration of your recordings, and it also allows you to compress the recorded audio . That is perfect if you need to record long lectures or conversations. Besides, you can connect an external microphone with the app in case you want to increase the quality of the sound you are recording. The app also lets you store your recordings on Dropbox or Google Drive, while it also offers the possibility to send recordings via email.
Easy Voice Recorder Pro Interface
Pros
- Allows users to manage and organize their recordings effortlessly
- Supports all standard output audio file formats
- Offers the option to record in stereo
- Recordings made with this app can be used as the ringtone
Cons
- Ads can be frustrating
- Limited basic audio editing tools
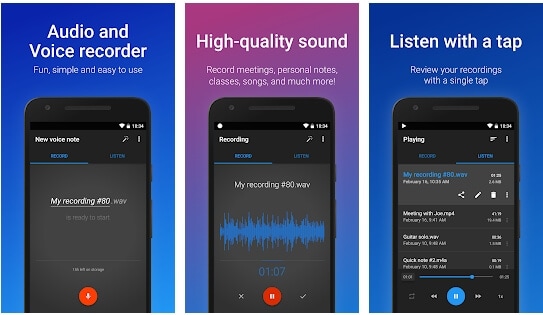
2. Smart Recorder – High-quality voice recorder
Price: Free, but contains ads and offers in-app purchases
Supported OS: Varies with the device
Best for: Students, musicians, and businessmen
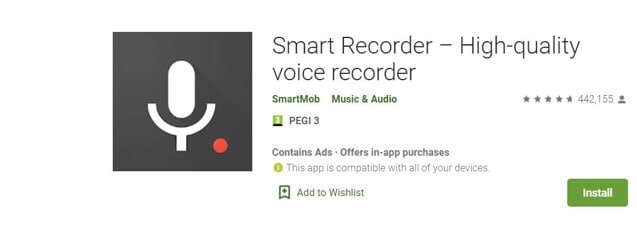
App in Google Play
Capturing high-quality audio recordings effortlessly is the ultimate goal of all Android users who want to use voice recorders. As one of the best free voice recorders for Android, Smart Recorder app has a plethora of features that enable users to make high-quality audio recordings even in imperfect conditions. Options like Live Audio Spectrum Analyzer, microphone gain calibration or automatic and manual sensitivity control in Skip Silence mode are just a few reasons why this app has over 10 million installs. However, you should keep in mind that you cannot create audio files that are larger than 2 GB with this app.
Smart Recorder – High-quality voice recorder Interface
Pros
- Provides full control over the audio recording process
- Equipped with the Wave Lock feature that prevents the device from going into the sleep mode
- Features a live audio spectrum analyzer
- Preserves battery life
Cons
- No phone call recording options
- Limited file-sharing capabilities
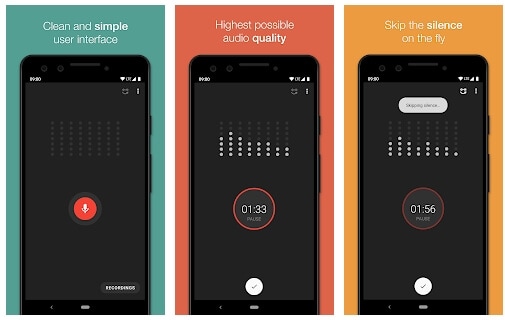
3. RecForge II Audio Recorder
Price: Free, but contains ads
Supported OS: Android 4.0 and up
Best for: Musicians
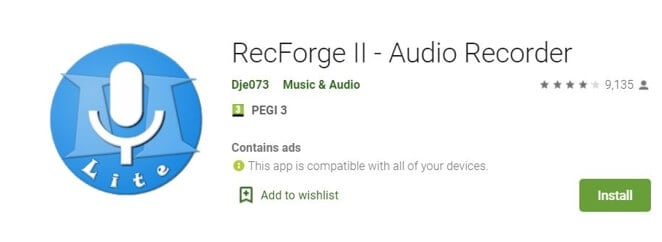
RecForge-audio-recorder App in Google Play
If you are looking for an Android voice recorder that allows you to customize bit rates, sample rates, choose codecs or record in mono or stereo mode, then you should consider installing RecForge II Audio Recorder on your device. The app allows you to schedule recordings, connect different types of external microphones or adjust the gain manually. In addition, you can also adjust the pitch , tempo and the playback rate of all audio files you record and edit with this app. RecForge II Audio Recorder continues working even while you are using other apps, and it keeps the battery consumption at the very minimum.
Pros
- Supports nearly all common audio file formats
- Offers a versatile set of audio editing tools
- Excellent file-sharing capabilities
- Allows users to increase the audio quality by disabling Automatic Gain Control
Cons
- The maximum duration of a recording is limited for some file formats
- Can be too complicated for inexperienced users
4. Hi-Q MP3 Voice Recorder
Price: Free
Supported OS: Varies with the device
Best for: Students, general use
Hi-Q MP3 Voice Recorder App in Google Play
You don’t need any previous audio recording experience to record long lectures, interviews and all other types of voice recordings with Hi-Q MP3 Voice Recorder. The free version of the app limits the maximum duration of a recording you can make to just 10 minutes. That is why you must upgrade to the Pro version of Hi-Q MP3 Voice Recorder if you want to capture hours of material directly from your phone. The best part is that all versions of the app automatically upload recordings to Google Drive or Dropbox which frees up space on your device.
Pros
- Intuitive and modernly designed interface
- Simple audio recording session setup
- Customizable audio quality
- Excellent file management capabilities
Cons
- Recording with external microphones is not an option
- The free version of the app limits the maximum duration of recordings
5. Voice Recorder
Price: Free, but contains ads
Supported OS: Android 4.1 and up
Best for: Students, musicians, and businessmen
Voice Recorder App in Google Play
If you are looking for an app you can use to record an interview, a business meeting or a lecture, then Voice Recorder may be one of your best options. You can record audio files without any restrictions and visualize the sounds with the Audio Spectrum Analyzer. The app continues recording from the background even while the phone’s screen is off which preserves battery life and enables you to perform other tasks while the recording session is in progress. Voice Recorder offers a broad range of file-sharing capabilities so that you can easily send your audio recordings via SMS, email and the Messenger app or share them on Facebook and WhatsApp.
Pros
- Available for free to all Android users
- Stopping, pausing or resuming a recording session is easy
- Allows users to adjust the sample rate
- Offers the microphone gain calibration tool
Cons
- Audio recordings can only be saved in two different file formats
- Doesn’t provide audio editing options
6. Music Maker JAM
Price: Free, but contains ads and offers in-app purchases
Supported OS: Varies with the device
Best for: Musicians
Music Maker JAM App in Google Play
With the selection of 300 mix packs, Music Maker JAM is one of the best android apps for aspiring musicians who want to compose their music even while they are on the go. You can choose from a variety of samples, audio loops and beats to create your next song or record live performances with the app’s 8-channel mixer. Music Maker JAM also enables you to record vocals, adjust the tempo of the audio files or apply effects to all recordings you edit with this app. Once your recording is ready, you can upload it to SoundCloud directly from the app or post it on Facebook and other social networks.
Pros
- Shake your Android phone to remix a song
- The app lets you choose from more than 300 mix packs
- Supports multi-channel recording
- Offers advanced audio editing options
Cons
- Music Maker JAM is not primarily a voice recorder
- No support for external microphones
7. LectureNotes
Price: Free
Supported OS: Android 3.0 and up
Best for: Students
LectureNotes App in Google Play
In case you take notes often, then this app can be an excellent choice for you as it allows you to use a stylus to create notes. However, the trial version limits the number of notebooks to just two, and neither of the notebooks can have more than eight pages. Moreover, if you would like to utilize the app’s voice recording features, you must install LectureRecordings plugin on your device. To capture videos, you must first install the LectureVideos plugin. Another disappointing thing is that you won’t be able to adjust the settings for your audio recording sessions or edit the recording you create with this app.
Pros
- An efficient tool for creating hand-written notes
- The app can be used while your Android phone is offline
- Allows users to export PDF files
- Compatible with OneNote and Evernote apps
Cons
- Underwhelming voice recording options
- You must install a plugin to record audio files
8. ASR Voice Recorder
Price: Free, but contains ads
Supported OS: Android 5.0 and up
Best for: Journalists, musicians, students

ASR Voice Recorder App in Google Play
A brief look at the list of features this app offers, you will find this is a well-rounded voice recorder because it offers all the tools you are going to need to create high-quality recordings. You can choose from a variety of file formats, add notes to recordings at recording or control the playback speed of all audio files you listen to in AVR Voice Recorder. You can also skip silences, connect a headset microphone to the app via Bluetooth or arrange your voice recordings in any way you want. The app lets you upload your audio files to Dropbox, Google Drive, and other file-hosting platforms.
Pros
- Provides excellent audio recording options for free
- Allows users to save recordings in different file formats
- Equipped with an audio playback controller
- Sharing multiple files is easy
Cons
- Offers only basic audio editing tools
- No audio transcription options
9. Call Recorder
Price: Free, but contains ads
Supported OS: Android 4.0 and up
Best for: Marketing professionals
Call Recorder App in Google Play
If you would like to record all incoming and outgoing calls on your device, the Call Recorder app is one of the best options you have at your disposal. Besides recording all calls from whitelisted numbers automatically, this app also allows you to choose from a variety of different recording modes. Furthermore, Call Recorder lets you blacklist numbers from which you don’t want to receive calls and enables you to organize your recordings efficiently. All files created with this app can be sent via Skype, SMS, Dropbox and other messaging services, which makes Call Recorder app a perfect choice for marketing professionals.
Pros
- No previous experience required to start using the app
- Records an unlimited number of phone calls
- Simple audio file management
- Offers several recording modes
Cons
- No voice recording options
- Doesn’t provide audio editing tools
10. Otter Voice Meeting Notes
Price: Free, but offers in-app purchases
Supported OS: Android 5.0 and up
Best for: Large teams of professionals
Otter Voice Meeting Notes App in Google Play
Besides being a powerful voice recorder, Otter Voice Meeting Notes is a collaborative tool that enables multiple team members to highlight and edit the transcripts this app generates in real-time. In addition to recording business meetings, you can also use Otter Voice Meeting Notes to record interviews, webinars or podcasts . Starting a new recording session takes only a second since you just have to tap on the Record button to capture the voices of all speakers in the room. What’s more, the app lets you add photos or slides to transcripts while the recording session is still in progress.
Pros
- Makes collaboration on a single transcript easier
- The app’s AI identifies different speakers automatically after the initial training
- Allows users to export MP3 audio files
- Compatible with the Call Recorder app
Cons
- In-app purchases are expensive
- Audio editing tools could be better
You may also like: 10 Best Free Discord Voice Changers
Conclusion
Creating an audio note or recording an entire interview with an Android device has never been easier. Each of the voice recorder apps we featured in this article enables you to create high-quality audio files you can share via email or store on the cloud.
Which of these Android voice recorders you are going to choose depends on a broad spectrum of factors, which range from the context in which you want to make the recording toaudio editing tools you want to use to process the audio files you created.
We’ve summarized the essential information in the table below. Hope that will help you to determine. What is your favorite Android voice recorder? Leave a comment and let us know.
| Voice recorder app | Price | Supported OS | User Rating | Best for |
|---|---|---|---|---|
| Easy Voice Recorder Pro | $3.99 | Varies with the device | 4.8 | Students, musicians, and businessmen |
| Smart Recorder – High-quality voice recorder | Free, but contains ads and offers in-app purchases | Varies with the device | 4.7 | Students, musicians, and businessmen |
| RecForge II Audio Recorder | Free, but contains ads | Android 4.0 and up | 4.0 | Musicians |
| Hi-Q MP3 Voice Recorder | Free | Varies with the device | 4.5 | Students |
| Voice Recorder | Free, but contains ads | Android 4.1 and up | 4.8 | Students, musicians, and businessmen |
| Music Maker JAM | Free, but contains ads and offers in-app purchases | Varies with the device | 4.6 | Musicians |
| LectureNotes | Free | Android 3.0 and up | 4.3 | Students |
| ASR Voice Recorder | Free, but contains ads | Android 5.0 and up | 4.4 | Journalists, musicians, students |
| Call Recorder | Free, but contains ads | Android 4.0 and up | 4.3 | Marketing professionals |
| Otter Voice Meeting Notes | Free, but offers in-app purchases | Android 5.0 and up | 4.5 | Large teams of professionals |
Benjamin Arango
Benjamin Arango is a writer and a lover of all things video.
Follow @Benjamin Arango
Benjamin Arango
Mar 27, 2024• Proven solutions
Memorizing every bit of information you need to perform your daily or weekly tasks becomes increasingly difficult as your workload rises. Students, journalists, and professionals from a wide array of industries can benefit from making audio notes or even recording entire conversations with their Smartphones.
A simple Android voice recorder can make this task easy since you can just tap on the Record button and create an audio note in seconds. However, with so many voice recorder apps for Android devices out there, finding the one best suited for your needs can be more complicated than it seems. So, in this article, we are going to help you discover some best free voice recorder for an Android device you are currently using.
Want to record voiceover and audio on iPhone? Check 10 Best Voice Recorder Apps for iPhones >>
10 Best Free Voice Recording Apps for Android Devices
Recording audio is no longer a highly technical process since now you can create an audio note or record an interview with an Android phone and a voice recorder app. The question is which voice recording app should you install on your device. So, let’s take a look at some of the most potent Android voice recorders you can find at Google Play Store.
1. Easy Voice Recorder Pro
Price: $3.99
Supported OS: Varies with the device
Best for: Students, musicians, and businessmen
App in Google Play
As the app’s name suggests making recordings for a broad range of purposes is easy. All you need to do is launch the app and start a new audio recording session. Easy Voice Recorder Pro doesn’t limit the duration of your recordings, and it also allows you to compress the recorded audio . That is perfect if you need to record long lectures or conversations. Besides, you can connect an external microphone with the app in case you want to increase the quality of the sound you are recording. The app also lets you store your recordings on Dropbox or Google Drive, while it also offers the possibility to send recordings via email.
Easy Voice Recorder Pro Interface
Pros
- Allows users to manage and organize their recordings effortlessly
- Supports all standard output audio file formats
- Offers the option to record in stereo
- Recordings made with this app can be used as the ringtone
Cons
- Ads can be frustrating
- Limited basic audio editing tools
2. Smart Recorder – High-quality voice recorder
Price: Free, but contains ads and offers in-app purchases
Supported OS: Varies with the device
Best for: Students, musicians, and businessmen
App in Google Play
Capturing high-quality audio recordings effortlessly is the ultimate goal of all Android users who want to use voice recorders. As one of the best free voice recorders for Android, Smart Recorder app has a plethora of features that enable users to make high-quality audio recordings even in imperfect conditions. Options like Live Audio Spectrum Analyzer, microphone gain calibration or automatic and manual sensitivity control in Skip Silence mode are just a few reasons why this app has over 10 million installs. However, you should keep in mind that you cannot create audio files that are larger than 2 GB with this app.
Smart Recorder – High-quality voice recorder Interface
Pros
- Provides full control over the audio recording process
- Equipped with the Wave Lock feature that prevents the device from going into the sleep mode
- Features a live audio spectrum analyzer
- Preserves battery life
Cons
- No phone call recording options
- Limited file-sharing capabilities
3. RecForge II Audio Recorder
Price: Free, but contains ads
Supported OS: Android 4.0 and up
Best for: Musicians
RecForge-audio-recorder App in Google Play
If you are looking for an Android voice recorder that allows you to customize bit rates, sample rates, choose codecs or record in mono or stereo mode, then you should consider installing RecForge II Audio Recorder on your device. The app allows you to schedule recordings, connect different types of external microphones or adjust the gain manually. In addition, you can also adjust the pitch , tempo and the playback rate of all audio files you record and edit with this app. RecForge II Audio Recorder continues working even while you are using other apps, and it keeps the battery consumption at the very minimum.
Pros
- Supports nearly all common audio file formats
- Offers a versatile set of audio editing tools
- Excellent file-sharing capabilities
- Allows users to increase the audio quality by disabling Automatic Gain Control
Cons
- The maximum duration of a recording is limited for some file formats
- Can be too complicated for inexperienced users
4. Hi-Q MP3 Voice Recorder
Price: Free
Supported OS: Varies with the device
Best for: Students, general use
Hi-Q MP3 Voice Recorder App in Google Play
You don’t need any previous audio recording experience to record long lectures, interviews and all other types of voice recordings with Hi-Q MP3 Voice Recorder. The free version of the app limits the maximum duration of a recording you can make to just 10 minutes. That is why you must upgrade to the Pro version of Hi-Q MP3 Voice Recorder if you want to capture hours of material directly from your phone. The best part is that all versions of the app automatically upload recordings to Google Drive or Dropbox which frees up space on your device.
Pros
- Intuitive and modernly designed interface
- Simple audio recording session setup
- Customizable audio quality
- Excellent file management capabilities
Cons
- Recording with external microphones is not an option
- The free version of the app limits the maximum duration of recordings
5. Voice Recorder
Price: Free, but contains ads
Supported OS: Android 4.1 and up
Best for: Students, musicians, and businessmen
Voice Recorder App in Google Play
If you are looking for an app you can use to record an interview, a business meeting or a lecture, then Voice Recorder may be one of your best options. You can record audio files without any restrictions and visualize the sounds with the Audio Spectrum Analyzer. The app continues recording from the background even while the phone’s screen is off which preserves battery life and enables you to perform other tasks while the recording session is in progress. Voice Recorder offers a broad range of file-sharing capabilities so that you can easily send your audio recordings via SMS, email and the Messenger app or share them on Facebook and WhatsApp.
Pros
- Available for free to all Android users
- Stopping, pausing or resuming a recording session is easy
- Allows users to adjust the sample rate
- Offers the microphone gain calibration tool
Cons
- Audio recordings can only be saved in two different file formats
- Doesn’t provide audio editing options
6. Music Maker JAM
Price: Free, but contains ads and offers in-app purchases
Supported OS: Varies with the device
Best for: Musicians
Music Maker JAM App in Google Play
With the selection of 300 mix packs, Music Maker JAM is one of the best android apps for aspiring musicians who want to compose their music even while they are on the go. You can choose from a variety of samples, audio loops and beats to create your next song or record live performances with the app’s 8-channel mixer. Music Maker JAM also enables you to record vocals, adjust the tempo of the audio files or apply effects to all recordings you edit with this app. Once your recording is ready, you can upload it to SoundCloud directly from the app or post it on Facebook and other social networks.
Pros
- Shake your Android phone to remix a song
- The app lets you choose from more than 300 mix packs
- Supports multi-channel recording
- Offers advanced audio editing options
Cons
- Music Maker JAM is not primarily a voice recorder
- No support for external microphones
7. LectureNotes
Price: Free
Supported OS: Android 3.0 and up
Best for: Students
LectureNotes App in Google Play
In case you take notes often, then this app can be an excellent choice for you as it allows you to use a stylus to create notes. However, the trial version limits the number of notebooks to just two, and neither of the notebooks can have more than eight pages. Moreover, if you would like to utilize the app’s voice recording features, you must install LectureRecordings plugin on your device. To capture videos, you must first install the LectureVideos plugin. Another disappointing thing is that you won’t be able to adjust the settings for your audio recording sessions or edit the recording you create with this app.
Pros
- An efficient tool for creating hand-written notes
- The app can be used while your Android phone is offline
- Allows users to export PDF files
- Compatible with OneNote and Evernote apps
Cons
- Underwhelming voice recording options
- You must install a plugin to record audio files
8. ASR Voice Recorder
Price: Free, but contains ads
Supported OS: Android 5.0 and up
Best for: Journalists, musicians, students
ASR Voice Recorder App in Google Play
A brief look at the list of features this app offers, you will find this is a well-rounded voice recorder because it offers all the tools you are going to need to create high-quality recordings. You can choose from a variety of file formats, add notes to recordings at recording or control the playback speed of all audio files you listen to in AVR Voice Recorder. You can also skip silences, connect a headset microphone to the app via Bluetooth or arrange your voice recordings in any way you want. The app lets you upload your audio files to Dropbox, Google Drive, and other file-hosting platforms.
Pros
- Provides excellent audio recording options for free
- Allows users to save recordings in different file formats
- Equipped with an audio playback controller
- Sharing multiple files is easy
Cons
- Offers only basic audio editing tools
- No audio transcription options
9. Call Recorder
Price: Free, but contains ads
Supported OS: Android 4.0 and up
Best for: Marketing professionals
Call Recorder App in Google Play
If you would like to record all incoming and outgoing calls on your device, the Call Recorder app is one of the best options you have at your disposal. Besides recording all calls from whitelisted numbers automatically, this app also allows you to choose from a variety of different recording modes. Furthermore, Call Recorder lets you blacklist numbers from which you don’t want to receive calls and enables you to organize your recordings efficiently. All files created with this app can be sent via Skype, SMS, Dropbox and other messaging services, which makes Call Recorder app a perfect choice for marketing professionals.
Pros
- No previous experience required to start using the app
- Records an unlimited number of phone calls
- Simple audio file management
- Offers several recording modes
Cons
- No voice recording options
- Doesn’t provide audio editing tools
10. Otter Voice Meeting Notes
Price: Free, but offers in-app purchases
Supported OS: Android 5.0 and up
Best for: Large teams of professionals
Otter Voice Meeting Notes App in Google Play
Besides being a powerful voice recorder, Otter Voice Meeting Notes is a collaborative tool that enables multiple team members to highlight and edit the transcripts this app generates in real-time. In addition to recording business meetings, you can also use Otter Voice Meeting Notes to record interviews, webinars or podcasts . Starting a new recording session takes only a second since you just have to tap on the Record button to capture the voices of all speakers in the room. What’s more, the app lets you add photos or slides to transcripts while the recording session is still in progress.
Pros
- Makes collaboration on a single transcript easier
- The app’s AI identifies different speakers automatically after the initial training
- Allows users to export MP3 audio files
- Compatible with the Call Recorder app
Cons
- In-app purchases are expensive
- Audio editing tools could be better
You may also like: 10 Best Free Discord Voice Changers
Conclusion
Creating an audio note or recording an entire interview with an Android device has never been easier. Each of the voice recorder apps we featured in this article enables you to create high-quality audio files you can share via email or store on the cloud.
Which of these Android voice recorders you are going to choose depends on a broad spectrum of factors, which range from the context in which you want to make the recording toaudio editing tools you want to use to process the audio files you created.
We’ve summarized the essential information in the table below. Hope that will help you to determine. What is your favorite Android voice recorder? Leave a comment and let us know.
| Voice recorder app | Price | Supported OS | User Rating | Best for |
|---|---|---|---|---|
| Easy Voice Recorder Pro | $3.99 | Varies with the device | 4.8 | Students, musicians, and businessmen |
| Smart Recorder – High-quality voice recorder | Free, but contains ads and offers in-app purchases | Varies with the device | 4.7 | Students, musicians, and businessmen |
| RecForge II Audio Recorder | Free, but contains ads | Android 4.0 and up | 4.0 | Musicians |
| Hi-Q MP3 Voice Recorder | Free | Varies with the device | 4.5 | Students |
| Voice Recorder | Free, but contains ads | Android 4.1 and up | 4.8 | Students, musicians, and businessmen |
| Music Maker JAM | Free, but contains ads and offers in-app purchases | Varies with the device | 4.6 | Musicians |
| LectureNotes | Free | Android 3.0 and up | 4.3 | Students |
| ASR Voice Recorder | Free, but contains ads | Android 5.0 and up | 4.4 | Journalists, musicians, students |
| Call Recorder | Free, but contains ads | Android 4.0 and up | 4.3 | Marketing professionals |
| Otter Voice Meeting Notes | Free, but offers in-app purchases | Android 5.0 and up | 4.5 | Large teams of professionals |
Benjamin Arango
Benjamin Arango is a writer and a lover of all things video.
Follow @Benjamin Arango
Mastering Volume Control: The Art of Audio Ducking with PowerDirector
How to Use Audio Ducking to Fade Out Music in PowerDirector?
Benjamin Arango
Oct 26, 2023• Proven solutions
“Can you explain to us the simple method to execute audio ducking?”
I hope you’re already aware of the audio ducking feature if you’re into video editing or any music industry. The audio ducking is commonly to balance two audios. You can see the very typical application while balancing the background music with the person speaking there. So, the different voices would pop up and needs an adjustment according to the scenario. However, selecting the most straightforward process and genuine video editor is the user’s responsibility to get the task done effectively. So, here, we would like to discuss the audio ducking function of CyberLink PowerDirector along with a suitable alternative - Wondershare Filmora.
Part 1: How to Use Audio Ducking to Fade Out Music in PowerDirector?
CyberLink PowerDirector is a video editing software with impeccable features, including Motion Tracking, Magic Movie Wizard, Encoding, Action Camera Tools, and so on. The audio ducking element in PowerDirector has automated the audio adjustment in terms of keyframes.
So, let’s consider the below steps to fade out music or fade out audio in PowerDirector audio ducking!
Step 1: Import Video
Open the CyberLink PowerDirector application, and import the video into the timeline, as shown below. Then, you can also import the background music you’d like to add to the video.
Step 2: Select Audio Ducking
Choose the background music and hit the “Audio Ducking” option from the Tools tab.
Step 3: Confirm the Audio Ducking
A pop-up audio ducking window like the below interface will appear to state that PowerDirector will automatically analyze the music.
All you need, is to hit the OK button and lend the job to PowerDirector.
Doing so will automatically add the keyframes into the background music you’ve already imported.
So, this was the entire process of music ducking keyframes automation in CyberLink PowerDirector.
Part 2: An Alternative Solution to Audio Ducking on Mac
If you’re looking for easiness, you must consider the following section for a suitable alternative!
“Which audio ducking software is the best for Mac?”
The Wondershare Filmora is not only suitable for Mac users but Windows users as well. Here are some of its features on why we used to admire Filmora for easiness and professionalism. Used by vlogger, make-up artists, and professional video editors for tutorials, editing, voice/audio editing, and after effects, Wondershare Filmora is the best choice to give a try today.
- The best part about the Wondershare Filmora is the versatility of audio editing tools.
- The window of the Audio Ducking is super intuitive and self-explanatory to the users.
- Want to go advanced? You should admire its features, including Advanced Color Tuning, Scene Detection, Green Screen, Color Match, Motion Tracking, Animation Keyframing, and so on.
All in all, the Wondershare Filmora is a remarkable video editor fulfilling the needs of endless people around the globe. It’s usually the first name in mind when it comes to innovation and simplicity.


Here is a step-by-step tutorial after which you can compare the audio ducking easiness of Wondershare Filmora with CyberLink PowerDirector.
So, let’s start without further ado!
Step 1: Install Wondershare Filmora
Click on the Try It Free button above to download and install Wondershare Filmora. Once the software installation is complete, launch it.
Step 2: Import the Video
Choose “New Project” from the primary interface, and now, go to the “Import” option to add or import the media files. You can also do a drag-and-drop.
Step 3: Select the Audio Option
Double-click the video or right-click the audio to choose the “Adjust Audio” option on the timeline that will lead you to the editing window.
Step 4: Employ Audio Ducking
You are almost there whereby tick the “Lower the volume of other clips” checkbox to proceed. Using the slider, swipe it to set the degree to which you want to lower the volume of background music.
So, these simple steps are required to enable audio ducking in Wondershare Filmora. So easy! Along with it, you can also consider using the Fade Out and Pitch slider tab for versatile audio adjustment. However, you must only check for the Ducking tab, especially when you’re a beginner and don’t want to go for extreme changes.
Conclusion
Thus, with a discussion over two different ways to implement the audio ducking feature, it’s time to state our final overview. No doubt, the PowerDirector audio ducking feature offers the simplistic way, but it lacks flexibility. Due to the keyframe setting’s automation, you can’t check for a specific part in the audio and adjust the volume as per your needs. However, this could have been done pretty quickly in Wondershare Filmora’s video editor, making it the best alternative to CyberLink PowerDirector. Keeping it the top priority, begin your journey today!
 |
|
|
 |
|
 |
|---|
Benjamin Arango
Benjamin Arango is a writer and a lover of all things video.
Follow @Benjamin Arango
Benjamin Arango
Oct 26, 2023• Proven solutions
“Can you explain to us the simple method to execute audio ducking?”
I hope you’re already aware of the audio ducking feature if you’re into video editing or any music industry. The audio ducking is commonly to balance two audios. You can see the very typical application while balancing the background music with the person speaking there. So, the different voices would pop up and needs an adjustment according to the scenario. However, selecting the most straightforward process and genuine video editor is the user’s responsibility to get the task done effectively. So, here, we would like to discuss the audio ducking function of CyberLink PowerDirector along with a suitable alternative - Wondershare Filmora.
Part 1: How to Use Audio Ducking to Fade Out Music in PowerDirector?
CyberLink PowerDirector is a video editing software with impeccable features, including Motion Tracking, Magic Movie Wizard, Encoding, Action Camera Tools, and so on. The audio ducking element in PowerDirector has automated the audio adjustment in terms of keyframes.
So, let’s consider the below steps to fade out music or fade out audio in PowerDirector audio ducking!
Step 1: Import Video
Open the CyberLink PowerDirector application, and import the video into the timeline, as shown below. Then, you can also import the background music you’d like to add to the video.
Step 2: Select Audio Ducking
Choose the background music and hit the “Audio Ducking” option from the Tools tab.
Step 3: Confirm the Audio Ducking
A pop-up audio ducking window like the below interface will appear to state that PowerDirector will automatically analyze the music.
All you need, is to hit the OK button and lend the job to PowerDirector.
Doing so will automatically add the keyframes into the background music you’ve already imported.
So, this was the entire process of music ducking keyframes automation in CyberLink PowerDirector.
Part 2: An Alternative Solution to Audio Ducking on Mac
If you’re looking for easiness, you must consider the following section for a suitable alternative!
“Which audio ducking software is the best for Mac?”
The Wondershare Filmora is not only suitable for Mac users but Windows users as well. Here are some of its features on why we used to admire Filmora for easiness and professionalism. Used by vlogger, make-up artists, and professional video editors for tutorials, editing, voice/audio editing, and after effects, Wondershare Filmora is the best choice to give a try today.
- The best part about the Wondershare Filmora is the versatility of audio editing tools.
- The window of the Audio Ducking is super intuitive and self-explanatory to the users.
- Want to go advanced? You should admire its features, including Advanced Color Tuning, Scene Detection, Green Screen, Color Match, Motion Tracking, Animation Keyframing, and so on.
All in all, the Wondershare Filmora is a remarkable video editor fulfilling the needs of endless people around the globe. It’s usually the first name in mind when it comes to innovation and simplicity.
Here is a step-by-step tutorial after which you can compare the audio ducking easiness of Wondershare Filmora with CyberLink PowerDirector.
So, let’s start without further ado!
Step 1: Install Wondershare Filmora
Click on the Try It Free button above to download and install Wondershare Filmora. Once the software installation is complete, launch it.
Step 2: Import the Video
Choose “New Project” from the primary interface, and now, go to the “Import” option to add or import the media files. You can also do a drag-and-drop.
Step 3: Select the Audio Option
Double-click the video or right-click the audio to choose the “Adjust Audio” option on the timeline that will lead you to the editing window.
Step 4: Employ Audio Ducking
You are almost there whereby tick the “Lower the volume of other clips” checkbox to proceed. Using the slider, swipe it to set the degree to which you want to lower the volume of background music.
So, these simple steps are required to enable audio ducking in Wondershare Filmora. So easy! Along with it, you can also consider using the Fade Out and Pitch slider tab for versatile audio adjustment. However, you must only check for the Ducking tab, especially when you’re a beginner and don’t want to go for extreme changes.
Conclusion
Thus, with a discussion over two different ways to implement the audio ducking feature, it’s time to state our final overview. No doubt, the PowerDirector audio ducking feature offers the simplistic way, but it lacks flexibility. Due to the keyframe setting’s automation, you can’t check for a specific part in the audio and adjust the volume as per your needs. However, this could have been done pretty quickly in Wondershare Filmora’s video editor, making it the best alternative to CyberLink PowerDirector. Keeping it the top priority, begin your journey today!
|
|
|
|
|
|
|---|
Benjamin Arango
Benjamin Arango is a writer and a lover of all things video.
Follow @Benjamin Arango
Integrating Sound Into Visual Media: Adobe Premiere Pro Guide
Versatile Video Editor - Wondershare Filmora
An easy yet powerful editor
Numerous effects to choose from
Detailed tutorials provided by the official channel
Look at any of the spot commercials, wedding videos, or even some family candid videos. Adding audio makes them appealing and likable. To catch a potential customer or create an emotional connection with the viewer combination of audio and video is a must. This makes the footage attractive and exceptional.
Read on to know more about the step-by-step approach how to add audio to video in Adobe Premiere Pro.
In this article
01 [How to add audio to video in Premiere Pro](#Part 1)
02 [How to adjust audio in Premiere Pro](#Part 2)
03 [Adding Audio to Video files](#Part 3)
Part 1 How to add audio to video in Premiere Pro
Some essential pointers for all would-be videographers are:
● Before you add audio to video in Premiere Pro, be ready to see your file size increase to a large extent. If you add a background score of 15MB, your total video file size will increase by the same amount of 15MB. The best way to take care of such a problem is to use additional compression techniques to get a suitable file size.
● Most videographers use lots of software tools to add audio to video professionally. One such trending software tool is the Adobe Premiere Pro. Its simple to add audio to video in Premiere Pro, edit your audio and video, and fine-tune the audio volume of each video project.
Let’s learn how.

Step1 Find out the Audio option
Navigate to the Audio workspace, select Audio at the top on the tools bar
Step2 Choose the Workspace
Click Window select Workspace click on Audio
Step3 Check toolbar
Within Audio, click on Choose Window Media Browser to show the Media Browser toolbar.
Step4 Select audio files
Go to your audio file; for Windows OS, right-click or control-click the selected audio file for macOS.
Step5 Import and add
Please select the desired audio file, then click import to add it to your Project.
An important tip is to keep the Ingest box selected if you want to copy your audio file concurrently to your project folder.
Adding audio to your series

Step1 Go to the Project panel
Select Window, click on Project to open the Project panel.
Step2 Select audio file
Click on the audio file you imported to select it.
Step3 Check the waveform
Double click the file to open it in the Source panel to check the sound and waveform.
Step4 Check sounds
Play the audio file if you want to check the audio quality, volume, and overall sound.
Step5 Add audio to the video track
Hold the left click on your mouse to drag the audio file to the series in the Timeline panel. You can add any audio file to the video track listed in the panel window in this step.
Step6 Trim audio file
Select the Trim option to trim your audio file the same way you will edit the video file in the final step.
Part 2 How to adjust audio in Premiere Pro
Now that you have understood how to add audio to video in Adobe Premier Pro. Let’s know how to adjust audio in Premier Pro.

Step1 Activate the series
Press on the spacebar to activate your series in the Program panel (appears in the top right of the panel)
Step2 Stop playback
To stop the playback, press the space bar again.
Step3 Choose starting point of playback
Press down the left mouse button to hold and drag the Blue colored play head to wherever you desire the playback to start.
If you feel the audio track is mild or too harsh compared to the rest of the audio series, change each audio track’s volume separately.
Step1 Select Audio Track Mixer
Click Window selects Audio Track Mixer from the menu.
Step2 Click the series name to see the audio mixer
Click the series name of your audio file to show the audio mixer for your series.
Step3 Choose playback to play the audio
At the bottom of the panel is the Audio Track Mixer. Click on playback to star, pause or play your audio in-ring sequence.
Step4 Click on the slider
When your audio file plays or loops, click on the slider to move up or down. It will increase or reduce the volume of each separate audio track in your audio series.
Step5 Adjust the volume
Use the slider to adjust the overall audio volume
Tips
Always keep the audio projects within the -6 to 3 dB volume range to get the best quality of the audio effect. Any lower you won’t be able to hear the sound, or if it’s higher, the sound will hurt the listeners’ ears.
Professional advice to all beginner-level videographers is that as Premiere Pro is complex so you need more straightforward tools like Filmora for all your video editing work. Filmora is easy to use and much cheaper than Premiere Pro.
You may think now why or how Filmora can be the best as an alternative on how to add audio to video using Premiere Pro. Well! It will help you to transform your video into a piece of art incredibly by offering simple drag and drop options, including an easy-to-use interface and powerful editing tools. You can:
● Edit and create your videos with minimal effort
● Get a Music Library to add comedy, fear, tension, and love to every scene
● Get several royalty-free songs and sound effects
● Create videos with up to 800 stunning effects
● Unleash your creativity with its offered Hollywood effects
● Import and export in almost any type of video format
How to use Filmora to add audio to video
Adding sound to any video file enhances its viewability and the whole experience of watching any video. To do this, you need to add audio to video. The same can be done quickly in Filmora, a 3rd-party video editing software tool now the hot favorite of amateur and professional video editors. Below we describe how to add audio to video in Filmora.
Import Media
To start the process of adding audio to video follow these steps.
Step1 Select the audio, add using the Import option or drag and select
Import selected audio using the Filmora Media Panel and add it to your timeline. You can also choose and drag the audio file from the source folder to the Media Panel. Filmora supports multiple audio file formats to ease adding audio to video. The supported audio files are MP3, M4V, MPA, WAV, WMA.

Step2 Add and make the audio file
Adding the audio file to Filmora Media Panel makes it a media asset and can now be used multiple times in future projects. The original file remains as Filmora doesn’t change the original audio file.
Step3 Copying or deleting an audio file
In Filmora, using the feature of copying or deleting an audio file, you can work on the audio and video from any computer or remote PC.
Part 3 Adding Audio to Video files
Using Filmora, it is easy to sync or add audio to the video, which is separately recorded and stored on your device.
Using Filmora, it is easy to sync or add audio to the video, which is separately recorded and stored on your device.
Step1 Click on Import in the Media Panel
Select the audio and video files to import them into Filmora.
Step2 Click on the video file to add audio
Press the Ctrl key (Windows) or Cmd key (Mac OS) and click on the audio file.
Step3 Add audio to video
Right-click on the files selected and choose the Merge audio & video option to add audio to the video.
Filmora analyzes audio and video files and replaces the existing audio with the newly selected audio file. Once the synchronization process is over, the new merged file will be available in the Media Panel for future processing.
The synchronized file will have the same terminology as the original video file with a difference. It will get an extension Merged to its name.
The original file will not get affected in Filmora. This software tool only references the files to generate a new file. The new file created when you add audio to the video can now be added to the timeline and exported.
Wondershare Filmora
Get started easily with Filmora’s powerful performance, intuitive interface, and countless effects!
Try It Free Try It Free Try It Free Learn More about Filmora>

Conclusion
So, this article listed how to add audio to video in Premiere Pro via a step-by-step guide. The guide lets you know the easy method of adding audio to video in Adobe Premiere Pro to all potential videographers. Thus, you can now start your journey of video edition by putting your best click forward!
Look at any of the spot commercials, wedding videos, or even some family candid videos. Adding audio makes them appealing and likable. To catch a potential customer or create an emotional connection with the viewer combination of audio and video is a must. This makes the footage attractive and exceptional.
Read on to know more about the step-by-step approach how to add audio to video in Adobe Premiere Pro.
In this article
01 [How to add audio to video in Premiere Pro](#Part 1)
02 [How to adjust audio in Premiere Pro](#Part 2)
03 [Adding Audio to Video files](#Part 3)
Part 1 How to add audio to video in Premiere Pro
Some essential pointers for all would-be videographers are:
● Before you add audio to video in Premiere Pro, be ready to see your file size increase to a large extent. If you add a background score of 15MB, your total video file size will increase by the same amount of 15MB. The best way to take care of such a problem is to use additional compression techniques to get a suitable file size.
● Most videographers use lots of software tools to add audio to video professionally. One such trending software tool is the Adobe Premiere Pro. Its simple to add audio to video in Premiere Pro, edit your audio and video, and fine-tune the audio volume of each video project.
Let’s learn how.
Step1 Find out the Audio option
Navigate to the Audio workspace, select Audio at the top on the tools bar
Step2 Choose the Workspace
Click Window select Workspace click on Audio
Step3 Check toolbar
Within Audio, click on Choose Window Media Browser to show the Media Browser toolbar.
Step4 Select audio files
Go to your audio file; for Windows OS, right-click or control-click the selected audio file for macOS.
Step5 Import and add
Please select the desired audio file, then click import to add it to your Project.
An important tip is to keep the Ingest box selected if you want to copy your audio file concurrently to your project folder.
Adding audio to your series
Step1 Go to the Project panel
Select Window, click on Project to open the Project panel.
Step2 Select audio file
Click on the audio file you imported to select it.
Step3 Check the waveform
Double click the file to open it in the Source panel to check the sound and waveform.
Step4 Check sounds
Play the audio file if you want to check the audio quality, volume, and overall sound.
Step5 Add audio to the video track
Hold the left click on your mouse to drag the audio file to the series in the Timeline panel. You can add any audio file to the video track listed in the panel window in this step.
Step6 Trim audio file
Select the Trim option to trim your audio file the same way you will edit the video file in the final step.
Part 2 How to adjust audio in Premiere Pro
Now that you have understood how to add audio to video in Adobe Premier Pro. Let’s know how to adjust audio in Premier Pro.
Step1 Activate the series
Press on the spacebar to activate your series in the Program panel (appears in the top right of the panel)
Step2 Stop playback
To stop the playback, press the space bar again.
Step3 Choose starting point of playback
Press down the left mouse button to hold and drag the Blue colored play head to wherever you desire the playback to start.
If you feel the audio track is mild or too harsh compared to the rest of the audio series, change each audio track’s volume separately.
Step1 Select Audio Track Mixer
Click Window selects Audio Track Mixer from the menu.
Step2 Click the series name to see the audio mixer
Click the series name of your audio file to show the audio mixer for your series.
Step3 Choose playback to play the audio
At the bottom of the panel is the Audio Track Mixer. Click on playback to star, pause or play your audio in-ring sequence.
Step4 Click on the slider
When your audio file plays or loops, click on the slider to move up or down. It will increase or reduce the volume of each separate audio track in your audio series.
Step5 Adjust the volume
Use the slider to adjust the overall audio volume
Tips
Always keep the audio projects within the -6 to 3 dB volume range to get the best quality of the audio effect. Any lower you won’t be able to hear the sound, or if it’s higher, the sound will hurt the listeners’ ears.
Professional advice to all beginner-level videographers is that as Premiere Pro is complex so you need more straightforward tools like Filmora for all your video editing work. Filmora is easy to use and much cheaper than Premiere Pro.
You may think now why or how Filmora can be the best as an alternative on how to add audio to video using Premiere Pro. Well! It will help you to transform your video into a piece of art incredibly by offering simple drag and drop options, including an easy-to-use interface and powerful editing tools. You can:
● Edit and create your videos with minimal effort
● Get a Music Library to add comedy, fear, tension, and love to every scene
● Get several royalty-free songs and sound effects
● Create videos with up to 800 stunning effects
● Unleash your creativity with its offered Hollywood effects
● Import and export in almost any type of video format
How to use Filmora to add audio to video
Adding sound to any video file enhances its viewability and the whole experience of watching any video. To do this, you need to add audio to video. The same can be done quickly in Filmora, a 3rd-party video editing software tool now the hot favorite of amateur and professional video editors. Below we describe how to add audio to video in Filmora.
Import Media
To start the process of adding audio to video follow these steps.
Step1 Select the audio, add using the Import option or drag and select
Import selected audio using the Filmora Media Panel and add it to your timeline. You can also choose and drag the audio file from the source folder to the Media Panel. Filmora supports multiple audio file formats to ease adding audio to video. The supported audio files are MP3, M4V, MPA, WAV, WMA.
Step2 Add and make the audio file
Adding the audio file to Filmora Media Panel makes it a media asset and can now be used multiple times in future projects. The original file remains as Filmora doesn’t change the original audio file.
Step3 Copying or deleting an audio file
In Filmora, using the feature of copying or deleting an audio file, you can work on the audio and video from any computer or remote PC.
Part 3 Adding Audio to Video files
Using Filmora, it is easy to sync or add audio to the video, which is separately recorded and stored on your device.
Using Filmora, it is easy to sync or add audio to the video, which is separately recorded and stored on your device.
Step1 Click on Import in the Media Panel
Select the audio and video files to import them into Filmora.
Step2 Click on the video file to add audio
Press the Ctrl key (Windows) or Cmd key (Mac OS) and click on the audio file.
Step3 Add audio to video
Right-click on the files selected and choose the Merge audio & video option to add audio to the video.
Filmora analyzes audio and video files and replaces the existing audio with the newly selected audio file. Once the synchronization process is over, the new merged file will be available in the Media Panel for future processing.
The synchronized file will have the same terminology as the original video file with a difference. It will get an extension Merged to its name.
The original file will not get affected in Filmora. This software tool only references the files to generate a new file. The new file created when you add audio to the video can now be added to the timeline and exported.
Wondershare Filmora
Get started easily with Filmora’s powerful performance, intuitive interface, and countless effects!
Try It Free Try It Free Try It Free Learn More about Filmora>
Conclusion
So, this article listed how to add audio to video in Premiere Pro via a step-by-step guide. The guide lets you know the easy method of adding audio to video in Adobe Premiere Pro to all potential videographers. Thus, you can now start your journey of video edition by putting your best click forward!
Also read:
- 2024 Approved Woof & Howl Repertoire Dognoises for Filmmakers & Game Developers
- New 2024 Approved A Curated Collection of 15 Dynamic News Music Pieces
- 2024 Approved The Alluring World of High-Quality Sound Editing Software Advantages, Disadvantages, and Competitive Insights
- Sound Effects for Podcasts Places to Find Them
- New 2024 Approved Aesthetically Pleasing Scores for YouTube Productions
- Updated In 2024, Streamlining Sound A Comprehensive Walkthrough to Tuning Audio Online
- Updated Audacity Alternatives Unveiled The Best Free Nonaudacity Apps on Your Desktop
- Updated The Ultimate Strategy for Fusing Audio with Video Content (Updated ) for 2024
- Updated Mastering Hip-Hop An Insiders Guide to the Best 8 DAW Software of the Year for 2024
- 2024 Approved The AI Music Forerunners Crafting Harmonies for a New Era
- Step Into the Future Our Curated List of the Top 9 Next-Gen AI Voice Systems to Revolutionize Your 2023 Experience for 2024
- Updated Instruction 1 (Same Diffits Level) Provide a List of Five Alternative Phrases that Convey Similar Meaning to Thrilling Adventure Series for Young Explorers for 2024
- New 2024 Approved Advanced Filmmaking Techniques Silencing the Distractions in Your Audio Recordings with Wondershare Filmora
- Ultimate Rankings Proven Platforms for Accurate MP3 Track Labeling
- In 2024, Speak in Style, Play to Win Transforming Your Virtual Identity with Morphvox for Streaming Games
- How to Locate and Apply a Kakáring Noise Effect for 2024
- In 2024, The Anticipated Retro-Inspired Ballads & Blues to Listen To
- In 2024, Find Laughing Sound Effect
- Venturing Beyond Jazz Norms Discovering Hidden Insights
- New In 2024, KineMaster Soundscape Techniques for Music Insertion
- Updated Uncovering Hidden Whistles in Soundscapes for 2024
- Updated In 2024, Crowds Delight Auditory Replicator
- Updated Song Inverted The Finest Backwards Music Videos Crafted for 2024
- Updated Elite No-Fee Female Audio Transformation Toolkit (Online)
- Mastering Audio Balance Achieving Consistent Volume Levels with VLC Media Player for 2024
- Updated Master Your Audio Projects with These 5 Indispensable Android Applications for Audio Editing for 2024
- New Exploring the Best Free HD Online Resources for Wallpapers and Video Backgrounds for 2024
- In 2024, Searching for Dynamic Echoes From Breaking Containers
- New Strategies for Minimizing Large-Scale Video and Audio Data
- Updated Exploring Cricket Auditory Signatures
- Free Audio Transmutation Exploring Six Efficient Ways to Convert Video to Sound
- Updated The Most Effective 6 Voice Changer Applications for Real-Time Use for 2024
- Updated Expert Roundup IPhone Vs. Android – Top 10 Music Editing Applications for 2024
- New Superior Systems for Infusing Vocal Elements Into Instagram TV Content
- Enhancing Machine Learning with AI-Enabled Denoising Solutions
- Updated Acclaimed AI Lyrics Converters and Their Rankings
- Unveiling the Nuances of Anime Dubbing Methodology, Examples, & Best Practices
- In 2024, Transform Your Audio Projects Professional Tips on Utilizing Keyframes in Adobe Premiere Pro for macOS
- In 2024, Crafting Original Soundscapes A Guide to Producing Music Video Tracks
- In 2024, How to Transfer Data After Switching From Tecno Camon 20 to Latest Samsung | Dr.fone
- In 2024, How to Fake Snapchat Location on Xiaomi Redmi Note 12 Pro 5G | Dr.fone
- How to Unlock Apple ID Activation Lock On Apple iPhone 12?
- iPhone 14 Pro Max iCloud Activation Lock Bypass
- How to Transfer Photos From Nokia XR21 to Samsung Galaxy S21 Ultra | Dr.fone
- In 2024, How to Change GPS Location on Oppo F23 5G Easily & Safely | Dr.fone
- Bricked Your OnePlus Nord N30 SE? Heres A Full Solution | Dr.fone
- How to Intercept Text Messages on Google Pixel 7a | Dr.fone
- 10 Leading Open-Source Video Editors You Can Use for Free for 2024
- Updated Transform Your Content with the Best 3D Video Generators for 2024
- How to get back lost photos from M6 5G.
- New 2024 Approved The Funniest Meme Creator Apps for Android and iOS (Updated 2023)
- Bypass iPhone 15 Plus activation lock using official methods
- 7 Fixes for Unfortunately, Phone Has Stopped on Xiaomi Redmi A2 | Dr.fone
- Battle of the Giants Adobe Premiere Pro vs After Effects for Visual Storytelling
- Title: New Discover the Best Android Speech-to-Text Programs with No Monthly Fees
- Author: Jacob
- Created at : 2024-05-20 00:04:01
- Updated at : 2024-05-21 00:04:01
- Link: https://audio-shaping.techidaily.com/new-discover-the-best-android-speech-to-text-programs-with-no-monthly-fees/
- License: This work is licensed under CC BY-NC-SA 4.0.
