
:max_bytes(150000):strip_icc():format(webp)/how-to-set-up-speech-to-text-on-android-0-928c48ab121248f9aa543a136d971f9a.jpg)
New 2024 Approved Step-by-Step An Essential Tutorial on Editing Your First Podcast
Step-by-Step: An Essential Tutorial on Editing Your First Podcast
Podcast Editing 101: How to Edit a Podcast

Benjamin Arango
Mar 27, 2024• Proven solutions
We are glad that you took the first steps to create your podcast episodes. We’d also like to know how far you have reached. Well, most probably, you are at the podcast editing stage as per your search query. So, you are in the right place if this is your concern. We have structured this entire post on how to edit podcasts, especially for the newbies. You can continue reading the article if you have already created a podcast episode and level up the steps with better podcast editing. Remember that editing can either make or break the game! So, don’t take any chances in editing a podcast right from the beginners’ level.

Without further ado, let’s get started with the following editing basics a podcaster should keep in mind.
- Part 1: Editing Basics that Beginners’ Should Keep in Mind
- Part 2: Which DAW should you use?
- Part 3: Advanced Editing Tips to Spice Up Your Podcasts
- Part 4: Edit Podcast with Video Editor
Editing Basics that Beginners’ Should Keep in Mind
Well, it is all dependent upon the approach you follow regarding the podcast audio editing. There are various podcast editing services, and styles worth consider. The list below is the critical podcast editing basics a beginner should follow before publishing the podcast. Overall, it would be awesome if you learn new skills instead of outsourcing the whole stuff. That’s fantastic as well!
Firstly, import the audio.
The editing process starts with importing the audio track. The audio material in the sequence must be at the primary place. Always place the audio track in the first position even if you are importing multiple audio tracks. You can leave the track underneath for editing purposes. After adding this first audio file, you can add sound effects, music, and other secondary audio files for further editing.
Listen again
Don’t proceed before re-listening your added audio! This manner will let you think for different sections, and you can further decide what to keep and what to preserve. Remove any computer noise, background hiss, and unwanted audio areas. Here, you can help with different noise reduction tools available or go for the reliable podcast editing software, specifically the audio ducking feature for noise removal.
Make it consistent throughout
The next step is to make the volume consistent at every stage of the podcast. After removing all the unwanted noises, take the necessary action to normalize the audio levels and specifically select -2.0 for peak amplitude. Amplify the tranquil areas.
Sound Designing and Mixing
Then, you are required to do sound designing and mixing for the podcast. Take it lightly and only especially when you are a beginner. Add the sound effects as per the message of the podcast. Always keep in mind to use significant sound effects that effectively evoke the emotion and ultimately save the audience engaged. The mixing part comes when you compress, equalize, and process the audio to adjust accordingly in the different sections.
Preview and Post
Once your podcast is edited and ready, preview it ensure everything is in place, especially if it is your first time. It would be best to post a clear, concise, and to the point audio/video. Finally, post your podcast, either for free or using one of the software available online on your desired blog/online media.
Which DAW should you use?
You can’t miss using Digital Audio Workstation (DAW) for podcast editing at any cost. It is an audio editing program with all the facilities right from recording the podcast to editing it. To start with, you must consider using among the following three DAWs.
Audacity

Audacity is the most common program providing free podcast editing services. The foremost reason for its popularity is the free and open-source availability. Secondly, the primary user interface makes it the best option for beginners. You can right away start recording with Audacity.
Alitu

Alitu is another recommended tool to make your podcast episodes easily. However, you have to pay to get the podcast editing services of Alitu. It can incredibly do the podcast editing for raw audios and provide you with different options of adding music, transitions, and segments, etc. It also contains the facility to publish your podcast.
Reaper

Reaper is another best podcast editing DAW with the availability of 60 days free trial. Despite a bit high learning curve in Reaper, you will ultimately feel like an artist working upon it. Moreover, it comes with lots of new updates and features for better outcomes. It is compatible with AU, VST, and JS plugins as well.
Advanced Editing Tips to Spice Up Your Podcasts
Don’t miss out on this portion if you want to upgrade your podcasting skills like professionals! Learn some advanced formulas of podcast audio editing as follows.
Trim the Ends
It’s better if you trim the ends before editing the podcast. And, make sure there are no blanks at the beginning or end of the podcast. You can also add fade-in or fade-out effects to avoid unprofessional vibes.
Work on your planning and presentation skills
Focus on having a time-saving podcast editing by working upon your planning and presentation skills. Don’t be that guy who tries to edit every verbal crutch. Instead, focus on being confident while presenting the podcast so that you will need to have significantly fewer editing issues or may not need editing at all. Think upon changing the approach of podcast recording as well.
Provide margin and look for transitions
Offer a little margin and say that thing smoothly again if you have misread or misspell the statement while recording the podcast. Thus, you must not squeeze the information that doesn’t provide a better room for podcast editing. The provided margin will make it a breeze to cut out the messy audio portion.
Then, you have to look for transitions precisely when you are recording in multiple tracks, co-hosting, or taking a long space while recording your podcast. These transitions could be like pointless babbles, awkward silences, cross talks, etc., that need careful watch at both the beginning and the end. Most of the editing will improve by considering and editing these kinds of transitions.
Eliminate awkward silences
Sometimes a podcast is full of awkward silences that look crap at all. Well, you don’t have to remove every silence taken at the end of a talk or something like that. Eliminate only long, awkward silences or reduce their duration. Different plugins are available within the DAWs to remove these background noises and long duration silences.
Adjust the volume of the podcast
It may be a bit tricky to edit the podcast when one person or interviewee is a lot quieter. First of all, check if their microphone signals and settings are strong enough to provide you with audio. Then, you can increase the gain of their speaker before podcast editing. Normalize the voice or add some compression to increase the loudness ultimately.
Save podcast to the right format
Finally, you must be careful while exporting your podcast to the correct format to ensure the best quality. Go to the export settings and find MP3 extension and 192kbps bitrate.
Edit Podcast with Video Editor
Are you recording a video podcast? If yes, you must make very little room for editing while considering the best recording equipment and settings. Secondly, you can look for a high-tech video editor that can do the task of both video editing and podcast editing. The Wondershare Filmora X is one such famous name in the world of video editing. But, the point is to check its features for podcast editing. Are they worth it or not? That is what we’d like to tell you by highlighting the podcast editing services of Filmora.


Video Podcast Editing Services of Wondershare Filmora X
- The very thing needed while podcast editing is the shortcut key commands to save time. The Wondershare Filmora X consists of several such hotkey commands for quick editing.
- You can use Audio Ducking to eliminate background noises and unwanted awkward silences recorded while making the podcast.
- Inject beautiful animations in your video podcast using the keyframing tool of Wondershare Filmora X.
- Use 1000+ Video Effects, including filters, transitions, motion elements, titles, etc., exclusively provided on Filmora.
- Use the Split Screen and showcase multiple screens to make an eye-catchy video podcast appearance.
Conclusion
Now, we are going to end our discussion on podcast editing basics as well as advanced concepts. Try following every tip and suggestion, especially when you are a beginner. Make up your mind to create eye-catchy content that well engages the audience while also providing useful information. Using the best video editor with stunning effects, as mentioned above, won’t make your content look boring at all.
Benjamin Arango
Benjamin Arango is a writer and a lover of all things video.
Follow @Benjamin Arango
Benjamin Arango
Mar 27, 2024• Proven solutions
We are glad that you took the first steps to create your podcast episodes. We’d also like to know how far you have reached. Well, most probably, you are at the podcast editing stage as per your search query. So, you are in the right place if this is your concern. We have structured this entire post on how to edit podcasts, especially for the newbies. You can continue reading the article if you have already created a podcast episode and level up the steps with better podcast editing. Remember that editing can either make or break the game! So, don’t take any chances in editing a podcast right from the beginners’ level.
Without further ado, let’s get started with the following editing basics a podcaster should keep in mind.
- Part 1: Editing Basics that Beginners’ Should Keep in Mind
- Part 2: Which DAW should you use?
- Part 3: Advanced Editing Tips to Spice Up Your Podcasts
- Part 4: Edit Podcast with Video Editor
Editing Basics that Beginners’ Should Keep in Mind
Well, it is all dependent upon the approach you follow regarding the podcast audio editing. There are various podcast editing services, and styles worth consider. The list below is the critical podcast editing basics a beginner should follow before publishing the podcast. Overall, it would be awesome if you learn new skills instead of outsourcing the whole stuff. That’s fantastic as well!
Firstly, import the audio.
The editing process starts with importing the audio track. The audio material in the sequence must be at the primary place. Always place the audio track in the first position even if you are importing multiple audio tracks. You can leave the track underneath for editing purposes. After adding this first audio file, you can add sound effects, music, and other secondary audio files for further editing.
Listen again
Don’t proceed before re-listening your added audio! This manner will let you think for different sections, and you can further decide what to keep and what to preserve. Remove any computer noise, background hiss, and unwanted audio areas. Here, you can help with different noise reduction tools available or go for the reliable podcast editing software, specifically the audio ducking feature for noise removal.
Make it consistent throughout
The next step is to make the volume consistent at every stage of the podcast. After removing all the unwanted noises, take the necessary action to normalize the audio levels and specifically select -2.0 for peak amplitude. Amplify the tranquil areas.
Sound Designing and Mixing
Then, you are required to do sound designing and mixing for the podcast. Take it lightly and only especially when you are a beginner. Add the sound effects as per the message of the podcast. Always keep in mind to use significant sound effects that effectively evoke the emotion and ultimately save the audience engaged. The mixing part comes when you compress, equalize, and process the audio to adjust accordingly in the different sections.
Preview and Post
Once your podcast is edited and ready, preview it ensure everything is in place, especially if it is your first time. It would be best to post a clear, concise, and to the point audio/video. Finally, post your podcast, either for free or using one of the software available online on your desired blog/online media.
Which DAW should you use?
You can’t miss using Digital Audio Workstation (DAW) for podcast editing at any cost. It is an audio editing program with all the facilities right from recording the podcast to editing it. To start with, you must consider using among the following three DAWs.
Audacity
Audacity is the most common program providing free podcast editing services. The foremost reason for its popularity is the free and open-source availability. Secondly, the primary user interface makes it the best option for beginners. You can right away start recording with Audacity.
Alitu
Alitu is another recommended tool to make your podcast episodes easily. However, you have to pay to get the podcast editing services of Alitu. It can incredibly do the podcast editing for raw audios and provide you with different options of adding music, transitions, and segments, etc. It also contains the facility to publish your podcast.
Reaper
Reaper is another best podcast editing DAW with the availability of 60 days free trial. Despite a bit high learning curve in Reaper, you will ultimately feel like an artist working upon it. Moreover, it comes with lots of new updates and features for better outcomes. It is compatible with AU, VST, and JS plugins as well.
Advanced Editing Tips to Spice Up Your Podcasts
Don’t miss out on this portion if you want to upgrade your podcasting skills like professionals! Learn some advanced formulas of podcast audio editing as follows.
Trim the Ends
It’s better if you trim the ends before editing the podcast. And, make sure there are no blanks at the beginning or end of the podcast. You can also add fade-in or fade-out effects to avoid unprofessional vibes.
Work on your planning and presentation skills
Focus on having a time-saving podcast editing by working upon your planning and presentation skills. Don’t be that guy who tries to edit every verbal crutch. Instead, focus on being confident while presenting the podcast so that you will need to have significantly fewer editing issues or may not need editing at all. Think upon changing the approach of podcast recording as well.
Provide margin and look for transitions
Offer a little margin and say that thing smoothly again if you have misread or misspell the statement while recording the podcast. Thus, you must not squeeze the information that doesn’t provide a better room for podcast editing. The provided margin will make it a breeze to cut out the messy audio portion.
Then, you have to look for transitions precisely when you are recording in multiple tracks, co-hosting, or taking a long space while recording your podcast. These transitions could be like pointless babbles, awkward silences, cross talks, etc., that need careful watch at both the beginning and the end. Most of the editing will improve by considering and editing these kinds of transitions.
Eliminate awkward silences
Sometimes a podcast is full of awkward silences that look crap at all. Well, you don’t have to remove every silence taken at the end of a talk or something like that. Eliminate only long, awkward silences or reduce their duration. Different plugins are available within the DAWs to remove these background noises and long duration silences.
Adjust the volume of the podcast
It may be a bit tricky to edit the podcast when one person or interviewee is a lot quieter. First of all, check if their microphone signals and settings are strong enough to provide you with audio. Then, you can increase the gain of their speaker before podcast editing. Normalize the voice or add some compression to increase the loudness ultimately.
Save podcast to the right format
Finally, you must be careful while exporting your podcast to the correct format to ensure the best quality. Go to the export settings and find MP3 extension and 192kbps bitrate.
Edit Podcast with Video Editor
Are you recording a video podcast? If yes, you must make very little room for editing while considering the best recording equipment and settings. Secondly, you can look for a high-tech video editor that can do the task of both video editing and podcast editing. The Wondershare Filmora X is one such famous name in the world of video editing. But, the point is to check its features for podcast editing. Are they worth it or not? That is what we’d like to tell you by highlighting the podcast editing services of Filmora.
Video Podcast Editing Services of Wondershare Filmora X
- The very thing needed while podcast editing is the shortcut key commands to save time. The Wondershare Filmora X consists of several such hotkey commands for quick editing.
- You can use Audio Ducking to eliminate background noises and unwanted awkward silences recorded while making the podcast.
- Inject beautiful animations in your video podcast using the keyframing tool of Wondershare Filmora X.
- Use 1000+ Video Effects, including filters, transitions, motion elements, titles, etc., exclusively provided on Filmora.
- Use the Split Screen and showcase multiple screens to make an eye-catchy video podcast appearance.
Conclusion
Now, we are going to end our discussion on podcast editing basics as well as advanced concepts. Try following every tip and suggestion, especially when you are a beginner. Make up your mind to create eye-catchy content that well engages the audience while also providing useful information. Using the best video editor with stunning effects, as mentioned above, won’t make your content look boring at all.
Benjamin Arango
Benjamin Arango is a writer and a lover of all things video.
Follow @Benjamin Arango
“Harnessing Free Speech-to-Text Technology: A 2023 Roundup of Online Resources”
10+ Free Online Audio to Text Converters

Shanoon Cox
Mar 27, 2024• Proven solutions
An audio-to-text converter is a tool that can convert audio files to texts or even record any audio and produce the text of it simultaneously. Audio files are one of the most used methods of storing information. From online classes and long lectures to big business meetings and product information, audio is being shared a lot across the world.
But accessing information from a long audio file can be difficult and time-consuming, which is why there is a need to convert audio to text. Information in the form of text can easily be fully or partly accessed and edited whenever needed. And texts can also easily be shared with whomever you want.
So let’s have a look at some of the best audio-to-text converters that might be of use to you.
10+ Free Online Audio to Text Converters
There is number of audio text converters available in the online market that can help you while studying, researching, or even in your business. Some of these recorders can convert any audio file to texts while some others can record and convert to text at the same time. Here we will talk about the top 11 free applications that can be used to convert audio to text.
| 1 - Filmora | 2 - Audext | 3 - Sonix.ai |
|---|---|---|
| 4 - Virtualspeech.com | 5 - Speechnotes | 6 - SpeechTexter |
| 7 - Textfromtospeech.com | 8 - Dictation.io | 9 - Voice Note |
| 10 - Voice Notebook | 11 - NaturalReaders |
1. Wondershare Filmora
Filmora’s Speech To Text (STT) function allows you to transcript audio/voice to subtitles/text in one click. it can save your plenty of time on transcribing subtitles and boost your editing efficiency by applying speech-to-text.
What you need to do is download the software and subsribe for its plan.
Features
- Built-in function to transcribe subtitles and captions for your video
- High accuracy in generating text, allows you to edit text by yourself
- Supports up to 26 languages of transcription to engage more users all around the world
- Offers various tools for editing your videos and audio
2. Audext
Audext is a free online application that can help you to save a lot of time while transcribing any audio to text. The transcription to text is done with the use of an advanced AI and hence produces faster and more accurate results.
Audext is used by people from different sectors like education, marketing, media, consulting, healthcare, etc. for their work purposes.

Features
- An inbuilt editor for editing the text while transcribing
- Identifies the speaker easily
- Supports a variety of audio and video formats like MP3, WAV, MP4, etc.
- Offers an option of easy upload and export of files
Pricing
- Free
- Transcription costs for one hour are $12
- Or with the subscription $5
3. Sonix.ai
Sonix is a fast and accurate application that can be used to convert audio to text for any purpose. This application offers a 30-minute free transcription after which an affordable amount may be charged.
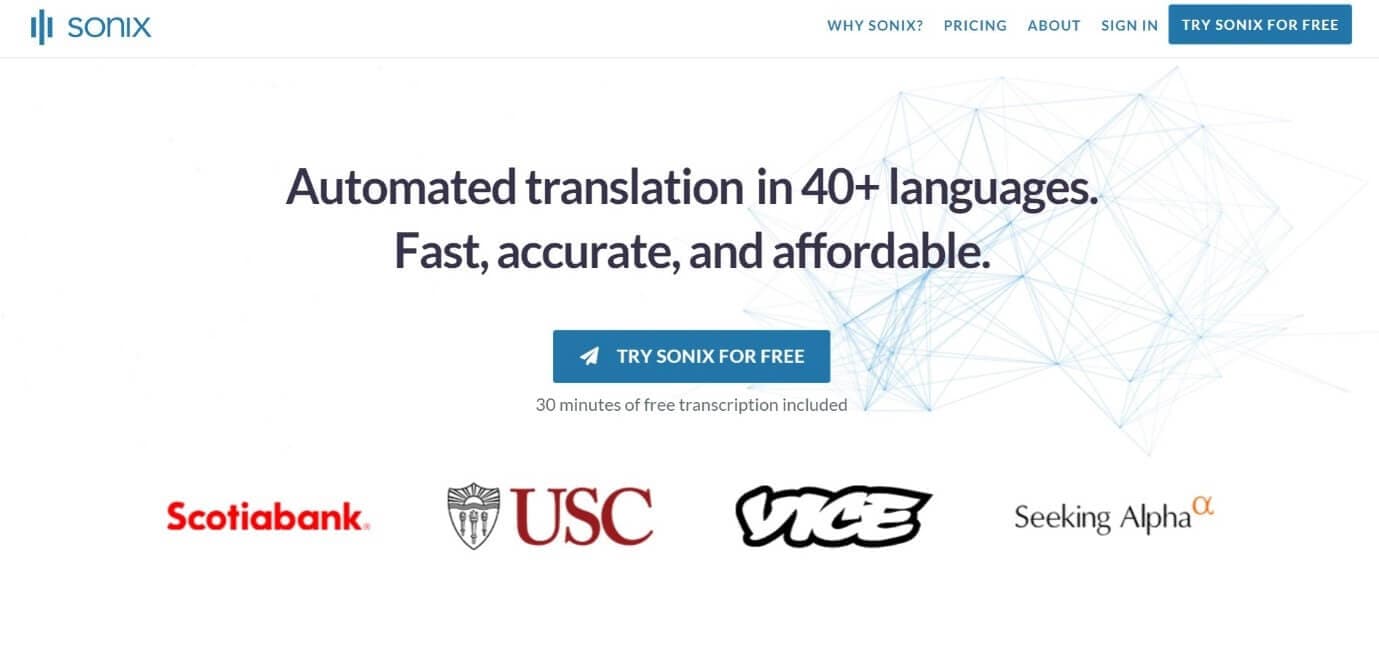
Features
- Automatic transcription of files and accessibility of these files from any device
- Advanced translation of these devices into 30 different languages
- Addition of subtitles into any video for easy understanding
- A Sonix media player that allows to share and publish files easily
Pricing
- Free
- Standard subscription - $10 per hour
- Premium subscription - $5 per hour, and an addition of $22 per month
4. Virtualspeech.com
Virtualspeech is an online tool that can transcribe audio to text free. It is a very simple application that allows fats conversion of audio files to texts. After conversion, the file will be emailed to the user from where it can be downloaded and saved.
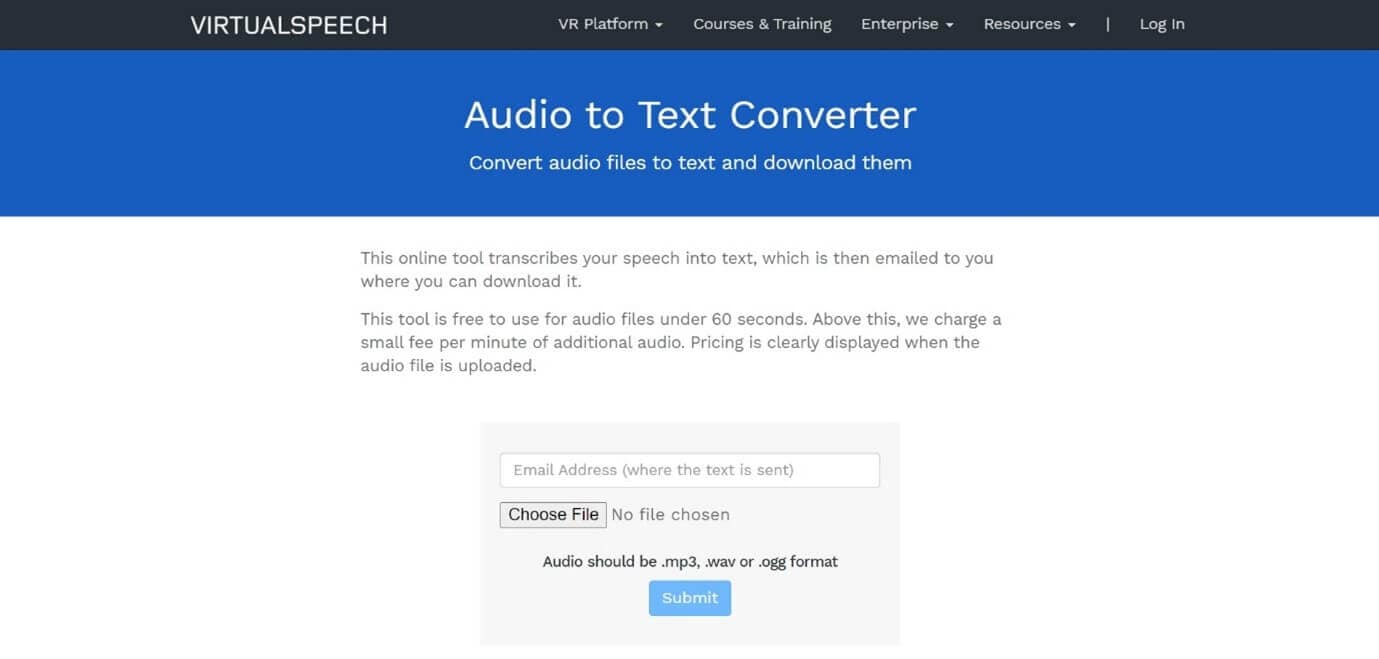
Features
- Free conversion of any audio files under 1 minute.
- Conversion of audio files of formats Mp3, Wav, or Ogg.
- Provides security as the no files are stored on the server and the site is secured with a b SSL
- Speech to text converter within the site
Pricing
- $0.50 per minute after the free minute

Filmora Audio to Text Converter
Filmora - Audio to Text Converter
• Enables you to convert video speech to text in one click
• Extremely accurate in video speech recognition
• Cross-platform supported - (Windows, Mac, iOS, Android)
Transcribe Audio to Text Free Transcribe Audio to Text Free Transcribe Audio to Text Free Learn More >
5. Speechnotes
Speechnotes is a powerful online notepad that can easily convert audio to text. This tool has implemented an efficient and clean design that makes conversion and editing very easy.
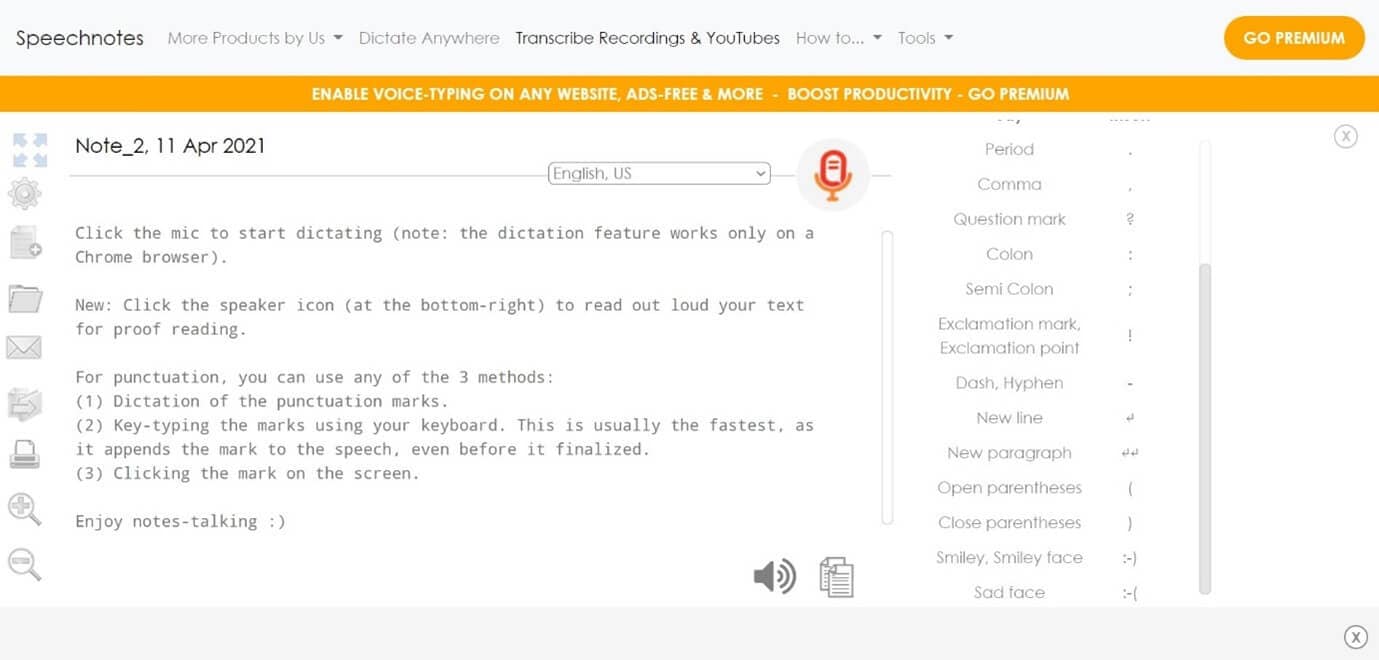
Features
- Best results with an advanced speech recognition technology
- Built-in tools that allow easy editing and correction of the converted text
- Fast working on any web browser and no installation apps required
- Autosave feature that ensures that your data is not lost
- Export to Google Drive option for easy accessibility from any device
Pricing
- Free
- Premium version with the addition of some extra features
6. SpeechTexter
SpeechTexter is a multilingual application that can help you transcribe any type of book, document, blog posts, etc. by using your audio. This tool has a custom dictionary that allows adding short commands for adding frequently used data like phone numbers, punctuation marks, addresses, etc.

Features
- Offers accuracy rate of 90 to 95% percent
- Can be used to increase your fluency in English
- Offers powerful real-time speech recognition
- Easy creation of emails, text notes, blog posts, etc.
- A custom dictionary that can be customized according to the individual use
- Supports more than 60 languages
- Available on both chrome browser and android
Pricing
- Free
7. Textfromtospeech.com
Textfromtospeech is a free online tool that allows you to easily convert audio to text without the need for registration downloading or installation. It has a very simple interface that can record and convert your speech into text with a single click.
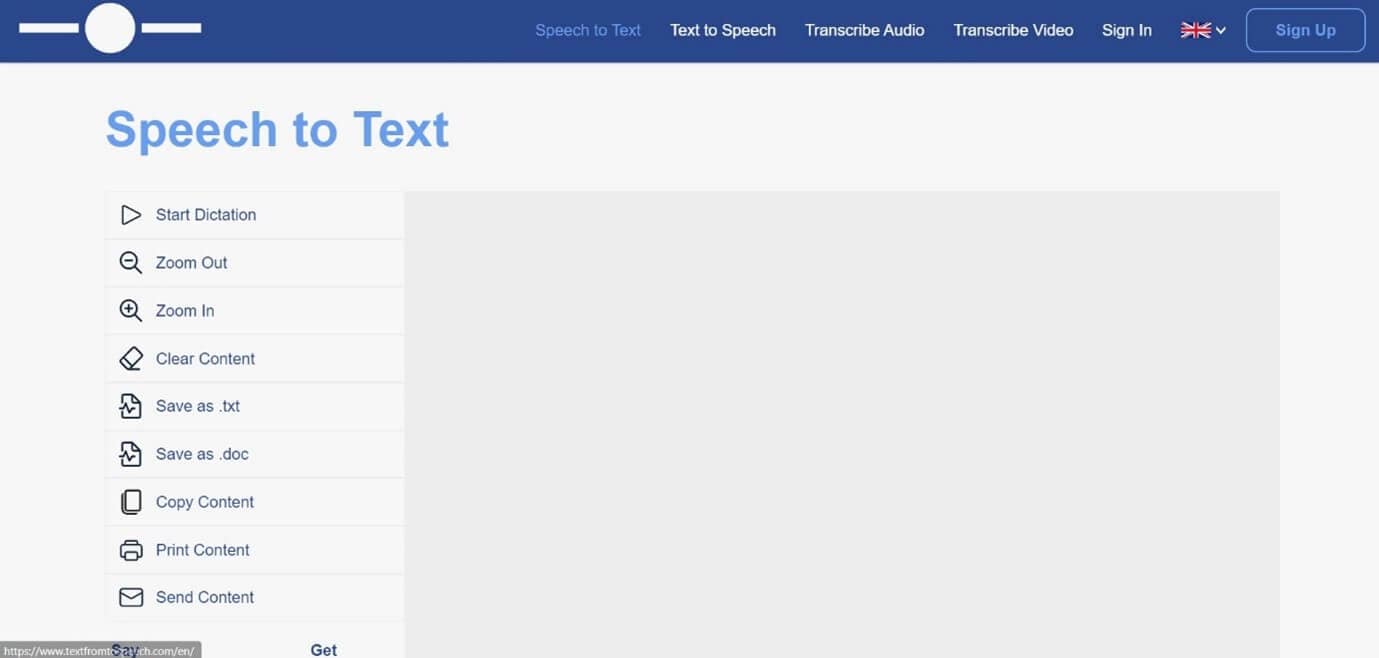
Features
- Free and online text recognition and transcription
- Supports many languages
- Pause and record option while converting large files
- Can use voice commands for insertion of symbols like “comma”, “full stop”, etc.
- Smart capitalization
- Easy saving, copying, and sharing of the dictated text
- Available on mobile devices, tablet, and computer
Pricing
- Free
![]()
A cross-platform for making videos anywhere for all creators

Why your video editing isn’t good enough? How about some creative inspo?
- 100 Million+ Users
- 150+ Countries and Regions
- 4 Million+ Social Media Followers
- 5 Million+ Stock Media for Use
* Secure Download

8. Dictation.io
Dictation is a free and simple tool that offers fast conversion of audio to text. Its interface is like that of a very simple notepad and allows the conversion of audio to text for a number of languages including English, Español, Français, Italiano, Português, and more.

Features
- Advanced speech recognition
- Easy editing within the notes
- Easy sharing to mail, tweets, etc.
- No storing of any data and hence offers the necessary security
Pricing
- Free
9. Voice Note
Voice Note is an online speech recognition tool that can automatically record and type anything including speech, interview, etc. This tool can convert any audio file into text format which can easily be opened in Microsoft Word.
Features
- No saving of data in any servers
- Customizable options for audio and text
- A number of languages to choose from while converting audio to text
- Easy copying and exporting options
- Direct Print option from the site
Price
- Free
10. Voice Notebook
Voice Notebook is a speech recognition app that can also convert audio files to text. This application is compatible with a wide range of devices like Mac, Windows, Linux OS, Android, and iOS.
Features
- Voice commands are available when you transcribe audio to text
- Has the ability to recognize any speech embedded in YouTube clips or HTML5 audio or video
- Simple interface and easy editing of text
- An option to download into TXT format is available
Price
- Free
11. NaturalReaders
Natural Readers is a professional program that can convert any text into spoken words. This program offers a lot of features like adjusting the speed of audio, conversion into mp3, selection of voice, etc.
Features
- A font option available for dyslexic people
- Supports formats like pdf, txt, docs, epub, ods, ppt, png, jpeg
- App versions of this online tool are available both for android and apple devices
Pricing
- Free
- Premium plan - $9.99 per month, $59.88 per year
- Plus plan - $19.00 per month, $110.00 per year
Filmora Audio to Text Converter
Filmora - Audio to Text Converter
• Enables you to convert video speech to text in one click
• Extremely accurate in video speech recognition
• Cross-platform supported - (Windows, Mac, iOS, Android)
Transcribe Audio to Text Free Transcribe Audio to Text Free Transcribe Audio to Text Free Learn More >
Conclusion
We have listed above the top 11 tools that can be used to convert audio to text on any device using a browser. Converting audio to text allows you to easily access the required information, edit it, or even share it fully or partially with anyone you wish,
The applications we have listed are free and some of them might charge for the extra features they provide. So no matter what your profession is if you are looking for an app to convert audio to text or record and produce the text of the recordings, choose any one of the listed above applications.
We hope our suggestions help you reduce effort and save time. Please leave your valuable feedback in the comment box below, thank you.
Transform Long Videos into Short Ones Instantly
Turn long videos into viral clips. Effortlessly transform lengthy videos into engaging, shareable clips.

Shanoon Cox
Shanoon Cox is a writer and a lover of all things video.
Follow @Shanoon Cox
Shanoon Cox
Mar 27, 2024• Proven solutions
An audio-to-text converter is a tool that can convert audio files to texts or even record any audio and produce the text of it simultaneously. Audio files are one of the most used methods of storing information. From online classes and long lectures to big business meetings and product information, audio is being shared a lot across the world.
But accessing information from a long audio file can be difficult and time-consuming, which is why there is a need to convert audio to text. Information in the form of text can easily be fully or partly accessed and edited whenever needed. And texts can also easily be shared with whomever you want.
So let’s have a look at some of the best audio-to-text converters that might be of use to you.
10+ Free Online Audio to Text Converters
There is number of audio text converters available in the online market that can help you while studying, researching, or even in your business. Some of these recorders can convert any audio file to texts while some others can record and convert to text at the same time. Here we will talk about the top 11 free applications that can be used to convert audio to text.
| 1 - Filmora | 2 - Audext | 3 - Sonix.ai |
|---|---|---|
| 4 - Virtualspeech.com | 5 - Speechnotes | 6 - SpeechTexter |
| 7 - Textfromtospeech.com | 8 - Dictation.io | 9 - Voice Note |
| 10 - Voice Notebook | 11 - NaturalReaders |
1. Wondershare Filmora
Filmora’s Speech To Text (STT) function allows you to transcript audio/voice to subtitles/text in one click. it can save your plenty of time on transcribing subtitles and boost your editing efficiency by applying speech-to-text.
What you need to do is download the software and subsribe for its plan.
Features
- Built-in function to transcribe subtitles and captions for your video
- High accuracy in generating text, allows you to edit text by yourself
- Supports up to 26 languages of transcription to engage more users all around the world
- Offers various tools for editing your videos and audio
2. Audext
Audext is a free online application that can help you to save a lot of time while transcribing any audio to text. The transcription to text is done with the use of an advanced AI and hence produces faster and more accurate results.
Audext is used by people from different sectors like education, marketing, media, consulting, healthcare, etc. for their work purposes.
Features
- An inbuilt editor for editing the text while transcribing
- Identifies the speaker easily
- Supports a variety of audio and video formats like MP3, WAV, MP4, etc.
- Offers an option of easy upload and export of files
Pricing
- Free
- Transcription costs for one hour are $12
- Or with the subscription $5
3. Sonix.ai
Sonix is a fast and accurate application that can be used to convert audio to text for any purpose. This application offers a 30-minute free transcription after which an affordable amount may be charged.
Features
- Automatic transcription of files and accessibility of these files from any device
- Advanced translation of these devices into 30 different languages
- Addition of subtitles into any video for easy understanding
- A Sonix media player that allows to share and publish files easily
Pricing
- Free
- Standard subscription - $10 per hour
- Premium subscription - $5 per hour, and an addition of $22 per month
4. Virtualspeech.com
Virtualspeech is an online tool that can transcribe audio to text free. It is a very simple application that allows fats conversion of audio files to texts. After conversion, the file will be emailed to the user from where it can be downloaded and saved.
Features
- Free conversion of any audio files under 1 minute.
- Conversion of audio files of formats Mp3, Wav, or Ogg.
- Provides security as the no files are stored on the server and the site is secured with a b SSL
- Speech to text converter within the site
Pricing
- $0.50 per minute after the free minute
Filmora Audio to Text Converter
Filmora - Audio to Text Converter
• Enables you to convert video speech to text in one click
• Extremely accurate in video speech recognition
• Cross-platform supported - (Windows, Mac, iOS, Android)
Transcribe Audio to Text Free Transcribe Audio to Text Free Transcribe Audio to Text Free Learn More >
5. Speechnotes
Speechnotes is a powerful online notepad that can easily convert audio to text. This tool has implemented an efficient and clean design that makes conversion and editing very easy.
Features
- Best results with an advanced speech recognition technology
- Built-in tools that allow easy editing and correction of the converted text
- Fast working on any web browser and no installation apps required
- Autosave feature that ensures that your data is not lost
- Export to Google Drive option for easy accessibility from any device
Pricing
- Free
- Premium version with the addition of some extra features
6. SpeechTexter
SpeechTexter is a multilingual application that can help you transcribe any type of book, document, blog posts, etc. by using your audio. This tool has a custom dictionary that allows adding short commands for adding frequently used data like phone numbers, punctuation marks, addresses, etc.
Features
- Offers accuracy rate of 90 to 95% percent
- Can be used to increase your fluency in English
- Offers powerful real-time speech recognition
- Easy creation of emails, text notes, blog posts, etc.
- A custom dictionary that can be customized according to the individual use
- Supports more than 60 languages
- Available on both chrome browser and android
Pricing
- Free
7. Textfromtospeech.com
Textfromtospeech is a free online tool that allows you to easily convert audio to text without the need for registration downloading or installation. It has a very simple interface that can record and convert your speech into text with a single click.
Features
- Free and online text recognition and transcription
- Supports many languages
- Pause and record option while converting large files
- Can use voice commands for insertion of symbols like “comma”, “full stop”, etc.
- Smart capitalization
- Easy saving, copying, and sharing of the dictated text
- Available on mobile devices, tablet, and computer
Pricing
- Free
![]()
A cross-platform for making videos anywhere for all creators
Why your video editing isn’t good enough? How about some creative inspo?
- 100 Million+ Users
- 150+ Countries and Regions
- 4 Million+ Social Media Followers
- 5 Million+ Stock Media for Use
* Secure Download
8. Dictation.io
Dictation is a free and simple tool that offers fast conversion of audio to text. Its interface is like that of a very simple notepad and allows the conversion of audio to text for a number of languages including English, Español, Français, Italiano, Português, and more.
Features
- Advanced speech recognition
- Easy editing within the notes
- Easy sharing to mail, tweets, etc.
- No storing of any data and hence offers the necessary security
Pricing
- Free
9. Voice Note
Voice Note is an online speech recognition tool that can automatically record and type anything including speech, interview, etc. This tool can convert any audio file into text format which can easily be opened in Microsoft Word.
Features
- No saving of data in any servers
- Customizable options for audio and text
- A number of languages to choose from while converting audio to text
- Easy copying and exporting options
- Direct Print option from the site
Price
- Free
10. Voice Notebook
Voice Notebook is a speech recognition app that can also convert audio files to text. This application is compatible with a wide range of devices like Mac, Windows, Linux OS, Android, and iOS.
Features
- Voice commands are available when you transcribe audio to text
- Has the ability to recognize any speech embedded in YouTube clips or HTML5 audio or video
- Simple interface and easy editing of text
- An option to download into TXT format is available
Price
- Free
11. NaturalReaders
Natural Readers is a professional program that can convert any text into spoken words. This program offers a lot of features like adjusting the speed of audio, conversion into mp3, selection of voice, etc.
Features
- A font option available for dyslexic people
- Supports formats like pdf, txt, docs, epub, ods, ppt, png, jpeg
- App versions of this online tool are available both for android and apple devices
Pricing
- Free
- Premium plan - $9.99 per month, $59.88 per year
- Plus plan - $19.00 per month, $110.00 per year
Filmora Audio to Text Converter
Filmora - Audio to Text Converter
• Enables you to convert video speech to text in one click
• Extremely accurate in video speech recognition
• Cross-platform supported - (Windows, Mac, iOS, Android)
Transcribe Audio to Text Free Transcribe Audio to Text Free Transcribe Audio to Text Free Learn More >
Conclusion
We have listed above the top 11 tools that can be used to convert audio to text on any device using a browser. Converting audio to text allows you to easily access the required information, edit it, or even share it fully or partially with anyone you wish,
The applications we have listed are free and some of them might charge for the extra features they provide. So no matter what your profession is if you are looking for an app to convert audio to text or record and produce the text of the recordings, choose any one of the listed above applications.
We hope our suggestions help you reduce effort and save time. Please leave your valuable feedback in the comment box below, thank you.
Transform Long Videos into Short Ones Instantly
Turn long videos into viral clips. Effortlessly transform lengthy videos into engaging, shareable clips.
Shanoon Cox
Shanoon Cox is a writer and a lover of all things video.
Follow @Shanoon Cox
Shanoon Cox
Mar 27, 2024• Proven solutions
An audio-to-text converter is a tool that can convert audio files to texts or even record any audio and produce the text of it simultaneously. Audio files are one of the most used methods of storing information. From online classes and long lectures to big business meetings and product information, audio is being shared a lot across the world.
But accessing information from a long audio file can be difficult and time-consuming, which is why there is a need to convert audio to text. Information in the form of text can easily be fully or partly accessed and edited whenever needed. And texts can also easily be shared with whomever you want.
So let’s have a look at some of the best audio-to-text converters that might be of use to you.
10+ Free Online Audio to Text Converters
There is number of audio text converters available in the online market that can help you while studying, researching, or even in your business. Some of these recorders can convert any audio file to texts while some others can record and convert to text at the same time. Here we will talk about the top 11 free applications that can be used to convert audio to text.
| 1 - Filmora | 2 - Audext | 3 - Sonix.ai |
|---|---|---|
| 4 - Virtualspeech.com | 5 - Speechnotes | 6 - SpeechTexter |
| 7 - Textfromtospeech.com | 8 - Dictation.io | 9 - Voice Note |
| 10 - Voice Notebook | 11 - NaturalReaders |
1. Wondershare Filmora
Filmora’s Speech To Text (STT) function allows you to transcript audio/voice to subtitles/text in one click. it can save your plenty of time on transcribing subtitles and boost your editing efficiency by applying speech-to-text.
What you need to do is download the software and subsribe for its plan.
Features
- Built-in function to transcribe subtitles and captions for your video
- High accuracy in generating text, allows you to edit text by yourself
- Supports up to 26 languages of transcription to engage more users all around the world
- Offers various tools for editing your videos and audio
2. Audext
Audext is a free online application that can help you to save a lot of time while transcribing any audio to text. The transcription to text is done with the use of an advanced AI and hence produces faster and more accurate results.
Audext is used by people from different sectors like education, marketing, media, consulting, healthcare, etc. for their work purposes.
Features
- An inbuilt editor for editing the text while transcribing
- Identifies the speaker easily
- Supports a variety of audio and video formats like MP3, WAV, MP4, etc.
- Offers an option of easy upload and export of files
Pricing
- Free
- Transcription costs for one hour are $12
- Or with the subscription $5
3. Sonix.ai
Sonix is a fast and accurate application that can be used to convert audio to text for any purpose. This application offers a 30-minute free transcription after which an affordable amount may be charged.
Features
- Automatic transcription of files and accessibility of these files from any device
- Advanced translation of these devices into 30 different languages
- Addition of subtitles into any video for easy understanding
- A Sonix media player that allows to share and publish files easily
Pricing
- Free
- Standard subscription - $10 per hour
- Premium subscription - $5 per hour, and an addition of $22 per month
4. Virtualspeech.com
Virtualspeech is an online tool that can transcribe audio to text free. It is a very simple application that allows fats conversion of audio files to texts. After conversion, the file will be emailed to the user from where it can be downloaded and saved.
Features
- Free conversion of any audio files under 1 minute.
- Conversion of audio files of formats Mp3, Wav, or Ogg.
- Provides security as the no files are stored on the server and the site is secured with a b SSL
- Speech to text converter within the site
Pricing
- $0.50 per minute after the free minute
Filmora Audio to Text Converter
Filmora - Audio to Text Converter
• Enables you to convert video speech to text in one click
• Extremely accurate in video speech recognition
• Cross-platform supported - (Windows, Mac, iOS, Android)
Transcribe Audio to Text Free Transcribe Audio to Text Free Transcribe Audio to Text Free Learn More >
5. Speechnotes
Speechnotes is a powerful online notepad that can easily convert audio to text. This tool has implemented an efficient and clean design that makes conversion and editing very easy.
Features
- Best results with an advanced speech recognition technology
- Built-in tools that allow easy editing and correction of the converted text
- Fast working on any web browser and no installation apps required
- Autosave feature that ensures that your data is not lost
- Export to Google Drive option for easy accessibility from any device
Pricing
- Free
- Premium version with the addition of some extra features
6. SpeechTexter
SpeechTexter is a multilingual application that can help you transcribe any type of book, document, blog posts, etc. by using your audio. This tool has a custom dictionary that allows adding short commands for adding frequently used data like phone numbers, punctuation marks, addresses, etc.
Features
- Offers accuracy rate of 90 to 95% percent
- Can be used to increase your fluency in English
- Offers powerful real-time speech recognition
- Easy creation of emails, text notes, blog posts, etc.
- A custom dictionary that can be customized according to the individual use
- Supports more than 60 languages
- Available on both chrome browser and android
Pricing
- Free
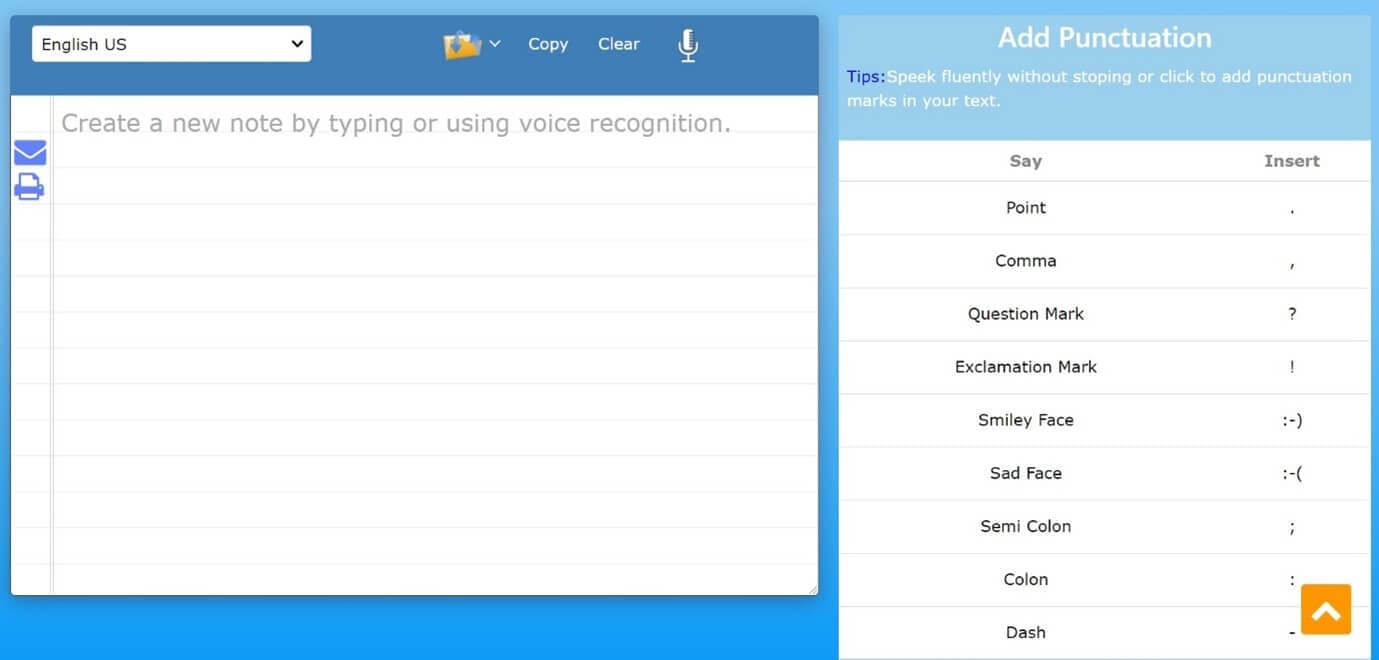
7. Textfromtospeech.com
Textfromtospeech is a free online tool that allows you to easily convert audio to text without the need for registration downloading or installation. It has a very simple interface that can record and convert your speech into text with a single click.
Features
- Free and online text recognition and transcription
- Supports many languages
- Pause and record option while converting large files
- Can use voice commands for insertion of symbols like “comma”, “full stop”, etc.
- Smart capitalization
- Easy saving, copying, and sharing of the dictated text
- Available on mobile devices, tablet, and computer
Pricing
- Free
![]()
A cross-platform for making videos anywhere for all creators
Why your video editing isn’t good enough? How about some creative inspo?
- 100 Million+ Users
- 150+ Countries and Regions
- 4 Million+ Social Media Followers
- 5 Million+ Stock Media for Use
* Secure Download
8. Dictation.io
Dictation is a free and simple tool that offers fast conversion of audio to text. Its interface is like that of a very simple notepad and allows the conversion of audio to text for a number of languages including English, Español, Français, Italiano, Português, and more.
Features
- Advanced speech recognition
- Easy editing within the notes
- Easy sharing to mail, tweets, etc.
- No storing of any data and hence offers the necessary security
Pricing
- Free
9. Voice Note
Voice Note is an online speech recognition tool that can automatically record and type anything including speech, interview, etc. This tool can convert any audio file into text format which can easily be opened in Microsoft Word.
Features
- No saving of data in any servers
- Customizable options for audio and text
- A number of languages to choose from while converting audio to text
- Easy copying and exporting options
- Direct Print option from the site
Price
- Free
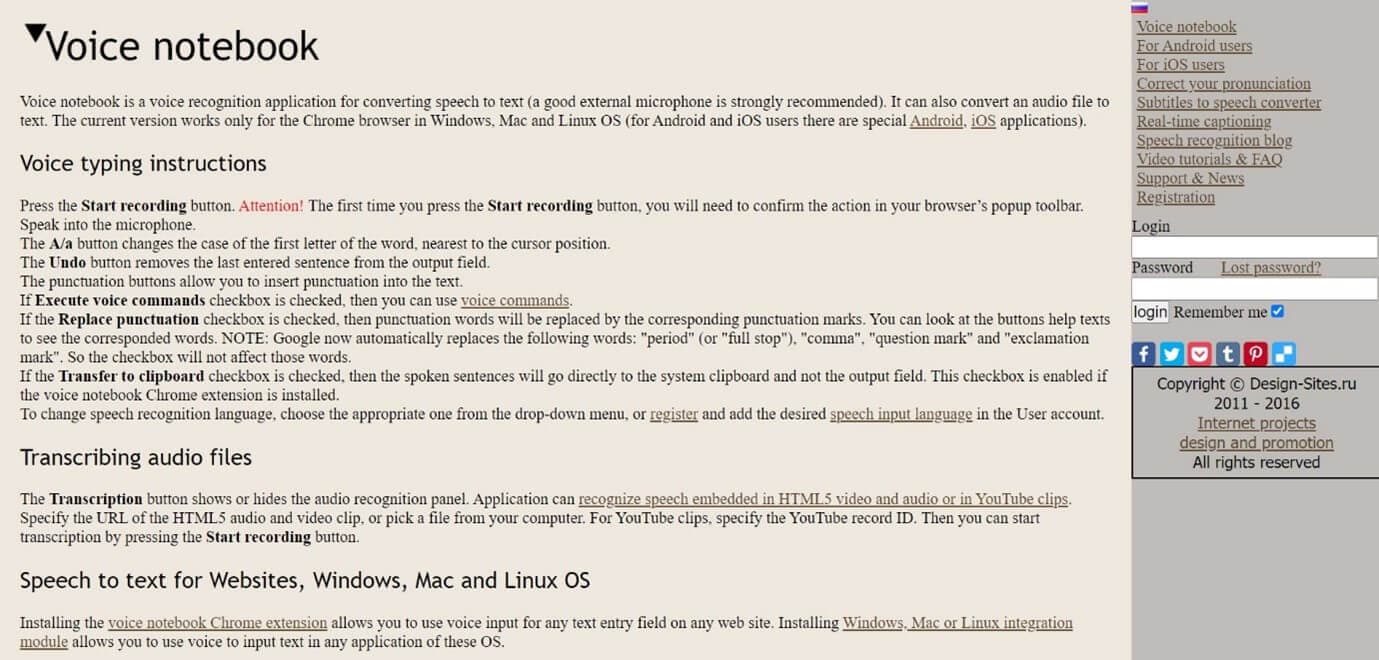
10. Voice Notebook
Voice Notebook is a speech recognition app that can also convert audio files to text. This application is compatible with a wide range of devices like Mac, Windows, Linux OS, Android, and iOS.
Features
- Voice commands are available when you transcribe audio to text
- Has the ability to recognize any speech embedded in YouTube clips or HTML5 audio or video
- Simple interface and easy editing of text
- An option to download into TXT format is available
Price
- Free
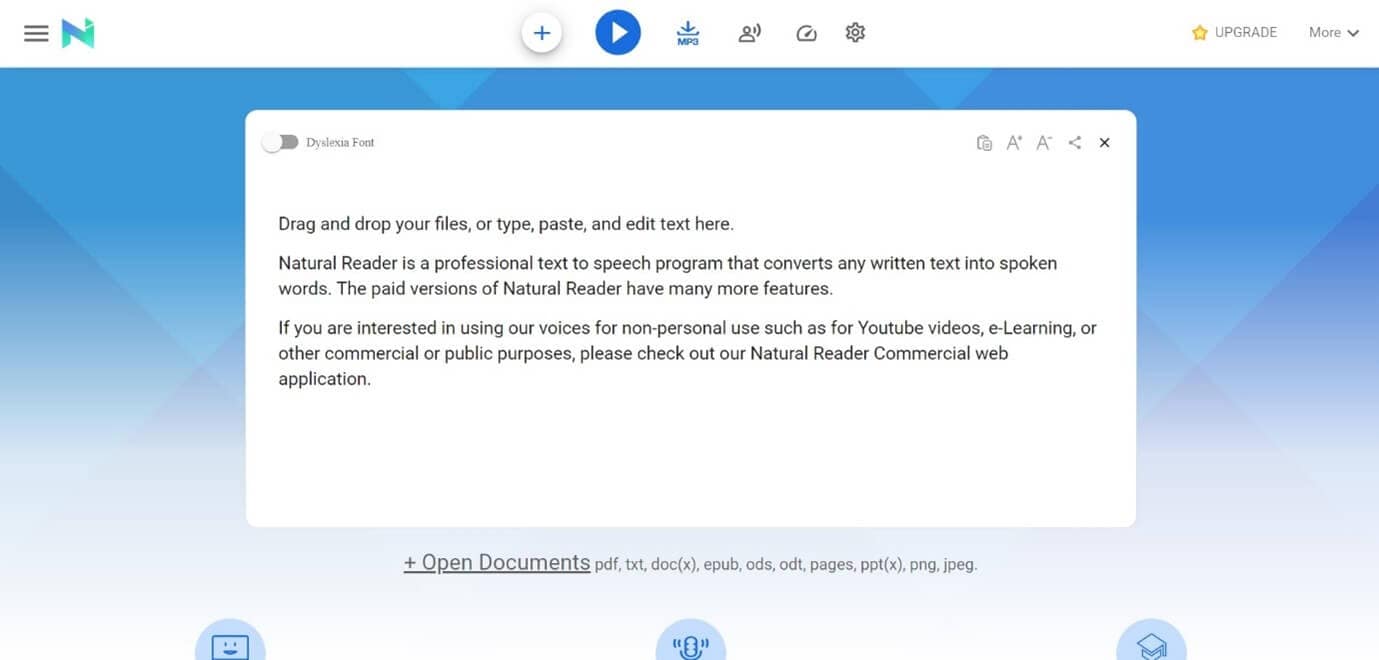
11. NaturalReaders
Natural Readers is a professional program that can convert any text into spoken words. This program offers a lot of features like adjusting the speed of audio, conversion into mp3, selection of voice, etc.
Features
- A font option available for dyslexic people
- Supports formats like pdf, txt, docs, epub, ods, ppt, png, jpeg
- App versions of this online tool are available both for android and apple devices
Pricing
- Free
- Premium plan - $9.99 per month, $59.88 per year
- Plus plan - $19.00 per month, $110.00 per year
Filmora Audio to Text Converter
Filmora - Audio to Text Converter
• Enables you to convert video speech to text in one click
• Extremely accurate in video speech recognition
• Cross-platform supported - (Windows, Mac, iOS, Android)
Transcribe Audio to Text Free Transcribe Audio to Text Free Transcribe Audio to Text Free Learn More >
Conclusion
We have listed above the top 11 tools that can be used to convert audio to text on any device using a browser. Converting audio to text allows you to easily access the required information, edit it, or even share it fully or partially with anyone you wish,
The applications we have listed are free and some of them might charge for the extra features they provide. So no matter what your profession is if you are looking for an app to convert audio to text or record and produce the text of the recordings, choose any one of the listed above applications.
We hope our suggestions help you reduce effort and save time. Please leave your valuable feedback in the comment box below, thank you.
Transform Long Videos into Short Ones Instantly
Turn long videos into viral clips. Effortlessly transform lengthy videos into engaging, shareable clips.
Shanoon Cox
Shanoon Cox is a writer and a lover of all things video.
Follow @Shanoon Cox
Stop Mobile Audio Dampening Feature in iOS Settings
Filmora Video Editor
An easy yet powerful editor
Numerous effects to choose from
Detailed tutorials provided by the official channel
During the audio edits, audio ducking plays a vital role. It enhances the audio quality of the soundtracks. This feature makes the track sound better and you can listen to the desired sounds clearly without any noise or external distractions. When this setting is not in use, then how to turn off audio ducking on iPhone.
It is high time to explore it and figure out the tips and tricks associated with this functionality. This article emphasizes this topic and gives you a better understanding to use this option precisely for desired outcomes. A third-party software customizes this ducking property accurately and helps you to use this feature optimally concerning the soundtracks. You can scroll down to enlighten with the audio ducking details and implement on desired audio tracks when required.

In this article
01 [The meaning of audio ducking iPhone](#Part 1)
02 [How to turn off audio ducking on iPhone?](#Part 2)
Part 1 The meaning of audio ducking iPhone
In the iPhone, the audio ducking feature helps to reduce the background music when it detects any voice signal. The audio ducking iPhone is available as an in-built function, it is enough if you turn on or off the toggle switch at its settings to avail for this functionality. The actual meaning of audio ducking is temporarily you are working on a specific audio signal and reduce it when other signals are playing. If you take any soundtracks, you will face scenarios like two audio signals playing at the same time.
For example, in movies, the speaker delivers the dialogue and at the same time, you will listen to some sort of background music accompanying the scene. In this situation, to enhance the clarity of the speaker’s audio signal, you can temporarily reduce the background signal using the ducking feature. There are attributes to assign the time duration for implementing this ducking property. Both the audio signals resume to their original volume when the set ducking period expires.

Part 2 How to turn off audio ducking on iPhone?
Here, you can turn off the audio ducking on your iPhone by following simple steps. Tapping the perfect clicks on your iPhone can disable the audio ducking feature in iPhone. Follow the below steps carefully and switch off this ducking option on your gadget.
Step 1: In your iPhone, hit the Settings icon then click ‘General -> Accessibility -> Voiceover -> Audio’.

In the Audio module, you will find the audio ducking option. Now, turn off this toggle switch to disable the audio ducking iPhone.
Step 2: In the Audio module, you will find the audio ducking option. Now, turn off this toggle switch to disable the audio ducking iPhone.

Follow up the above guidelines to disable the audio ducking feature in your iPhone. Tap the options accordingly to complete the process. The audio ducking property is disabled effortlessly in your iPhone by following the perfect clicks as discussed in the above chain.
Tips: Turn off audio ducking when editing videos
It is feasible to turn off audio ducking while editing the videos. It sounds interesting, there are options in the reliable video editors to modify the ducking features during the editing process. It is simple and yet effective too. You can bring awesome impacts on your audio signals by implementing the features on time and at the perfect duration on the audio files. In the below discussion, you will learn how to perform audio ducking with the Filmora video editor application on the Windows platform. You will also study accessing these features on your Android and iPhone gadgets using the Filmora program.
For PC: Audio ducking with Filmora
The Filmora is an incredible application that hails from Wondershare firm. It has fabulous in-built features that refine every detail on the media files. Convert your files with professional settings effortlessly in this mind-blowing space. Using this video editor, you can bring a positive impact on the videos and entertain the viewers to the core. Easy import and export of the media files add comforts to the editors. This program serves as a boon for video editor professionals. It provides maximum possibilities to personalize the media files as per your requirements.
The Filmora applications help to apply miraculous edits on the videos like frame freeze, Zoom, filter effects, and transitions. There are built-in templates to commence your edit feature flawlessly and they add flavors to the existing content. Even while creating new videos, you do not have to start them from scratch, it is enough if you import the templates available at this platform as per your needs.
Wondershare Filmora - Best Video Editor for Mac/Windows
5,481,435 people have downloaded it.
Expand your creativity using the color grading feature on your videos
Fadeaway specific audio tracks in your file with the Audio Ducking option
Enhance the video appearance with the help of the keyframe option
The green effect feature allows you to edit the backgrounds according to your needs
Filmora cuts out repetition so you can move on to your next creative breakthrough.
There are many features to go and you will feel astonished once you begin to work on this tool for media file edits. You can edit the videos and split the screens while conveying a story through your videos. Unleash your imagination and creative skills limitless using the Filmora app. This program permits you to work beyond your imagination.
The stepwise procedure to implement the audio ducking using the Filmora application
Step 1: Install the app and launch it
On the official website of Filmora, download the program and install it. Then, launch the app and press Media -> Import Media -> Import Media Files.
Step 2: Adjust the Audio
Drag and drop the audio file into the timeline and make a right-click on it. From the expanded menu, select the ‘Adjust Audio’ option. A new window pops up displaying the audio parameters.

Step 3: Select the desired volumes
Toggle on the slide bar and select the desired volumes as per your needs. Finally, save the changes by tapping the OK button.

The changes applied to the volume will become effective on the media file that is dragged into the timeline of Filmora.
The above steps help you to perform the audio ducking on the desired media file using the Filmora application. It is a simple tool with a user-friendly interface. You can work on it effortlessly and you need not require any technical skills to use this application.
For Phone (iOS & Android): Filmora
The Filmora is like the above-discussed program but this app is exclusively designed for Android and iPhones. It is a powerful tool that aids you to make innovative changes to your file. You can embed stunning video effects and export them to any social media platform like Instagram, Facebook directly from its platform precisely. It helps you to perform all sorts of video edits to refine the overall appearance of the media file. There are in-built filters, keyframe animation tools to trigger a wow feel in viewers.
Here, you can find a wide range of music recorder options that includes nearly 1000 types of music device rhythms that assist in professional recordings. Extract audio tracks from videos to improvise for betterment. This app provides ample resources to create Vlogs, Game Videos, and funny clippings. The built-in emojis and stickers offer the best customization option to the users.
Filmora is a handy program that embeds on your gadgets to edit your media files like a pro effortlessly without any technical knowledge. Few clicks are enough to acquire desired changes to the media files.

AI Portrait – The best feature of Wondershare Filmora for gameplay editing
The AI Portrait is a new add-on in Wondershare Filmora. It can easily remove video backgrounds without using a green screen or chroma key, allowing you to add borders, glitch effects, pixelated, noise, or segmentation video effects.

Conclusion
Thus, in this article, you had a better understanding of audio ducking iPhone. Surf the above discussion to learn about the in-built ducking options in your iPhone. The Filmora and Filmora are remarkable tools that aid in media file edits. Customize the videos and audio files optimally using these efficient programs. Connect with this tool to bring out mesmerizing changes to your media files. Choose Filmora and Filmora to create impressive media files for your requirements.
Wondershare Filmora
Get started easily with Filmora’s powerful performance, intuitive interface, and countless effects!
Try It Free Try It Free Try It Free Learn More about FIlmora>
During the audio edits, audio ducking plays a vital role. It enhances the audio quality of the soundtracks. This feature makes the track sound better and you can listen to the desired sounds clearly without any noise or external distractions. When this setting is not in use, then how to turn off audio ducking on iPhone.
It is high time to explore it and figure out the tips and tricks associated with this functionality. This article emphasizes this topic and gives you a better understanding to use this option precisely for desired outcomes. A third-party software customizes this ducking property accurately and helps you to use this feature optimally concerning the soundtracks. You can scroll down to enlighten with the audio ducking details and implement on desired audio tracks when required.
In this article
01 [The meaning of audio ducking iPhone](#Part 1)
02 [How to turn off audio ducking on iPhone?](#Part 2)
Part 1 The meaning of audio ducking iPhone
In the iPhone, the audio ducking feature helps to reduce the background music when it detects any voice signal. The audio ducking iPhone is available as an in-built function, it is enough if you turn on or off the toggle switch at its settings to avail for this functionality. The actual meaning of audio ducking is temporarily you are working on a specific audio signal and reduce it when other signals are playing. If you take any soundtracks, you will face scenarios like two audio signals playing at the same time.
For example, in movies, the speaker delivers the dialogue and at the same time, you will listen to some sort of background music accompanying the scene. In this situation, to enhance the clarity of the speaker’s audio signal, you can temporarily reduce the background signal using the ducking feature. There are attributes to assign the time duration for implementing this ducking property. Both the audio signals resume to their original volume when the set ducking period expires.
Part 2 How to turn off audio ducking on iPhone?
Here, you can turn off the audio ducking on your iPhone by following simple steps. Tapping the perfect clicks on your iPhone can disable the audio ducking feature in iPhone. Follow the below steps carefully and switch off this ducking option on your gadget.
Step 1: In your iPhone, hit the Settings icon then click ‘General -> Accessibility -> Voiceover -> Audio’.
In the Audio module, you will find the audio ducking option. Now, turn off this toggle switch to disable the audio ducking iPhone.
Step 2: In the Audio module, you will find the audio ducking option. Now, turn off this toggle switch to disable the audio ducking iPhone.
Follow up the above guidelines to disable the audio ducking feature in your iPhone. Tap the options accordingly to complete the process. The audio ducking property is disabled effortlessly in your iPhone by following the perfect clicks as discussed in the above chain.
Tips: Turn off audio ducking when editing videos
It is feasible to turn off audio ducking while editing the videos. It sounds interesting, there are options in the reliable video editors to modify the ducking features during the editing process. It is simple and yet effective too. You can bring awesome impacts on your audio signals by implementing the features on time and at the perfect duration on the audio files. In the below discussion, you will learn how to perform audio ducking with the Filmora video editor application on the Windows platform. You will also study accessing these features on your Android and iPhone gadgets using the Filmora program.
For PC: Audio ducking with Filmora
The Filmora is an incredible application that hails from Wondershare firm. It has fabulous in-built features that refine every detail on the media files. Convert your files with professional settings effortlessly in this mind-blowing space. Using this video editor, you can bring a positive impact on the videos and entertain the viewers to the core. Easy import and export of the media files add comforts to the editors. This program serves as a boon for video editor professionals. It provides maximum possibilities to personalize the media files as per your requirements.
The Filmora applications help to apply miraculous edits on the videos like frame freeze, Zoom, filter effects, and transitions. There are built-in templates to commence your edit feature flawlessly and they add flavors to the existing content. Even while creating new videos, you do not have to start them from scratch, it is enough if you import the templates available at this platform as per your needs.
Wondershare Filmora - Best Video Editor for Mac/Windows
5,481,435 people have downloaded it.
Expand your creativity using the color grading feature on your videos
Fadeaway specific audio tracks in your file with the Audio Ducking option
Enhance the video appearance with the help of the keyframe option
The green effect feature allows you to edit the backgrounds according to your needs
Filmora cuts out repetition so you can move on to your next creative breakthrough.
There are many features to go and you will feel astonished once you begin to work on this tool for media file edits. You can edit the videos and split the screens while conveying a story through your videos. Unleash your imagination and creative skills limitless using the Filmora app. This program permits you to work beyond your imagination.
The stepwise procedure to implement the audio ducking using the Filmora application
Step 1: Install the app and launch it
On the official website of Filmora, download the program and install it. Then, launch the app and press Media -> Import Media -> Import Media Files.
Step 2: Adjust the Audio
Drag and drop the audio file into the timeline and make a right-click on it. From the expanded menu, select the ‘Adjust Audio’ option. A new window pops up displaying the audio parameters.
Step 3: Select the desired volumes
Toggle on the slide bar and select the desired volumes as per your needs. Finally, save the changes by tapping the OK button.
The changes applied to the volume will become effective on the media file that is dragged into the timeline of Filmora.
The above steps help you to perform the audio ducking on the desired media file using the Filmora application. It is a simple tool with a user-friendly interface. You can work on it effortlessly and you need not require any technical skills to use this application.
For Phone (iOS & Android): Filmora
The Filmora is like the above-discussed program but this app is exclusively designed for Android and iPhones. It is a powerful tool that aids you to make innovative changes to your file. You can embed stunning video effects and export them to any social media platform like Instagram, Facebook directly from its platform precisely. It helps you to perform all sorts of video edits to refine the overall appearance of the media file. There are in-built filters, keyframe animation tools to trigger a wow feel in viewers.
Here, you can find a wide range of music recorder options that includes nearly 1000 types of music device rhythms that assist in professional recordings. Extract audio tracks from videos to improvise for betterment. This app provides ample resources to create Vlogs, Game Videos, and funny clippings. The built-in emojis and stickers offer the best customization option to the users.
Filmora is a handy program that embeds on your gadgets to edit your media files like a pro effortlessly without any technical knowledge. Few clicks are enough to acquire desired changes to the media files.
AI Portrait – The best feature of Wondershare Filmora for gameplay editing
The AI Portrait is a new add-on in Wondershare Filmora. It can easily remove video backgrounds without using a green screen or chroma key, allowing you to add borders, glitch effects, pixelated, noise, or segmentation video effects.
Conclusion
Thus, in this article, you had a better understanding of audio ducking iPhone. Surf the above discussion to learn about the in-built ducking options in your iPhone. The Filmora and Filmora are remarkable tools that aid in media file edits. Customize the videos and audio files optimally using these efficient programs. Connect with this tool to bring out mesmerizing changes to your media files. Choose Filmora and Filmora to create impressive media files for your requirements.
Wondershare Filmora
Get started easily with Filmora’s powerful performance, intuitive interface, and countless effects!
Try It Free Try It Free Try It Free Learn More about FIlmora>
Also read:
- New 2024 Approved Comprehensive Catalog of Podcast Indexing Services
- New In 2024, Best 6 Apps for Real-Time Voice Changing
- New In 2024, Transform Your Auditory Perception with Internet-Based Audio Modification Tools
- Pinpointing Audible Whistle Phenomena
- New In 2024, Gaming Voice Alteration Techniques Selecting the Optimal Solution
- New In 2024, Achieving Crystal-Cleared Voices Tools for Subtracting Unwanted Acoustics in Digital Recordings
- Sculpting the Silence An In-Depth Look at Modifying Audio Keyframes for Immersive Experiences in Final Cut Pro X
- Updated Discovering 8 Premium, Cost-Free Videogame Soundscape Highlights for 2024
- New Transform Your TikTok Experience Simple Ways to Reduce Video Noise Levels
- New In 2024, Best Pop Background Music List to Videos
- How to Change Pitch in Audacity? Without Losing Quality
- New Voice Transformation Powerhouses A Deep Dive Into 25 Leading Apps and Their Capabilities
- Updated Harmony Hunters Excellent iOS and Android Apps That Help Identify Tracks Effortlessly
- Updated In 2024, Auditory Balance Expert Tips on Achieving Even Audio Volume in Video Formats
- New In 2024, Top-Rated Audio Editing Software for macOS Identifying the Ultimate MP3 Trimmer
- New From Silence to Symphony Cutting-Edge Strategies for Extracting Audio From MP4s
- Updated In 2024, Unveiling 8 Crucial Video Game Auditory Elements - All Free
- Updated Premier Collection of Popular Mobile Alert Melodies for 2024
- Updated 2024 Approved Discover the Best Sound Recording Applications for PC Users (Top 10)
- New Voice Alteration Devices A Guide to Introductions, Assessments, and Substitutes for 2024
- Updated 2024 Approved The Definitive Guide to Chromebook-Compatible DAWs Ranked Top 8 for Professional Sound Engineers
- In 2024, In-Depth Process Changing the Narrative Voice of Your Visual Story
- Updated Premium Apps for Enhancing and Modifying Your Digital Vocal Presence
- Updated The Ultimate List of Cutting-Edge Anime Vocal Adaptors and Alterers for PCs & Phones
- 2024 Approved Pure Sound Protocols Methods to Minimize Distractions in Digital Videos
- Music-Infused Videos Made Easy A Guide to the Leading Apps and Websites for Audio Integration
- 2024 Approved Voicing the Future on a Budget The Free, High-Impact Online Platforms Leading the Change
- New In 2024, Premier Digital Aids to Refine and Clean Up Sounds
- New High-Fidelity Audio Tuning Prescriptions for Modern Devices for 2024
- 2024 Approved Master List of Reliable MP3-to-Text Conversion Software Options
- Updated The Comprehensive Analysis of the Cambridge Auditory Experience CXU Device
- Updated 2023 Compilation of Top Free Music Software Produce, Edit & Record with Zero Cost Windows and macOS for 2024
- New 2024 Approved Hunting for Genuine Creature Roar Ambience
- New Navigating the World of In-Game Voice Changing Software
- New Unlocking Sound Quality in Linux Tips and Applications for Flawless Recordings for 2024
- New The Filmmakers Voice How to Raise Your Pitch for Impact Using Filmora
- 2024 Approved Echoes of the Digital Age Leading TTS Platforms Unveiled
- Updated 2024 Approved Cutting Edge Techniques for Incorporating Smooth Audio Reduction
- New In 2024, Normalizing Volume in VLC A Step-by-Step Guide
- New In 2024, Innovative Approaches to Infusing Sound Into AVI Files Post-Update
- Updated 2024 Approved The Ultimate Ranking Best Mac Music Editor Applications
- Updated The Ultimate Guide to Premium Audio Voice-Reduction Apps & Online Services
- How to get the dragon scale and evolution-enabled pokemon On Oppo A78? | Dr.fone
- In 2024, List of Pokémon Go Joysticks On Apple iPhone SE (2022) | Dr.fone
- 3 Solutions to Find Your Realme C55 Current Location of a Mobile Number | Dr.fone
- In 2024, The Ultimate Guide to Get the Rare Candy on Pokemon Go Fire Red On Oppo Find N3 Flip | Dr.fone
- Updated Unleash Your Creativity 10+ Alternatives to Windows Movie Maker for 2024
- How To Transfer Data From Apple iPhone 14 To Other iPhone 11 devices? | Dr.fone
- What Pokémon Evolve with A Dawn Stone For Apple iPhone 12? | Dr.fone
- In 2024, How to Mirror Xiaomi Redmi 12 5G to Mac? | Dr.fone
- The Fastest Way to Trim AVI Files A Quick and Easy Guide for 2024
- New Get Splice Video Editing Software for Mac
- Updated 2024 Approved Are You Looking for Videoleap for MacBook, but Cant Seem to Find Any Solution? Here Is a Detailed Guide on How to Download and Install Videoleap for Mac
- Unlock Your iPhone 13 Pro Max in Minutes with ICCID Code Everything You Need to Know
- Guide to Mirror Your Nokia C300 to Other Android devices | Dr.fone
- How and Where to Find a Shiny Stone Pokémon For Apple iPhone 8? | Dr.fone
- 2024 Approved Final Cut Pro X Productivity Hacks Top 40 Keyboard Shortcuts
- 5 Ways to Transfer Music from Apple iPhone XR to Android | Dr.fone
- Updated In 2024, Top GoPro Video Editing Software Alternatives
- New 2024 Approved Get a Grip on Your Footage 3 Ways to Stabilize Video in AE
- New In 2024, Cut, Trim, and Split The Best Free Video Editors
- In 2024, How to Unlock Apple ID From your Apple iPhone 14 Pro Max without Security Questions?
- In 2024, Forgot iPhone Passcode Again? Unlock Apple iPhone 13 mini Without Passcode Now
- New 2024 Approved How to Edit Your GoPro Videos with Quik on Mac
- For People Wanting to Mock GPS on Honor Play 7T Devices | Dr.fone
- Title: New 2024 Approved Step-by-Step An Essential Tutorial on Editing Your First Podcast
- Author: Jacob
- Created at : 2024-05-05 04:06:00
- Updated at : 2024-05-06 04:06:00
- Link: https://audio-shaping.techidaily.com/new-2024-approved-step-by-step-an-essential-tutorial-on-editing-your-first-podcast/
- License: This work is licensed under CC BY-NC-SA 4.0.
