
:max_bytes(150000):strip_icc():format(webp)/sofya-NomETWcv2Fo-unsplash-be3fc2855a7e477db0273993fd22e822.jpg)
New 2024 Approved Innovations in Home Audio Engineering Analyzing the Best and Worst of the Top Digital Music Makers This Year
Innovations in Home Audio Engineering: Analyzing the Best and Worst of the Top Digital Music Makers This Year
FREE 10 Best Online Music Makers

Benjamin Arango
Apr 26, 2024• Proven solutions


Expressing ideas through music was never easy, and even today in the age of powerful digital audio stations like Ableton Live or FruityLoops , producing original music requires a certain set of skills. However, online content producers often need music for their videos, but they neither have the time or the budget to hire a professional musician to create a soundtrack for their project in studio conditions. If you are looking for a quick way to make your own music online, then you should keep reading, because in this article we are going to take you through the ten best online music makers you should check out in 2021.
10 Best Online Music Makers in 2021
The music-making platforms that are currently available online are still not as nearly as powerful as professional software products for music producers. Nonetheless, this doesn’t mean that you can’t use them to create the music you like or just have fun with them. Here are the ten best online music makers in 2019.
1. Typeatone
Price: Free
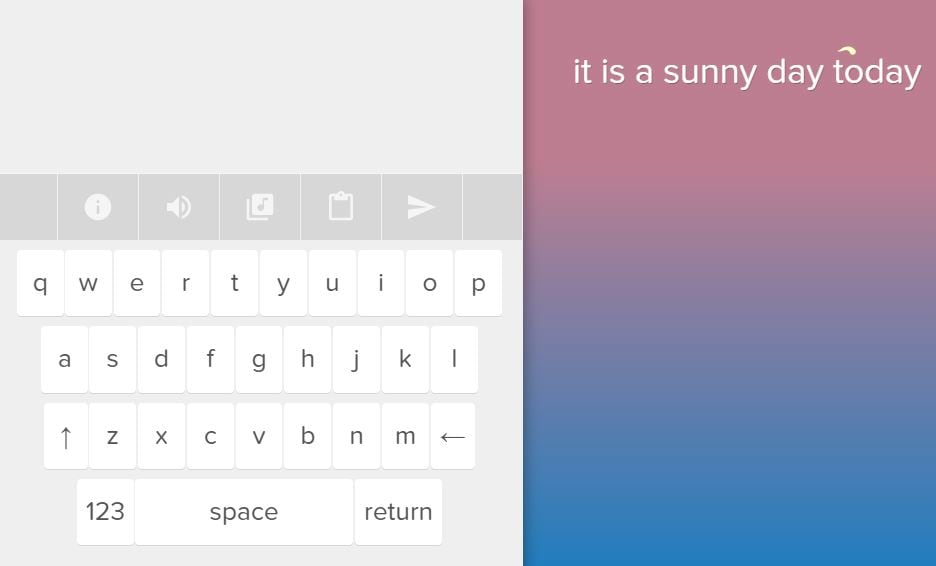
Image from Internet
Have you ever wondered what your words would sound like if they were turned into music? Head over to the Typeatone platform if you want to find out since all you have to do in order to start creating your own music is type in the text. As you type, the platform will automatically start playing your words and once you’re done, you’ll be able to hear your new song. You can also choose between different instruments to make the process of creating music with Typeatone even more entertaining. You can share all of your creations with your friends on social media.
![]()
A cross-platform for making videos anywhere for all creators

Why your video editing isn’t good enough? How about some creative inspo?
- 100 Million+ Users
- 150+ Countries and Regions
- 4 Million+ Social Media Followers
- 5 Million+ Stock Media for Use
* Secure Download

2. Audiotool
Price: Free
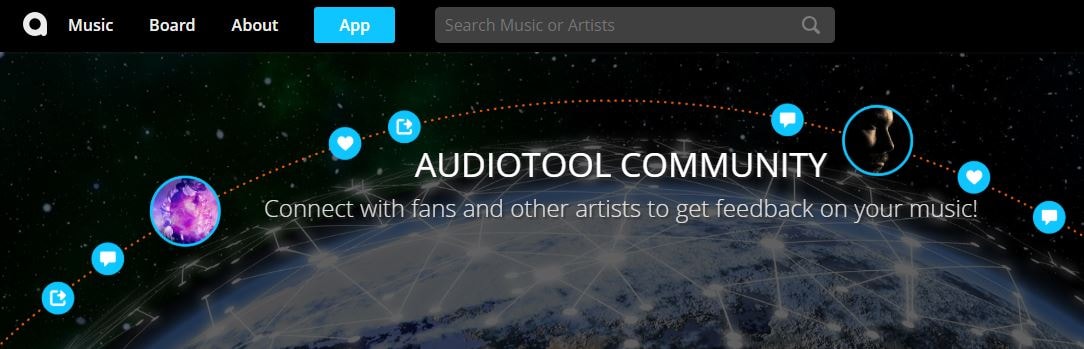
Image from Internet
Electronic music producers who often use synthesizers like Roland TB-303 or Roland TR-909 are going to love the features this online collaborative platform offers. Audiotool hosts a huge music library, you can explore even if you are not a registered user. In order to access the platform’s music studio, you first have to create an account and make sure that you are signed in. Audiotool is also a community of like-minded people where you can meet artists whose work you appreciate or hear what others think about your work. The only downside is that Audiotool’s abundance of features can be overwhelming for the newcomers to the world of electronic music production.
3. AudioSauna
Price: Free
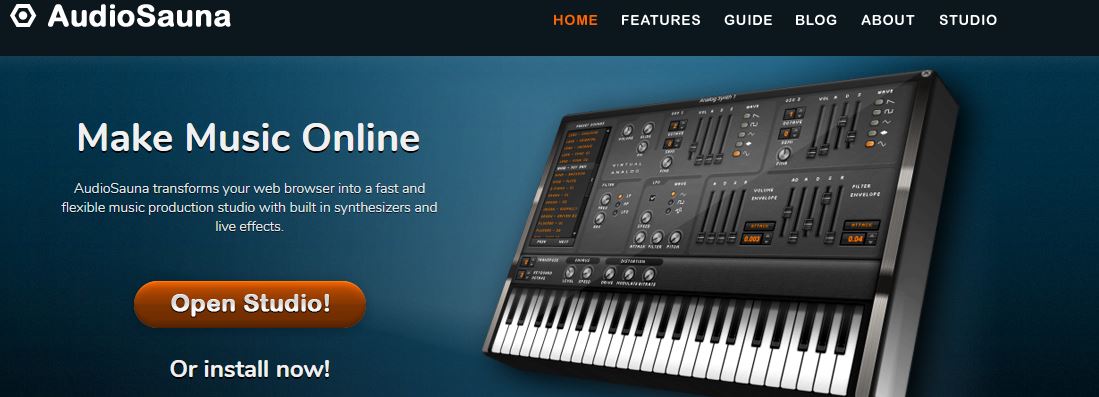
Image from Internet
AudioSauna seems to offer everything its users need to create inspiring music because it is equipped with frequency modulation synth, virtual analog synth and a sampler that provides layering features. Moreover, its intuitive interface makes the process of arranging the song structure or changing several note values simultaneously much easier. Creating an account on AudioSauna will enable to record all your projects and export them as audio files that can be uploaded to SoundCloud or any other audio distribution platform. AudioSauna is a perfect tool for skilled producers who want to create their music online.
4. Soundtrap
Price: Free trial available, subscription plans start at $3.99 per month

Image from Internet
Soundtrap offers a long list of features that enable professional musicians to create their music online. All you have to do is create an account and you will get access to the Sountrap’s studio that let you create new beat patterns, use a synthesizer or even invite friends to make music together. The platform also offers the possibility to connect your own instruments to the Soundtrap’s studio, so that you can record your music as you play it. This online platform also has an Education section where you can share your knowledge with others or learn valuable music lessons.
5. PatternSketch
Price: Free
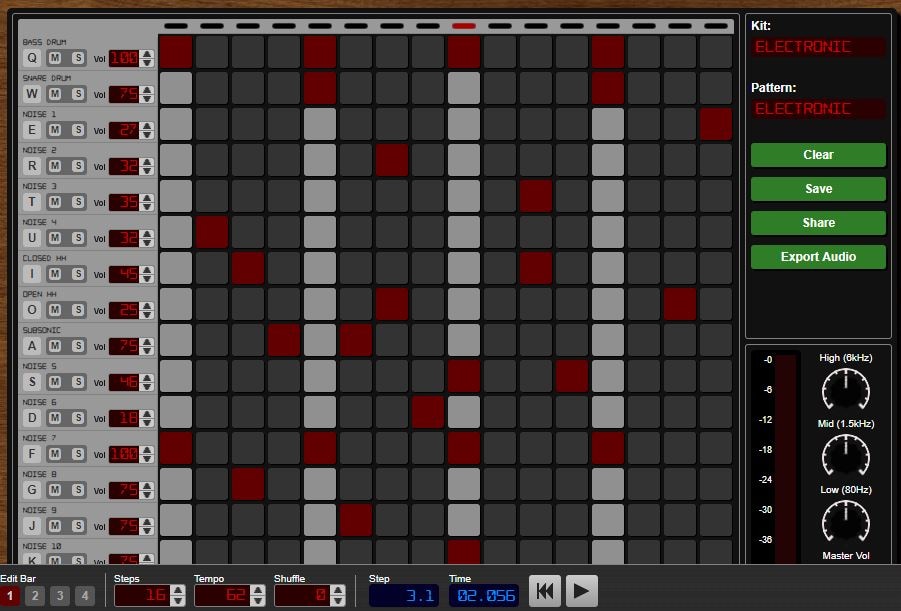
Image from Internet
This basic and yet effective drum machine can help you generate amazing beats for the songs you’re working on. Once you sign up, you will be able to choose from a number of different kits and patterns that are fully customizable or create your own original beats. After you create a pattern you like, you can save it with a single click or send it to your friends via email. Optionally, you can export all of your creations from PatternSketch and save them as wav, mp3 or ogg files, although in some cases mp3 audio files may not loop properly.
6. Soundation
Price: Free version available, pricing plans start at $1.99 per month

Image from Internet
If you choose to create music with the free version of Soundation, you’ll be able to work on up to ten projects, try out over 700 audio effects and loops, and export all your music in low quality. Purchasing the Intro pricing plan will enable you to work on an unlimited number of projects, make live audio recordings, import audio files smaller than 100MB or use an external midi controller. Moreover, opting for any of the annual or monthly subscription plans will allow you to export entire projects and audio files in high resolution from Soundation.
7. Text to Speech
Price: Free

online-music-maker-Text to Speech.jpg
Vocals are often overlooked in contemporary electronic music, but there are so many ways they can be used creatively. The platform lets you turn up to 50000 characters into speech at once, and it also offers several different voices you can choose from. Before you create an audio file you can determine how fast the text is going to be vocalized, so you should try different options and see which one fits your project the best. Text to Speech platform can be used during the process of creating a new song, but the tools it offers are not enough to make an entire song.
8. Looplabs
Price: Free
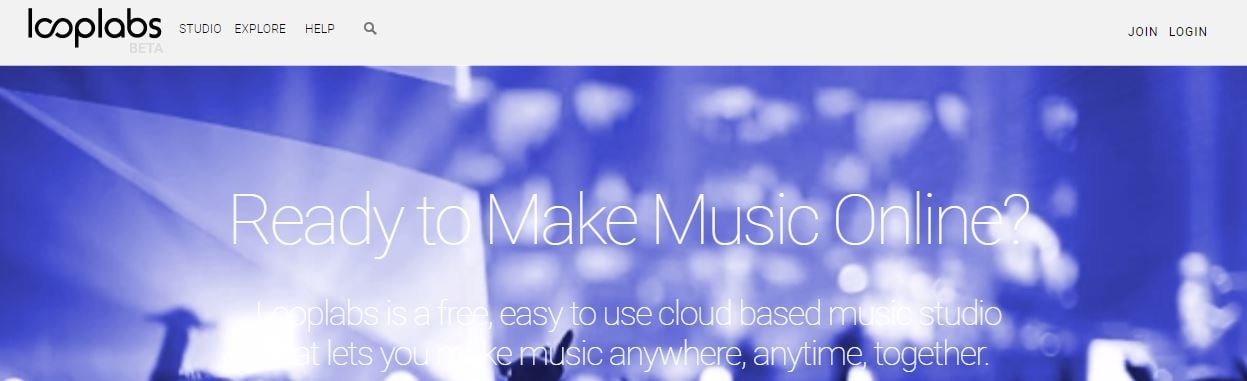
Music enthusiasts who would like to produce different genres of music online should definitely get familiar with Looplabs, as this online music maker lets its users remix songs or make music from scratch. Besides being one of the best places on the Internet to record music, Looplabs is also a community where you can meet people who like your music or discover artists whose work you admire. The Looplab’s studio features samples for a broad range of music genres and musical instruments, and you can use it to make Electro or Funk music equally effectively.
9. Online Sequencer
Price: Free
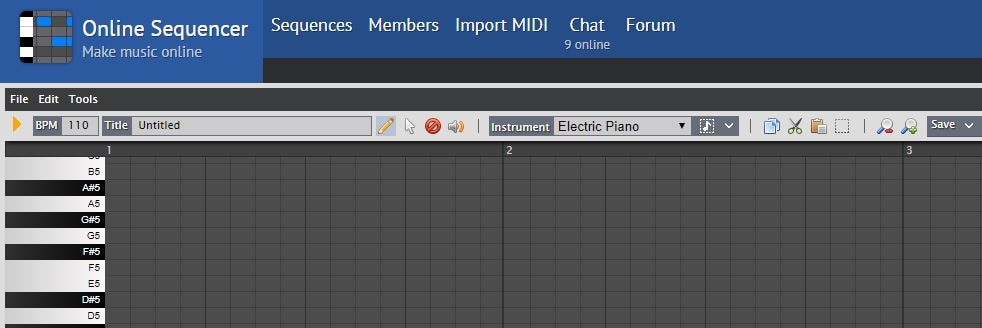
This is a perfect tool for developing an idea for a song, as you can create a sequence in just a few minutes. You can choose from Piano, Drums and Guitar categories of instruments or browse through a huge collection of fully customizable preset sequences that is updated on a daily basis. The platform also lets you import MIDI files and work on projects you’ve already started developing or you can export your sequences as MIDI files from the Online Sequencer and edit them with your DAW. Even though Online Sequencer is a useful tool for making music, the features it offers can’t really be compared with those on Soundation or AudioSauna.
10. Autochords
Price: Free
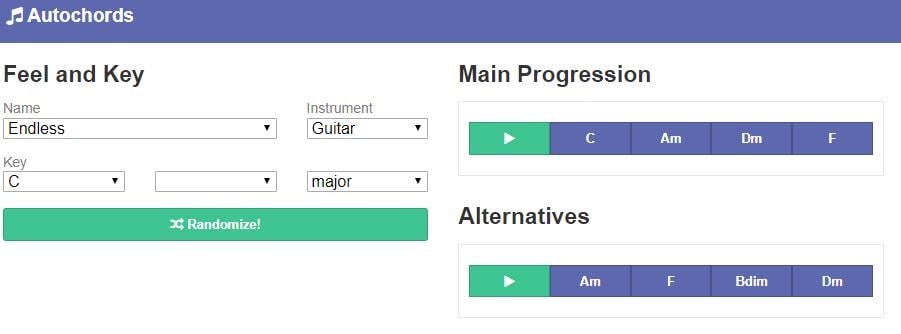
Finding new ideas for songs is often more difficult than it sounds, and if you ever face a creative block you should simply head over to Autochords. This platform suggests chord progressions based on the parameters you set, so you just have to select an instrument and the name of the song to set the feel, and the platform will show you the main progression and its alternatives. Rather than being an online music maker, Autochords is more a tool that helps piano and guitar players understand chord progressions better. iPhone and iPad users can download the Autochords app from the App Store for free.
Read More to Get : Best Free DAW for Windows and Mac for Beginners >>
Conclusion
You don’t have to be a professional musician in order to start making music online, you just have to love music, and an online music maker of your choice will take care of the rest. Do you use online music makers for entertainment or to express your creativity? Leave a comment below and share your opinions with us.
Benjamin Arango
Benjamin Arango is a writer and a lover of all things video.
Follow @Benjamin Arango
Benjamin Arango
Apr 26, 2024• Proven solutions
Expressing ideas through music was never easy, and even today in the age of powerful digital audio stations like Ableton Live or FruityLoops , producing original music requires a certain set of skills. However, online content producers often need music for their videos, but they neither have the time or the budget to hire a professional musician to create a soundtrack for their project in studio conditions. If you are looking for a quick way to make your own music online, then you should keep reading, because in this article we are going to take you through the ten best online music makers you should check out in 2021.
10 Best Online Music Makers in 2021
The music-making platforms that are currently available online are still not as nearly as powerful as professional software products for music producers. Nonetheless, this doesn’t mean that you can’t use them to create the music you like or just have fun with them. Here are the ten best online music makers in 2019.
1. Typeatone
Price: Free
Image from Internet
Have you ever wondered what your words would sound like if they were turned into music? Head over to the Typeatone platform if you want to find out since all you have to do in order to start creating your own music is type in the text. As you type, the platform will automatically start playing your words and once you’re done, you’ll be able to hear your new song. You can also choose between different instruments to make the process of creating music with Typeatone even more entertaining. You can share all of your creations with your friends on social media.
![]()
A cross-platform for making videos anywhere for all creators
Why your video editing isn’t good enough? How about some creative inspo?
- 100 Million+ Users
- 150+ Countries and Regions
- 4 Million+ Social Media Followers
- 5 Million+ Stock Media for Use
* Secure Download
2. Audiotool
Price: Free
Image from Internet
Electronic music producers who often use synthesizers like Roland TB-303 or Roland TR-909 are going to love the features this online collaborative platform offers. Audiotool hosts a huge music library, you can explore even if you are not a registered user. In order to access the platform’s music studio, you first have to create an account and make sure that you are signed in. Audiotool is also a community of like-minded people where you can meet artists whose work you appreciate or hear what others think about your work. The only downside is that Audiotool’s abundance of features can be overwhelming for the newcomers to the world of electronic music production.
3. AudioSauna
Price: Free
Image from Internet
AudioSauna seems to offer everything its users need to create inspiring music because it is equipped with frequency modulation synth, virtual analog synth and a sampler that provides layering features. Moreover, its intuitive interface makes the process of arranging the song structure or changing several note values simultaneously much easier. Creating an account on AudioSauna will enable to record all your projects and export them as audio files that can be uploaded to SoundCloud or any other audio distribution platform. AudioSauna is a perfect tool for skilled producers who want to create their music online.
4. Soundtrap
Price: Free trial available, subscription plans start at $3.99 per month
Image from Internet
Soundtrap offers a long list of features that enable professional musicians to create their music online. All you have to do is create an account and you will get access to the Sountrap’s studio that let you create new beat patterns, use a synthesizer or even invite friends to make music together. The platform also offers the possibility to connect your own instruments to the Soundtrap’s studio, so that you can record your music as you play it. This online platform also has an Education section where you can share your knowledge with others or learn valuable music lessons.
5. PatternSketch
Price: Free
Image from Internet
This basic and yet effective drum machine can help you generate amazing beats for the songs you’re working on. Once you sign up, you will be able to choose from a number of different kits and patterns that are fully customizable or create your own original beats. After you create a pattern you like, you can save it with a single click or send it to your friends via email. Optionally, you can export all of your creations from PatternSketch and save them as wav, mp3 or ogg files, although in some cases mp3 audio files may not loop properly.
6. Soundation
Price: Free version available, pricing plans start at $1.99 per month
Image from Internet
If you choose to create music with the free version of Soundation, you’ll be able to work on up to ten projects, try out over 700 audio effects and loops, and export all your music in low quality. Purchasing the Intro pricing plan will enable you to work on an unlimited number of projects, make live audio recordings, import audio files smaller than 100MB or use an external midi controller. Moreover, opting for any of the annual or monthly subscription plans will allow you to export entire projects and audio files in high resolution from Soundation.
7. Text to Speech
Price: Free

online-music-maker-Text to Speech.jpg
Vocals are often overlooked in contemporary electronic music, but there are so many ways they can be used creatively. The platform lets you turn up to 50000 characters into speech at once, and it also offers several different voices you can choose from. Before you create an audio file you can determine how fast the text is going to be vocalized, so you should try different options and see which one fits your project the best. Text to Speech platform can be used during the process of creating a new song, but the tools it offers are not enough to make an entire song.
8. Looplabs
Price: Free
Music enthusiasts who would like to produce different genres of music online should definitely get familiar with Looplabs, as this online music maker lets its users remix songs or make music from scratch. Besides being one of the best places on the Internet to record music, Looplabs is also a community where you can meet people who like your music or discover artists whose work you admire. The Looplab’s studio features samples for a broad range of music genres and musical instruments, and you can use it to make Electro or Funk music equally effectively.
9. Online Sequencer
Price: Free
This is a perfect tool for developing an idea for a song, as you can create a sequence in just a few minutes. You can choose from Piano, Drums and Guitar categories of instruments or browse through a huge collection of fully customizable preset sequences that is updated on a daily basis. The platform also lets you import MIDI files and work on projects you’ve already started developing or you can export your sequences as MIDI files from the Online Sequencer and edit them with your DAW. Even though Online Sequencer is a useful tool for making music, the features it offers can’t really be compared with those on Soundation or AudioSauna.
10. Autochords
Price: Free
Finding new ideas for songs is often more difficult than it sounds, and if you ever face a creative block you should simply head over to Autochords. This platform suggests chord progressions based on the parameters you set, so you just have to select an instrument and the name of the song to set the feel, and the platform will show you the main progression and its alternatives. Rather than being an online music maker, Autochords is more a tool that helps piano and guitar players understand chord progressions better. iPhone and iPad users can download the Autochords app from the App Store for free.
Read More to Get : Best Free DAW for Windows and Mac for Beginners >>
Conclusion
You don’t have to be a professional musician in order to start making music online, you just have to love music, and an online music maker of your choice will take care of the rest. Do you use online music makers for entertainment or to express your creativity? Leave a comment below and share your opinions with us.
Benjamin Arango
Benjamin Arango is a writer and a lover of all things video.
Follow @Benjamin Arango
Quick Guide to Disabling Zoom Microphones on PC/Mac and iOS Devices
Zoom Meeting is a beneficial application, and video conferencing is on another level because of this app. Zoom offers high-quality audio and video. With this conferencing app, cross-platform messaging is also possible, and you can also schedule your meeting calendar with Zoom.
Many offices conduct formal meetings through Zoom. During the pandemic era, online classes were taken through Zoom. Sometimes, you wish to mute the mic and sit back. What bothers you is that you don’t know how to mute audio in zoom. If this is your case, then stay with us. We are about to discuss how you can mute zoom audio.
In this article
01 How to Mute Zoom Audio on Windows and Mac
02 How to Mute Zoom Audio on iPhone and Android
03 Tips To Optimize Zoom Audio Settings for Better Performance
04 Frequently Asked Questions about Zoom
Part 1. How to Mute Zoom Audio on Windows and Mac
Imagine you are having a meeting on Zoom, and there are a lot of people in the meeting. You are trying to do some office work, but their voices disturb you. You cannot even leave the meeting. What are you going to do now? Are you going to submit average quality work?
One thing that you can do is to mute audio on Zoom. The question is, do you know how to mute the microphone on zoom? Let us share the steps that will help you to mute Zoom audio on your Windows or Mac.
Step 1: First of all, open the desktop Zoom app and start a call. Then, for the options to appear on the screen, you need to move the cursor.
Step 2: To mute any participant, bring the cursor over their name. The options will appear. You can click on the blue ‘Mute’ button to mute them. Or else, you can open a pop-up menu by right-clicking on the participants’ names. There, select the option of ‘Mute Audio.’ You can unmute them in the same way.

Step 3: If you are the meeting host, you can manage all participants at once. For that, look at the bottom toolbar hit the ‘Manage Participants’ tab. Zoom meeting will display the total count of the participants in a sidebar on the screen. Along with the participants’ names, a microphone and video icon will also appear.

Step 5: If you are the meeting host, then you can mute individual participants. You have to bring the cursor over the microphone icon. A ‘Mute’ and ‘Unmute’ buttons will show up.

Step 6: Being the host, you can ‘Mute All’ and ‘Unmute All’ participants at once by clicking on these buttons at the bottom. A pop-up will appear on the screen, don’t forget to check the box. With this, the participants can unmute themselves.
Step 7: Also, the participants receive a message if the host is muting or unmuting everyone. To complete the process and apply the changes, hit the ‘Continue’ button.

Part 2. How to Mute Zoom Audio on iPhone and Android
Zoom meeting is compatible with Windows, Mac, Android, and also iPhone. You don’t need to always join zoom meetings with your computer. Sometimes, you join zoom with your mobile. In any case, you might need to mute zoom audio. Sadly, you don’t know how to mute Zoom audio. Let us share an easy step-by-step guideline to do this on both Android and iPhone.
Step 1: If you want to mute the sound of your mobile device, then in the top left corner, tap on the volume button. You will see ‘X’ appears over the speaker icon. You can tap on it again to play the sound.

Step 2: Being the host, you can manage participants. For that, look at the bottom and click on the ‘Participants’ tab. A pop-up will appear on your screen, and you can individually mute participants. For this, you need to hit the microphone icon visible next to the participants’ names. You can easily reverse this and unmute it by tapping on the microphone icon again. You can also manage the settings by clicking on the participant’s name.

Step 3: The host has the authority to Mute all participants at once. For this, the host needs to tap on the ‘Mute All’ button from the bottom. The host needs to check the box. This will allow the participants to unmute themselves.

Step 4: Lastly, once you are done and satisfied with everything, hit the ‘Close’ option. This will close the participants’ window.
Part 3. Tips To Optimize Zoom Audio Settings for Better Performance
Although Zoom meeting is itself an amazing app with so many different features, among those features, one is that Zoom has high-quality video and audio. Besides everything, you can still improve Zoom Audio’s performance by following the tips that are shared below.
· Reduce Background Noise
Your audio performance is instantly improved if you reduce background noise. Any disturbing noise in the background falls under this category. It can be the fan, air conditioning, ticking clocks, etc. You should move away from the noise.
· Use High-Quality Microphone
For better audio performance, use a high-quality microphone for your Zoom meetings. This factor is the most important factor when it comes to improving audio. Investing in a decent and good external microphone is never a bad option.
· Stable Internet Connection
With a weak internet connection, your voice breaks. If you want to have improved Zoom audio performance, then make sure that you have a stable internet connection. Distortion and disturbance cause problems while communicating.
· Distance from Microphone
You must sit at an average distance from your microphone. Sitting too close will sound like you are shouting. Whereas sitting too far, your voice is quieter, and background noise sounds loud. So, measure the appropriate distance from the microphone.
Part 4. Frequently Asked Questions about Zoom
1. Can you mute Zoom audio without muting the computer?
Yes, you can mute zoom without muting your computer. For Windows, look at the bottom right corner. Right-click on the speaker/volume icon. A pop-up menu will appear; from there, select ‘Open Volume Mixer.’ When Volume Mixer appears on the screen, turn down and mute the volume for Zoom Meetings.
In case you are a Mac user, then let us tell you what to do. During the Zoom call, click on the Zoom Meetings Control for Audio. Then select the option of ‘Audio Settings.’ From the audio setting panel, you can turn down the volume for the ‘Speaker.’ This lowers the volume for Zoom meetings and can even mute it.
2. How can I improve my zoom video quality?
Various ways could be adopted to improve the video quality for Zoom meetings. For instance, you can use the ‘Touch up my Appearance’ feature. Or else, you can enable HD, apply Studio Effects, enable Zoom’s Low Light Adjustment setting, etc.
3. How do I change the resolution of a video Zoom?
For changing the resolution of Zoom video, firstly open Zoom on either your mobile or computer. Then, head over to the ‘Settings’ section. There, you need to select ‘Video Quality’ settings. Lastly, check the box with HD. This will enable the HD option, and your device will stream high-quality videos.
4. How do you set a virtual background on Zoom without a green screen?
For setting a virtual background on Zoom, you firstly need to sign in to your account. After that, you should open the ‘Settings’ by clicking on your profile picture. From settings, select ‘Virtual Background.’ Now, you can add the image that you want as your virtual background. You can even upload any image and video by hitting the ‘+’ sign.
5. Where do you get zoom backgrounds?
Zoom website offers a variety of cool virtual backgrounds. You can easily download them and use them. In comparison, there is another site that offers free backgrounds. You can also download virtual background images from Unsplash and use them easily.
Final Thoughts
Now are days, Zoom Meeting is being widely used. This article will surely increase your knowledge regarding Zoom Audio. We have shared the steps for both computer and mobile for Zoom mute microphone. We also shared tips that will help you improve the Zoom audio performance.
02 How to Mute Zoom Audio on iPhone and Android
03 Tips To Optimize Zoom Audio Settings for Better Performance
04 Frequently Asked Questions about Zoom
Part 1. How to Mute Zoom Audio on Windows and Mac
Imagine you are having a meeting on Zoom, and there are a lot of people in the meeting. You are trying to do some office work, but their voices disturb you. You cannot even leave the meeting. What are you going to do now? Are you going to submit average quality work?
One thing that you can do is to mute audio on Zoom. The question is, do you know how to mute the microphone on zoom? Let us share the steps that will help you to mute Zoom audio on your Windows or Mac.
Step 1: First of all, open the desktop Zoom app and start a call. Then, for the options to appear on the screen, you need to move the cursor.
Step 2: To mute any participant, bring the cursor over their name. The options will appear. You can click on the blue ‘Mute’ button to mute them. Or else, you can open a pop-up menu by right-clicking on the participants’ names. There, select the option of ‘Mute Audio.’ You can unmute them in the same way.
Step 3: If you are the meeting host, you can manage all participants at once. For that, look at the bottom toolbar hit the ‘Manage Participants’ tab. Zoom meeting will display the total count of the participants in a sidebar on the screen. Along with the participants’ names, a microphone and video icon will also appear.
Step 5: If you are the meeting host, then you can mute individual participants. You have to bring the cursor over the microphone icon. A ‘Mute’ and ‘Unmute’ buttons will show up.
Step 6: Being the host, you can ‘Mute All’ and ‘Unmute All’ participants at once by clicking on these buttons at the bottom. A pop-up will appear on the screen, don’t forget to check the box. With this, the participants can unmute themselves.
Step 7: Also, the participants receive a message if the host is muting or unmuting everyone. To complete the process and apply the changes, hit the ‘Continue’ button.
Part 2. How to Mute Zoom Audio on iPhone and Android
Zoom meeting is compatible with Windows, Mac, Android, and also iPhone. You don’t need to always join zoom meetings with your computer. Sometimes, you join zoom with your mobile. In any case, you might need to mute zoom audio. Sadly, you don’t know how to mute Zoom audio. Let us share an easy step-by-step guideline to do this on both Android and iPhone.
Step 1: If you want to mute the sound of your mobile device, then in the top left corner, tap on the volume button. You will see ‘X’ appears over the speaker icon. You can tap on it again to play the sound.
Step 2: Being the host, you can manage participants. For that, look at the bottom and click on the ‘Participants’ tab. A pop-up will appear on your screen, and you can individually mute participants. For this, you need to hit the microphone icon visible next to the participants’ names. You can easily reverse this and unmute it by tapping on the microphone icon again. You can also manage the settings by clicking on the participant’s name.
Step 3: The host has the authority to Mute all participants at once. For this, the host needs to tap on the ‘Mute All’ button from the bottom. The host needs to check the box. This will allow the participants to unmute themselves.
Step 4: Lastly, once you are done and satisfied with everything, hit the ‘Close’ option. This will close the participants’ window.
Part 3. Tips To Optimize Zoom Audio Settings for Better Performance
Although Zoom meeting is itself an amazing app with so many different features, among those features, one is that Zoom has high-quality video and audio. Besides everything, you can still improve Zoom Audio’s performance by following the tips that are shared below.
· Reduce Background Noise
Your audio performance is instantly improved if you reduce background noise. Any disturbing noise in the background falls under this category. It can be the fan, air conditioning, ticking clocks, etc. You should move away from the noise.
· Use High-Quality Microphone
For better audio performance, use a high-quality microphone for your Zoom meetings. This factor is the most important factor when it comes to improving audio. Investing in a decent and good external microphone is never a bad option.
· Stable Internet Connection
With a weak internet connection, your voice breaks. If you want to have improved Zoom audio performance, then make sure that you have a stable internet connection. Distortion and disturbance cause problems while communicating.
· Distance from Microphone
You must sit at an average distance from your microphone. Sitting too close will sound like you are shouting. Whereas sitting too far, your voice is quieter, and background noise sounds loud. So, measure the appropriate distance from the microphone.
Part 4. Frequently Asked Questions about Zoom
1. Can you mute Zoom audio without muting the computer?
Yes, you can mute zoom without muting your computer. For Windows, look at the bottom right corner. Right-click on the speaker/volume icon. A pop-up menu will appear; from there, select ‘Open Volume Mixer.’ When Volume Mixer appears on the screen, turn down and mute the volume for Zoom Meetings.
In case you are a Mac user, then let us tell you what to do. During the Zoom call, click on the Zoom Meetings Control for Audio. Then select the option of ‘Audio Settings.’ From the audio setting panel, you can turn down the volume for the ‘Speaker.’ This lowers the volume for Zoom meetings and can even mute it.
2. How can I improve my zoom video quality?
Various ways could be adopted to improve the video quality for Zoom meetings. For instance, you can use the ‘Touch up my Appearance’ feature. Or else, you can enable HD, apply Studio Effects, enable Zoom’s Low Light Adjustment setting, etc.
3. How do I change the resolution of a video Zoom?
For changing the resolution of Zoom video, firstly open Zoom on either your mobile or computer. Then, head over to the ‘Settings’ section. There, you need to select ‘Video Quality’ settings. Lastly, check the box with HD. This will enable the HD option, and your device will stream high-quality videos.
4. How do you set a virtual background on Zoom without a green screen?
For setting a virtual background on Zoom, you firstly need to sign in to your account. After that, you should open the ‘Settings’ by clicking on your profile picture. From settings, select ‘Virtual Background.’ Now, you can add the image that you want as your virtual background. You can even upload any image and video by hitting the ‘+’ sign.
5. Where do you get zoom backgrounds?
Zoom website offers a variety of cool virtual backgrounds. You can easily download them and use them. In comparison, there is another site that offers free backgrounds. You can also download virtual background images from Unsplash and use them easily.
Final Thoughts
Now are days, Zoom Meeting is being widely used. This article will surely increase your knowledge regarding Zoom Audio. We have shared the steps for both computer and mobile for Zoom mute microphone. We also shared tips that will help you improve the Zoom audio performance.
Syncopation Techniques: Matching Music with Film Footage
Whether you are making a casual video for sharing with friends or making something much more complex for uploading on social media, all videos are not complete without the right music. While you can easily find the right song and music, you may get confused when you want to put music behind video that you may want to upload on social media. Thus, we are here with a complete detailed guide on how to put music over a video. To help you in easily learning how to put music behind a video, we have given multiple methods down below. This includes methods that need a computer, methods to put music on video online, methods on how to put music on Kinemaster, and much more.
In this article
01 [How to Put Music Over a Video?](#Part 1)
Part 1 How to Put Music Over a Video?
#1) Put Music on Video with Filmora
If you are interested in learning how to put music on my video, then Filmora should be your first pick. This is due to the reason that it is one of the easiest to use video editors out there. And despite its basic user interface which is quite easy to use, it still offers a wide range of features and options.

You can find things like basic trim, cut, merge, and other tools along with advanced features like video effects, motion tracking, keyframing, audio processing, and much more making it the perfect video editor for computers. And since it has so many effects and options, you can also find the option to put music over a video inside Filmora. You can also learn how do you put music over a video using Filmora as given here:
Wondershare Filmora
Get started easily with Filmora’s powerful performance, intuitive interface, and countless effects!
Try It Free Try It Free Try It Free Learn More about Filmora>

● First, click on the Import option using the Media Library panel.
● Here, you have to browse, find, and select the music file that you wish to add to your video.
● Once you have selected the right music file, it will be added to the Media Library in Filmora after which you can drag the media file from the Media Library to the timeline audio tracks.
● In case you do not have your own music files, then you can also go to the Filmora media audio library which offers more than 50 free to use music tracks.
● After you have added music of your choice using your preferred method, you can double click on the audio track to adjust its volume, pitch, keyframes, and many other advanced settings.
● At last, export the video in your desired settings to apply music over your video files using Filmora.
#2) Put Music over Video with iMovie

Just as you can probably guess by its name, iMovie is a video editor made by Apple which is available on almost all of its devices. This means that you can have a similar editing experience on your iPhone, iPad, iMac, and more. While this software is not ideal for any kind of advanced and large scale video editing projects, it is certainly more than enough for adding music to video files. Despite lacking video effects or other advanced features, you do get basic options like trimming, cutting, cropping, adding music, adding text, and other basic yet important features. Hence, if you want to learn how can I put music over a video on any of your Apple devices for completely free, then you can go through these steps and instructions:
● Since iMovie is available for both mobile devices and computers, we will be first taking a look at adding music on mobile devices and then on computers.
● On your Apple mobile device, you need to press the Add Media button on the iMovie timeline where you need to select Audio and browse from the display list.
● You can then tap on the Add icon next to the music track that you want to add to your videos.
● Finally, move the music track under your video and trip it to your desired length before saving your video in a desired video format along with the music track under it.
#3) Put Music under video with Premiere Pro

When compared with other video editors out there, Premiere Pro by Adobe is used for all kinds of large scale products including Hollywood movies and TV shows. This is due to the reason that Adobe Premiere offers every possible feature that you can ever want in a video editor. Even though Adobe Premiere Pro is not free to use, it is still a great option for many users who want to edit videos more than just adding music files. Whether it is advanced video effects, plugins support, automated editing, extensive media support, color grading options, VFX support, compatibility with other Adobe tools, sound design, or anything else, Adobe Premiere Pro offers it all. As a result, if you want to use Premiere Pro for adding music to video files, then it can be done quite easily as described here:
● Even though the user interface of Adobe Premiere Pro can be a little intimidating, adding music in it is still quite easy.
● To start, go to the Media Browser in Adobe Premiere Pro to find and browse your desired music tracks.
● You can then right click on a music track and select Import to get the music track in the media library.
● Finally, you can open the Media Library and drag this music track onto your timeline where it can be moved under any video of your choice.
● If you want, you can select the music track and go to the Effects Control window to change the volume levels, pitch, keyframes, and apply all other kinds of music effects before saving your video with music under it.
#4) How to Put Music Over Video Online?

In case you just want to add music to video files without using or applying any more effects, then you don’t need to install any programs on your computer. Instead, you can use one of the various online video editors for putting music over videos. Such video editors are completely free and do not use your computer’s processor which makes them great for entry level computers which cannot run heavy video editing programs. Most of these online video editors are also quite easy to use with basic and simple user interfaces making them great for beginners. You can also put music over videos online using such video editors by going through this step by step guide:
● First, open the Audio to Video Tool by Online Converter in any web browser of your choice.
● Now, choose the video file and the audio file that you want to combine together into a single media file.
● You can also change settings like the position of the audio, its volume level, mute the video file, and many others.
● Once all settings are changed to your preferences, you can click on Add to save the video with music added to it.
#5) How to Put Music in Kinemaster?

While all the various video editor apps given above are great for easily adding music to videos, all of them require you to have a computer for using them. Unfortunately, not everyone has a computer which means that using the methods stated earlier might not be feasible. Thankfully, you can still put music on video files using your smartphone. This is made possible thanks to various video editors available for mobile devices out there. One such great video editor option that you can use on your mobile device is Kinemaster. Not only can it be used for adding music, but you can also use multiple video effects, add video layers, add text and images, use an inbuilt media library, and so much more. And if you just want to add music to videos, then you can use Kinemaster as given in these steps:
● Since Kinemasater is made for mobile devices, its user interface is quite simple and easy to use.
● You can simply click on the Audio button to import any music file that you want to add to your video.
● Finally, adjust the music track to any position of your choice by long pressing on it and save the video with music added to it.
Conclusion
There might be many cases where you would want to add music or a specific song to a video that you want to share with others. By adding such music to your videos, you can make much better videos quite easily. Once you have added music, sharing the video with your friends and on social media will be a much better experience. However, since you will need a video editor to add music, most of you will not know how to put music in your videos. Therefore, if you want to know how do I put music over a video, you can go through all the different methods given above. You can easily go through all these methods to easily learn how to music under a video for making much better videos for social media. You can also leave your thoughts and questions on how do you put music to a video in the comments section down below.
Part 1 How to Put Music Over a Video?
#1) Put Music on Video with Filmora
If you are interested in learning how to put music on my video, then Filmora should be your first pick. This is due to the reason that it is one of the easiest to use video editors out there. And despite its basic user interface which is quite easy to use, it still offers a wide range of features and options.
You can find things like basic trim, cut, merge, and other tools along with advanced features like video effects, motion tracking, keyframing, audio processing, and much more making it the perfect video editor for computers. And since it has so many effects and options, you can also find the option to put music over a video inside Filmora. You can also learn how do you put music over a video using Filmora as given here:
Wondershare Filmora
Get started easily with Filmora’s powerful performance, intuitive interface, and countless effects!
Try It Free Try It Free Try It Free Learn More about Filmora>
● First, click on the Import option using the Media Library panel.
● Here, you have to browse, find, and select the music file that you wish to add to your video.
● Once you have selected the right music file, it will be added to the Media Library in Filmora after which you can drag the media file from the Media Library to the timeline audio tracks.
● In case you do not have your own music files, then you can also go to the Filmora media audio library which offers more than 50 free to use music tracks.
● After you have added music of your choice using your preferred method, you can double click on the audio track to adjust its volume, pitch, keyframes, and many other advanced settings.
● At last, export the video in your desired settings to apply music over your video files using Filmora.
#2) Put Music over Video with iMovie
Just as you can probably guess by its name, iMovie is a video editor made by Apple which is available on almost all of its devices. This means that you can have a similar editing experience on your iPhone, iPad, iMac, and more. While this software is not ideal for any kind of advanced and large scale video editing projects, it is certainly more than enough for adding music to video files. Despite lacking video effects or other advanced features, you do get basic options like trimming, cutting, cropping, adding music, adding text, and other basic yet important features. Hence, if you want to learn how can I put music over a video on any of your Apple devices for completely free, then you can go through these steps and instructions:
● Since iMovie is available for both mobile devices and computers, we will be first taking a look at adding music on mobile devices and then on computers.
● On your Apple mobile device, you need to press the Add Media button on the iMovie timeline where you need to select Audio and browse from the display list.
● You can then tap on the Add icon next to the music track that you want to add to your videos.
● Finally, move the music track under your video and trip it to your desired length before saving your video in a desired video format along with the music track under it.
#3) Put Music under video with Premiere Pro
When compared with other video editors out there, Premiere Pro by Adobe is used for all kinds of large scale products including Hollywood movies and TV shows. This is due to the reason that Adobe Premiere offers every possible feature that you can ever want in a video editor. Even though Adobe Premiere Pro is not free to use, it is still a great option for many users who want to edit videos more than just adding music files. Whether it is advanced video effects, plugins support, automated editing, extensive media support, color grading options, VFX support, compatibility with other Adobe tools, sound design, or anything else, Adobe Premiere Pro offers it all. As a result, if you want to use Premiere Pro for adding music to video files, then it can be done quite easily as described here:
● Even though the user interface of Adobe Premiere Pro can be a little intimidating, adding music in it is still quite easy.
● To start, go to the Media Browser in Adobe Premiere Pro to find and browse your desired music tracks.
● You can then right click on a music track and select Import to get the music track in the media library.
● Finally, you can open the Media Library and drag this music track onto your timeline where it can be moved under any video of your choice.
● If you want, you can select the music track and go to the Effects Control window to change the volume levels, pitch, keyframes, and apply all other kinds of music effects before saving your video with music under it.
#4) How to Put Music Over Video Online?
In case you just want to add music to video files without using or applying any more effects, then you don’t need to install any programs on your computer. Instead, you can use one of the various online video editors for putting music over videos. Such video editors are completely free and do not use your computer’s processor which makes them great for entry level computers which cannot run heavy video editing programs. Most of these online video editors are also quite easy to use with basic and simple user interfaces making them great for beginners. You can also put music over videos online using such video editors by going through this step by step guide:
● First, open the Audio to Video Tool by Online Converter in any web browser of your choice.
● Now, choose the video file and the audio file that you want to combine together into a single media file.
● You can also change settings like the position of the audio, its volume level, mute the video file, and many others.
● Once all settings are changed to your preferences, you can click on Add to save the video with music added to it.
#5) How to Put Music in Kinemaster?
While all the various video editor apps given above are great for easily adding music to videos, all of them require you to have a computer for using them. Unfortunately, not everyone has a computer which means that using the methods stated earlier might not be feasible. Thankfully, you can still put music on video files using your smartphone. This is made possible thanks to various video editors available for mobile devices out there. One such great video editor option that you can use on your mobile device is Kinemaster. Not only can it be used for adding music, but you can also use multiple video effects, add video layers, add text and images, use an inbuilt media library, and so much more. And if you just want to add music to videos, then you can use Kinemaster as given in these steps:
● Since Kinemasater is made for mobile devices, its user interface is quite simple and easy to use.
● You can simply click on the Audio button to import any music file that you want to add to your video.
● Finally, adjust the music track to any position of your choice by long pressing on it and save the video with music added to it.
Conclusion
There might be many cases where you would want to add music or a specific song to a video that you want to share with others. By adding such music to your videos, you can make much better videos quite easily. Once you have added music, sharing the video with your friends and on social media will be a much better experience. However, since you will need a video editor to add music, most of you will not know how to put music in your videos. Therefore, if you want to know how do I put music over a video, you can go through all the different methods given above. You can easily go through all these methods to easily learn how to music under a video for making much better videos for social media. You can also leave your thoughts and questions on how do you put music to a video in the comments section down below.
Also read:
- New Ultimate Guide to Premium Feminine Vocalization Web Tools, Update for 2024
- 2024 Approved Audio-Free Filming Tips for Cleaner iPhone Videos
- New Hear It Here First Effective Techniques for Capturing and Storing Computer-Based Audio Files in Episodic Format for 2024
- Innovations and Leaders in Audio-Video Disassociation A Top 10 Software List
- In 2024, The 10 Leading Free Online DAW Platforms You Must Check Out
- Exploring the Best Online Hubs for Free BGM Music Downloads
- Updated Step-by-Step Guide to Audio Keyframing with Adobe Premiere Pro on Apple Devices, 2023 Edition
- Audio-Visual Fusion Excellence Discovering the Best Mixers S Industry Leaders
- Updated Exploring the Most Trending Audio Recording Software for Streaming for 2024
- In 2024, Elevate Sound Integrity with Preventative Noise Suppression Tactics
- Updated 2024 Approved Best Budget-Friendly MP3 Mesh Merger Software 2023S Guide
- In 2024, 5 Top-Ranked Social Media Series for Crafting Effective Marketing Tactics
- The Sound Detectives Handbook Extracting Silence From Video Files in iOS/OS X Systems for 2024
- Best Mac-Compatible Soundboard Options A Five-Pack Review for 2024
- New 2024 Approved Amp Up Your Practice with FREE Guitar Visuals & Melodies Archive
- New In 2024, Reimagining Auditory Experiences with These Industry Standards
- Updated 2024 Approved Superior Mac System for Fusion of Vehicle Soundscape
- New 2024 Approved Acclaimed Virtual Equipment for Isolating Pure Sound
- Updated In 2024, The Filmorians Guide to Eloquent Volume Dynamics Using Keyframe Editing on macOS
- Updated 2024 Approved Discovering the Leading Mac Audio Mixers - A Complete Assessment
- New 8 Best DAW Software for Mac Fully Review
- New Mastering the Art of Audio Replacement A Comprehensive Guide to Video Dubbing with Wondershare Filmora
- New 2024 Approved Perfecting Audio Transitions in Live Streaming The OBS Guide to Equalizing Sounds
- New In 2024, The Quintessential Free MP3 Amplitude Adjusters Guide
- New 2024 Approved Top 10 Mobile Tools for Mastering Melodies IOS Vs. Android Edition
- Identifying Kits with Intense Grumble Implementations for 2024
- The A-List Articulation Assistants Comprehensive Device Features, How-To Guides & Voice Alternatives for Celebrity Singers
- New In 2024, User-Friendly Harmony Dissector for Novice Singers & Virtuosos
- New 2024 Approved Mute Magic Top 5 Ways to Erase Sound From Web Videos
- Updated Top AVI Video Trimming Software for Windows, MAC, Android, iPhone, and Online for 2024
- In 2024, Best 3 Infinix Hot 40 Emulator for Mac to Run Your Wanted Android Apps | Dr.fone
- All Must-Knows to Use Fake GPS GO Location Spoofer On Infinix Smart 8 Plus | Dr.fone
- In 2024, How to Screen Mirroring Nokia 150 (2023)? | Dr.fone
- New 2024 Approved Make Stunning Videos Microsoft Video Editor Tips and Tricks for Windows
- How To Transfer Data From Apple iPhone 6 Plus To Other iPhone 14 Pro Max devices? | Dr.fone
- In 2024, How Can We Bypass Nokia G310 FRP?
- In 2024, Detailed Steps to Add Border to Video Using Premiere Pro
- Updated The Ultimate Mac Slideshow Creator A Beginners Guide for 2024
- How to get back lost photos from Vivo .
- How to Turn Off Google Location to Stop Tracking You on Vivo V27e | Dr.fone
- New 2024 Approved Reframing Your Content The Impact of Aspect Ratio on Video Style
- In 2024, Here Are Some Reliable Ways to Get Pokemon Go Friend Codes For Motorola G54 5G | Dr.fone
- In 2024, Complete Review & Guide to Techeligible FRP Bypass and More For Infinix Hot 30i
- In 2024, Bypass iCloud Activation Lock with IMEI Code On Apple iPhone SE (2022)
- The Top 20 Motion Graphics Companies & Studios
- How to Mirror Your Samsung Galaxy A23 5G Screen to PC with Chromecast | Dr.fone
- In 2024, How to Cast HTC U23 Pro to Computer for iPhone and Android? | Dr.fone
- How to Cast Meizu 21 Screen to PC Using WiFi | Dr.fone
- In 2024, Mobile Reaction Video Studios Top iOS and Android Apps
- Forgot Pattern Lock? Heres How You Can Unlock Nokia C32 Pattern Lock Screen
- In 2024, What You Want To Know About Two-Factor Authentication for iCloud On your Apple iPhone 6 Plus
- Title: New 2024 Approved Innovations in Home Audio Engineering Analyzing the Best and Worst of the Top Digital Music Makers This Year
- Author: Jacob
- Created at : 2024-05-05 03:58:18
- Updated at : 2024-05-06 03:58:18
- Link: https://audio-shaping.techidaily.com/new-2024-approved-innovations-in-home-audio-engineering-analyzing-the-best-and-worst-of-the-top-digital-music-makers-this-year/
- License: This work is licensed under CC BY-NC-SA 4.0.
