
:max_bytes(150000):strip_icc():format(webp)/mothersday_NataliaCampbell_Getty-5a4baef6c7822d00371e56cd.jpg)
In 2024, The Ultimate Guide to Preventing Phasing Issues in Studio Monitoring
The Ultimate Guide to Preventing Phasing Issues in Studio Monitoring
You just finished recording your content and everything seems fine. But when you start editing, you notice echo in your audio with reverberations. This can be so annoying and you will have to publish your content before you remove echo from audio. There are several ways to do this. Some prefer audition echo removal while others are familiar with audacity remove echo tactics. You may also remove echo in Premiere Pro and achieve quality results. This will remove the echo sound in your audio and help achieve better sound clarity. In this article, we explore how you can remove echo from audio using these three main methods and achieve the best results.
AI Vocal Remover A cross-platform for facilitating your video editing process by offering valuable benefits!
Free Download Free Download Learn More

Part 1. How to Remove Echo from Audio in Audacity : A Step-by-Step Guide
Echo in your audio can occur for many reasons. You could be recording a podcast in different locations and working from a home studio. This could naturally create echoes in your audio when microphones pick undesired background noise. When you realize such noises post-production, Audacity may be your solution. Audacity reduces echo and other background sounds with high accuracy. Here are the steps you will need to follow:
Step 1: Start Audacity and Import Audio Files
Visit the Audacity website and download the software if you haven’t already. Do the simple installation process and open the Audacity software on your desktop. Import the audio files that you want to edit by going to File, and then opening or dragging and dropping the files into Audacity.

Step 2: Select Sound Track
Select the track you need to edit by clicking Select on the left side menu. Then choose the file that you want or press CMD+A on Mac or CTRL+A on Windows.

Step 3: Get a Noise Profile
Under the Effect dropdown menu, click Noise Reduction then select Get Noise Profile. This will prepare the track for noise reduction. The window will close immediately after this. Repeat the steps by clicking the Effects Menu, then Noise Reduction, and OK.

Step 4: Replay and Amplify Audio
The waveform of the audio track will change. Replay it to hear the results. Press CMD+Z or CTRL+Z on your to undo the process if not satisfied. Then, repeat the previous steps and play around with different values to achieve a better outcome. When you like the results, the audio volume output will be lower. Click Effects then Amplify to bring the volume back again, and adjust it to the level that you want.

Part 2. How to Remove Echo from Audio in Adobe Audition : A Quick Tutorial
Adobe Audition is an effective editing software that will clean up echoes, winds, reverberations, instruments, and anything in between. The software offers a perfect solution to achieve pleasant audio within minutes.
Step 1: Launch Adobe Audition and Import Files
Start by launching the Audition software on your PC. Then, import the files you want to edit by going to File. Click Menu and select Open to browse the files on your computer.

Step 2: Select Audio File to Edit
You need to select the audio files that you will be removing echo from. Go to the Edit menu, Click Select, and choose Select All. You can also double-click the track.

Step 3: Start the Noise Restoration Menu
Click the Effects Menu, and then the Noise Reduction Restoration. Choose the DeReverb option. This will open the DeReverb window where you can make appropriate adjustments. You also have the option to left-click at the start of the selection. Then drag the dereverb over the part of the track you want to apply it to.

Step 4: Adjust the Amount of DeReverb Effect
Use the slider at the bottom of the DeReverb window to make the adjustments. Drag the slider slowly as you listen to the audio sounds. Be careful not to drag it too far that you start hearing buzzing and clipping. Once satisfied, preview the audio then click Apply and the audio file will be ready.

Part 3. How to Remove Echo from Audio in Premiere Pro : A Quick Guide
The other effective way to remove echoes and reverberation in your audio file is using Premiere Pro. To remove Echo Premiere Pro, you need to add your audio click with Echo and process it with the software. Here is a summary of the steps to follow:
Step 1: Start DeReverb Effect
Start by importing the files that you want to edit to Adobe Premiere Pro. Then drag it into the timeline. On the search box, type DeReverb. You can also click on Audio Effects, followed by Noise Reduction/Restoration, and then DeReverb. Click on the effect and drag it to your clip on the timeline.

Step 2: Setup Your Settings
You should see the new effects under the Effects Control panel. Click the little arrow to the left, followed by Edit to open a new window.

Step 3: Adjust Settings
The new window will display the Clip FX Editor. You will have the option for presents on the top where you can find a default, light, and heavy reverb reduction. Choose one of them and preview it. Adjust the amount of reverb using the slider on the bottom. You can also check the Auto Gain to automatically take care of the volume as you edit the settings. Preview the settings and close the window once satisfied.

Bonus Part. How to Remove Echo from Audio in Wondershare Filmora : A Guided Tutorial
In most cases, you will want to remove echo from audio files to continue editing them further. Probably it is a voiceover for your next YouTube video or even a podcast upload. Wondershare Filmora allows you to do this and more. The versatile video editing software come with some unique features that make audio and video editing a breeze. You even get an AI Copilot that serves as your personal assistant when editing your files.
Free Download For Win 7 or later(64-bit)
Free Download For macOS 10.14 or later
AI Vocal Remover
For you to remove echo from your audio files with Filmora, you will need to utilize the AI Vocal Remover feature. The feature is specially designed to separate vocals and music from any song. However, it also allows you to remove other audio elements from your soundtrack, including echoes and wind. You only need to optimize your preferences, and the feature will handle the rest. Here are the few simple steps you will need to follow:
Step 1: Launch Filmora and Create a New Project
First of all, start the Filmora software on your desktop. Then click the “New Project” tab. This will open the Filmora editing space.

Step 2: Import Your Soundtrack or Files
Select the “Media” tab in the toolbar. This will allow you to edit the soundtrack files you want to edit in this project. Click on the “Files” icon and select the files to import. You can also drag and drop the files from your Windows Explorer or Mac’s Finder onto the Filmora media section.

Step 3: Start AI Vocal Remover
Choose the clips you want to remove echoes from in the timeline. Then click on the “Audio” and select “AI Vocal Remover.” Adjust the settings for DeReverb and Wind removal to remove echoes from your audio file. You can also explore Hum removal, AI Speech Enhancement, and Denoise to achieve optimal results.

Conclusion
Echoes in your soundtracks can be so annoying. They affect the clarity of vocals and can make your audio or video seem unprofessional. While there are many ways you can remove echo from audio, we recommend Wondershare Filmora. The versatile video editor comes with a broad choice of features to help you edit your audio more accurately. You can remove echoes, wind, and more while maintaining the same quality of your audio. The software also allows you to continue editing your audio or video further as desired.
Free Download Free Download Learn More
Part 1. How to Remove Echo from Audio in Audacity : A Step-by-Step Guide
Echo in your audio can occur for many reasons. You could be recording a podcast in different locations and working from a home studio. This could naturally create echoes in your audio when microphones pick undesired background noise. When you realize such noises post-production, Audacity may be your solution. Audacity reduces echo and other background sounds with high accuracy. Here are the steps you will need to follow:
Step 1: Start Audacity and Import Audio Files
Visit the Audacity website and download the software if you haven’t already. Do the simple installation process and open the Audacity software on your desktop. Import the audio files that you want to edit by going to File, and then opening or dragging and dropping the files into Audacity.
Step 2: Select Sound Track
Select the track you need to edit by clicking Select on the left side menu. Then choose the file that you want or press CMD+A on Mac or CTRL+A on Windows.
Step 3: Get a Noise Profile
Under the Effect dropdown menu, click Noise Reduction then select Get Noise Profile. This will prepare the track for noise reduction. The window will close immediately after this. Repeat the steps by clicking the Effects Menu, then Noise Reduction, and OK.
Step 4: Replay and Amplify Audio
The waveform of the audio track will change. Replay it to hear the results. Press CMD+Z or CTRL+Z on your to undo the process if not satisfied. Then, repeat the previous steps and play around with different values to achieve a better outcome. When you like the results, the audio volume output will be lower. Click Effects then Amplify to bring the volume back again, and adjust it to the level that you want.
Part 2. How to Remove Echo from Audio in Adobe Audition : A Quick Tutorial
Adobe Audition is an effective editing software that will clean up echoes, winds, reverberations, instruments, and anything in between. The software offers a perfect solution to achieve pleasant audio within minutes.
Step 1: Launch Adobe Audition and Import Files
Start by launching the Audition software on your PC. Then, import the files you want to edit by going to File. Click Menu and select Open to browse the files on your computer.
Step 2: Select Audio File to Edit
You need to select the audio files that you will be removing echo from. Go to the Edit menu, Click Select, and choose Select All. You can also double-click the track.
Step 3: Start the Noise Restoration Menu
Click the Effects Menu, and then the Noise Reduction Restoration. Choose the DeReverb option. This will open the DeReverb window where you can make appropriate adjustments. You also have the option to left-click at the start of the selection. Then drag the dereverb over the part of the track you want to apply it to.
Step 4: Adjust the Amount of DeReverb Effect
Use the slider at the bottom of the DeReverb window to make the adjustments. Drag the slider slowly as you listen to the audio sounds. Be careful not to drag it too far that you start hearing buzzing and clipping. Once satisfied, preview the audio then click Apply and the audio file will be ready.
Part 3. How to Remove Echo from Audio in Premiere Pro : A Quick Guide
The other effective way to remove echoes and reverberation in your audio file is using Premiere Pro. To remove Echo Premiere Pro, you need to add your audio click with Echo and process it with the software. Here is a summary of the steps to follow:
Step 1: Start DeReverb Effect
Start by importing the files that you want to edit to Adobe Premiere Pro. Then drag it into the timeline. On the search box, type DeReverb. You can also click on Audio Effects, followed by Noise Reduction/Restoration, and then DeReverb. Click on the effect and drag it to your clip on the timeline.
Step 2: Setup Your Settings
You should see the new effects under the Effects Control panel. Click the little arrow to the left, followed by Edit to open a new window.
Step 3: Adjust Settings
The new window will display the Clip FX Editor. You will have the option for presents on the top where you can find a default, light, and heavy reverb reduction. Choose one of them and preview it. Adjust the amount of reverb using the slider on the bottom. You can also check the Auto Gain to automatically take care of the volume as you edit the settings. Preview the settings and close the window once satisfied.
Bonus Part. How to Remove Echo from Audio in Wondershare Filmora : A Guided Tutorial
In most cases, you will want to remove echo from audio files to continue editing them further. Probably it is a voiceover for your next YouTube video or even a podcast upload. Wondershare Filmora allows you to do this and more. The versatile video editing software come with some unique features that make audio and video editing a breeze. You even get an AI Copilot that serves as your personal assistant when editing your files.
Free Download For Win 7 or later(64-bit)
Free Download For macOS 10.14 or later
AI Vocal Remover
For you to remove echo from your audio files with Filmora, you will need to utilize the AI Vocal Remover feature. The feature is specially designed to separate vocals and music from any song. However, it also allows you to remove other audio elements from your soundtrack, including echoes and wind. You only need to optimize your preferences, and the feature will handle the rest. Here are the few simple steps you will need to follow:
Step 1: Launch Filmora and Create a New Project
First of all, start the Filmora software on your desktop. Then click the “New Project” tab. This will open the Filmora editing space.
Step 2: Import Your Soundtrack or Files
Select the “Media” tab in the toolbar. This will allow you to edit the soundtrack files you want to edit in this project. Click on the “Files” icon and select the files to import. You can also drag and drop the files from your Windows Explorer or Mac’s Finder onto the Filmora media section.
Step 3: Start AI Vocal Remover
Choose the clips you want to remove echoes from in the timeline. Then click on the “Audio” and select “AI Vocal Remover.” Adjust the settings for DeReverb and Wind removal to remove echoes from your audio file. You can also explore Hum removal, AI Speech Enhancement, and Denoise to achieve optimal results.
Conclusion
Echoes in your soundtracks can be so annoying. They affect the clarity of vocals and can make your audio or video seem unprofessional. While there are many ways you can remove echo from audio, we recommend Wondershare Filmora. The versatile video editor comes with a broad choice of features to help you edit your audio more accurately. You can remove echoes, wind, and more while maintaining the same quality of your audio. The software also allows you to continue editing your audio or video further as desired.
“Sonic Resource Hub: A Curated List of Premium Websites with a Stockpile of Free Sound Scores
FREE Top 10 Best Websites to Download Sound Clips for Videos

Liza Brown
Mar 27, 2024• Proven solutions


Are you working on animation , video, game, music, or maybe some other media file? Sound is a vital factor for all. It is the effect of the sound that can make or break a project.
But it can be difficult to find perfect and quality free sound clips. There are thousands of software for creating excellent videos, adding sounds , titles, overlays, tracks, and more. But what if you don’t wish to create a piece for just jazzing up your already existing video?
Free sound clips are great resources to download for videos if you don’t want to create sound effects.
Many people want to know the source of high-quality free audio for videos. These free sound samples are easy to find on the Internet.
In this article, you will get to know the 10 best websites to download free sound clips.
10 Best Free Sound Samples to Use
1. Freesound
Licensed under the Creative Commons License , the Freesound comprises of a large sound database. You can choose from the huge collection of sounds and decide which one is free and which sound needs attribution.
You can ensure if the sound can be used in commercial products or not. If you are not a professional and just need free sound samples for personal use, you may use free sound download from any site. The features of Freesound include-
- You can search for sounds or browse by tags or geotags
- The pack feature helps you to find a bunch of similar sounds very easily
- Preview the sound without logging in
- For downloading the sound, you need to log in
- Add your audio samples to contribute to the database
- You get 5 free sound clips download
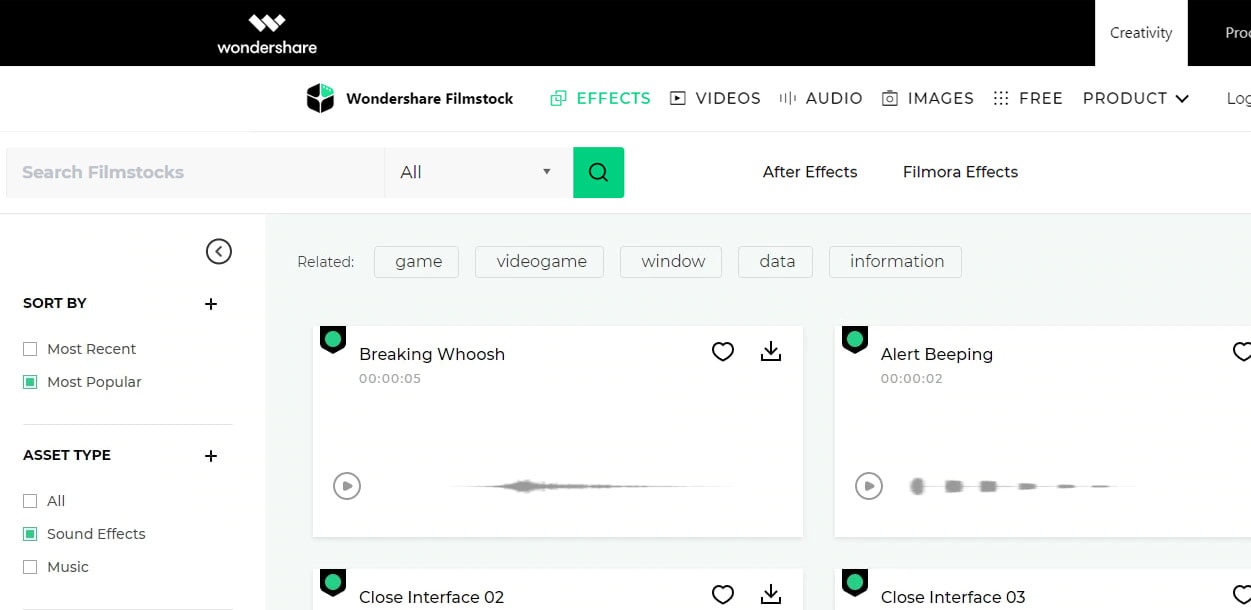
2. Filmstock
Filmstock from the house of Wondershare is one of the greatest libraries for free sound clips.
Any budget filmmaker would love to have this invaluable resource not just for free audio clips for videos but also for royalty-free sound clips.
You can bring your cinematic video to life from the Filmstock free-stuff one-stop-shop. The features of Filmstock include-
- Royalty-free video effects, audio, and stock media
- There are genres like science fiction, sci-fi, ufo, technology games
- Huge selection of curated quality stock images
- Filmstock library is continuously updated
- No attribution required for any project on Filmstock
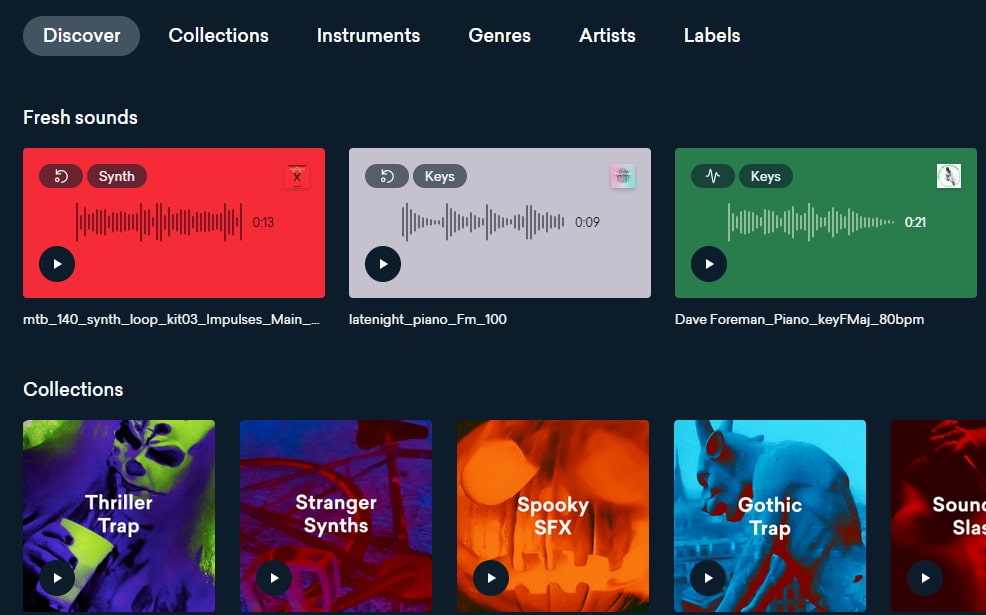
3. Landr
With a simple interface, Landr offers the best loops, packs, and samples to you. Make use of powerful Artificial Intelligence (AI) and you can spend lesser time searching and browsing. The features of Landr includes-
- You can browse free sound clips from the various collection of instruments
- Quickly find the right sound from the millions of free sound samples
- Get access to Selector tool powered by AI to make your browsing session faster
- Nourish your ideas with the curated collection and smart browsing
- The filter sounds by instrument, mood, BPM or key
- Go pro with your sampling
- Royalty-free sounds from today’s best artists, producers, and labels
4. Audio Micro
Audio Micro is one of the best tools for downloading horror-based free sound clips. Once you register with Audio Micro, you can easily download free audio clips for videos.
For downloading sound for commercial uses like TV or mass reproduction, you must be a paid subscriber. The features of Audio Micro are-
- Get access to the collection of royalty-free music and 2000 free good quality sound effects
- High-quality audio content for commercial use, available at competitive prices without any hidden cost
- Research, locate, purchase, and download stock audio
- Easy and fast search option with free sound collection visible from the navigation bar on the homepage
5. Audio Blocks
It is an intuitive platform to download loops, sound effects, and music. It has a low-cost subscription model and the content is constantly updated based on the search results. The features of Audio Blocks are-
- Unlimited royalty-free audio
- Loop, sound effects, and music download
- Low-cost subscription offers more content at a nominal price
- There are flexible plans for every budget
- Use content multiple times for commercial and personal projects
6. Free Stock Music
Whether YouTube project or your personal Vlog, Free Stock Music offers royalty-free music for a range of media platforms.
For any non-copyrighted sound clips free download, always feel free to reach Free Stock Music. The features are-
- Free access to non-copyrighted music
- Just put the attribution in credits to use the sound clips
- Unlimited royalty-free music in all moods, lengths, tempos, and categories
7. Bensound
Available under the Creative Common License, Bensound is used for multimedia projects like web applications or videos.
You can use the free tracks available with Bensound stock music in the various website background score, animations, web adverts, slideshows, etc. The features of Bensound include-
- Royalty-free stock music in various genres like electronica, urban, cinematic, jazz, rock, etc.
- Download free sound clips from the huge collection and add attributions in credits
- If you don’t wish to give credits and use the high-quality premium tracks, get the Bensound Pro License
8. Sounds Crate
Are you looking for the best soundtrack for your video? Sounds Crate offers some of the best royalty-free music and sound FX.
With the tracks completely mastered for your production, Sound Crate offers 100% quality content created by industry professionals from Hollywood. The Sound Crate features include-
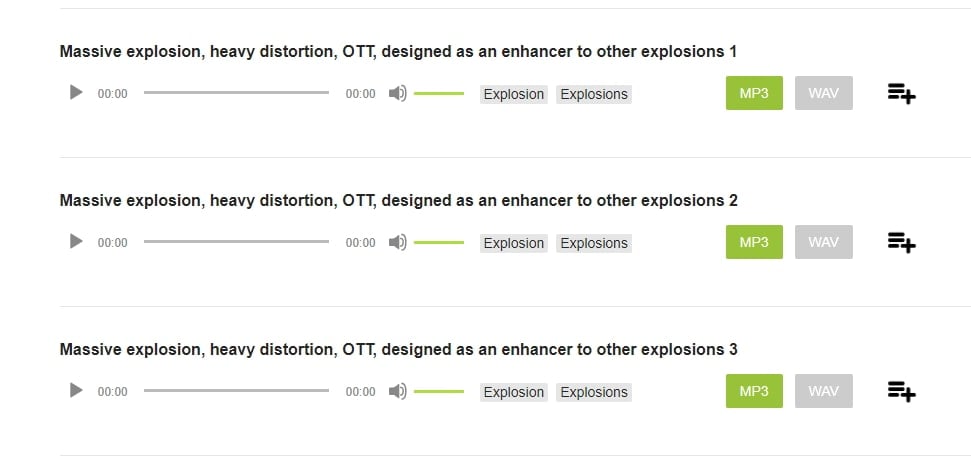
- Sound FX for electricity, gun, explosion, weapons, sci-fi, vehicles, movements, etc.
- Royalty-free music in diverse genres
- You can also use idents for corporate, news jingles, holiday idents, etc.
- Download and use the royalty-free sound clips easily
- Over 10000 plus HD assets
- No attribution required
- Browse from unlimited music, sound effects, etc.
9. ZapSlat
Do your audio and video editing projects need some cool soundtracks to jazz it up? Look no further. ZapSlat is one of the best free sound download sites to make your project successful. The features of ZapSlat are-
- Comprises over 54,000 professional free sound effects and royalty-free music files
- Variety of free sound effect packs
- Download royalty-free music from a variety of genres
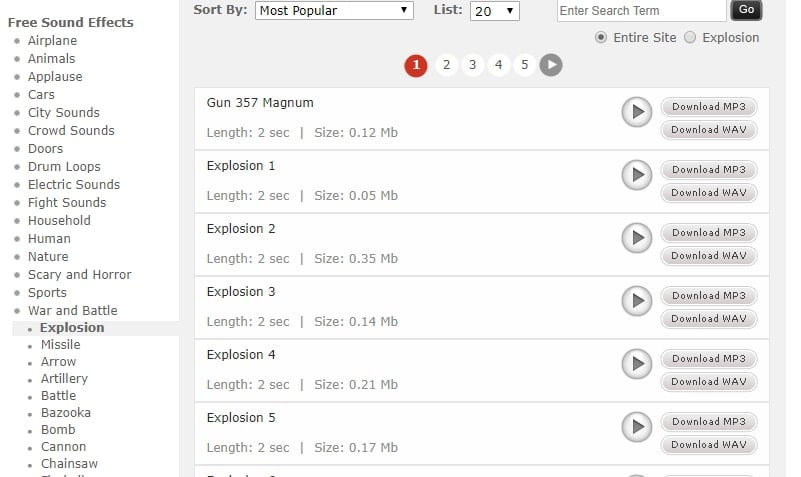
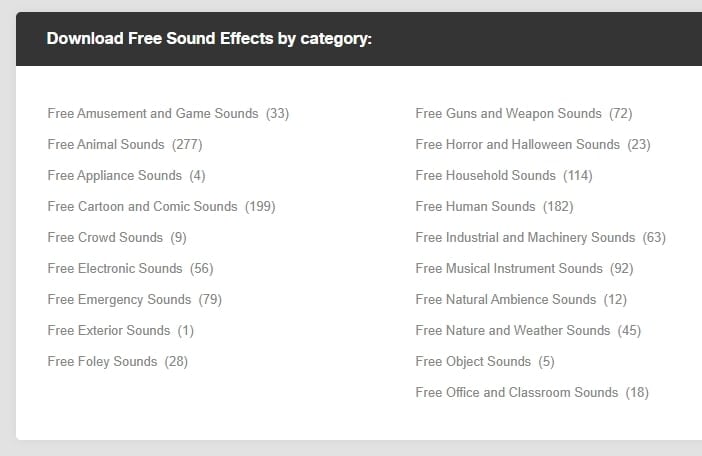
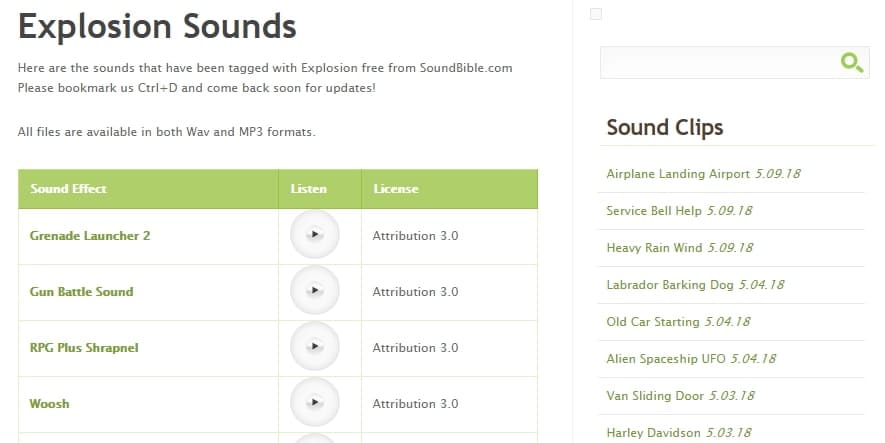
10. Sound Bible
Choose the best from 2000 free sound clips licensed under Creative Commons. To use the sound effect for commercial video, you can select from the royalty-free sounds. The features of SoundBible are-
- Download free sound clips without logging in or creating an account
- 2000 free sounds
- Copyright-free sound resources are weekly updated
Conclusion
Now that you know the best 10 free sound clip download sites, make use of it in your videos. Without worrying about the expense, you can use these sites to download free sound clips.
Liza Brown
Liza Brown is a writer and a lover of all things video.
Follow @Liza Brown
Liza Brown
Mar 27, 2024• Proven solutions
Are you working on animation , video, game, music, or maybe some other media file? Sound is a vital factor for all. It is the effect of the sound that can make or break a project.
But it can be difficult to find perfect and quality free sound clips. There are thousands of software for creating excellent videos, adding sounds , titles, overlays, tracks, and more. But what if you don’t wish to create a piece for just jazzing up your already existing video?
Free sound clips are great resources to download for videos if you don’t want to create sound effects.
Many people want to know the source of high-quality free audio for videos. These free sound samples are easy to find on the Internet.
In this article, you will get to know the 10 best websites to download free sound clips.
10 Best Free Sound Samples to Use
1. Freesound
Licensed under the Creative Commons License , the Freesound comprises of a large sound database. You can choose from the huge collection of sounds and decide which one is free and which sound needs attribution.
You can ensure if the sound can be used in commercial products or not. If you are not a professional and just need free sound samples for personal use, you may use free sound download from any site. The features of Freesound include-
- You can search for sounds or browse by tags or geotags
- The pack feature helps you to find a bunch of similar sounds very easily
- Preview the sound without logging in
- For downloading the sound, you need to log in
- Add your audio samples to contribute to the database
- You get 5 free sound clips download
2. Filmstock
Filmstock from the house of Wondershare is one of the greatest libraries for free sound clips.
Any budget filmmaker would love to have this invaluable resource not just for free audio clips for videos but also for royalty-free sound clips.
You can bring your cinematic video to life from the Filmstock free-stuff one-stop-shop. The features of Filmstock include-
- Royalty-free video effects, audio, and stock media
- There are genres like science fiction, sci-fi, ufo, technology games
- Huge selection of curated quality stock images
- Filmstock library is continuously updated
- No attribution required for any project on Filmstock
3. Landr
With a simple interface, Landr offers the best loops, packs, and samples to you. Make use of powerful Artificial Intelligence (AI) and you can spend lesser time searching and browsing. The features of Landr includes-
- You can browse free sound clips from the various collection of instruments
- Quickly find the right sound from the millions of free sound samples
- Get access to Selector tool powered by AI to make your browsing session faster
- Nourish your ideas with the curated collection and smart browsing
- The filter sounds by instrument, mood, BPM or key
- Go pro with your sampling
- Royalty-free sounds from today’s best artists, producers, and labels
4. Audio Micro
Audio Micro is one of the best tools for downloading horror-based free sound clips. Once you register with Audio Micro, you can easily download free audio clips for videos.
For downloading sound for commercial uses like TV or mass reproduction, you must be a paid subscriber. The features of Audio Micro are-
- Get access to the collection of royalty-free music and 2000 free good quality sound effects
- High-quality audio content for commercial use, available at competitive prices without any hidden cost
- Research, locate, purchase, and download stock audio
- Easy and fast search option with free sound collection visible from the navigation bar on the homepage
5. Audio Blocks
It is an intuitive platform to download loops, sound effects, and music. It has a low-cost subscription model and the content is constantly updated based on the search results. The features of Audio Blocks are-
- Unlimited royalty-free audio
- Loop, sound effects, and music download
- Low-cost subscription offers more content at a nominal price
- There are flexible plans for every budget
- Use content multiple times for commercial and personal projects
6. Free Stock Music
Whether YouTube project or your personal Vlog, Free Stock Music offers royalty-free music for a range of media platforms.
For any non-copyrighted sound clips free download, always feel free to reach Free Stock Music. The features are-
- Free access to non-copyrighted music
- Just put the attribution in credits to use the sound clips
- Unlimited royalty-free music in all moods, lengths, tempos, and categories
7. Bensound
Available under the Creative Common License, Bensound is used for multimedia projects like web applications or videos.
You can use the free tracks available with Bensound stock music in the various website background score, animations, web adverts, slideshows, etc. The features of Bensound include-
- Royalty-free stock music in various genres like electronica, urban, cinematic, jazz, rock, etc.
- Download free sound clips from the huge collection and add attributions in credits
- If you don’t wish to give credits and use the high-quality premium tracks, get the Bensound Pro License
8. Sounds Crate
Are you looking for the best soundtrack for your video? Sounds Crate offers some of the best royalty-free music and sound FX.
With the tracks completely mastered for your production, Sound Crate offers 100% quality content created by industry professionals from Hollywood. The Sound Crate features include-
- Sound FX for electricity, gun, explosion, weapons, sci-fi, vehicles, movements, etc.
- Royalty-free music in diverse genres
- You can also use idents for corporate, news jingles, holiday idents, etc.
- Download and use the royalty-free sound clips easily
- Over 10000 plus HD assets
- No attribution required
- Browse from unlimited music, sound effects, etc.
9. ZapSlat
Do your audio and video editing projects need some cool soundtracks to jazz it up? Look no further. ZapSlat is one of the best free sound download sites to make your project successful. The features of ZapSlat are-
- Comprises over 54,000 professional free sound effects and royalty-free music files
- Variety of free sound effect packs
- Download royalty-free music from a variety of genres
10. Sound Bible
Choose the best from 2000 free sound clips licensed under Creative Commons. To use the sound effect for commercial video, you can select from the royalty-free sounds. The features of SoundBible are-
- Download free sound clips without logging in or creating an account
- 2000 free sounds
- Copyright-free sound resources are weekly updated
Conclusion
Now that you know the best 10 free sound clip download sites, make use of it in your videos. Without worrying about the expense, you can use these sites to download free sound clips.
Liza Brown
Liza Brown is a writer and a lover of all things video.
Follow @Liza Brown
Liza Brown
Mar 27, 2024• Proven solutions
Are you working on animation , video, game, music, or maybe some other media file? Sound is a vital factor for all. It is the effect of the sound that can make or break a project.
But it can be difficult to find perfect and quality free sound clips. There are thousands of software for creating excellent videos, adding sounds , titles, overlays, tracks, and more. But what if you don’t wish to create a piece for just jazzing up your already existing video?
Free sound clips are great resources to download for videos if you don’t want to create sound effects.
Many people want to know the source of high-quality free audio for videos. These free sound samples are easy to find on the Internet.
In this article, you will get to know the 10 best websites to download free sound clips.
10 Best Free Sound Samples to Use
1. Freesound
Licensed under the Creative Commons License , the Freesound comprises of a large sound database. You can choose from the huge collection of sounds and decide which one is free and which sound needs attribution.
You can ensure if the sound can be used in commercial products or not. If you are not a professional and just need free sound samples for personal use, you may use free sound download from any site. The features of Freesound include-
- You can search for sounds or browse by tags or geotags
- The pack feature helps you to find a bunch of similar sounds very easily
- Preview the sound without logging in
- For downloading the sound, you need to log in
- Add your audio samples to contribute to the database
- You get 5 free sound clips download
2. Filmstock
Filmstock from the house of Wondershare is one of the greatest libraries for free sound clips.
Any budget filmmaker would love to have this invaluable resource not just for free audio clips for videos but also for royalty-free sound clips.
You can bring your cinematic video to life from the Filmstock free-stuff one-stop-shop. The features of Filmstock include-
- Royalty-free video effects, audio, and stock media
- There are genres like science fiction, sci-fi, ufo, technology games
- Huge selection of curated quality stock images
- Filmstock library is continuously updated
- No attribution required for any project on Filmstock
3. Landr
With a simple interface, Landr offers the best loops, packs, and samples to you. Make use of powerful Artificial Intelligence (AI) and you can spend lesser time searching and browsing. The features of Landr includes-
- You can browse free sound clips from the various collection of instruments
- Quickly find the right sound from the millions of free sound samples
- Get access to Selector tool powered by AI to make your browsing session faster
- Nourish your ideas with the curated collection and smart browsing
- The filter sounds by instrument, mood, BPM or key
- Go pro with your sampling
- Royalty-free sounds from today’s best artists, producers, and labels
4. Audio Micro
Audio Micro is one of the best tools for downloading horror-based free sound clips. Once you register with Audio Micro, you can easily download free audio clips for videos.
For downloading sound for commercial uses like TV or mass reproduction, you must be a paid subscriber. The features of Audio Micro are-
- Get access to the collection of royalty-free music and 2000 free good quality sound effects
- High-quality audio content for commercial use, available at competitive prices without any hidden cost
- Research, locate, purchase, and download stock audio
- Easy and fast search option with free sound collection visible from the navigation bar on the homepage
5. Audio Blocks
It is an intuitive platform to download loops, sound effects, and music. It has a low-cost subscription model and the content is constantly updated based on the search results. The features of Audio Blocks are-
- Unlimited royalty-free audio
- Loop, sound effects, and music download
- Low-cost subscription offers more content at a nominal price
- There are flexible plans for every budget
- Use content multiple times for commercial and personal projects
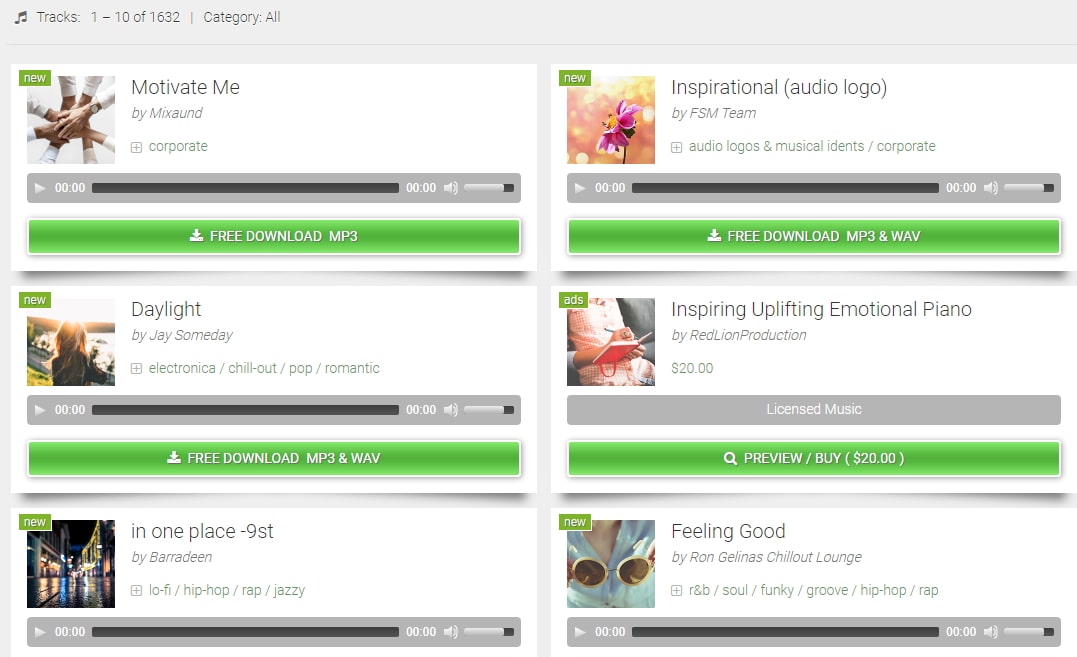
6. Free Stock Music
Whether YouTube project or your personal Vlog, Free Stock Music offers royalty-free music for a range of media platforms.
For any non-copyrighted sound clips free download, always feel free to reach Free Stock Music. The features are-
- Free access to non-copyrighted music
- Just put the attribution in credits to use the sound clips
- Unlimited royalty-free music in all moods, lengths, tempos, and categories
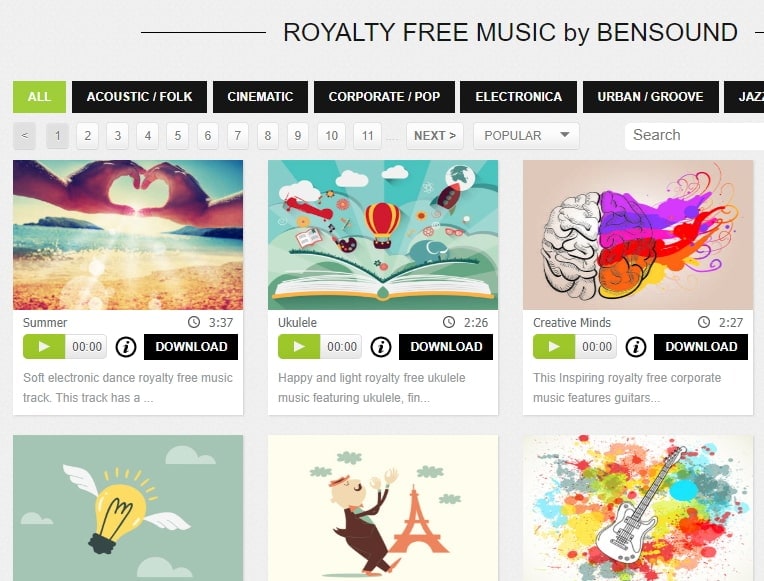
7. Bensound
Available under the Creative Common License, Bensound is used for multimedia projects like web applications or videos.
You can use the free tracks available with Bensound stock music in the various website background score, animations, web adverts, slideshows, etc. The features of Bensound include-
- Royalty-free stock music in various genres like electronica, urban, cinematic, jazz, rock, etc.
- Download free sound clips from the huge collection and add attributions in credits
- If you don’t wish to give credits and use the high-quality premium tracks, get the Bensound Pro License
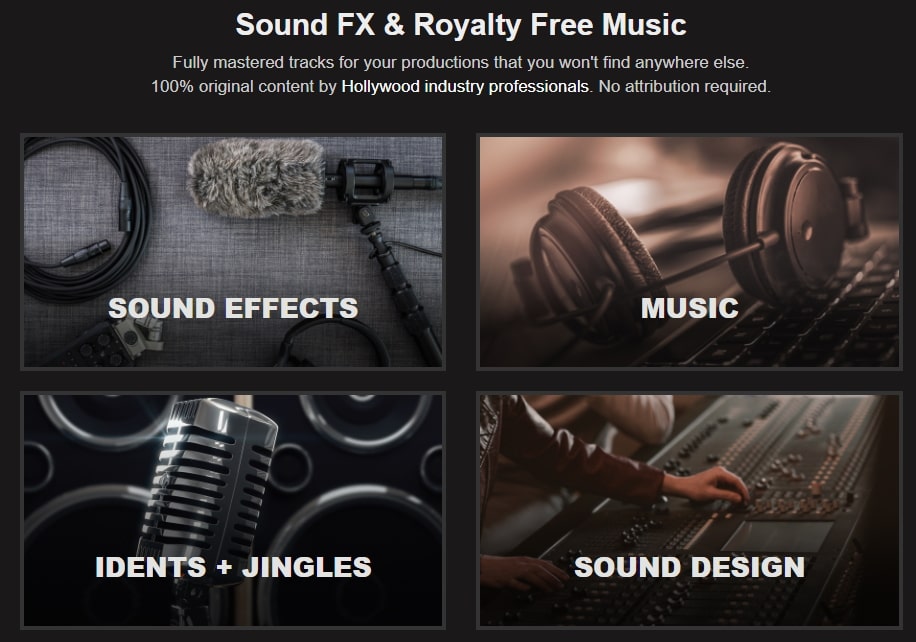
8. Sounds Crate
Are you looking for the best soundtrack for your video? Sounds Crate offers some of the best royalty-free music and sound FX.
With the tracks completely mastered for your production, Sound Crate offers 100% quality content created by industry professionals from Hollywood. The Sound Crate features include-
- Sound FX for electricity, gun, explosion, weapons, sci-fi, vehicles, movements, etc.
- Royalty-free music in diverse genres
- You can also use idents for corporate, news jingles, holiday idents, etc.
- Download and use the royalty-free sound clips easily
- Over 10000 plus HD assets
- No attribution required
- Browse from unlimited music, sound effects, etc.
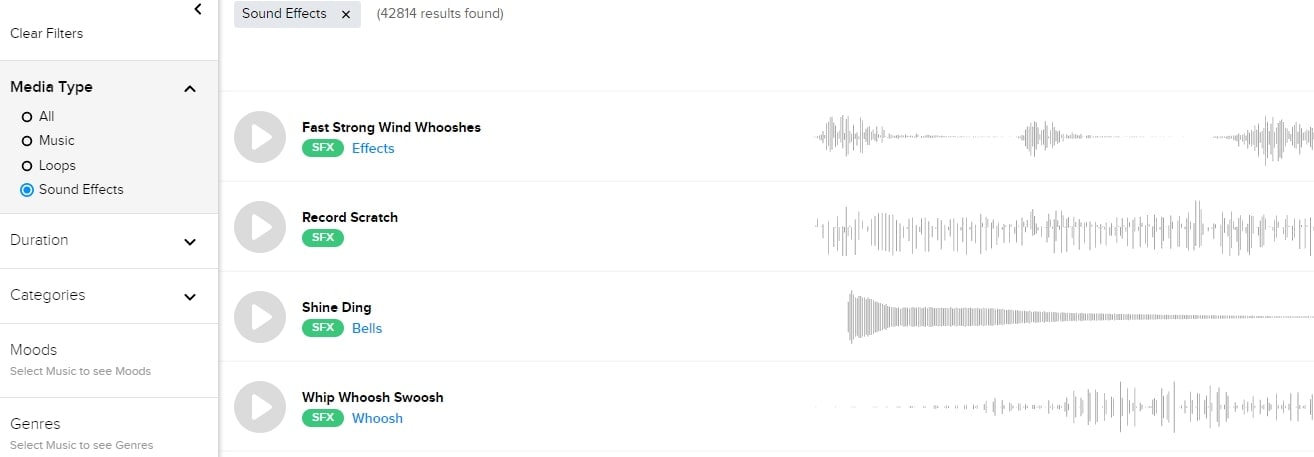
9. ZapSlat
Do your audio and video editing projects need some cool soundtracks to jazz it up? Look no further. ZapSlat is one of the best free sound download sites to make your project successful. The features of ZapSlat are-
- Comprises over 54,000 professional free sound effects and royalty-free music files
- Variety of free sound effect packs
- Download royalty-free music from a variety of genres
10. Sound Bible
Choose the best from 2000 free sound clips licensed under Creative Commons. To use the sound effect for commercial video, you can select from the royalty-free sounds. The features of SoundBible are-
- Download free sound clips without logging in or creating an account
- 2000 free sounds
- Copyright-free sound resources are weekly updated
Conclusion
Now that you know the best 10 free sound clip download sites, make use of it in your videos. Without worrying about the expense, you can use these sites to download free sound clips.
Liza Brown
Liza Brown is a writer and a lover of all things video.
Follow @Liza Brown
Liza Brown
Mar 27, 2024• Proven solutions
Are you working on animation , video, game, music, or maybe some other media file? Sound is a vital factor for all. It is the effect of the sound that can make or break a project.
But it can be difficult to find perfect and quality free sound clips. There are thousands of software for creating excellent videos, adding sounds , titles, overlays, tracks, and more. But what if you don’t wish to create a piece for just jazzing up your already existing video?
Free sound clips are great resources to download for videos if you don’t want to create sound effects.
Many people want to know the source of high-quality free audio for videos. These free sound samples are easy to find on the Internet.
In this article, you will get to know the 10 best websites to download free sound clips.
10 Best Free Sound Samples to Use
1. Freesound
Licensed under the Creative Commons License , the Freesound comprises of a large sound database. You can choose from the huge collection of sounds and decide which one is free and which sound needs attribution.
You can ensure if the sound can be used in commercial products or not. If you are not a professional and just need free sound samples for personal use, you may use free sound download from any site. The features of Freesound include-
- You can search for sounds or browse by tags or geotags
- The pack feature helps you to find a bunch of similar sounds very easily
- Preview the sound without logging in
- For downloading the sound, you need to log in
- Add your audio samples to contribute to the database
- You get 5 free sound clips download
2. Filmstock
Filmstock from the house of Wondershare is one of the greatest libraries for free sound clips.
Any budget filmmaker would love to have this invaluable resource not just for free audio clips for videos but also for royalty-free sound clips.
You can bring your cinematic video to life from the Filmstock free-stuff one-stop-shop. The features of Filmstock include-
- Royalty-free video effects, audio, and stock media
- There are genres like science fiction, sci-fi, ufo, technology games
- Huge selection of curated quality stock images
- Filmstock library is continuously updated
- No attribution required for any project on Filmstock
3. Landr
With a simple interface, Landr offers the best loops, packs, and samples to you. Make use of powerful Artificial Intelligence (AI) and you can spend lesser time searching and browsing. The features of Landr includes-
- You can browse free sound clips from the various collection of instruments
- Quickly find the right sound from the millions of free sound samples
- Get access to Selector tool powered by AI to make your browsing session faster
- Nourish your ideas with the curated collection and smart browsing
- The filter sounds by instrument, mood, BPM or key
- Go pro with your sampling
- Royalty-free sounds from today’s best artists, producers, and labels
4. Audio Micro
Audio Micro is one of the best tools for downloading horror-based free sound clips. Once you register with Audio Micro, you can easily download free audio clips for videos.
For downloading sound for commercial uses like TV or mass reproduction, you must be a paid subscriber. The features of Audio Micro are-
- Get access to the collection of royalty-free music and 2000 free good quality sound effects
- High-quality audio content for commercial use, available at competitive prices without any hidden cost
- Research, locate, purchase, and download stock audio
- Easy and fast search option with free sound collection visible from the navigation bar on the homepage
5. Audio Blocks
It is an intuitive platform to download loops, sound effects, and music. It has a low-cost subscription model and the content is constantly updated based on the search results. The features of Audio Blocks are-
- Unlimited royalty-free audio
- Loop, sound effects, and music download
- Low-cost subscription offers more content at a nominal price
- There are flexible plans for every budget
- Use content multiple times for commercial and personal projects
6. Free Stock Music
Whether YouTube project or your personal Vlog, Free Stock Music offers royalty-free music for a range of media platforms.
For any non-copyrighted sound clips free download, always feel free to reach Free Stock Music. The features are-
- Free access to non-copyrighted music
- Just put the attribution in credits to use the sound clips
- Unlimited royalty-free music in all moods, lengths, tempos, and categories
7. Bensound
Available under the Creative Common License, Bensound is used for multimedia projects like web applications or videos.
You can use the free tracks available with Bensound stock music in the various website background score, animations, web adverts, slideshows, etc. The features of Bensound include-
- Royalty-free stock music in various genres like electronica, urban, cinematic, jazz, rock, etc.
- Download free sound clips from the huge collection and add attributions in credits
- If you don’t wish to give credits and use the high-quality premium tracks, get the Bensound Pro License
8. Sounds Crate
Are you looking for the best soundtrack for your video? Sounds Crate offers some of the best royalty-free music and sound FX.
With the tracks completely mastered for your production, Sound Crate offers 100% quality content created by industry professionals from Hollywood. The Sound Crate features include-
- Sound FX for electricity, gun, explosion, weapons, sci-fi, vehicles, movements, etc.
- Royalty-free music in diverse genres
- You can also use idents for corporate, news jingles, holiday idents, etc.
- Download and use the royalty-free sound clips easily
- Over 10000 plus HD assets
- No attribution required
- Browse from unlimited music, sound effects, etc.
9. ZapSlat
Do your audio and video editing projects need some cool soundtracks to jazz it up? Look no further. ZapSlat is one of the best free sound download sites to make your project successful. The features of ZapSlat are-
- Comprises over 54,000 professional free sound effects and royalty-free music files
- Variety of free sound effect packs
- Download royalty-free music from a variety of genres
10. Sound Bible
Choose the best from 2000 free sound clips licensed under Creative Commons. To use the sound effect for commercial video, you can select from the royalty-free sounds. The features of SoundBible are-
- Download free sound clips without logging in or creating an account
- 2000 free sounds
- Copyright-free sound resources are weekly updated
Conclusion
Now that you know the best 10 free sound clip download sites, make use of it in your videos. Without worrying about the expense, you can use these sites to download free sound clips.
Liza Brown
Liza Brown is a writer and a lover of all things video.
Follow @Liza Brown
Elevating Your Tone: Techniques for a Louder, Clearer Vocal Performance in Video Production
How to Make Your Voice Higher With Filmora
Liza Brown
Mar 27, 2024• Proven solutions
A video is nothing without a clear and smooth voice. It doesn’t matter if you have a high definition video quality but your video doesn’t have a clear and loud voice, it will be a failure. If you are recording a video and you don’t have the equipment to record your voice properly, low voice can become a big problem in your recorded videos. But some steps can help you and show you the ways of how to make your voice higher. Increasing one’s voice is not an as easy task as it may seem. Just like other skills, it is also a form of skill that requires a lot of practice and experience to master. There are o many factors to consider while recording a video with a high voice or pitch. In this article, we are going to describe how to make your voice higher with two steps. In the first step, we will talk about the factors that you must consider while recording your video. And in the 2nd step, we will be discussing the way of how to make your voice higher using Filmora. Both of these steps require patience and practice.
Step 1: How to make your voice higher while recording
Step 2: How to make your voice higher with Filmora
So let’s start with the first step to making your voice higher while you are recording your video. If you can successfully make your voice higher during this process, it will not require any hard work to make it higher in the post-production process.

You might be interested in:
How to make your Voice Higher while Recording
There are so many ways and exercises that can help change the pitch of your voice and make it higher even if you don’t have high pitch voice. We are going to discuss 5 exercises that can help you achieve this task. But remember that these exercises will practice and patience in order to show the required results.
- Focus on Breathing
The higher voice you want the more air it will need. To higher your voice, you have to take deep breathes from your nose and release them while speaking. It will boost the pitch of your voice and make it higher than your usual voice. Singers use this technique while they want to hit a high pitch. It gives your body and lungs the power to generate a higher voice. Breathing plays a very vital role in making your voice higher. If you are not breathing correctly, you can’t keep the voice higher for a longer period of time. Just like all other skills, this exercise also needs a lot of practice to master. Start practicing this technique by reading a sentence, then move forward to a paragraph, and so on. Following this process will make you master the process of highering your voice using your own breaths. Then you can start using this technique in all of your videos very easily.
- Listen to Your Voice
Do you find it amusing to know that you haven’t ever heard your own voice if you haven’t listened to your own recorded audio or video? You will find your voice very different on the recording than in reality. Because in reality, it is difficult to focus on listening to your own voice while you speak. You will probably hate your own voice the first time you listen to it as a recording. To make your voice higher, it is important to listen and observe your voice very carefully and analyze where it goes down and where it goes up. It will help you improve your voice after every try. This practice will help you master the process of highering your voice using your own analyzes.
- Remove the Obstacles
Since now we know that the main way to make your voice higher is to provide your lungs power with the help of your own breathes. But what makes it decrease its intensity is the obstacles that come in the way of your voice. The first and main obstacle that your voice faces is your tongue. Everyone knows the importance of tongue in helping you speak and generate words. But it sometimes works as a hindrance to block the sounds our lungs make. Therefore, it is very important to keep your tongue in the right position while generating high pitched voice. Try to keep your tongue as low as possible and don’t let it touch the upper part of your mouth to avoid creating a blockage for your voice. In the beginning, it will feel like an impossible task, but as you move forward and practice it more often, you will notice the difference. This will enhance your voice a lot and take it to a level, where you had never imagined it would reach. If you are failing again and again, then don’t worry. This is not an easy task to accomplish, it requires patience and consistency to master.
- Use Nasal Voice
There are multiple ways of generating voice in a human body. Just like the mouth, sometimes the nose is also used to release voices. Those who use Nasal voices while they speak have a higher voice than those who don’t. The gateway used by the nose to release voice is very narrow, producing a thinner voice resulting in high pitched sound. It is also not a good practice to use this technique very often. Because it can make you irritated and annoying. Try to mix the nasal voice only 50% to the voice of your mouth to keep it safe, and sound normal.
- Focus on your Posture
If you know anything about signing or you know any singer, you will come to know that your posture plays a very vital role in generating the sound of your choice. The ideal posture for a higher voice and proper tone is to sit with your back straight, keep your tongue as low as possible, rest your mouth and look slightly upward to make your neck relax a bit. This can completely transform your voice and make it sound like a professional.
How to make your Voice Higher with Filmora
If you have already recorded a video and that video has a very pathetic voice quality, then there is also a hope to make your voice higher by using Filmora. The previous step will help you improve your voice quality to a great extent, but if you don’t want to re-record the video and improve the existing video, you can follow these steps to make sound better.
Method 1: Low Bass
Step 1: Open Filmora, and export the video to a higher voice.

Step 2: Drag and drop the video into the timeline to enable its editing options.

Step 3: Right Click on the video, and select Adjust Audio from the list to open the option.

Step 4: It will open the settings related to the sound of your video, you make any required changes from here, in order to higher its voice.

Step 5: From the equalizer drop-down menu, select the low base option. It will make your voice heavy and will make it more audible than its original voice.

Method 2: High-Pitched Voice
Step 1: Open Filmora and export the video to a higher voice.

Step 2: Drag and drop the video into the timeline to enable its editing options.

Step 3: Right Click on the video, and select Adjust Audio from the list to open the option.

Step 4: It will open the settings related to the sound of your video, you make any required changes from here, in order to higher its voice.

Step 5: From these options, go to the pitch, and increase by two to three points. Now play your video and check the results. It will make the voice of your video higher with a high pitch.

Method 3: Low-Pitched Voice
Step 1: Open Filmora, and export the video to a higher voice.

Step 2: Drag and drop the video into the timeline to enable its editing options.

Step 3: Right Click on the video, and select Adjust Audio from the list to open the option.

Step 4: It will open the settings related to the sound of your video, you make any required changes from here, in order to higher its voice.

Step 5: From settings, go to the pitch settings, and decrease it by two to three points. It will make your voice sound intense and make it a bit higher than its original voice. Play the video and notice the changes. You can change the pitch settings accordingly after checking its results and choose a setting that best suits your video.

Both of these steps can help you enhance the quality of your voice to a great extent. For better results, follow both steps, higher your voice while recording and higher your voice with Filmora. The first step will let you make your voice higher using your own mouth and lungs. The second step will help you improve it more and you can choose any one method from the three available methods that best suits your video and voice of the video and make your videos more engaging and interesting video. So, let’s transform your videos to make them more engaging and appealing to the viewers.
Liza Brown
Liza Brown is a writer and a lover of all things video.
Follow @Liza Brown
Liza Brown
Mar 27, 2024• Proven solutions
A video is nothing without a clear and smooth voice. It doesn’t matter if you have a high definition video quality but your video doesn’t have a clear and loud voice, it will be a failure. If you are recording a video and you don’t have the equipment to record your voice properly, low voice can become a big problem in your recorded videos. But some steps can help you and show you the ways of how to make your voice higher. Increasing one’s voice is not an as easy task as it may seem. Just like other skills, it is also a form of skill that requires a lot of practice and experience to master. There are o many factors to consider while recording a video with a high voice or pitch. In this article, we are going to describe how to make your voice higher with two steps. In the first step, we will talk about the factors that you must consider while recording your video. And in the 2nd step, we will be discussing the way of how to make your voice higher using Filmora. Both of these steps require patience and practice.
Step 1: How to make your voice higher while recording
Step 2: How to make your voice higher with Filmora
So let’s start with the first step to making your voice higher while you are recording your video. If you can successfully make your voice higher during this process, it will not require any hard work to make it higher in the post-production process.
You might be interested in:
How to make your Voice Higher while Recording
There are so many ways and exercises that can help change the pitch of your voice and make it higher even if you don’t have high pitch voice. We are going to discuss 5 exercises that can help you achieve this task. But remember that these exercises will practice and patience in order to show the required results.
- Focus on Breathing
The higher voice you want the more air it will need. To higher your voice, you have to take deep breathes from your nose and release them while speaking. It will boost the pitch of your voice and make it higher than your usual voice. Singers use this technique while they want to hit a high pitch. It gives your body and lungs the power to generate a higher voice. Breathing plays a very vital role in making your voice higher. If you are not breathing correctly, you can’t keep the voice higher for a longer period of time. Just like all other skills, this exercise also needs a lot of practice to master. Start practicing this technique by reading a sentence, then move forward to a paragraph, and so on. Following this process will make you master the process of highering your voice using your own breaths. Then you can start using this technique in all of your videos very easily.
- Listen to Your Voice
Do you find it amusing to know that you haven’t ever heard your own voice if you haven’t listened to your own recorded audio or video? You will find your voice very different on the recording than in reality. Because in reality, it is difficult to focus on listening to your own voice while you speak. You will probably hate your own voice the first time you listen to it as a recording. To make your voice higher, it is important to listen and observe your voice very carefully and analyze where it goes down and where it goes up. It will help you improve your voice after every try. This practice will help you master the process of highering your voice using your own analyzes.
- Remove the Obstacles
Since now we know that the main way to make your voice higher is to provide your lungs power with the help of your own breathes. But what makes it decrease its intensity is the obstacles that come in the way of your voice. The first and main obstacle that your voice faces is your tongue. Everyone knows the importance of tongue in helping you speak and generate words. But it sometimes works as a hindrance to block the sounds our lungs make. Therefore, it is very important to keep your tongue in the right position while generating high pitched voice. Try to keep your tongue as low as possible and don’t let it touch the upper part of your mouth to avoid creating a blockage for your voice. In the beginning, it will feel like an impossible task, but as you move forward and practice it more often, you will notice the difference. This will enhance your voice a lot and take it to a level, where you had never imagined it would reach. If you are failing again and again, then don’t worry. This is not an easy task to accomplish, it requires patience and consistency to master.
- Use Nasal Voice
There are multiple ways of generating voice in a human body. Just like the mouth, sometimes the nose is also used to release voices. Those who use Nasal voices while they speak have a higher voice than those who don’t. The gateway used by the nose to release voice is very narrow, producing a thinner voice resulting in high pitched sound. It is also not a good practice to use this technique very often. Because it can make you irritated and annoying. Try to mix the nasal voice only 50% to the voice of your mouth to keep it safe, and sound normal.
- Focus on your Posture
If you know anything about signing or you know any singer, you will come to know that your posture plays a very vital role in generating the sound of your choice. The ideal posture for a higher voice and proper tone is to sit with your back straight, keep your tongue as low as possible, rest your mouth and look slightly upward to make your neck relax a bit. This can completely transform your voice and make it sound like a professional.
How to make your Voice Higher with Filmora
If you have already recorded a video and that video has a very pathetic voice quality, then there is also a hope to make your voice higher by using Filmora. The previous step will help you improve your voice quality to a great extent, but if you don’t want to re-record the video and improve the existing video, you can follow these steps to make sound better.
Method 1: Low Bass
Step 1: Open Filmora, and export the video to a higher voice.
Step 2: Drag and drop the video into the timeline to enable its editing options.
Step 3: Right Click on the video, and select Adjust Audio from the list to open the option.
Step 4: It will open the settings related to the sound of your video, you make any required changes from here, in order to higher its voice.
Step 5: From the equalizer drop-down menu, select the low base option. It will make your voice heavy and will make it more audible than its original voice.
Method 2: High-Pitched Voice
Step 1: Open Filmora and export the video to a higher voice.
Step 2: Drag and drop the video into the timeline to enable its editing options.
Step 3: Right Click on the video, and select Adjust Audio from the list to open the option.
Step 4: It will open the settings related to the sound of your video, you make any required changes from here, in order to higher its voice.
Step 5: From these options, go to the pitch, and increase by two to three points. Now play your video and check the results. It will make the voice of your video higher with a high pitch.
Method 3: Low-Pitched Voice
Step 1: Open Filmora, and export the video to a higher voice.
Step 2: Drag and drop the video into the timeline to enable its editing options.
Step 3: Right Click on the video, and select Adjust Audio from the list to open the option.
Step 4: It will open the settings related to the sound of your video, you make any required changes from here, in order to higher its voice.
Step 5: From settings, go to the pitch settings, and decrease it by two to three points. It will make your voice sound intense and make it a bit higher than its original voice. Play the video and notice the changes. You can change the pitch settings accordingly after checking its results and choose a setting that best suits your video.
Both of these steps can help you enhance the quality of your voice to a great extent. For better results, follow both steps, higher your voice while recording and higher your voice with Filmora. The first step will let you make your voice higher using your own mouth and lungs. The second step will help you improve it more and you can choose any one method from the three available methods that best suits your video and voice of the video and make your videos more engaging and interesting video. So, let’s transform your videos to make them more engaging and appealing to the viewers.
Liza Brown
Liza Brown is a writer and a lover of all things video.
Follow @Liza Brown
Also read:
- In 2024, Audio Extraction Masterclass The Top 10 Tools and Techniques Every Editor Should Know
- New Add & Edit A Song To Video For Free for 2024
- New 2024 Approved Pro Audio Editing on the Go Navigating Through the Best 5 Apps for Android
- Updated Where Can I Find Game Sound Effects, In 2024
- Updated The Essential Guide to REAPER Tools & Techniques for New Users
- In 2024, Symphony in Reverse A Guide to State-of-the-Art Audio Reversal Applications
- New From Full Blast to Quietude Implementing Audio Volume Transitions in iMovie for 2024
- The Essential Guide to Implementing Lame for High-Quality Auditory Outputs in Audacity
- Updated Seeking Spots Where Massive Celebratory Roars Occur for 2024
- The Ultimate Guide to Sourcing Natures Ambiance Online 2 Title Missing, Assuming a Similar Title Might Be Exploring Top Websites for Legitimate Forest and Ocean Sound Collections for 2024
- Updated 2024 Approved Insert Song Into iMovie Media Library
- New Prime 11 Mobile Audio Processing Software for Creatives
- New 2024 Approved 10 Best Voice Recorder for PC
- Procuring Growls and Whispers Audio Packages
- Updated Top 10 Song Recorder That You Wont Want to Miss for 2024
- Audiovisual Beat Engineering Taking Audio Separates for Creative Endeavors
- 2024 Approved Reversing the Flow A Comprehensive List of Advanced Audio Reversal Tools
- 2024 Approved Voice Clarity Made Simple Top 10 No-Cost and Easy-to-Use Audio Tools
- Updated Beatless Beats Innovative Strategies for Eliminating Drums From Audio Tracks for 2024
- New 2024 Approved Muting the Mundane Essential Insights for Filtering Background Noise in Audiovisual Content
- Updated In 2024, A Guide to Optimal Mac-Compatible Audio Data Labelers
- New Ultimate List of Linux-Based Audio Editors Review and Ratings Edition
- Achieving Pristine Audio Quality Tips to Eradicate Distorted Sounds in Visual Media
- 2024 Approved Harmonic Pinnacle Identifying Exceptional Music for Visual Sequences
- Updated 10 Premium Multitrack Audio Editors That Outshine Audacity for 2024
- Updated In 2024, How to Remove Echo From Audio 3 Easy and Proven Ways
- Updated In 2024, Unlocking Creative Power in Logic Pro X with These Top 8 Plugins
- Updated Audiovisual Transition Incorporating a Subtle Decline Into Your Soundscapes (Updated )
- Updated Exploring Cricket Auditory Signatures
- Audio Excellence Techniques for Clearer Sound in Video Editing Using Filmora for 2024
- Updated In 2024, Uncovering Resources for Realistic Bellow and Exasperation Effects
- Swift Guide to Extracting WhatsApp Voice Recordings as MP3 Files for 2024
- Proven Choices Selecting the Top 6 Costless Cloud-Based Sound Editors
- In 2024, Pokemon Go No GPS Signal? Heres Every Possible Solution On Nokia 130 Music | Dr.fone
- Updated 2024 Approved Get Started with Filmora Scrn A Quick and Easy Guide to Desktop Recording
- How To Fix Unresponsive Touch Screen on Huawei P60 | Dr.fone
- In 2024, Top 10 Telegram Spy Tools On ZTE Axon 40 Lite for Parents | Dr.fone
- How To Repair iOS System Issues of Apple iPhone 6? | Dr.fone
- How to Add Emojis To Discord on Desktop Computer and Mobile
- In 2024, Unlock Your Samsung Galaxy XCover 6 Pro Tactical Edition Phone with Ease The 3 Best Lock Screen Removal Tools
- In 2024, Fake Android Location without Rooting For Your Xiaomi Redmi A2+ | Dr.fone
- In 2024, How to Fix iPad or iPhone XS Max Stuck On Activation Lock?
- How To Remove Phone Number From Your Apple ID on Your iPhone 12?
- Does find my friends work on Tecno Spark 10 4G | Dr.fone
- Delete Gmail Account With/Without Password On Xiaomi Redmi 12
- New Premiere Pro Computer Setup Meet the Minimum System Requirements for 2024
- 5 Hassle-Free Solutions to Fake Location on Find My Friends Of Samsung Galaxy XCover 7 | Dr.fone
- In 2024, Complete Review & Guide to Techeligible FRP Bypass and More For Vivo S18 Pro
- Forgotten The Voicemail Password Of Xiaomi Redmi 13C 5G? Try These Fixes
- In 2024, 15 Best Strongest Pokémon To Use in Pokémon GO PvP Leagues For Tecno Spark 20 | Dr.fone
- In 2024, How to Change your Poco F5 Pro 5G Location on Twitter | Dr.fone
- How to Screen Mirror your Apple iPhone 11 Pro Display? | Dr.fone
- In 2024, How To Unlink Apple ID From iPhone 6s
- Top iPhone 11 Pro Max Message Recovery Software | Stellar
- How to Slice 3GP Videos Into Smaller Clips 2023 Tutorial
- The Ultimate List Best Public Domain Images Online for 2024
- Title: In 2024, The Ultimate Guide to Preventing Phasing Issues in Studio Monitoring
- Author: Jacob
- Created at : 2024-05-05 03:39:35
- Updated at : 2024-05-06 03:39:35
- Link: https://audio-shaping.techidaily.com/in-2024-the-ultimate-guide-to-preventing-phasing-issues-in-studio-monitoring/
- License: This work is licensed under CC BY-NC-SA 4.0.
