
:max_bytes(150000):strip_icc():format(webp)/003_the-best-lgbt-movies-on-netflix-right-now-june-2022-5069913-8dbc370e568349c8a347c650353f17b1.jpg)
In 2024, No-Cost Voice Shaping Secrets Revealed Comprehensive Guide to Professional Video Voice Edits Using Filmora
“No-Cost Voice Shaping Secrets Revealed: Comprehensive Guide to Professional Video Voice Edits Using Filmora”
Best Free Voice Changer & How to Video Voice Editing With Filmora in 2024

Shanoon Cox
Mar 27, 2024• Proven solutions
Whenever you make videos, have you ever wished you could do voice video editing? What about just changing the voice in a video using a voice changer? It’s not just you. Below are some questions that users have frequently asked.
- Are there any free software programs that can change your voice even if the video is already recorded?
- I have recorded my video; how can I change the pitch of my voice to make it high or low?
A voice in a video can be changed for a number of reasons, such as changing the quality of the voice or adjusting the sound for anonymity. Whatever the reason for changing your voice, the methods remain the same. There are plenty of software programs available in the market using which you can easily change the voice of your video regardless of your purpose.
In this article, we will discuss how you can do voice video editing using Filmora X version 10.5. We are using Filmora because it is one of the easiest video editing software available in the market right now, and it is also loaded with audio editing tools. Who needs a free voice changer if you can do it in an all-in-one tool. The latest version of Filmora (Version 10.5) has some amazing tools to easily modify and change your voice to make it sound different in your videos.
You might be interested in:
For Win 7 or later (64-bit)
For macOS 10.12 or later
How To Change Your Voice Using Filmora Version 10.5
In this article, we will discuss three different methods to change your voice in Filmora.
  1. **[Using Tune-up or Tune Down Option](#a)**
  2. **[Using Equilizer Option](#b)**
  3. **[Using Filmora Audio Effects](#c)**
Let’s discuss every method one by one in detail and see how you can easily change your voice in Filmora. First of all, make sure that Filmora version 10.5 is installed in your system. If it isn’t already installed, you can visit the official website of Wondershare Filmora and download it from there. If you have an older version of Filmora Installed on your system, then you can update it. The best thing about Filmora is that you can download it for free and use all its features without paying anything. The only drawback here is that the final output of your video will have a watermark on it, which you can easily remove by purchasing Filmora.
1. Using Tune-up or Tune Down Option
Step1: Open Filmora and Import your desired video to filmora by going into a file, then clicking on import, and selecting import media files from there.

Step 2: Now drag and drop the video file to your timeline and double click on it to open the clip settings. You will see different options here; make sure to select the audio to open the audio settings.

Step3: From there, you can easily adjust the pitch of your voice. You can either increase or decrease the pitch of your voice, and it will make your voice sound a lot different as compared to your original voice.

Step4: Once you have done adjusting the pitch of your voice, click ok to apply changes to your audio.
Step5: Now play the audio, and you will notice a considerable change in your voice. Even if you show the video to your friends and family, they won’t even recognize your voice.
2. Using Equilizer Option
Step1: First of all, repeat all steps that we did in option one and open the audio settings of your video clip.

Step2: Not go to the equalizer option and click on the arrow in front of the equalizer option.

Step3: A dropdown menu will appear on your screen where you will see a lot of presets.

Step4: You can select any preset of your choice from this menu. Like if you want to make your voice sound very crisp, then you can choose Sparkle preset.
Step5: Once you have selected your desired preset, click the ok button to apply it to your video.
Step6: Now listen to your video’s audio, and you will notice a considerable difference in the voice of your video.

Also, don’t forget to tick that auto normalization box at the bottom of the audio settings for the above-mentioned methods. It will automatically normalize your video’s audio and make it sound more professional.
3. Using Filmora Audio Effects
The third method you can use to change your voice in a video is through the audio effects of Filmora.
Step1: Click on the Effects tab from the top menu, and you will see an audio effects option in the left sidebar.

Step2: You can see there are a lot of audio effects available to use in your videos.
Step3: If you want to apply any effect on your audio, drag the effect and drop it above your video in the timeline. A yellow symbol will appear on the video file, indicating that the effect has been applied to your audio.

Step4: Now play the video, and you will see that the audio effect has been applied to your voice, and it sounds a lot different.
Conclusion
So, these are the three different methods using which you can easily change your voice in Filmora. As discussed earlier, Filmora is free to download, and you can try all of its features without paying anything. Also, it has a very intuitive interface that is easy to adopt for anyone, even if you are a newbie and don’t have any prior video editing experience. So, make sure to give it a try. You can easily download it from the official website of Filmora.


Shanoon Cox
Shanoon Cox is a writer and a lover of all things video.
Follow @Shanoon Cox
Shanoon Cox
Mar 27, 2024• Proven solutions
Whenever you make videos, have you ever wished you could do voice video editing? What about just changing the voice in a video using a voice changer? It’s not just you. Below are some questions that users have frequently asked.
- Are there any free software programs that can change your voice even if the video is already recorded?
- I have recorded my video; how can I change the pitch of my voice to make it high or low?
A voice in a video can be changed for a number of reasons, such as changing the quality of the voice or adjusting the sound for anonymity. Whatever the reason for changing your voice, the methods remain the same. There are plenty of software programs available in the market using which you can easily change the voice of your video regardless of your purpose.
In this article, we will discuss how you can do voice video editing using Filmora X version 10.5. We are using Filmora because it is one of the easiest video editing software available in the market right now, and it is also loaded with audio editing tools. Who needs a free voice changer if you can do it in an all-in-one tool. The latest version of Filmora (Version 10.5) has some amazing tools to easily modify and change your voice to make it sound different in your videos.
You might be interested in:
For Win 7 or later (64-bit)
For macOS 10.12 or later
How To Change Your Voice Using Filmora Version 10.5
In this article, we will discuss three different methods to change your voice in Filmora.
  1. **[Using Tune-up or Tune Down Option](#a)**
  2. **[Using Equilizer Option](#b)**
  3. **[Using Filmora Audio Effects](#c)**
Let’s discuss every method one by one in detail and see how you can easily change your voice in Filmora. First of all, make sure that Filmora version 10.5 is installed in your system. If it isn’t already installed, you can visit the official website of Wondershare Filmora and download it from there. If you have an older version of Filmora Installed on your system, then you can update it. The best thing about Filmora is that you can download it for free and use all its features without paying anything. The only drawback here is that the final output of your video will have a watermark on it, which you can easily remove by purchasing Filmora.
1. Using Tune-up or Tune Down Option
Step1: Open Filmora and Import your desired video to filmora by going into a file, then clicking on import, and selecting import media files from there.
Step 2: Now drag and drop the video file to your timeline and double click on it to open the clip settings. You will see different options here; make sure to select the audio to open the audio settings.
Step3: From there, you can easily adjust the pitch of your voice. You can either increase or decrease the pitch of your voice, and it will make your voice sound a lot different as compared to your original voice.
Step4: Once you have done adjusting the pitch of your voice, click ok to apply changes to your audio.
Step5: Now play the audio, and you will notice a considerable change in your voice. Even if you show the video to your friends and family, they won’t even recognize your voice.
2. Using Equilizer Option
Step1: First of all, repeat all steps that we did in option one and open the audio settings of your video clip.
Step2: Not go to the equalizer option and click on the arrow in front of the equalizer option.
Step3: A dropdown menu will appear on your screen where you will see a lot of presets.
Step4: You can select any preset of your choice from this menu. Like if you want to make your voice sound very crisp, then you can choose Sparkle preset.
Step5: Once you have selected your desired preset, click the ok button to apply it to your video.
Step6: Now listen to your video’s audio, and you will notice a considerable difference in the voice of your video.
Also, don’t forget to tick that auto normalization box at the bottom of the audio settings for the above-mentioned methods. It will automatically normalize your video’s audio and make it sound more professional.
3. Using Filmora Audio Effects
The third method you can use to change your voice in a video is through the audio effects of Filmora.
Step1: Click on the Effects tab from the top menu, and you will see an audio effects option in the left sidebar.
Step2: You can see there are a lot of audio effects available to use in your videos.
Step3: If you want to apply any effect on your audio, drag the effect and drop it above your video in the timeline. A yellow symbol will appear on the video file, indicating that the effect has been applied to your audio.
Step4: Now play the video, and you will see that the audio effect has been applied to your voice, and it sounds a lot different.
Conclusion
So, these are the three different methods using which you can easily change your voice in Filmora. As discussed earlier, Filmora is free to download, and you can try all of its features without paying anything. Also, it has a very intuitive interface that is easy to adopt for anyone, even if you are a newbie and don’t have any prior video editing experience. So, make sure to give it a try. You can easily download it from the official website of Filmora.
Shanoon Cox
Shanoon Cox is a writer and a lover of all things video.
Follow @Shanoon Cox
Exploring the Best Virtual Music Production Suites – Comparison Chart Included
FREE 10 Best Online Music Makers

Benjamin Arango
Apr 26, 2024• Proven solutions
Expressing ideas through music was never easy, and even today in the age of powerful digital audio stations like Ableton Live or FruityLoops , producing original music requires a certain set of skills. However, online content producers often need music for their videos, but they neither have the time or the budget to hire a professional musician to create a soundtrack for their project in studio conditions. If you are looking for a quick way to make your own music online, then you should keep reading, because in this article we are going to take you through the ten best online music makers you should check out in 2021.
10 Best Online Music Makers in 2021
The music-making platforms that are currently available online are still not as nearly as powerful as professional software products for music producers. Nonetheless, this doesn’t mean that you can’t use them to create the music you like or just have fun with them. Here are the ten best online music makers in 2019.
1. Typeatone
Price: Free
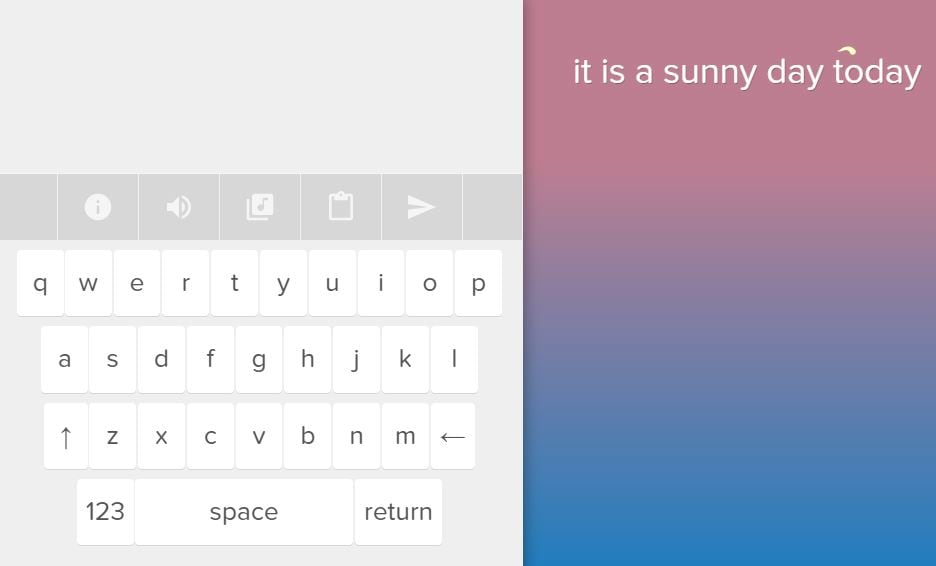
Image from Internet
Have you ever wondered what your words would sound like if they were turned into music? Head over to the Typeatone platform if you want to find out since all you have to do in order to start creating your own music is type in the text. As you type, the platform will automatically start playing your words and once you’re done, you’ll be able to hear your new song. You can also choose between different instruments to make the process of creating music with Typeatone even more entertaining. You can share all of your creations with your friends on social media.
![]()
A cross-platform for making videos anywhere for all creators

Why your video editing isn’t good enough? How about some creative inspo?
- 100 Million+ Users
- 150+ Countries and Regions
- 4 Million+ Social Media Followers
- 5 Million+ Stock Media for Use
* Secure Download

2. Audiotool
Price: Free
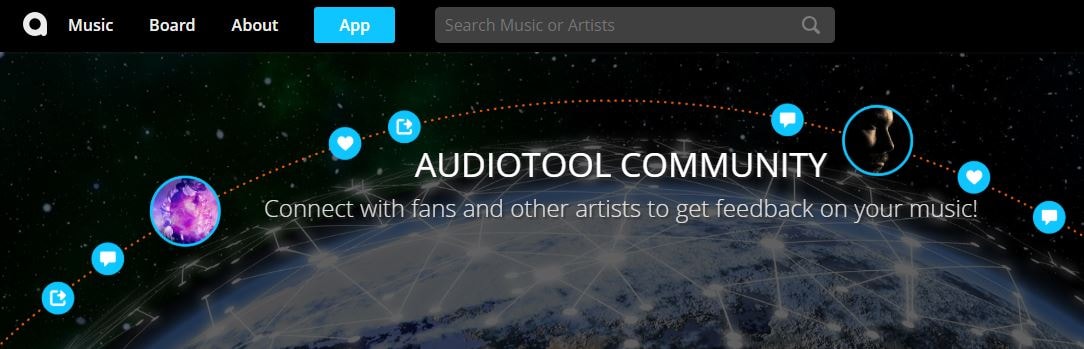
Image from Internet
Electronic music producers who often use synthesizers like Roland TB-303 or Roland TR-909 are going to love the features this online collaborative platform offers. Audiotool hosts a huge music library, you can explore even if you are not a registered user. In order to access the platform’s music studio, you first have to create an account and make sure that you are signed in. Audiotool is also a community of like-minded people where you can meet artists whose work you appreciate or hear what others think about your work. The only downside is that Audiotool’s abundance of features can be overwhelming for the newcomers to the world of electronic music production.
3. AudioSauna
Price: Free
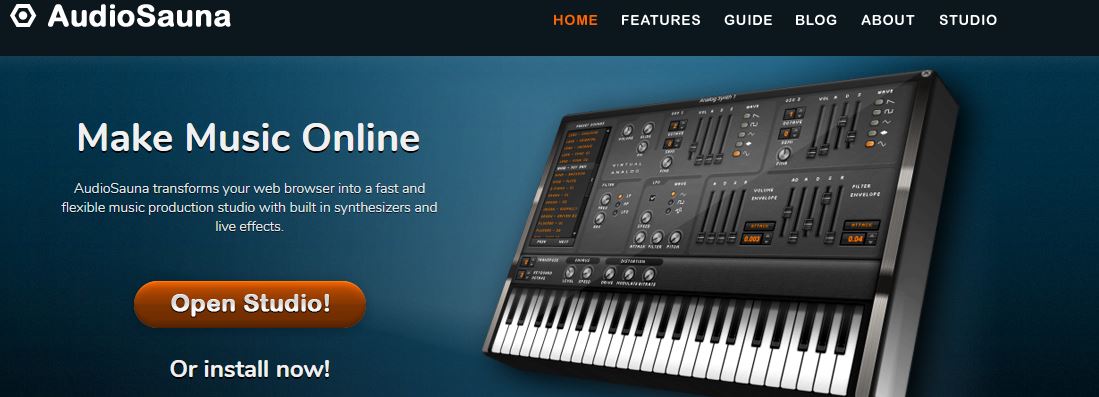
Image from Internet
AudioSauna seems to offer everything its users need to create inspiring music because it is equipped with frequency modulation synth, virtual analog synth and a sampler that provides layering features. Moreover, its intuitive interface makes the process of arranging the song structure or changing several note values simultaneously much easier. Creating an account on AudioSauna will enable to record all your projects and export them as audio files that can be uploaded to SoundCloud or any other audio distribution platform. AudioSauna is a perfect tool for skilled producers who want to create their music online.
4. Soundtrap
Price: Free trial available, subscription plans start at $3.99 per month

Image from Internet
Soundtrap offers a long list of features that enable professional musicians to create their music online. All you have to do is create an account and you will get access to the Sountrap’s studio that let you create new beat patterns, use a synthesizer or even invite friends to make music together. The platform also offers the possibility to connect your own instruments to the Soundtrap’s studio, so that you can record your music as you play it. This online platform also has an Education section where you can share your knowledge with others or learn valuable music lessons.
5. PatternSketch
Price: Free
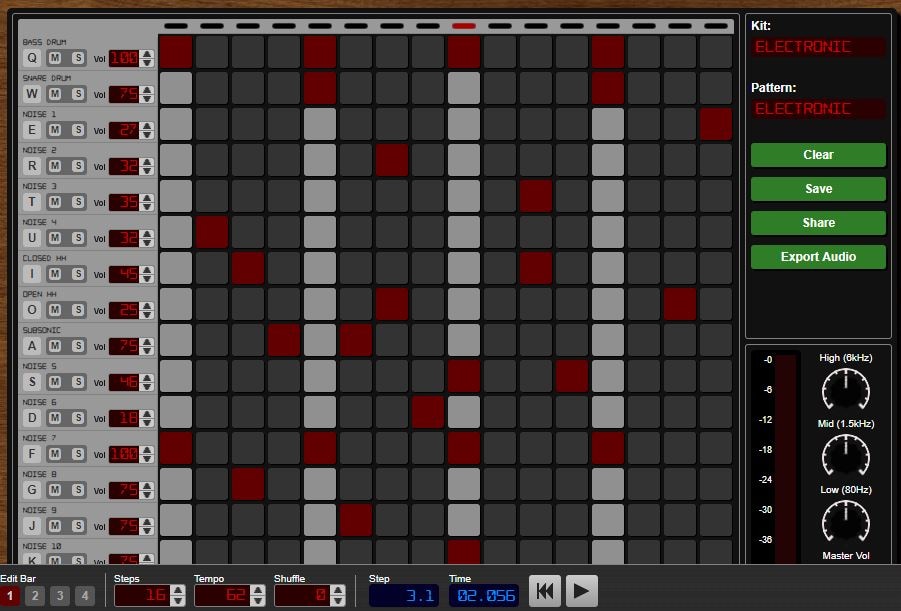
Image from Internet
This basic and yet effective drum machine can help you generate amazing beats for the songs you’re working on. Once you sign up, you will be able to choose from a number of different kits and patterns that are fully customizable or create your own original beats. After you create a pattern you like, you can save it with a single click or send it to your friends via email. Optionally, you can export all of your creations from PatternSketch and save them as wav, mp3 or ogg files, although in some cases mp3 audio files may not loop properly.
6. Soundation
Price: Free version available, pricing plans start at $1.99 per month

Image from Internet
If you choose to create music with the free version of Soundation, you’ll be able to work on up to ten projects, try out over 700 audio effects and loops, and export all your music in low quality. Purchasing the Intro pricing plan will enable you to work on an unlimited number of projects, make live audio recordings, import audio files smaller than 100MB or use an external midi controller. Moreover, opting for any of the annual or monthly subscription plans will allow you to export entire projects and audio files in high resolution from Soundation.
7. Text to Speech
Price: Free

online-music-maker-Text to Speech.jpg
Vocals are often overlooked in contemporary electronic music, but there are so many ways they can be used creatively. The platform lets you turn up to 50000 characters into speech at once, and it also offers several different voices you can choose from. Before you create an audio file you can determine how fast the text is going to be vocalized, so you should try different options and see which one fits your project the best. Text to Speech platform can be used during the process of creating a new song, but the tools it offers are not enough to make an entire song.
8. Looplabs
Price: Free
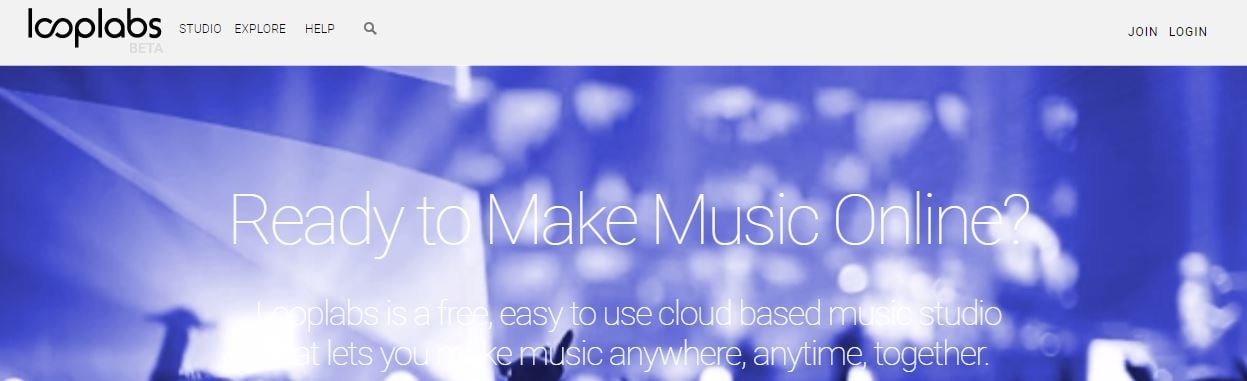
Music enthusiasts who would like to produce different genres of music online should definitely get familiar with Looplabs, as this online music maker lets its users remix songs or make music from scratch. Besides being one of the best places on the Internet to record music, Looplabs is also a community where you can meet people who like your music or discover artists whose work you admire. The Looplab’s studio features samples for a broad range of music genres and musical instruments, and you can use it to make Electro or Funk music equally effectively.
9. Online Sequencer
Price: Free
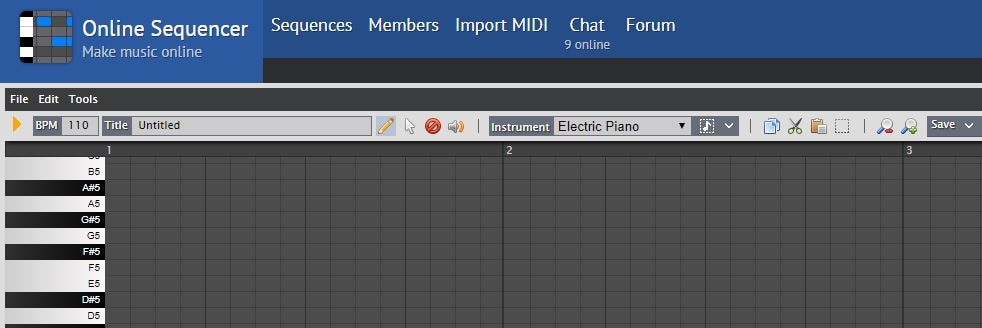
This is a perfect tool for developing an idea for a song, as you can create a sequence in just a few minutes. You can choose from Piano, Drums and Guitar categories of instruments or browse through a huge collection of fully customizable preset sequences that is updated on a daily basis. The platform also lets you import MIDI files and work on projects you’ve already started developing or you can export your sequences as MIDI files from the Online Sequencer and edit them with your DAW. Even though Online Sequencer is a useful tool for making music, the features it offers can’t really be compared with those on Soundation or AudioSauna.
10. Autochords
Price: Free
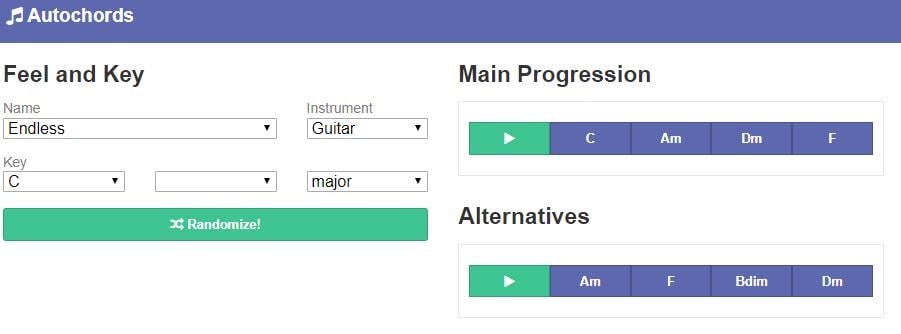
Finding new ideas for songs is often more difficult than it sounds, and if you ever face a creative block you should simply head over to Autochords. This platform suggests chord progressions based on the parameters you set, so you just have to select an instrument and the name of the song to set the feel, and the platform will show you the main progression and its alternatives. Rather than being an online music maker, Autochords is more a tool that helps piano and guitar players understand chord progressions better. iPhone and iPad users can download the Autochords app from the App Store for free.
Read More to Get : Best Free DAW for Windows and Mac for Beginners >>
Conclusion
You don’t have to be a professional musician in order to start making music online, you just have to love music, and an online music maker of your choice will take care of the rest. Do you use online music makers for entertainment or to express your creativity? Leave a comment below and share your opinions with us.
Benjamin Arango
Benjamin Arango is a writer and a lover of all things video.
Follow @Benjamin Arango
Benjamin Arango
Apr 26, 2024• Proven solutions
Expressing ideas through music was never easy, and even today in the age of powerful digital audio stations like Ableton Live or FruityLoops , producing original music requires a certain set of skills. However, online content producers often need music for their videos, but they neither have the time or the budget to hire a professional musician to create a soundtrack for their project in studio conditions. If you are looking for a quick way to make your own music online, then you should keep reading, because in this article we are going to take you through the ten best online music makers you should check out in 2021.
10 Best Online Music Makers in 2021
The music-making platforms that are currently available online are still not as nearly as powerful as professional software products for music producers. Nonetheless, this doesn’t mean that you can’t use them to create the music you like or just have fun with them. Here are the ten best online music makers in 2019.
1. Typeatone
Price: Free
Image from Internet
Have you ever wondered what your words would sound like if they were turned into music? Head over to the Typeatone platform if you want to find out since all you have to do in order to start creating your own music is type in the text. As you type, the platform will automatically start playing your words and once you’re done, you’ll be able to hear your new song. You can also choose between different instruments to make the process of creating music with Typeatone even more entertaining. You can share all of your creations with your friends on social media.
![]()
A cross-platform for making videos anywhere for all creators
Why your video editing isn’t good enough? How about some creative inspo?
- 100 Million+ Users
- 150+ Countries and Regions
- 4 Million+ Social Media Followers
- 5 Million+ Stock Media for Use
* Secure Download
2. Audiotool
Price: Free
Image from Internet
Electronic music producers who often use synthesizers like Roland TB-303 or Roland TR-909 are going to love the features this online collaborative platform offers. Audiotool hosts a huge music library, you can explore even if you are not a registered user. In order to access the platform’s music studio, you first have to create an account and make sure that you are signed in. Audiotool is also a community of like-minded people where you can meet artists whose work you appreciate or hear what others think about your work. The only downside is that Audiotool’s abundance of features can be overwhelming for the newcomers to the world of electronic music production.
3. AudioSauna
Price: Free
Image from Internet
AudioSauna seems to offer everything its users need to create inspiring music because it is equipped with frequency modulation synth, virtual analog synth and a sampler that provides layering features. Moreover, its intuitive interface makes the process of arranging the song structure or changing several note values simultaneously much easier. Creating an account on AudioSauna will enable to record all your projects and export them as audio files that can be uploaded to SoundCloud or any other audio distribution platform. AudioSauna is a perfect tool for skilled producers who want to create their music online.
4. Soundtrap
Price: Free trial available, subscription plans start at $3.99 per month
Image from Internet
Soundtrap offers a long list of features that enable professional musicians to create their music online. All you have to do is create an account and you will get access to the Sountrap’s studio that let you create new beat patterns, use a synthesizer or even invite friends to make music together. The platform also offers the possibility to connect your own instruments to the Soundtrap’s studio, so that you can record your music as you play it. This online platform also has an Education section where you can share your knowledge with others or learn valuable music lessons.
5. PatternSketch
Price: Free
Image from Internet
This basic and yet effective drum machine can help you generate amazing beats for the songs you’re working on. Once you sign up, you will be able to choose from a number of different kits and patterns that are fully customizable or create your own original beats. After you create a pattern you like, you can save it with a single click or send it to your friends via email. Optionally, you can export all of your creations from PatternSketch and save them as wav, mp3 or ogg files, although in some cases mp3 audio files may not loop properly.
6. Soundation
Price: Free version available, pricing plans start at $1.99 per month
Image from Internet
If you choose to create music with the free version of Soundation, you’ll be able to work on up to ten projects, try out over 700 audio effects and loops, and export all your music in low quality. Purchasing the Intro pricing plan will enable you to work on an unlimited number of projects, make live audio recordings, import audio files smaller than 100MB or use an external midi controller. Moreover, opting for any of the annual or monthly subscription plans will allow you to export entire projects and audio files in high resolution from Soundation.
7. Text to Speech
Price: Free

online-music-maker-Text to Speech.jpg
Vocals are often overlooked in contemporary electronic music, but there are so many ways they can be used creatively. The platform lets you turn up to 50000 characters into speech at once, and it also offers several different voices you can choose from. Before you create an audio file you can determine how fast the text is going to be vocalized, so you should try different options and see which one fits your project the best. Text to Speech platform can be used during the process of creating a new song, but the tools it offers are not enough to make an entire song.
8. Looplabs
Price: Free
Music enthusiasts who would like to produce different genres of music online should definitely get familiar with Looplabs, as this online music maker lets its users remix songs or make music from scratch. Besides being one of the best places on the Internet to record music, Looplabs is also a community where you can meet people who like your music or discover artists whose work you admire. The Looplab’s studio features samples for a broad range of music genres and musical instruments, and you can use it to make Electro or Funk music equally effectively.
9. Online Sequencer
Price: Free
This is a perfect tool for developing an idea for a song, as you can create a sequence in just a few minutes. You can choose from Piano, Drums and Guitar categories of instruments or browse through a huge collection of fully customizable preset sequences that is updated on a daily basis. The platform also lets you import MIDI files and work on projects you’ve already started developing or you can export your sequences as MIDI files from the Online Sequencer and edit them with your DAW. Even though Online Sequencer is a useful tool for making music, the features it offers can’t really be compared with those on Soundation or AudioSauna.
10. Autochords
Price: Free
Finding new ideas for songs is often more difficult than it sounds, and if you ever face a creative block you should simply head over to Autochords. This platform suggests chord progressions based on the parameters you set, so you just have to select an instrument and the name of the song to set the feel, and the platform will show you the main progression and its alternatives. Rather than being an online music maker, Autochords is more a tool that helps piano and guitar players understand chord progressions better. iPhone and iPad users can download the Autochords app from the App Store for free.
Read More to Get : Best Free DAW for Windows and Mac for Beginners >>
Conclusion
You don’t have to be a professional musician in order to start making music online, you just have to love music, and an online music maker of your choice will take care of the rest. Do you use online music makers for entertainment or to express your creativity? Leave a comment below and share your opinions with us.
Benjamin Arango
Benjamin Arango is a writer and a lover of all things video.
Follow @Benjamin Arango
Harmonizing Sight and Sound: How to Edit Videos Into a Perfect Rhythmic Dance Using Premiere Pro
How to Edit Videos to the Beat in Premiere Pro?
Benjamin Arango
Mar 27, 2024• Proven solutions
A rapid succession of shots can make any music video or a feature film more entertaining to watch. The popularity of beat edits has gone through the roof in the era of social media videos, as so many YouTubers and video content creators produce videos that are perfectly synced to the music. This video editing technique can be used in a single scene or throughout an entire video, depending on the project and the effect you would like the video to make on the viewer. Read on if you would like to learn how to edit video clips to match the beat of a song in Adobe Premiere Pro.
How to Edit and Auto-Sync Video Clips to the Beat of a Song in Adobe Premiere Pro for Free?
Before you start editing clips to the beat, you must first ensure that all of the materials you want to include in that video are imported into the project you created in Adobe Premiere Pro. Once the footage you intend to use in your video is in the Media Bin, you should head over to the New submenu in the File menu.
Afterward, you can add an audio file to the timeline and ensure that the sequence settings are correct. The audio file is going to serve as the core around which you are going to build the entire video, which is why it is important to select a rhythmic song that has clearly distinguishable beats.
Click on the Wrench icon and choose the Show Audio Waveform option from the drop-down menu, so that you can see the beats in the audio file. Make sure that the sequence you created is selected and not the audio file you added to the timeline and then position the playhead at the beginning of the song. Listening to the music to which you would like to edit your video a few times is recommended because it will enable you to better understand where the beats are located.
When ready start adding markers to the sequence by using the M keyboard shortcut, so that every beat of the song contains a marker. This may take a few tries because hitting the beats can be difficult for video editors that don’t have any musical talents, but with practice, you should be able to position the markers precisely where they need to be. Also, you can make the adjustments to the video you’re creating after you sync your footage with the audio so even if the markers aren’t positioned perfectly you can make corrections later.
Head over to the Media Bin and proceed to add In and Out points, by either clicking on their icons or using the I and O buttons, to all video clips you want to edit to the beat. By doing so you will let Adobe Premiere know which parts of the video clips you want to keep and where it should create cuts. After setting the In and Out points for all the video clips you would like to use in your project you just have to select them. The order in which your footage is selected is important as it will determine where they are going to be placed on the timeline.
Choose the Automate to Sequence option from the Clip menu and once the Automate to Sequence window appears on the screen you should choose the Selection Order option from the Ordering menu. Afterward, you should select the At Unnumbered Markers setting from the Placement menu and change the Method to the Overwrite Edit.
Make sure that the Use In/Out Range option is enabled and click on the Ignore Audio checkbox if your video clips also contain audio. Click OK to confirm the changes and Adobe Premiere Pro will automatically match your footage to the markers you added to the sequence.
How to Edit Video Clips to the Beat of a Song with BeatEdit Extension for Adobe Premiere Pro?
Placing markers at each beat in the song can be both difficult and time-consuming, which defeats the purpose of using Adobe Premiere Pro to automate this process. In case you are looking to save some time on adding markers to a sequence, you should try the Mamoworld’s BeatEdit extension for Adobe Premiere Pro that analyses the music and adds markers automatically. Here’s how you can edit video clips to match the beat with BeatEdit.
How to Edit Footage to the Beat in Premiere Pro with the BeatEdit Extension?
In order to download and install the BeatEdit in Adobe Premiere Pro, you must pay a one-time $99,99 fee. After you go through the installation process, you can launch BeatEdit from the Extensions submenu that is located in the Window menu.
After the BeatEdit window pops up on the screen you should click on the Load Music button in order to start the beat detection process. After the audio file is analyzed blue lines are going to be displayed at each beat and you’ll be able to hear a click sound if you play the song. BeatEdit lets you adjust the volume of the audio file you analyzed and enables you to select the beats where you want to make the cuts in your footage.
You can choose if you want to select beats evenly or randomly, specify their frequency or select the portion of the song from which you want to select the beats. The extension also lets you add extra markers that are not located at beat and adjust their amount or minimum distance. BeatEdit generates clip and sequence markers, so make sure that the sequence markers option is selected before clicking on the Create Markers button.
Add the audio file you would like to use in your video to the Adobe Premiere Pro’s timeline and proceed to select the video clips in the Media Bin. Place the playhead at the beginning of the timeline and select the Automate to Sequence option from the Clip menu. You can then select the same settings you’d select if you added the markers to the sequence on your own.
Conclusion
Editing videos to the beat of a song in Premiere Pro is becoming increasingly popular among video content creators. Hopefully, our tutorial has helped you learn this simple but effective video editing technique so that you can use it to make the videos your friends and followers on social media are going to enjoy watching. It is important to remember that how effective your beat edits are going to be, depends on the quality of the footage and the song selection. Do you know how to edit video clips to match the beat of a song in Premiere Pro? If so, share your experiences with us in the comments.
Benjamin Arango
Benjamin Arango is a writer and a lover of all things video.
Follow @Benjamin Arango
Benjamin Arango
Mar 27, 2024• Proven solutions
A rapid succession of shots can make any music video or a feature film more entertaining to watch. The popularity of beat edits has gone through the roof in the era of social media videos, as so many YouTubers and video content creators produce videos that are perfectly synced to the music. This video editing technique can be used in a single scene or throughout an entire video, depending on the project and the effect you would like the video to make on the viewer. Read on if you would like to learn how to edit video clips to match the beat of a song in Adobe Premiere Pro.
How to Edit and Auto-Sync Video Clips to the Beat of a Song in Adobe Premiere Pro for Free?
Before you start editing clips to the beat, you must first ensure that all of the materials you want to include in that video are imported into the project you created in Adobe Premiere Pro. Once the footage you intend to use in your video is in the Media Bin, you should head over to the New submenu in the File menu.
Afterward, you can add an audio file to the timeline and ensure that the sequence settings are correct. The audio file is going to serve as the core around which you are going to build the entire video, which is why it is important to select a rhythmic song that has clearly distinguishable beats.
Click on the Wrench icon and choose the Show Audio Waveform option from the drop-down menu, so that you can see the beats in the audio file. Make sure that the sequence you created is selected and not the audio file you added to the timeline and then position the playhead at the beginning of the song. Listening to the music to which you would like to edit your video a few times is recommended because it will enable you to better understand where the beats are located.
When ready start adding markers to the sequence by using the M keyboard shortcut, so that every beat of the song contains a marker. This may take a few tries because hitting the beats can be difficult for video editors that don’t have any musical talents, but with practice, you should be able to position the markers precisely where they need to be. Also, you can make the adjustments to the video you’re creating after you sync your footage with the audio so even if the markers aren’t positioned perfectly you can make corrections later.
Head over to the Media Bin and proceed to add In and Out points, by either clicking on their icons or using the I and O buttons, to all video clips you want to edit to the beat. By doing so you will let Adobe Premiere know which parts of the video clips you want to keep and where it should create cuts. After setting the In and Out points for all the video clips you would like to use in your project you just have to select them. The order in which your footage is selected is important as it will determine where they are going to be placed on the timeline.
Choose the Automate to Sequence option from the Clip menu and once the Automate to Sequence window appears on the screen you should choose the Selection Order option from the Ordering menu. Afterward, you should select the At Unnumbered Markers setting from the Placement menu and change the Method to the Overwrite Edit.
Make sure that the Use In/Out Range option is enabled and click on the Ignore Audio checkbox if your video clips also contain audio. Click OK to confirm the changes and Adobe Premiere Pro will automatically match your footage to the markers you added to the sequence.
How to Edit Video Clips to the Beat of a Song with BeatEdit Extension for Adobe Premiere Pro?
Placing markers at each beat in the song can be both difficult and time-consuming, which defeats the purpose of using Adobe Premiere Pro to automate this process. In case you are looking to save some time on adding markers to a sequence, you should try the Mamoworld’s BeatEdit extension for Adobe Premiere Pro that analyses the music and adds markers automatically. Here’s how you can edit video clips to match the beat with BeatEdit.
How to Edit Footage to the Beat in Premiere Pro with the BeatEdit Extension?
In order to download and install the BeatEdit in Adobe Premiere Pro, you must pay a one-time $99,99 fee. After you go through the installation process, you can launch BeatEdit from the Extensions submenu that is located in the Window menu.
After the BeatEdit window pops up on the screen you should click on the Load Music button in order to start the beat detection process. After the audio file is analyzed blue lines are going to be displayed at each beat and you’ll be able to hear a click sound if you play the song. BeatEdit lets you adjust the volume of the audio file you analyzed and enables you to select the beats where you want to make the cuts in your footage.
You can choose if you want to select beats evenly or randomly, specify their frequency or select the portion of the song from which you want to select the beats. The extension also lets you add extra markers that are not located at beat and adjust their amount or minimum distance. BeatEdit generates clip and sequence markers, so make sure that the sequence markers option is selected before clicking on the Create Markers button.
Add the audio file you would like to use in your video to the Adobe Premiere Pro’s timeline and proceed to select the video clips in the Media Bin. Place the playhead at the beginning of the timeline and select the Automate to Sequence option from the Clip menu. You can then select the same settings you’d select if you added the markers to the sequence on your own.
Conclusion
Editing videos to the beat of a song in Premiere Pro is becoming increasingly popular among video content creators. Hopefully, our tutorial has helped you learn this simple but effective video editing technique so that you can use it to make the videos your friends and followers on social media are going to enjoy watching. It is important to remember that how effective your beat edits are going to be, depends on the quality of the footage and the song selection. Do you know how to edit video clips to match the beat of a song in Premiere Pro? If so, share your experiences with us in the comments.
Benjamin Arango
Benjamin Arango is a writer and a lover of all things video.
Follow @Benjamin Arango
Also read:
- In 2024, The Virtuosos Choice A Ranked List of Available BGM Score Archives
- New In 2024, Exploring the Best Uncopyrighted Soundscape for Compelling Video Sequences
- Updated In 2024, Top-Rated Dog Howling and Growling Sounds for Filmmakers
- Step-by-Step Audio Capture in GarageBand Your Personalized Tutorial for 2024
- Updated Top 15 Groundbreaking Rock Tracks Unveiled
- Cutting-Edge 11 Mobile Audio Tools for Home Studios
- Unlock the Potential of Your Videos with Our Comprehensive List of Best Free Converters (Online/Offline) for 2024
- Updated In 2024, Digital Feline Audio Illusion
- New Removing Noise From Music Using Adobe Audition Reviewing All Possibilities for 2024
- New In 2024, Premier Vocal Transformation Suite Unveiling the Top Singing Audio Enhancer
- Synching Visuals and Audio Step-by-Step Process for 2024
- Delve Into the Aural Essence of Artistic Appliances
- 2024 Approved From Amateur to Expert Utilizing Free Tools for Effective AutoTune in Audacity
- Multimodal Media Mastery Integrating Audio Into Video Projects Today for 2024
- Updated Lexis Audio Editor Deep Dive Critical Analysis, Advanced Techniques, and Tutorial Exercises
- Updated The Definitive Guide to Choosing Best Pop Sounds for Video Backdrops (2024S Catalogue)
- New In 2024, The Rhythmic Realm of KineMaster Incorporating Melodies and Beats
- New Clap Quest Unearthing Enthusiastic Reactions
- Updated In 2024, The Ultimate Technique for Taming Room Rumbles in Recording Sessions
- New 2024 Approved Mastering Audio Amplitude Control in Audacity
- In 2024, Bypass iCloud Activation Lock with IMEI Code From iPhone XR
- In 2024, How to Check Distance and Radius on Google Maps For your Samsung Galaxy M54 5G | Dr.fone
- 6 Ways to Change Spotify Location On Your Tecno Spark 10 5G | Dr.fone
- Updated Based on Preferences, You Can Adjust the Speed of YouTube Videos. Learn How to Produce a YouTube Slow-Motion Video in This Article
- 2024 Approved In This Article We Will Be Covering the Most Important Topics You Have to Remember when Becoming a Successful YouTube-Star
- In 2024, 3 Ways to Unlock Your Apple iPhone SE (2022) for Free
- Overview of the Best Realme GT 3 Screen Mirroring App | Dr.fone
- Updated 2024 Approved The VHS Effect in FCP A Beginners Guide to Retro Editing
- Updated Free and Fabulous Top 10 Ubuntu Video Editing Software Options
- Using Compressor in FCPX Tips, Tricks, and Best Practices for 2024
- 8 Solutions to Solve YouTube App Crashing on Vivo S18 | Dr.fone
- Super Easy Ways To Deal with Oppo A58 4G Unresponsive Screen | Dr.fone
- 3uTools Virtual Location Not Working On Honor 100? Fix Now | Dr.fone
- The Ultimate List 10 Best Intro Video Makers Online for 2024
- Title: In 2024, No-Cost Voice Shaping Secrets Revealed Comprehensive Guide to Professional Video Voice Edits Using Filmora
- Author: Jacob
- Created at : 2024-05-20 00:04:18
- Updated at : 2024-05-21 00:04:18
- Link: https://audio-shaping.techidaily.com/in-2024-no-cost-voice-shaping-secrets-revealed-comprehensive-guide-to-professional-video-voice-edits-using-filmora/
- License: This work is licensed under CC BY-NC-SA 4.0.
