
:max_bytes(150000):strip_icc():format(webp)/how-to-safely-use-airport-charging-stations-4690583-01-6085c56e46b34f84b5f5d2d976e20677.jpg)
Harmonizing Sound Innovative Solutions to Tackle Distorted Audio Problems
Harmonizing Sound: Innovative Solutions to Tackle Distorted Audio Problems
Create High-Quality Video - Wondershare Filmora
An easy and powerful YouTube video editor
Numerous video and audio effects to choose from
Detailed tutorials are provided by the official channel
So you’re all set: you’ve sat down, grabbed your microphone, fired up your recording software, and started pouring out the content of your mind. Once finished, you listen back to the recording, thinking you’re about to hear the silky-smooth undertones of your voice resonating through your ears, but something odd occurs — it sounds terrible. Distorted audio is very unwelcoming since you want the sound to be natural. This guide will explain how to fix distorted audio using various methods.
In this article
01 What Causes Distorted Audio?
02 How To Fix Distorted Audio Using Different Methods
What Causes Distorted Audio?
Distorted audio is the main culprit in ruined audio clips. Here are some of the causes of distorted sound.
1. Recording Environment
Not recording dialogue and voice-over in a studio can cause distorted audio. However, audio quality can be out of control if you conduct an onsite interview. Getting a meaningful and cinematic shot should come first. If you do not use a studio-quality microphone that comes with directional controls, you’ll likely have distorted audio. You might want to go for a unidirectional stereo channel if you want boom movements to be undetectable.
When a cheap, low-quality microphone is moving, you’ll hear the unsteadiness in your recording, leading to distorted audio. Recording audio in an echo chamber or an overly large room can also result in distorted audio.
2. Touching the Mic While Recording
If you hand the microphone to someone who does not know how to use it, they might hold it too loosely or close. Microphones feature sensitive parts that should not be dropped, shaken, or breathed on. When you are interviewing people unfamiliar with industry standards, you should hold the microphone, not the person you are interviewing. The mic is not within the range of 6” to 12 “ away from the speaker, this could lead to distorted audio.
3. Using the Wrong Mic
A reliable mic comes with audio controls and captures room tone and timbre. It should be portable, compact, and have a wind sleeve. In outdoor situations where ADR is not an option, you might want to use a wind sleeve.
Podcast showrunners and content creators often use Blue Yeti mics connected to a soundboard. While these are cheaper options, they can cause distorted audio. Content creators who are not stationary should purchase a lavalier, and wireless is a more high-end and expensive option.
4. Positioning Your Microphones Incorrectly
You have to be careful if you’ll be mounting a mic on your DSLR. Filming events with a one-mic setup is a promise to record everything you hear again. You’ll inevitably film some moments at a distance and leave the audio compromised to distortion.
5. Faulty Equipment
Your equipment can fail in different ways. For instance, your effects processor can fail, meaning that you won’t hear any sound passing through it. It can also fail, and you end up hearing a distorted sound passing out of the processor. Essentially, this might or might not be linked to the component’s capability of handling the signal as much as the busted internals result.
How To Fix Distorted Audio Using Different Methods
You can fix distorted audio using various methods. They include:
Method 1: How To Fix Distorted Audio in Audacity
Audacity is the bread and butter for individuals who adore a crisp audio quality. Audacity helps users finetune various attributes of their recordings. It is a free and intuitive software suite suitable for newbies and individuals who don’t interact with computers. With that in mind, here is how to fix distorted audio using Audacity.
- Open the audio file by dragging and dropping it into Audacity.
- Select the distorted part and click on the Effect option. Then, select Noise Reduction.


- The Noise Reduction window will open.

- Now, click on Noise Profile, and Audacity will know what to filter out.
- Next, select the entire audio and open the Noise Reduction Window again ( Effect > Noise Reduction ). Then, set the values to suit your preferences.
- Hit preview to check the audio, then the Click OK button.
If the audio is still distorted, apply the filter again. Don’t overdo the process numerous times to ensure your audio is not degraded, making the voice sound robotic and tinny.
Now, use compression to your advantage. If compression confuses you, think of it as a tool that adjusts your audio for the listener’s benefit. Compression not only quiets the background minutiae that creeps into your recording, but it also boosts your voice and gives it a full, captivating resonance.
- To start the compression process, select your audio track, press CTRL + A, click “Effect” and then click “Compressor.”

- Adjust the values in the compressor to meet your needs and make your voice “pop” from the background.
- Once you have set the values, hit the Preview button to check the audio. Then, click on OK.
That is how to fix distorted audio using Audacity.
You May Be Interested In
How To Fix Distorted Audio in Garageband
Garageband is one of the most popular audio recording software available. Though you can use it for various purposes, it is mainly intended to be used to create music. However, many people have the problem of distorted audio files, making production difficult when trying to perfect a project. To learn how to fix distorted audio in Garageband, follow the steps below:
- Launch GarageBand, then open your audio file. Once your audio file finishes loading, select the audio file from which you want to remove distortion by clicking it.
- Click on the “i” symbol encapsulated in a blue circle positioned on the lower-right portion of your screen. This icon sits in the middle of two other icons: a set of notes and an eye.
- Select the “Real Instrument” tab located on the top right side of your screen. You’ll see two tabs: Master Tracks and Real Instrument.
- Click the Edit tab to activate it, and a list of effects will pop up.
- Select Distortion from the list, and you’ll see a drop-down menu.
- Next, select the None option to remove distortion.
If you have distorted audio due to poor recording quality, navigate to the Real Instrument”Edit menu and select AULowpass from the boxes available. Doing this will remove frequencies above a certain range, and this will fix the distorted audio.
Method 3: How To Fix Distorted Audio in Windows 10
Several actions can cause problems or distort sound on your Windows 10 application. Some of the common causes include:
- When upgrading your computer from an older version to a new one
- In case your computer gets corrupted with a virus
- If your computer or device doesn’t the right sound drivers
So how do you fix distorted audio in Windows 10? There are several ways you can fix distorted audio in Windows 10. Here is how to fix distorted audio using some of the best ways.
1. Reinstall drivers
- Right-click the start button and choose device manager.
- Navigate through sound, video, and game controllers.
- Click on the Details tab.
- Select hardware Ids from the drop-down menu.

- Copy and first the first value of drivers in your browser and search the internet.

- Open the official site and download the correct driver。
- Install and restart your PC。
2. Update drivers
- Right-click on the start button.
- Scroll to the sound, video, and game controllers option.
- Right-click on the sound device and select uninstall the device.

- Restart your PC after the uninstall process is finished.
- Open the device manager.
- Select and click on the scan for hardware changes option.

Windows will automatically install a new version of sound drivers
3. Run Windows Audio Troubleshooter
- To use this method, open Start and click the cog-like icon. This will open the Settings app.
- Select Update & security.
- Choose Troubleshoot in the left pane.
- Expand the Playing Audio by clicking it.
- Hit the Run the troubleshooter button, then follow the further instructions.

4. Take Exclusive Control of Your Device Option by Disabling Allow Applications
- Navigate to the notification area and right-click on the sound icon. Open Playback devices.
- Next, right-click on the default Playback Device, then open Properties.
- Choose the Advanced tab option.
- Navigate to the Exclusive mode section and check the box that says disable Allow applications to control your device.

When it comes to editing or performing audio editing in the video, Wondershare Filmora is a powerful video editing software that can help you with reducing the voiceover volume, mute the audio in the video, or cut, copy, paste or insert your audio files. Learn more about the audio editing features of Filmora from the below video & download Filmora to try!
For Win 7 or later (64-bit)
For macOS 10.12 or later
Conclusion
● Whether you’re an amateur audio enthusiast or produce a podcast with thousands of listeners, the quality of your audio can “make or break” your results. When your audience is listening to an audio recording, the last thing they want to notice or hear is a distortion because it is very distracting. When recording, it is almost impossible to find an environment that removes audio distortion without access to a recording studio. Luckily, you can use the above methods to fix distorted audio and make it look professional.
So you’re all set: you’ve sat down, grabbed your microphone, fired up your recording software, and started pouring out the content of your mind. Once finished, you listen back to the recording, thinking you’re about to hear the silky-smooth undertones of your voice resonating through your ears, but something odd occurs — it sounds terrible. Distorted audio is very unwelcoming since you want the sound to be natural. This guide will explain how to fix distorted audio using various methods.
In this article
01 What Causes Distorted Audio?
02 How To Fix Distorted Audio Using Different Methods
What Causes Distorted Audio?
Distorted audio is the main culprit in ruined audio clips. Here are some of the causes of distorted sound.
1. Recording Environment
Not recording dialogue and voice-over in a studio can cause distorted audio. However, audio quality can be out of control if you conduct an onsite interview. Getting a meaningful and cinematic shot should come first. If you do not use a studio-quality microphone that comes with directional controls, you’ll likely have distorted audio. You might want to go for a unidirectional stereo channel if you want boom movements to be undetectable.
When a cheap, low-quality microphone is moving, you’ll hear the unsteadiness in your recording, leading to distorted audio. Recording audio in an echo chamber or an overly large room can also result in distorted audio.
2. Touching the Mic While Recording
If you hand the microphone to someone who does not know how to use it, they might hold it too loosely or close. Microphones feature sensitive parts that should not be dropped, shaken, or breathed on. When you are interviewing people unfamiliar with industry standards, you should hold the microphone, not the person you are interviewing. The mic is not within the range of 6” to 12 “ away from the speaker, this could lead to distorted audio.
3. Using the Wrong Mic
A reliable mic comes with audio controls and captures room tone and timbre. It should be portable, compact, and have a wind sleeve. In outdoor situations where ADR is not an option, you might want to use a wind sleeve.
Podcast showrunners and content creators often use Blue Yeti mics connected to a soundboard. While these are cheaper options, they can cause distorted audio. Content creators who are not stationary should purchase a lavalier, and wireless is a more high-end and expensive option.
4. Positioning Your Microphones Incorrectly
You have to be careful if you’ll be mounting a mic on your DSLR. Filming events with a one-mic setup is a promise to record everything you hear again. You’ll inevitably film some moments at a distance and leave the audio compromised to distortion.
5. Faulty Equipment
Your equipment can fail in different ways. For instance, your effects processor can fail, meaning that you won’t hear any sound passing through it. It can also fail, and you end up hearing a distorted sound passing out of the processor. Essentially, this might or might not be linked to the component’s capability of handling the signal as much as the busted internals result.
How To Fix Distorted Audio Using Different Methods
You can fix distorted audio using various methods. They include:
Method 1: How To Fix Distorted Audio in Audacity
Audacity is the bread and butter for individuals who adore a crisp audio quality. Audacity helps users finetune various attributes of their recordings. It is a free and intuitive software suite suitable for newbies and individuals who don’t interact with computers. With that in mind, here is how to fix distorted audio using Audacity.
- Open the audio file by dragging and dropping it into Audacity.
- Select the distorted part and click on the Effect option. Then, select Noise Reduction.
- The Noise Reduction window will open.
- Now, click on Noise Profile, and Audacity will know what to filter out.
- Next, select the entire audio and open the Noise Reduction Window again ( Effect > Noise Reduction ). Then, set the values to suit your preferences.
- Hit preview to check the audio, then the Click OK button.
If the audio is still distorted, apply the filter again. Don’t overdo the process numerous times to ensure your audio is not degraded, making the voice sound robotic and tinny.
Now, use compression to your advantage. If compression confuses you, think of it as a tool that adjusts your audio for the listener’s benefit. Compression not only quiets the background minutiae that creeps into your recording, but it also boosts your voice and gives it a full, captivating resonance.
- To start the compression process, select your audio track, press CTRL + A, click “Effect” and then click “Compressor.”
- Adjust the values in the compressor to meet your needs and make your voice “pop” from the background.
- Once you have set the values, hit the Preview button to check the audio. Then, click on OK.
That is how to fix distorted audio using Audacity.
You May Be Interested In
How To Fix Distorted Audio in Garageband
Garageband is one of the most popular audio recording software available. Though you can use it for various purposes, it is mainly intended to be used to create music. However, many people have the problem of distorted audio files, making production difficult when trying to perfect a project. To learn how to fix distorted audio in Garageband, follow the steps below:
- Launch GarageBand, then open your audio file. Once your audio file finishes loading, select the audio file from which you want to remove distortion by clicking it.
- Click on the “i” symbol encapsulated in a blue circle positioned on the lower-right portion of your screen. This icon sits in the middle of two other icons: a set of notes and an eye.
- Select the “Real Instrument” tab located on the top right side of your screen. You’ll see two tabs: Master Tracks and Real Instrument.
- Click the Edit tab to activate it, and a list of effects will pop up.
- Select Distortion from the list, and you’ll see a drop-down menu.
- Next, select the None option to remove distortion.
If you have distorted audio due to poor recording quality, navigate to the Real Instrument”Edit menu and select AULowpass from the boxes available. Doing this will remove frequencies above a certain range, and this will fix the distorted audio.
Method 3: How To Fix Distorted Audio in Windows 10
Several actions can cause problems or distort sound on your Windows 10 application. Some of the common causes include:
- When upgrading your computer from an older version to a new one
- In case your computer gets corrupted with a virus
- If your computer or device doesn’t the right sound drivers
So how do you fix distorted audio in Windows 10? There are several ways you can fix distorted audio in Windows 10. Here is how to fix distorted audio using some of the best ways.
1. Reinstall drivers
- Right-click the start button and choose device manager.
- Navigate through sound, video, and game controllers.
- Click on the Details tab.
- Select hardware Ids from the drop-down menu.
- Copy and first the first value of drivers in your browser and search the internet.
- Open the official site and download the correct driver。
- Install and restart your PC。
2. Update drivers
- Right-click on the start button.
- Scroll to the sound, video, and game controllers option.
- Right-click on the sound device and select uninstall the device.
- Restart your PC after the uninstall process is finished.
- Open the device manager.
- Select and click on the scan for hardware changes option.
Windows will automatically install a new version of sound drivers
3. Run Windows Audio Troubleshooter
- To use this method, open Start and click the cog-like icon. This will open the Settings app.
- Select Update & security.
- Choose Troubleshoot in the left pane.
- Expand the Playing Audio by clicking it.
- Hit the Run the troubleshooter button, then follow the further instructions.
4. Take Exclusive Control of Your Device Option by Disabling Allow Applications
- Navigate to the notification area and right-click on the sound icon. Open Playback devices.
- Next, right-click on the default Playback Device, then open Properties.
- Choose the Advanced tab option.
- Navigate to the Exclusive mode section and check the box that says disable Allow applications to control your device.
When it comes to editing or performing audio editing in the video, Wondershare Filmora is a powerful video editing software that can help you with reducing the voiceover volume, mute the audio in the video, or cut, copy, paste or insert your audio files. Learn more about the audio editing features of Filmora from the below video & download Filmora to try!
For Win 7 or later (64-bit)
For macOS 10.12 or later
Conclusion
● Whether you’re an amateur audio enthusiast or produce a podcast with thousands of listeners, the quality of your audio can “make or break” your results. When your audience is listening to an audio recording, the last thing they want to notice or hear is a distortion because it is very distracting. When recording, it is almost impossible to find an environment that removes audio distortion without access to a recording studio. Luckily, you can use the above methods to fix distorted audio and make it look professional.
A New Dawn for Music Creation: A Compilation of the Most Promising AI Composers
Top Best 10 AI Music Composers in 2024

Benjamin Arango
Mar 27, 2024• Proven solutions
Robots can’t be creative, right? A number of startups that focus on the development of artificial intelligence that is capable of composing music have proved this statement wrong. AI music composers generate original, copyright-free music you can use in your latest YouTube video or social media video ad. You don’t even have to be a sound designer or a musician to produce soundtracks for your videos with AI Music Composers, because you can upload the music that has already been recorded and create variations of it. So, let’s take a look at what AI music composers have to offer in 2024.
| 1 - Amper Music | 2 - AIVA |
|---|---|
| 3 - Jukedeck | 4 - Ecrett Music |
| 5 - Melodrive | 6 - ORB Composer |
| 7 - Amadeus Code | 8 - Humtap |
| 9 - Muzeek | 10 - Brain.fm |
Ten Best AI Music Composers You Should Know About
The AI technologies that can compose music are still relatively novel, and as time passes, they can only develop and grow further. Consequently, each of the AI music composers we featured in this article offers a different range of possibilities. Here are the ten best AI music composers you shouldn’t miss out on in 2024.

Filmora AI Music Editor
Edit Audio with AI Music Editor
Experience the power of Filmora’s AI tools and make your audio or music stand out like never before! Audio Denoise, Audio Ducking, Audio Synchronization, Audio Stretch, etc…
Try It Free Try It Free Try It Free Learn More >
1. Amper Music
Price: Available upon request
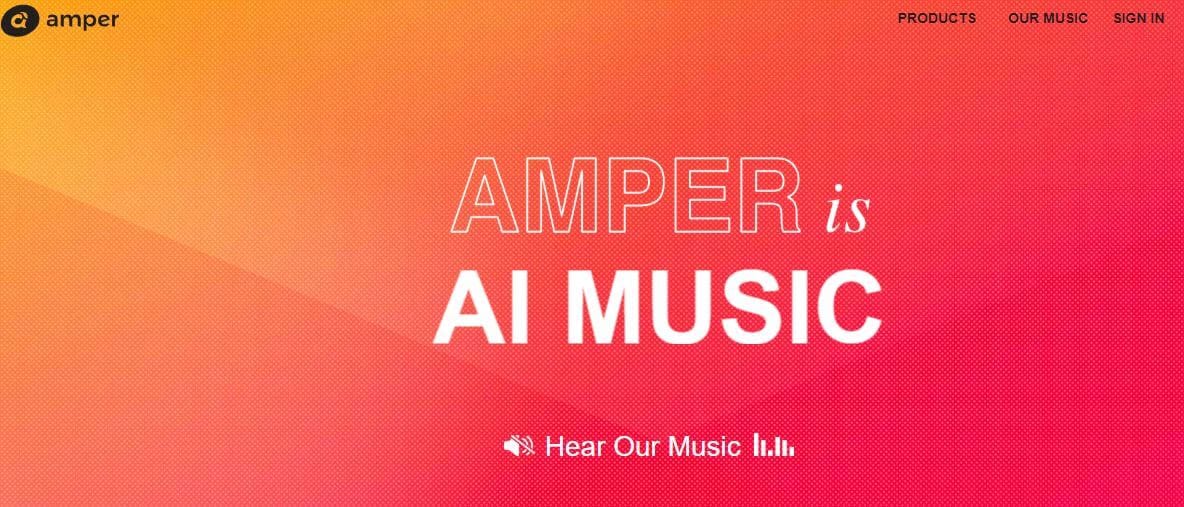
Industry professionals know just how frustrating the music licensing process can be. Amper Music is a cloud-based platform designed to simplify the process of creating soundtracks for movies and video games, as it produces AI generated algorithms that help users create music in a variety of music genres. You must first create an account on this platform, in order to be able to use the free version of Amper Music that provides only a limited amount of features. Upgrading to the pro version of Amper Music will enable you to enjoy the full potential of this rapidly growing AI Music Composer.
2. AIVA
Price: Free version available, subscription plans start from €14 p/month
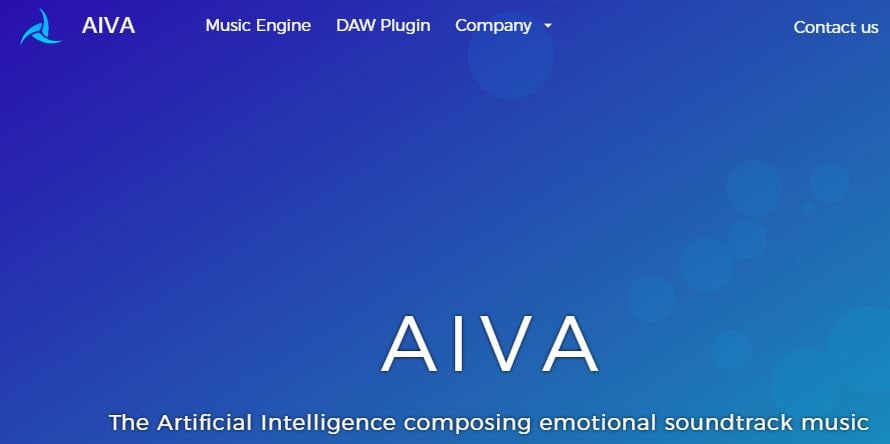
Since 2016, when AIVA Technologies was founded, its team has worked on developing an AI script that can compose emotional soundtracks for ads, video games, or movies. Soon after, the AI published its first oeuvre titled ‘Opus 1 for Piano Solo and in the subsequent years, AIVA released an album and composed music for a video game. Besides enabling its users to create music from scratch, AIVA can also be used to produce variations of existing songs. The music engine that powers this AI music composer makes the production of corporate or social media videos much easier, as it eliminates the need to go through the music licensing process.
3. Jukedeck
Price: Free version available, Pricing plans start from $0.99 per download

The AI music composer developed by the Jukedeck startup resembles the Amper’s music composer because they both rely on neural networks to analyze music data, that is then used by the AI to learn how to compose original music. Each track that is available through this AI music composer can be edited, so you can change its length or its tempo. You can create music with Jukedeck for free if you decide to give all the rights to the AI composer, while both individuals and small businesses can purchase the license to use the song created with Jukedeck for just $0.99.
Note: Jukedeck has been acquired by TikTok, and we are waiting for a new Jukedeck.
![]()
A cross-platform for making videos anywhere for all creators

Why your video editing isn’t good enough? How about some creative inspo?
- 100 Million+ Users
- 150+ Countries and Regions
- 4 Million+ Social Media Followers
- 5 Million+ Stock Media for Use
* Secure Download

4. Ecrett Music
Price: Subscription plans start at $5
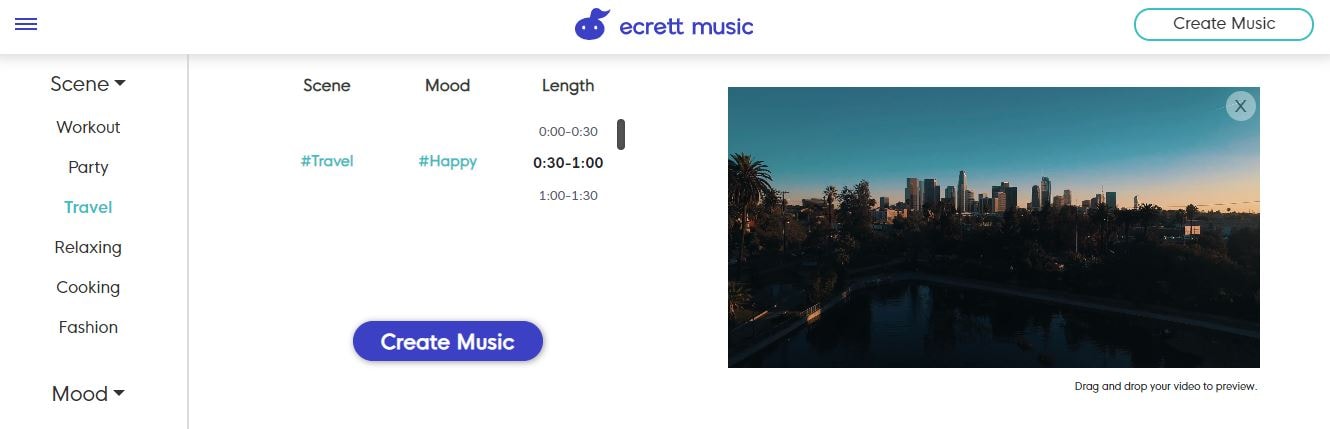
This online AI music composer makes creating stunning soundtracks for videos look easy. You just have to upload a video for which you want to generate music and select the type of scene and the mood of that scene. Party, Travel or Fashion are among the types of scenes you can choose from, while moods range from happy to serious. When done, simply click on the Create Music button, and the platform will automatically generate the soundtrack for your video. In case you are producing videos on a constant basis, you should consider purchasing one of the available subscription plans.
5. Melodrive
Price: Free
Compatibility: iOS, Windows
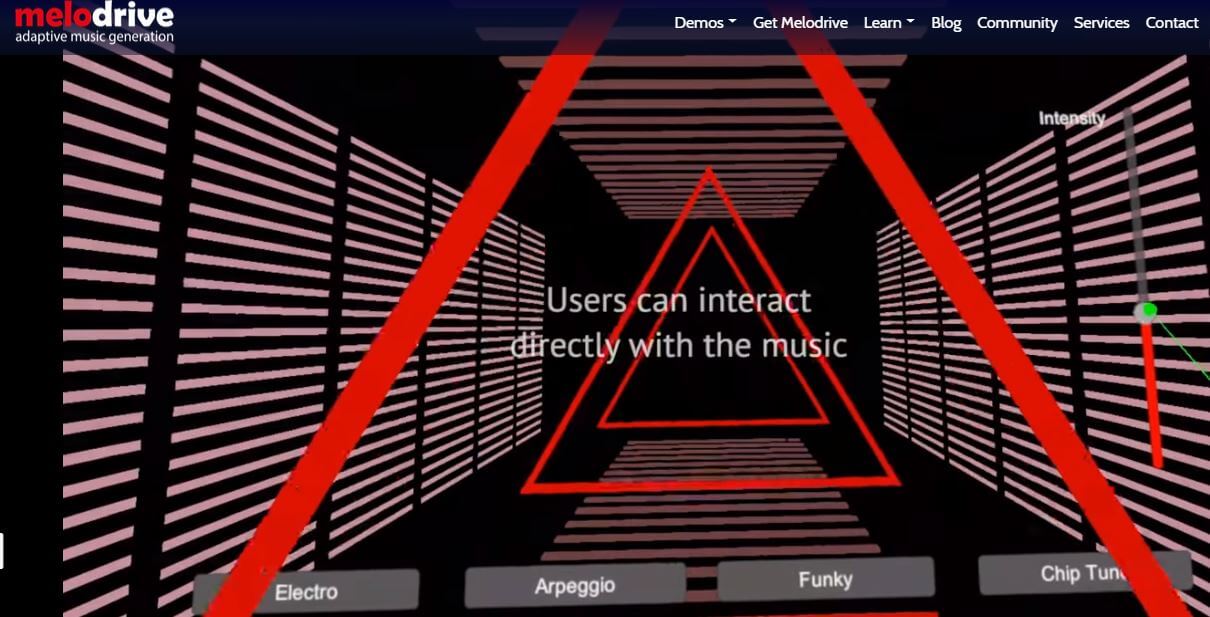
At the moment, the Lite and Indie versions of Melodrive are available for download free of charge, but the Indie version of this AI music composer still offers more options. Melodrive is one of the first AI systems that can compose emotional and unique music in real time. The AI generates music by adapting to the media environment and aims to match the mood and the style of the video. It is worth noting that Melodrive is still under development and that through time its capabilities to compose music are going to become even more refined than they already are.
6. ORB Composer
Price: Pricing plans start at $149,00
Compatibility: macOS, Windows

You can’t generate music automatically with ORB Composer, because the AI creates music based on your choices. That’s why you need to know at least the basic rules of music composition in order to be able to use the ORB Composer properly. The AI music composer comes bundled with a rich collection of chord progressions, that contains almost all chords used in popular music. This tool is aimed at artists who are interested in experimenting with the possibilities of creating music with artificial intelligence and discovering new styles of music. There are six music templates you can choose from, and you can create compositions by simply organizing different blocks of music.

Filmora AI Audio Stretcher
Wondershare Filmora - AI Audio Stretcher
• Retime any audio track to fit the duration of your video almost instantly.
• Rearrange songs without quality loss.
• Cross-platform supported - (Windows, Mac, iOS, Android)
Start Audio Stretch Start Audio Stretch Start Audio Stretch Learn More >
7. Amadeus Code
Price: Free, but the app offers in-app purchases
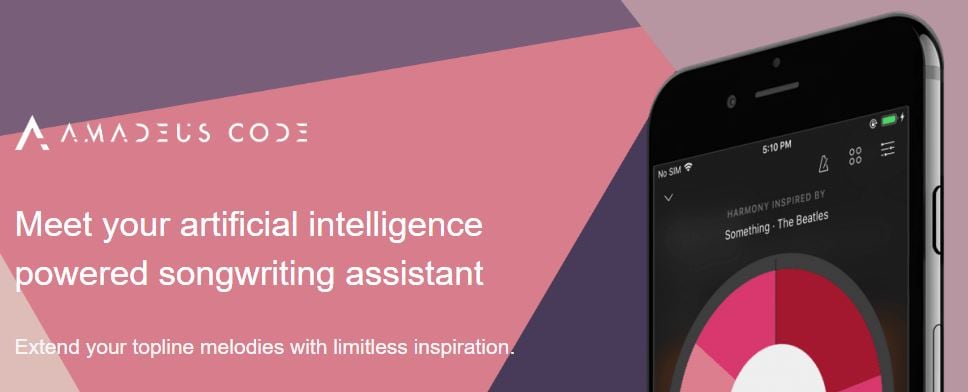
Compatibility: iOS
Both skilled musicians and music enthusiast can use this iOS-based app to create new melodies in just a few minutes. The AI engine that the Amadeus Code uses contains chord progressions of some of the most famous songs ever created and it let you use them to create new and innovative structures of music compositions. Moreover, you can use gestures to create new songs or recreate specific segments of songs you composed earlier. Even though Amadeus Code lets its users export audio and MIDI files to audio editing software, you still have to purchase all songs you want to keep.
8. Humtap
Price: Free
Compatibility: iOS
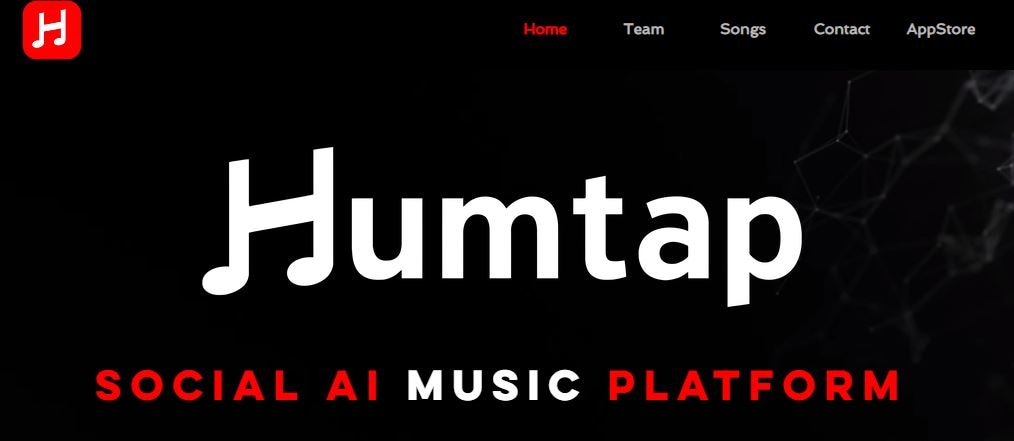
Musicians who have a tough time remembering their own ideas are going to love using Humtap because they can just hum a melody and the app will automatically generate an entire song using different instruments. What’s more, beats can be added with a single tap, and after the music is generated you can proceed to add the vocals as well. Humptap also has video making capabilities, so you can create videos for all songs you compose with this app. All tracks and videos generated with the Humtap AI music composer can be saved to your phone, but you can’t share your new creations to social media directly from the app.
9. Muzeek
Price: Free trial available, pricing plans start from $19 per month
Compatibility: macOS
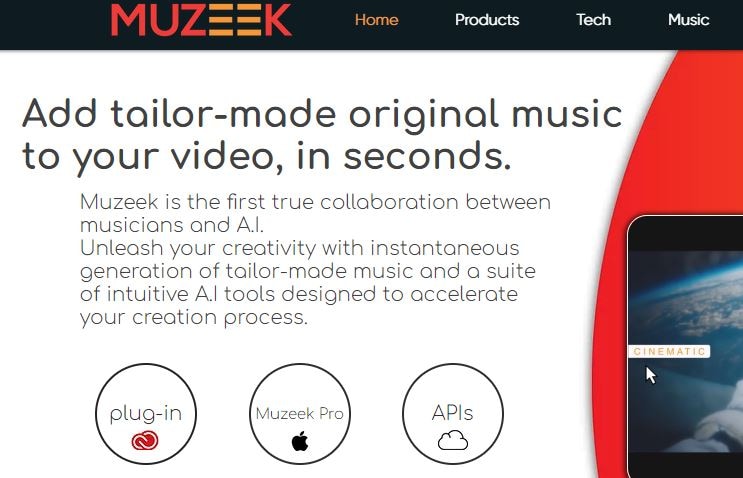
If you are in need of licensed music for the video you’re planning on sharing to social media networks, then Muzeek is one of the best choices you can make. The AI algorithm Muzeek uses analyzes the videos for which you are generating music and it creates soundtracks that perfectly fit the rhythm of the video. All content creators, including online marketing agencies or video game developers, can rely on Muzeek AI music composer to create authentic music in high quality. Moreover, Muzeek can also analyze the video’s original audio and create subtitles from it or adjust its volume automatically.
10. Brain.fm
Price: Subscription plans start from $6,95 per month
Compatibility: Android, online
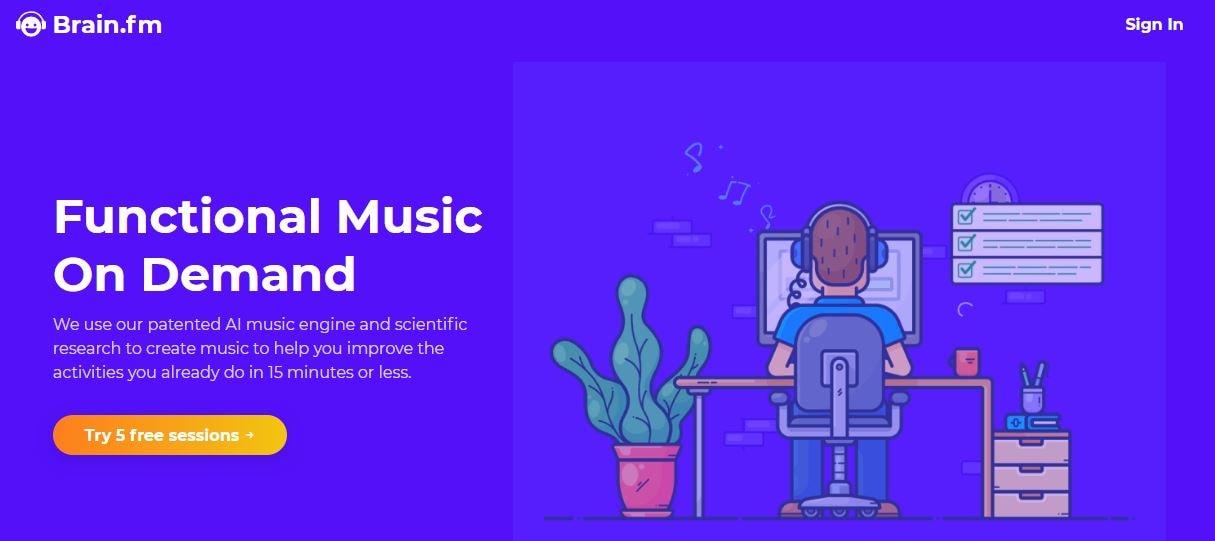
The idea that music can make our brains more productive is at the very core of what Brain.fm platform is all about. A team of scientists, musicians and engineers uses artificial intelligence to generate music designed to make your brain more productive and focused. They claim that the music created with their AI music composer achieve its effects in just ten to fifteen minutes. However, you can’t use Brain.fm to create your own music, as this platform is better suited for people who spend a lot of time at work and have a tough time maintaining their focus while performing important tasks.
Conclusion
The opportunities AI music composers offer are still not properly explored, because most of these technologies are still under development. The results AI music composers we included in this article have managed to achieve so far are impressive because each of them can produce high-quality audio files for all sorts of video content. Which AI music composer do you like to use the most? Leave a comment, and let us know.
Benjamin Arango
Benjamin Arango is a writer and a lover of all things video.
Follow @Benjamin Arango
Benjamin Arango
Mar 27, 2024• Proven solutions
Robots can’t be creative, right? A number of startups that focus on the development of artificial intelligence that is capable of composing music have proved this statement wrong. AI music composers generate original, copyright-free music you can use in your latest YouTube video or social media video ad. You don’t even have to be a sound designer or a musician to produce soundtracks for your videos with AI Music Composers, because you can upload the music that has already been recorded and create variations of it. So, let’s take a look at what AI music composers have to offer in 2024.
| 1 - Amper Music | 2 - AIVA |
|---|---|
| 3 - Jukedeck | 4 - Ecrett Music |
| 5 - Melodrive | 6 - ORB Composer |
| 7 - Amadeus Code | 8 - Humtap |
| 9 - Muzeek | 10 - Brain.fm |
Ten Best AI Music Composers You Should Know About
The AI technologies that can compose music are still relatively novel, and as time passes, they can only develop and grow further. Consequently, each of the AI music composers we featured in this article offers a different range of possibilities. Here are the ten best AI music composers you shouldn’t miss out on in 2024.
Filmora AI Music Editor
Edit Audio with AI Music Editor
Experience the power of Filmora’s AI tools and make your audio or music stand out like never before! Audio Denoise, Audio Ducking, Audio Synchronization, Audio Stretch, etc…
Try It Free Try It Free Try It Free Learn More >
1. Amper Music
Price: Available upon request
Industry professionals know just how frustrating the music licensing process can be. Amper Music is a cloud-based platform designed to simplify the process of creating soundtracks for movies and video games, as it produces AI generated algorithms that help users create music in a variety of music genres. You must first create an account on this platform, in order to be able to use the free version of Amper Music that provides only a limited amount of features. Upgrading to the pro version of Amper Music will enable you to enjoy the full potential of this rapidly growing AI Music Composer.
2. AIVA
Price: Free version available, subscription plans start from €14 p/month
Since 2016, when AIVA Technologies was founded, its team has worked on developing an AI script that can compose emotional soundtracks for ads, video games, or movies. Soon after, the AI published its first oeuvre titled ‘Opus 1 for Piano Solo and in the subsequent years, AIVA released an album and composed music for a video game. Besides enabling its users to create music from scratch, AIVA can also be used to produce variations of existing songs. The music engine that powers this AI music composer makes the production of corporate or social media videos much easier, as it eliminates the need to go through the music licensing process.
3. Jukedeck
Price: Free version available, Pricing plans start from $0.99 per download
The AI music composer developed by the Jukedeck startup resembles the Amper’s music composer because they both rely on neural networks to analyze music data, that is then used by the AI to learn how to compose original music. Each track that is available through this AI music composer can be edited, so you can change its length or its tempo. You can create music with Jukedeck for free if you decide to give all the rights to the AI composer, while both individuals and small businesses can purchase the license to use the song created with Jukedeck for just $0.99.
Note: Jukedeck has been acquired by TikTok, and we are waiting for a new Jukedeck.
![]()
A cross-platform for making videos anywhere for all creators
Why your video editing isn’t good enough? How about some creative inspo?
- 100 Million+ Users
- 150+ Countries and Regions
- 4 Million+ Social Media Followers
- 5 Million+ Stock Media for Use
* Secure Download
4. Ecrett Music
Price: Subscription plans start at $5

This online AI music composer makes creating stunning soundtracks for videos look easy. You just have to upload a video for which you want to generate music and select the type of scene and the mood of that scene. Party, Travel or Fashion are among the types of scenes you can choose from, while moods range from happy to serious. When done, simply click on the Create Music button, and the platform will automatically generate the soundtrack for your video. In case you are producing videos on a constant basis, you should consider purchasing one of the available subscription plans.
5. Melodrive
Price: Free
Compatibility: iOS, Windows
At the moment, the Lite and Indie versions of Melodrive are available for download free of charge, but the Indie version of this AI music composer still offers more options. Melodrive is one of the first AI systems that can compose emotional and unique music in real time. The AI generates music by adapting to the media environment and aims to match the mood and the style of the video. It is worth noting that Melodrive is still under development and that through time its capabilities to compose music are going to become even more refined than they already are.
6. ORB Composer
Price: Pricing plans start at $149,00
Compatibility: macOS, Windows

You can’t generate music automatically with ORB Composer, because the AI creates music based on your choices. That’s why you need to know at least the basic rules of music composition in order to be able to use the ORB Composer properly. The AI music composer comes bundled with a rich collection of chord progressions, that contains almost all chords used in popular music. This tool is aimed at artists who are interested in experimenting with the possibilities of creating music with artificial intelligence and discovering new styles of music. There are six music templates you can choose from, and you can create compositions by simply organizing different blocks of music.
Filmora AI Audio Stretcher
Wondershare Filmora - AI Audio Stretcher
• Retime any audio track to fit the duration of your video almost instantly.
• Rearrange songs without quality loss.
• Cross-platform supported - (Windows, Mac, iOS, Android)
Start Audio Stretch Start Audio Stretch Start Audio Stretch Learn More >
7. Amadeus Code
Price: Free, but the app offers in-app purchases
Compatibility: iOS
Both skilled musicians and music enthusiast can use this iOS-based app to create new melodies in just a few minutes. The AI engine that the Amadeus Code uses contains chord progressions of some of the most famous songs ever created and it let you use them to create new and innovative structures of music compositions. Moreover, you can use gestures to create new songs or recreate specific segments of songs you composed earlier. Even though Amadeus Code lets its users export audio and MIDI files to audio editing software, you still have to purchase all songs you want to keep.
8. Humtap
Price: Free
Compatibility: iOS
Musicians who have a tough time remembering their own ideas are going to love using Humtap because they can just hum a melody and the app will automatically generate an entire song using different instruments. What’s more, beats can be added with a single tap, and after the music is generated you can proceed to add the vocals as well. Humptap also has video making capabilities, so you can create videos for all songs you compose with this app. All tracks and videos generated with the Humtap AI music composer can be saved to your phone, but you can’t share your new creations to social media directly from the app.
9. Muzeek
Price: Free trial available, pricing plans start from $19 per month
Compatibility: macOS
If you are in need of licensed music for the video you’re planning on sharing to social media networks, then Muzeek is one of the best choices you can make. The AI algorithm Muzeek uses analyzes the videos for which you are generating music and it creates soundtracks that perfectly fit the rhythm of the video. All content creators, including online marketing agencies or video game developers, can rely on Muzeek AI music composer to create authentic music in high quality. Moreover, Muzeek can also analyze the video’s original audio and create subtitles from it or adjust its volume automatically.
10. Brain.fm
Price: Subscription plans start from $6,95 per month
Compatibility: Android, online
The idea that music can make our brains more productive is at the very core of what Brain.fm platform is all about. A team of scientists, musicians and engineers uses artificial intelligence to generate music designed to make your brain more productive and focused. They claim that the music created with their AI music composer achieve its effects in just ten to fifteen minutes. However, you can’t use Brain.fm to create your own music, as this platform is better suited for people who spend a lot of time at work and have a tough time maintaining their focus while performing important tasks.
Conclusion
The opportunities AI music composers offer are still not properly explored, because most of these technologies are still under development. The results AI music composers we included in this article have managed to achieve so far are impressive because each of them can produce high-quality audio files for all sorts of video content. Which AI music composer do you like to use the most? Leave a comment, and let us know.
Benjamin Arango
Benjamin Arango is a writer and a lover of all things video.
Follow @Benjamin Arango
Podcast Editing 101: How to Edit a Podcast
Podcast Editing 101: How to Edit a Podcast
Benjamin Arango
Mar 27, 2024• Proven solutions
We are glad that you took the first steps to create your podcast episodes. We’d also like to know how far you have reached. Well, most probably, you are at the podcast editing stage as per your search query. So, you are in the right place if this is your concern. We have structured this entire post on how to edit podcasts, especially for the newbies. You can continue reading the article if you have already created a podcast episode and level up the steps with better podcast editing. Remember that editing can either make or break the game! So, don’t take any chances in editing a podcast right from the beginners’ level.

Without further ado, let’s get started with the following editing basics a podcaster should keep in mind.
- Part 1: Editing Basics that Beginners’ Should Keep in Mind
- Part 2: Which DAW should you use?
- Part 3: Advanced Editing Tips to Spice Up Your Podcasts
- Part 4: Edit Podcast with Video Editor
Editing Basics that Beginners’ Should Keep in Mind
Well, it is all dependent upon the approach you follow regarding the podcast audio editing. There are various podcast editing services, and styles worth consider. The list below is the critical podcast editing basics a beginner should follow before publishing the podcast. Overall, it would be awesome if you learn new skills instead of outsourcing the whole stuff. That’s fantastic as well!
Firstly, import the audio.
The editing process starts with importing the audio track. The audio material in the sequence must be at the primary place. Always place the audio track in the first position even if you are importing multiple audio tracks. You can leave the track underneath for editing purposes. After adding this first audio file, you can add sound effects, music, and other secondary audio files for further editing.
Listen again
Don’t proceed before re-listening your added audio! This manner will let you think for different sections, and you can further decide what to keep and what to preserve. Remove any computer noise, background hiss, and unwanted audio areas. Here, you can help with different noise reduction tools available or go for the reliable podcast editing software, specifically the audio ducking feature for noise removal.
Make it consistent throughout
The next step is to make the volume consistent at every stage of the podcast. After removing all the unwanted noises, take the necessary action to normalize the audio levels and specifically select -2.0 for peak amplitude. Amplify the tranquil areas.
Sound Designing and Mixing
Then, you are required to do sound designing and mixing for the podcast. Take it lightly and only especially when you are a beginner. Add the sound effects as per the message of the podcast. Always keep in mind to use significant sound effects that effectively evoke the emotion and ultimately save the audience engaged. The mixing part comes when you compress, equalize, and process the audio to adjust accordingly in the different sections.
Preview and Post
Once your podcast is edited and ready, preview it ensure everything is in place, especially if it is your first time. It would be best to post a clear, concise, and to the point audio/video. Finally, post your podcast, either for free or using one of the software available online on your desired blog/online media.
Which DAW should you use?
You can’t miss using Digital Audio Workstation (DAW) for podcast editing at any cost. It is an audio editing program with all the facilities right from recording the podcast to editing it. To start with, you must consider using among the following three DAWs.
Audacity

Audacity is the most common program providing free podcast editing services. The foremost reason for its popularity is the free and open-source availability. Secondly, the primary user interface makes it the best option for beginners. You can right away start recording with Audacity.
Alitu

Alitu is another recommended tool to make your podcast episodes easily. However, you have to pay to get the podcast editing services of Alitu. It can incredibly do the podcast editing for raw audios and provide you with different options of adding music, transitions, and segments, etc. It also contains the facility to publish your podcast.
Reaper

Reaper is another best podcast editing DAW with the availability of 60 days free trial. Despite a bit high learning curve in Reaper, you will ultimately feel like an artist working upon it. Moreover, it comes with lots of new updates and features for better outcomes. It is compatible with AU, VST, and JS plugins as well.
Advanced Editing Tips to Spice Up Your Podcasts
Don’t miss out on this portion if you want to upgrade your podcasting skills like professionals! Learn some advanced formulas of podcast audio editing as follows.
Trim the Ends
It’s better if you trim the ends before editing the podcast. And, make sure there are no blanks at the beginning or end of the podcast. You can also add fade-in or fade-out effects to avoid unprofessional vibes.
Work on your planning and presentation skills
Focus on having a time-saving podcast editing by working upon your planning and presentation skills. Don’t be that guy who tries to edit every verbal crutch. Instead, focus on being confident while presenting the podcast so that you will need to have significantly fewer editing issues or may not need editing at all. Think upon changing the approach of podcast recording as well.
Provide margin and look for transitions
Offer a little margin and say that thing smoothly again if you have misread or misspell the statement while recording the podcast. Thus, you must not squeeze the information that doesn’t provide a better room for podcast editing. The provided margin will make it a breeze to cut out the messy audio portion.
Then, you have to look for transitions precisely when you are recording in multiple tracks, co-hosting, or taking a long space while recording your podcast. These transitions could be like pointless babbles, awkward silences, cross talks, etc., that need careful watch at both the beginning and the end. Most of the editing will improve by considering and editing these kinds of transitions.
Eliminate awkward silences
Sometimes a podcast is full of awkward silences that look crap at all. Well, you don’t have to remove every silence taken at the end of a talk or something like that. Eliminate only long, awkward silences or reduce their duration. Different plugins are available within the DAWs to remove these background noises and long duration silences.
Adjust the volume of the podcast
It may be a bit tricky to edit the podcast when one person or interviewee is a lot quieter. First of all, check if their microphone signals and settings are strong enough to provide you with audio. Then, you can increase the gain of their speaker before podcast editing. Normalize the voice or add some compression to increase the loudness ultimately.
Save podcast to the right format
Finally, you must be careful while exporting your podcast to the correct format to ensure the best quality. Go to the export settings and find MP3 extension and 192kbps bitrate.
Edit Podcast with Video Editor
Are you recording a video podcast? If yes, you must make very little room for editing while considering the best recording equipment and settings. Secondly, you can look for a high-tech video editor that can do the task of both video editing and podcast editing. The Wondershare Filmora X is one such famous name in the world of video editing. But, the point is to check its features for podcast editing. Are they worth it or not? That is what we’d like to tell you by highlighting the podcast editing services of Filmora.


Video Podcast Editing Services of Wondershare Filmora X
- The very thing needed while podcast editing is the shortcut key commands to save time. The Wondershare Filmora X consists of several such hotkey commands for quick editing.
- You can use Audio Ducking to eliminate background noises and unwanted awkward silences recorded while making the podcast.
- Inject beautiful animations in your video podcast using the keyframing tool of Wondershare Filmora X.
- Use 1000+ Video Effects, including filters, transitions, motion elements, titles, etc., exclusively provided on Filmora.
- Use the Split Screen and showcase multiple screens to make an eye-catchy video podcast appearance.
Conclusion
Now, we are going to end our discussion on podcast editing basics as well as advanced concepts. Try following every tip and suggestion, especially when you are a beginner. Make up your mind to create eye-catchy content that well engages the audience while also providing useful information. Using the best video editor with stunning effects, as mentioned above, won’t make your content look boring at all.
Benjamin Arango
Benjamin Arango is a writer and a lover of all things video.
Follow @Benjamin Arango
Benjamin Arango
Mar 27, 2024• Proven solutions
We are glad that you took the first steps to create your podcast episodes. We’d also like to know how far you have reached. Well, most probably, you are at the podcast editing stage as per your search query. So, you are in the right place if this is your concern. We have structured this entire post on how to edit podcasts, especially for the newbies. You can continue reading the article if you have already created a podcast episode and level up the steps with better podcast editing. Remember that editing can either make or break the game! So, don’t take any chances in editing a podcast right from the beginners’ level.
Without further ado, let’s get started with the following editing basics a podcaster should keep in mind.
- Part 1: Editing Basics that Beginners’ Should Keep in Mind
- Part 2: Which DAW should you use?
- Part 3: Advanced Editing Tips to Spice Up Your Podcasts
- Part 4: Edit Podcast with Video Editor
Editing Basics that Beginners’ Should Keep in Mind
Well, it is all dependent upon the approach you follow regarding the podcast audio editing. There are various podcast editing services, and styles worth consider. The list below is the critical podcast editing basics a beginner should follow before publishing the podcast. Overall, it would be awesome if you learn new skills instead of outsourcing the whole stuff. That’s fantastic as well!
Firstly, import the audio.
The editing process starts with importing the audio track. The audio material in the sequence must be at the primary place. Always place the audio track in the first position even if you are importing multiple audio tracks. You can leave the track underneath for editing purposes. After adding this first audio file, you can add sound effects, music, and other secondary audio files for further editing.
Listen again
Don’t proceed before re-listening your added audio! This manner will let you think for different sections, and you can further decide what to keep and what to preserve. Remove any computer noise, background hiss, and unwanted audio areas. Here, you can help with different noise reduction tools available or go for the reliable podcast editing software, specifically the audio ducking feature for noise removal.
Make it consistent throughout
The next step is to make the volume consistent at every stage of the podcast. After removing all the unwanted noises, take the necessary action to normalize the audio levels and specifically select -2.0 for peak amplitude. Amplify the tranquil areas.
Sound Designing and Mixing
Then, you are required to do sound designing and mixing for the podcast. Take it lightly and only especially when you are a beginner. Add the sound effects as per the message of the podcast. Always keep in mind to use significant sound effects that effectively evoke the emotion and ultimately save the audience engaged. The mixing part comes when you compress, equalize, and process the audio to adjust accordingly in the different sections.
Preview and Post
Once your podcast is edited and ready, preview it ensure everything is in place, especially if it is your first time. It would be best to post a clear, concise, and to the point audio/video. Finally, post your podcast, either for free or using one of the software available online on your desired blog/online media.
Which DAW should you use?
You can’t miss using Digital Audio Workstation (DAW) for podcast editing at any cost. It is an audio editing program with all the facilities right from recording the podcast to editing it. To start with, you must consider using among the following three DAWs.
Audacity
Audacity is the most common program providing free podcast editing services. The foremost reason for its popularity is the free and open-source availability. Secondly, the primary user interface makes it the best option for beginners. You can right away start recording with Audacity.
Alitu
Alitu is another recommended tool to make your podcast episodes easily. However, you have to pay to get the podcast editing services of Alitu. It can incredibly do the podcast editing for raw audios and provide you with different options of adding music, transitions, and segments, etc. It also contains the facility to publish your podcast.
Reaper
Reaper is another best podcast editing DAW with the availability of 60 days free trial. Despite a bit high learning curve in Reaper, you will ultimately feel like an artist working upon it. Moreover, it comes with lots of new updates and features for better outcomes. It is compatible with AU, VST, and JS plugins as well.
Advanced Editing Tips to Spice Up Your Podcasts
Don’t miss out on this portion if you want to upgrade your podcasting skills like professionals! Learn some advanced formulas of podcast audio editing as follows.
Trim the Ends
It’s better if you trim the ends before editing the podcast. And, make sure there are no blanks at the beginning or end of the podcast. You can also add fade-in or fade-out effects to avoid unprofessional vibes.
Work on your planning and presentation skills
Focus on having a time-saving podcast editing by working upon your planning and presentation skills. Don’t be that guy who tries to edit every verbal crutch. Instead, focus on being confident while presenting the podcast so that you will need to have significantly fewer editing issues or may not need editing at all. Think upon changing the approach of podcast recording as well.
Provide margin and look for transitions
Offer a little margin and say that thing smoothly again if you have misread or misspell the statement while recording the podcast. Thus, you must not squeeze the information that doesn’t provide a better room for podcast editing. The provided margin will make it a breeze to cut out the messy audio portion.
Then, you have to look for transitions precisely when you are recording in multiple tracks, co-hosting, or taking a long space while recording your podcast. These transitions could be like pointless babbles, awkward silences, cross talks, etc., that need careful watch at both the beginning and the end. Most of the editing will improve by considering and editing these kinds of transitions.
Eliminate awkward silences
Sometimes a podcast is full of awkward silences that look crap at all. Well, you don’t have to remove every silence taken at the end of a talk or something like that. Eliminate only long, awkward silences or reduce their duration. Different plugins are available within the DAWs to remove these background noises and long duration silences.
Adjust the volume of the podcast
It may be a bit tricky to edit the podcast when one person or interviewee is a lot quieter. First of all, check if their microphone signals and settings are strong enough to provide you with audio. Then, you can increase the gain of their speaker before podcast editing. Normalize the voice or add some compression to increase the loudness ultimately.
Save podcast to the right format
Finally, you must be careful while exporting your podcast to the correct format to ensure the best quality. Go to the export settings and find MP3 extension and 192kbps bitrate.
Edit Podcast with Video Editor
Are you recording a video podcast? If yes, you must make very little room for editing while considering the best recording equipment and settings. Secondly, you can look for a high-tech video editor that can do the task of both video editing and podcast editing. The Wondershare Filmora X is one such famous name in the world of video editing. But, the point is to check its features for podcast editing. Are they worth it or not? That is what we’d like to tell you by highlighting the podcast editing services of Filmora.
Video Podcast Editing Services of Wondershare Filmora X
- The very thing needed while podcast editing is the shortcut key commands to save time. The Wondershare Filmora X consists of several such hotkey commands for quick editing.
- You can use Audio Ducking to eliminate background noises and unwanted awkward silences recorded while making the podcast.
- Inject beautiful animations in your video podcast using the keyframing tool of Wondershare Filmora X.
- Use 1000+ Video Effects, including filters, transitions, motion elements, titles, etc., exclusively provided on Filmora.
- Use the Split Screen and showcase multiple screens to make an eye-catchy video podcast appearance.
Conclusion
Now, we are going to end our discussion on podcast editing basics as well as advanced concepts. Try following every tip and suggestion, especially when you are a beginner. Make up your mind to create eye-catchy content that well engages the audience while also providing useful information. Using the best video editor with stunning effects, as mentioned above, won’t make your content look boring at all.
Benjamin Arango
Benjamin Arango is a writer and a lover of all things video.
Follow @Benjamin Arango
Also read:
- New 2024 Approved Auditory Enhancements for Photos A Visionary Approach to Sound Integration
- Updated Blending the Tunes and Pictures A Step-by-Step Guide to Audio Video Integration in Current Technology for 2024
- New Essential Windows Audio Enhancers The Ultimate List for Instant Volume Upgrade for 2024
- 2024 Approved Enhancing Video Experience with Easy-to-Implement Audio Effects
- Updated 2024 Approved Techniques for Regulating Audio Loudness in Video-Based Streaming with VLC
- New 2024 Approved Background Freedom Mastering Noise Reduction in Videos and Audio
- Updated Cinemas Resonating Reign A Compilation of High-Quality, Royalty-Free Piano Melodies for Video Enhancement for 2024
- Where Can I Find Moan Sound Effect for 2024
- 2024 Approved Top 6 Zoom-Compatible Vocal Modifiers Amplify Your Personality on Video Calls
- New 2024 Approved Innovative and Poignant Soundscapes Paving the Path
- In 2024, The Experts Choice Identifying the Top 11 High-Quality, Fee-Free Speech Alteration Tools for iPhone & Android Users
- The Powerful Messages Woven Into Rap Lyrics
- 2024 Approved Tutorial Walkthrough Getting the Most Out of Your Experience with Adobe Audition
- New In 2024, Eliminating Reverberation in Sound Tracks Three Effective Methods
- New In 2024, Best Recommendations for Music Video Editors
- Updated In 2024, Optimal Cost-Free Girl Voice Overhaul Web Application
- New Best Voice Recording Apps for Android Free Options Included
- In 2024, Silencing the Breeze Techniques for Eliminating Wind Ambient in Recorded Sounds
- New The Soundscape Explorers Guide to Button Effects in Games for 2024
- Updated In 2024, Silent the Screen How to Strip Audio From Your Movies in iMovie
- New In 2024, Mastering Sound Quality Eliminating Unwanted Audio From Recording Spaces
- Updated 2024 Approved The Art of Acoustic Purity Practical Steps to Reduce Resonance and Retrieve Clean Audio Outputs
- Pinpoint Frightening Audio Triggers for 2024
- Updated In 2024, Professional Pathways for Audio Integration in IGTV Media
- Updated The Art of Accompaniment Crafting a Harmonious Blend Between Video and Music for 2024
- New Beat Design Mastery Tailoring Soundtracks to Captivate Your Music Videos
- New In 2024, 5 Proven Methods to Record Quality Sound on Apple Devices
- Updated Photobook with Tunes Compile Free Audio Files on Pictures for 2024
- 8 Best Websites To Download Free Sound FX
- New The Audio Engineers Guide to Live Sound Management with OBS Maximizing Your Broadcast Quality for 2024
- In 2024, Discovering High-Quality Bell Toll Recordings
- New In 2024, Top 10 Best Alternatives to Audacity on Windows/Mac/Linux
- Updated Unparalleled YouTube Soundscapes to Experience for 2024
- Updated Incorporate Soundtracks Into The Boomerang Editing Suite for 2024
- New The Ultimate Compilation of Free Sound Amplitude Balancers
- 2024 Approved The Audio Experts Manual to Identifying Superior Sound Formats
- Updated 2024 Approved Breaking Barriers of Breeze Overcoming Wind-Induced Disturbances in Sound Recordings
- Updated Mastering Your Podcast Sound with These 10 Premier Audio Editing Software Options (Free or Paid) for 2024
- The Guide to Enhancing AVI Files with Audio Tracks
- In 2024, Elegant Sound Sculpting An Overview of Leading Audio Editors Features, Perks & Pitfalls
- Unleashing Potential in Your Recordings with Easy Voice Changes on Audacity for 2024
- In 2024, Leveraging Machine Learning for Clean Audio Transmission
- New In 2024, How to Detach Audio in Premiere Pro? Step by Step Guide
- Updated In 2024, Free & Easy A Comparative Analysis of 3 Effective Audio-to-Text Techniques for the Modern Era
- New Trimming Sound Out of MP4 Videos for Editing Purposes for 2024
- Mastering Autotune A Step-by-Step Guide for Audacity Users
- New 2024 Approved 10 Essential Marketing Podcasts for Navigating Social Networking Landscapes
- Updated In 2024, The Ultimate Selection Identifying the Best PC Microphone Recorders of the Year
- 2024 Approved From Original Notes to New Narratives Step-by-Step Guide for Audio Replacement in Videos
- Updated In 2024, Focused Tutorial Excluding Audio From Latest MKV Updates
- 5 Ways Change Your Home Address in Google/Apple Map on Apple iPhone SE (2020)/iPad | Dr.fone
- Top 10 Nokia G42 5G Android SIM Unlock APK
- Top 7 Phone Number Locators To Track Oppo Find X6 Location | Dr.fone
- A Comprehensive Guide to Apple iPhone XR Blacklist Removal Tips and Tools | Dr.fone
- Fixing Persistent Pandora Crashes on Samsung Galaxy M34 5G | Dr.fone
- In 2024, How to use Pokemon Go Joystick on Vivo Y100? | Dr.fone
- In 2024, How to Reset a Itel S23+ Phone that is Locked?
- Which Pokémon can Evolve with a Moon Stone For Samsung Galaxy F14 5G? | Dr.fone
- Put and play MKV movies on Xiaomi Redmi Note 12 4G
- Process of Screen Sharing Realme C33 2023 to PC- Detailed Steps | Dr.fone
- Title: Harmonizing Sound Innovative Solutions to Tackle Distorted Audio Problems
- Author: Jacob
- Created at : 2024-05-20 00:03:43
- Updated at : 2024-05-21 00:03:43
- Link: https://audio-shaping.techidaily.com/harmonizing-sound-innovative-solutions-to-tackle-distorted-audio-problems/
- License: This work is licensed under CC BY-NC-SA 4.0.
