
:max_bytes(150000):strip_icc():format(webp)/On-Line-Job-Search-aa2565e859bd43a2aa34dfa1537dbd50.jpg)
2024 Approved Innovative Platforms to Connect Visually Videochat Alternatives to Omegle
“Innovative Platforms to Connect Visually: Videochat Alternatives to Omegle [Top List 2023]”
Top 10 Omegle Alternative Videochat Websites

Liza Brown
Mar 27, 2024• Proven solutions
From several different purposes and advantages of the internet, chatting and making new friends is the most favorite of all the teenagers. There are so many platforms that provide its users with the ability to connect, chat and make new friends such as Facebook, Instagram, and Twitter. But there is another platform that is totally different from all these which is known as Omegle. It has the same features as other social media platforms, but the best thing about Omegle is its feature of connecting with others anonymously. It helps you chat through text messages and video calls with other users without letting them know your identity and personal information. It allows you to talk to random people throughout the world without the fear of being exposed or leaking your information. But with the passage of time, Omegle has become an overpopulated platform and it has lost the original feel of connecting with other people and making friends. People now are more concerned about other things than making friends and chatting. But there is no need to worry, there are various Omegle alternatives available on the internet that will provide you with the same experience and feeling. Being abundant in number, it is very difficult to choose the best site. In this article, we are going to share with you the Top 10 Omegle alternatives with the same features and options. Some of these platforms contain more advanced features than Omegle, we have tried to select only those platforms that provide something more or at least the same as Omegle.
You might be interested in:
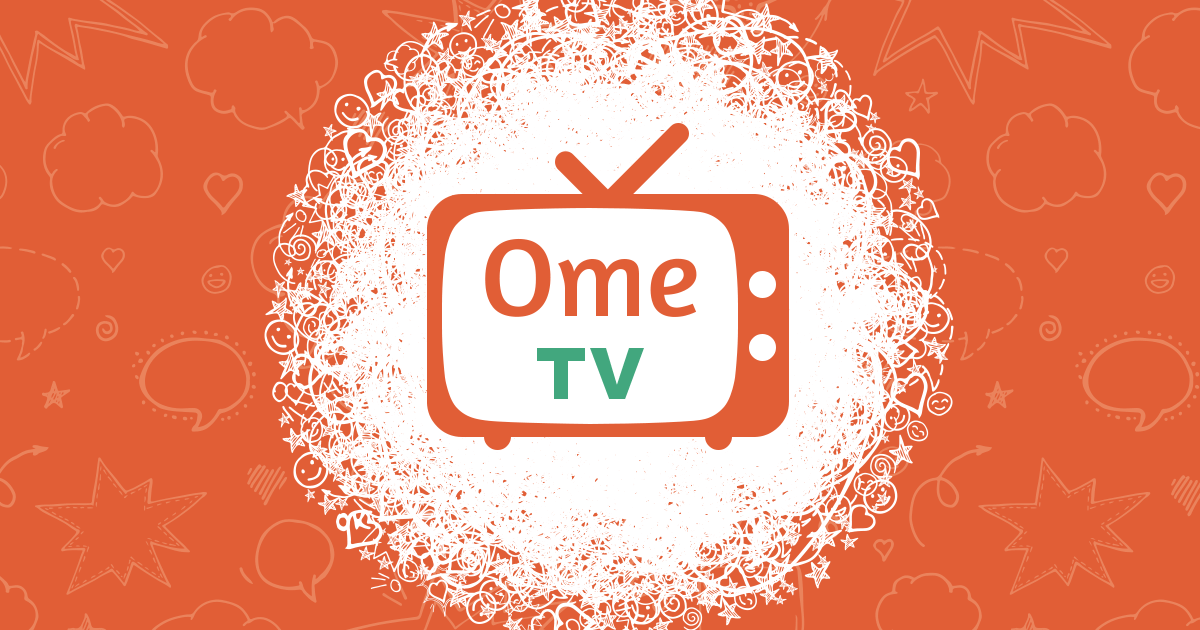
1. OmeTV
Platforms:Website, Android, iOS
Price: Free
If you are looking for the best Omegle Alternative then you can’t find any other platform better than OmeTV. This platform enables you to chat with people instantly with one click. The best thing about OmeTV is its smartphone applications. It has applications for Android and iOS to provide you with a better experience and to help you communicate with anyone, anytime and anywhere. It allows you to filter the other users by location, gender, and age. You can also see the number of active users that are currently using this platform for instantaneous communication.
Features
- Free to use platform
- Ability to block unwanted chats
- Android and iOS Apps
- Filter users by Location, Age, and Gender
- Communicate all around the Globe
2. Chatroulette

Price: Free
Chatroulette is one of the best Omegle Alternatives for connecting with random people throughout the world. This platform supports several different languages to make it for everyone to use and chat. This platform was launched by a 17 years old boy as a communication tool with the help of Skype. It doesn’t only allow you to chat via messages but it is a perfect platform for those who love to have video chats with random people all around the world. There is an option to filter chat if you want to avoid anything inappropriate while chatting with others. The user will need a webcam and a microphone in order to start chatting. This platform doesn’t need you to sign up, you can instantly connect with someone randomly and start having chat with them.
Features
- No Sign Up required
- Instant chatting
- Free to use Platform
- Available in several languages
- Android App Available
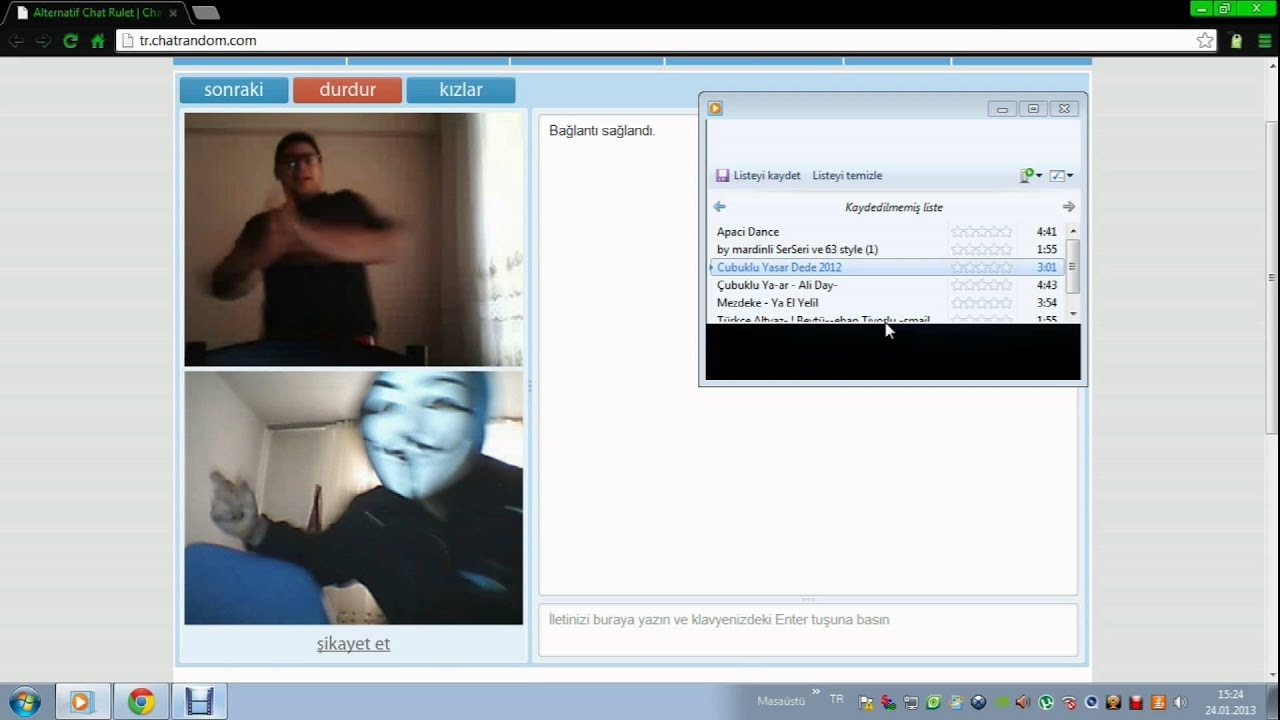
3. ChatRandom
Platforms: Website, Android , iOS
Price: Free
ChatRandom is another Omegle Alternative with so many unique features and options. It is a webcam platform that allows connecting with random users everywhere in the world. It provides you an easy-to-use interface with a one-click connection. You only have to select your gender and confirm that you are 18+ to get started making new friends and having fun. ChatRandom will find a perfect match for you from thousands of online users and connect you with them. It is almost available in all countries in languages, but the developers are continuously making it better by adding new countries and languages to expand their reach and users. It allows you to choose the user you want to be connected with. You can choose from a person, group, or girl only to start connecting with your preferred individual or group. This platform can be easily accessed from your Android and iOS device using the application that is specifically designed for these devices.
Features
- Filter the users according to your preference
- Available on Android and iOS
- One-click connection
- User-friendly Interface
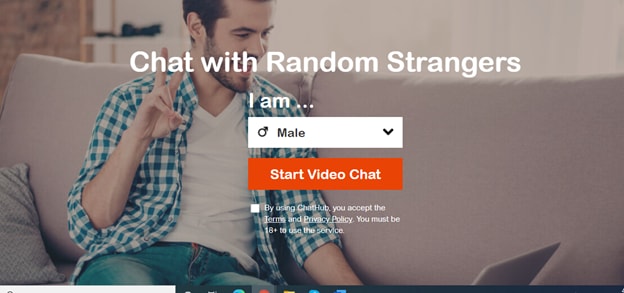
4. ChatHub
Platforms:Website
Price: Free
ChatHub is an amazing Omegle Alternative that allows you to video chat with strangers simply by selecting your gender for free. With ChatHub, get ready to meet new people and make friends from all around the world. It enables you to communicate with strangers through messages or Video Chats according to your convenience. This website allows you to select one person out of four that is suggested to you by the platform according to your preferences and filters. It also provides you with full control over the communications. If someone is chatting with you inappropriately, you have the option to block them instantly. It is one of the best Omegle Alternative for having fun and making friends all around the world.
Features
- Can be accessed from Mobile Devices
- It will never match you with the same person again
- Control your conversions with the Blocking feature
- Choose from four different people to connect
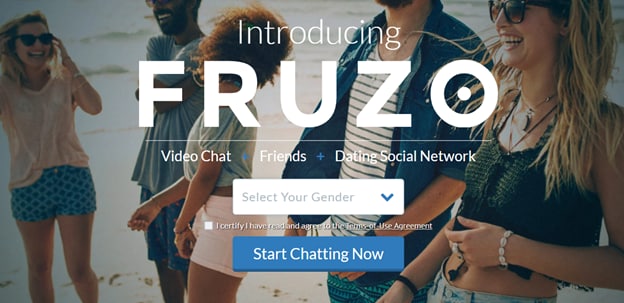
5. Fruzo
Platforms: Website
Price: Free
Fruzo is another Omegle Alternative but it is more than just a simple video chatting platform. Fruzo is an online dating platform that allows you to connect and meet people using your Facebook account or creating a brand new account using information. This platform enables you to find a perfect match for you, add them to your friend list, and chat with them via messages and video calls. The user can easily find other users by filtering location, gender, age, and searching by keywords using its search feature. Just like other social media platforms, Fruzo provides you with the ability to scroll through a wide range of pictures on your timeline. This is an ideal platform for making new friends and interacting with them.
Features
- Connect your Facebook Profile
- Keyword-based Search for people
- Filter your search based on Gender and location
- Scroll through a huge list of pictures
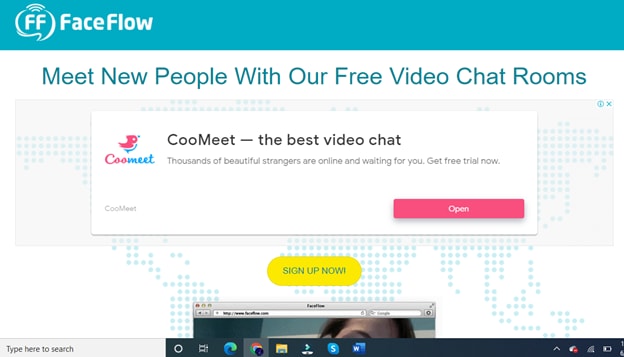
6. FaceFlow
Platforms:Website
Price: Free
FaceFlow is one of the best Omegle Alternative but with more advanced options and features. There are various advantages of using this platform which make it the most important platform of all others. It enables its user to have a video chat with three people at a time. It allows you to have video conferences with your friends as well as strangers to make new friends. Just like other famous social media platforms, FaceFlows allows you to create a searchable profile with a profile picture and a video. This platform can be accessed from all types of devices whether it is a mobile phone, PC, or Laptop. You can choose any option of communicating with others such as text, voice messages, one-on-one video calls, or group video calls. To make your conversations more interesting and fun, it allows you to use emojis and gifs.
Features
- Group Video Calls
- No Download
- Guest Chat Link
- Availability of Public Chat Rooms
- Allows you to Share Files
- Communicate via Voice Messages
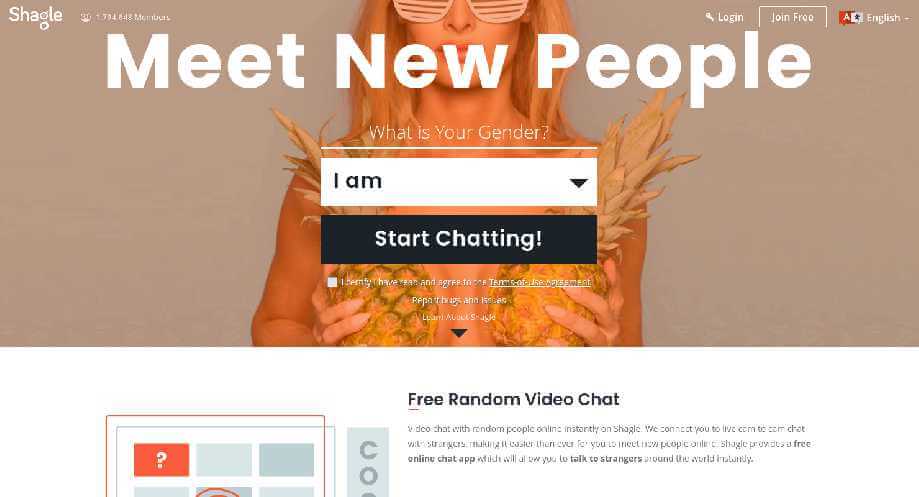
7. Shagle
Platforms: Website
Price: Free
Shagle has a huge number of active users around 3 Million, which makes it one of the best Omegle Alternative. It doesn’t require any kind of information except your gender to get started, which makes connecting with others and making new friends more easy and instant. This platform also provides an amazing feature of filtering the people according to their interests to find a perfect match for you according to your choice instead of being connected to someone with totally different preferences and interests. If you don’t know how to start a conversation or how to respond to some of the messages others send you, this platform allows you to use templates to break the ice and convey your messages more effectively. Gender filtration has become very important due to the huge number of active users, to cater to this problem, Shagle provides you with the ability to filter the people you will be connected to by their gender to avoid wasting your time.
Features
- Filter users by Country
- Easy to use and connect
- Filter users by gender
- Chat with others anonymously
- Instant video chats
8. TinyChat

Platforms: Website, Android , iOS
Price: Free
TinyChat is one of the largest voice and video chat platforms available on the internet, with airtime of five million minutes per day. TinyChat provides you with a wide range of chat rooms that already created by other users. You might find some of your locals on this platform as well. With all these created rooms, you can find your topic of interest and join it. But if you are unable to find a topic of your interest, you can always create your own room and let others join it. Rooms are allowed up to 12 video feeds at a time. You can always choose a way that best suits you for communicating with others. It can be text messages, voice messages, and video calls. This is the best Omegle Alternative you can find with such amazing features and options. You can use this platform from anywhere and anytime with its Android and iOS applications. These smartphone applications enable you to access this platform anywhere without having your desktop or laptop. This platform not only allows you to communicate with individuals but you can always communicate with group people using rooms and conference calls for more fun. With TinyChat, you are not bound to chat in any specific way. It allows you to communicate in multiple ways such as text messages, voice messages, and video calls. Choose a way that best suits you.
Features
- The largest video chat platform
- Wide range of different rooms
- Multiple ways of communication
- Communicate with a group of people
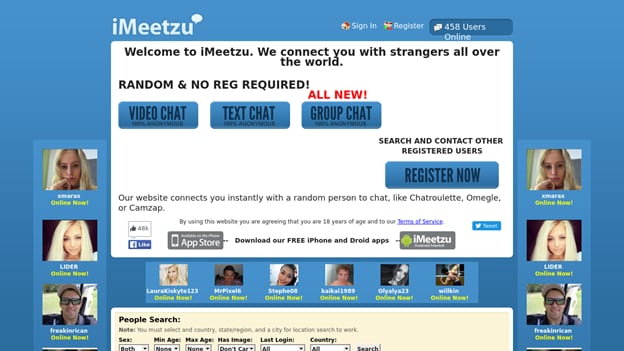
9. iMeetzu
Platforms: Website
Price: Free
iMeetzu is an Omegle Alternative with some extra features such as sending and receiving documents and images. This platform allows you to chat with strangers instantly via text messages and video calls. You can easily find random video chat or chat rooms that can join easily without any inconvenience. iMeetzu is growing very fast day by day with thousands of new users each day, it is one of the fastest-growing Omegle Alternative platforms. You can find and chat with different people throughout the world to provide you with diverse choices. This platform helps you protect your personal information and chat with random people instantly without revealing your true identity. It also features a wide range of rooms that allows you to talk to a number of different users at once and make more friends in a limited time.
Features
- Free to use Platform
- Largest growing Omegle Alternative
- Connect with people around the planet
- Join rooms and talk with groups
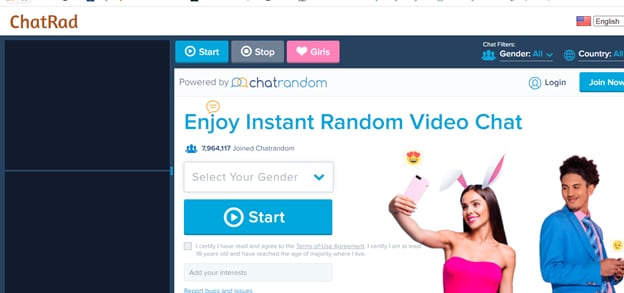
10. ChatRad
Platforms:Website
Price: Free
ChatRad is a G-rated Omegle Alternative with its strict actions against misbehaviors. The aim of ChatRad is to create an environment where everyone can chat in a decent and normal way instead of being so bold and exposing themselves. Just like other Omegle Alternative, this platform also allows you to connect with strangers and have chat with them either via messages or video calls but in a clean and secure environment that is being monitored by the moderator 24/7 to provide its users with a safe and honest environment to make real friends instead of going off-topic and making others feel frustrated and angry. All these features make this platform unique and different from all the above platforms. It helps you connect with the people of your interest and preferences to best match your connections with your interests and create the process of making new friends easier and convenient for everyone.
Features
- G-Rated Platform
- Clean and controlled environment
- Monitored 24/7 by moderators
- Connect people based on your interests
- Make real friends
Conclusion:
We know and understand that these platforms will not take place of Omegle but all the above platforms will provide you with the same features and options of Omegle to help you enjoy making new friends, talking to strangers, and having fun connecting with the people around the world. All these Omegle Alternatives have been selected after thorough research and comparison with all the available platforms to provide you with the best platforms with the best features.


Liza Brown
Liza Brown is a writer and a lover of all things video.
Follow @Liza Brown
Liza Brown
Mar 27, 2024• Proven solutions
From several different purposes and advantages of the internet, chatting and making new friends is the most favorite of all the teenagers. There are so many platforms that provide its users with the ability to connect, chat and make new friends such as Facebook, Instagram, and Twitter. But there is another platform that is totally different from all these which is known as Omegle. It has the same features as other social media platforms, but the best thing about Omegle is its feature of connecting with others anonymously. It helps you chat through text messages and video calls with other users without letting them know your identity and personal information. It allows you to talk to random people throughout the world without the fear of being exposed or leaking your information. But with the passage of time, Omegle has become an overpopulated platform and it has lost the original feel of connecting with other people and making friends. People now are more concerned about other things than making friends and chatting. But there is no need to worry, there are various Omegle alternatives available on the internet that will provide you with the same experience and feeling. Being abundant in number, it is very difficult to choose the best site. In this article, we are going to share with you the Top 10 Omegle alternatives with the same features and options. Some of these platforms contain more advanced features than Omegle, we have tried to select only those platforms that provide something more or at least the same as Omegle.
You might be interested in:
1. OmeTV
Platforms:Website, Android, iOS
Price: Free
If you are looking for the best Omegle Alternative then you can’t find any other platform better than OmeTV. This platform enables you to chat with people instantly with one click. The best thing about OmeTV is its smartphone applications. It has applications for Android and iOS to provide you with a better experience and to help you communicate with anyone, anytime and anywhere. It allows you to filter the other users by location, gender, and age. You can also see the number of active users that are currently using this platform for instantaneous communication.
Features
- Free to use platform
- Ability to block unwanted chats
- Android and iOS Apps
- Filter users by Location, Age, and Gender
- Communicate all around the Globe
2. Chatroulette
Price: Free
Chatroulette is one of the best Omegle Alternatives for connecting with random people throughout the world. This platform supports several different languages to make it for everyone to use and chat. This platform was launched by a 17 years old boy as a communication tool with the help of Skype. It doesn’t only allow you to chat via messages but it is a perfect platform for those who love to have video chats with random people all around the world. There is an option to filter chat if you want to avoid anything inappropriate while chatting with others. The user will need a webcam and a microphone in order to start chatting. This platform doesn’t need you to sign up, you can instantly connect with someone randomly and start having chat with them.
Features
- No Sign Up required
- Instant chatting
- Free to use Platform
- Available in several languages
- Android App Available
3. ChatRandom
Platforms: Website, Android , iOS
Price: Free
ChatRandom is another Omegle Alternative with so many unique features and options. It is a webcam platform that allows connecting with random users everywhere in the world. It provides you an easy-to-use interface with a one-click connection. You only have to select your gender and confirm that you are 18+ to get started making new friends and having fun. ChatRandom will find a perfect match for you from thousands of online users and connect you with them. It is almost available in all countries in languages, but the developers are continuously making it better by adding new countries and languages to expand their reach and users. It allows you to choose the user you want to be connected with. You can choose from a person, group, or girl only to start connecting with your preferred individual or group. This platform can be easily accessed from your Android and iOS device using the application that is specifically designed for these devices.
Features
- Filter the users according to your preference
- Available on Android and iOS
- One-click connection
- User-friendly Interface
4. ChatHub
Platforms:Website
Price: Free
ChatHub is an amazing Omegle Alternative that allows you to video chat with strangers simply by selecting your gender for free. With ChatHub, get ready to meet new people and make friends from all around the world. It enables you to communicate with strangers through messages or Video Chats according to your convenience. This website allows you to select one person out of four that is suggested to you by the platform according to your preferences and filters. It also provides you with full control over the communications. If someone is chatting with you inappropriately, you have the option to block them instantly. It is one of the best Omegle Alternative for having fun and making friends all around the world.
Features
- Can be accessed from Mobile Devices
- It will never match you with the same person again
- Control your conversions with the Blocking feature
- Choose from four different people to connect
5. Fruzo
Platforms: Website
Price: Free
Fruzo is another Omegle Alternative but it is more than just a simple video chatting platform. Fruzo is an online dating platform that allows you to connect and meet people using your Facebook account or creating a brand new account using information. This platform enables you to find a perfect match for you, add them to your friend list, and chat with them via messages and video calls. The user can easily find other users by filtering location, gender, age, and searching by keywords using its search feature. Just like other social media platforms, Fruzo provides you with the ability to scroll through a wide range of pictures on your timeline. This is an ideal platform for making new friends and interacting with them.
Features
- Connect your Facebook Profile
- Keyword-based Search for people
- Filter your search based on Gender and location
- Scroll through a huge list of pictures
6. FaceFlow
Platforms:Website
Price: Free
FaceFlow is one of the best Omegle Alternative but with more advanced options and features. There are various advantages of using this platform which make it the most important platform of all others. It enables its user to have a video chat with three people at a time. It allows you to have video conferences with your friends as well as strangers to make new friends. Just like other famous social media platforms, FaceFlows allows you to create a searchable profile with a profile picture and a video. This platform can be accessed from all types of devices whether it is a mobile phone, PC, or Laptop. You can choose any option of communicating with others such as text, voice messages, one-on-one video calls, or group video calls. To make your conversations more interesting and fun, it allows you to use emojis and gifs.
Features
- Group Video Calls
- No Download
- Guest Chat Link
- Availability of Public Chat Rooms
- Allows you to Share Files
- Communicate via Voice Messages
7. Shagle
Platforms: Website
Price: Free
Shagle has a huge number of active users around 3 Million, which makes it one of the best Omegle Alternative. It doesn’t require any kind of information except your gender to get started, which makes connecting with others and making new friends more easy and instant. This platform also provides an amazing feature of filtering the people according to their interests to find a perfect match for you according to your choice instead of being connected to someone with totally different preferences and interests. If you don’t know how to start a conversation or how to respond to some of the messages others send you, this platform allows you to use templates to break the ice and convey your messages more effectively. Gender filtration has become very important due to the huge number of active users, to cater to this problem, Shagle provides you with the ability to filter the people you will be connected to by their gender to avoid wasting your time.
Features
- Filter users by Country
- Easy to use and connect
- Filter users by gender
- Chat with others anonymously
- Instant video chats
8. TinyChat
Platforms: Website, Android , iOS
Price: Free
TinyChat is one of the largest voice and video chat platforms available on the internet, with airtime of five million minutes per day. TinyChat provides you with a wide range of chat rooms that already created by other users. You might find some of your locals on this platform as well. With all these created rooms, you can find your topic of interest and join it. But if you are unable to find a topic of your interest, you can always create your own room and let others join it. Rooms are allowed up to 12 video feeds at a time. You can always choose a way that best suits you for communicating with others. It can be text messages, voice messages, and video calls. This is the best Omegle Alternative you can find with such amazing features and options. You can use this platform from anywhere and anytime with its Android and iOS applications. These smartphone applications enable you to access this platform anywhere without having your desktop or laptop. This platform not only allows you to communicate with individuals but you can always communicate with group people using rooms and conference calls for more fun. With TinyChat, you are not bound to chat in any specific way. It allows you to communicate in multiple ways such as text messages, voice messages, and video calls. Choose a way that best suits you.
Features
- The largest video chat platform
- Wide range of different rooms
- Multiple ways of communication
- Communicate with a group of people
9. iMeetzu
Platforms: Website
Price: Free
iMeetzu is an Omegle Alternative with some extra features such as sending and receiving documents and images. This platform allows you to chat with strangers instantly via text messages and video calls. You can easily find random video chat or chat rooms that can join easily without any inconvenience. iMeetzu is growing very fast day by day with thousands of new users each day, it is one of the fastest-growing Omegle Alternative platforms. You can find and chat with different people throughout the world to provide you with diverse choices. This platform helps you protect your personal information and chat with random people instantly without revealing your true identity. It also features a wide range of rooms that allows you to talk to a number of different users at once and make more friends in a limited time.
Features
- Free to use Platform
- Largest growing Omegle Alternative
- Connect with people around the planet
- Join rooms and talk with groups
10. ChatRad
Platforms:Website
Price: Free
ChatRad is a G-rated Omegle Alternative with its strict actions against misbehaviors. The aim of ChatRad is to create an environment where everyone can chat in a decent and normal way instead of being so bold and exposing themselves. Just like other Omegle Alternative, this platform also allows you to connect with strangers and have chat with them either via messages or video calls but in a clean and secure environment that is being monitored by the moderator 24/7 to provide its users with a safe and honest environment to make real friends instead of going off-topic and making others feel frustrated and angry. All these features make this platform unique and different from all the above platforms. It helps you connect with the people of your interest and preferences to best match your connections with your interests and create the process of making new friends easier and convenient for everyone.
Features
- G-Rated Platform
- Clean and controlled environment
- Monitored 24/7 by moderators
- Connect people based on your interests
- Make real friends
Conclusion:
We know and understand that these platforms will not take place of Omegle but all the above platforms will provide you with the same features and options of Omegle to help you enjoy making new friends, talking to strangers, and having fun connecting with the people around the world. All these Omegle Alternatives have been selected after thorough research and comparison with all the available platforms to provide you with the best platforms with the best features.
Liza Brown
Liza Brown is a writer and a lover of all things video.
Follow @Liza Brown
Fine-Tuning Filmic Soundtracks: Integrating Music Into Your Video Projects in Premiere Pro
Versatile Video Editor - Wondershare Filmora
An easy yet powerful editor
Numerous effects to choose from
Detailed tutorials provided by the official channel
Look at any of the spot commercials, wedding videos, or even some family candid videos. Adding audio makes them appealing and likable. To catch a potential customer or create an emotional connection with the viewer combination of audio and video is a must. This makes the footage attractive and exceptional.
Read on to know more about the step-by-step approach how to add audio to video in Adobe Premiere Pro.
In this article
01 [How to add audio to video in Premiere Pro](#Part 1)
02 [How to adjust audio in Premiere Pro](#Part 2)
03 [Adding Audio to Video files](#Part 3)
Part 1 How to add audio to video in Premiere Pro
Some essential pointers for all would-be videographers are:
● Before you add audio to video in Premiere Pro, be ready to see your file size increase to a large extent. If you add a background score of 15MB, your total video file size will increase by the same amount of 15MB. The best way to take care of such a problem is to use additional compression techniques to get a suitable file size.
● Most videographers use lots of software tools to add audio to video professionally. One such trending software tool is the Adobe Premiere Pro. Its simple to add audio to video in Premiere Pro, edit your audio and video, and fine-tune the audio volume of each video project.
Let’s learn how.

Step1 Find out the Audio option
Navigate to the Audio workspace, select Audio at the top on the tools bar
Step2 Choose the Workspace
Click Window select Workspace click on Audio
Step3 Check toolbar
Within Audio, click on Choose Window Media Browser to show the Media Browser toolbar.
Step4 Select audio files
Go to your audio file; for Windows OS, right-click or control-click the selected audio file for macOS.
Step5 Import and add
Please select the desired audio file, then click import to add it to your Project.
An important tip is to keep the Ingest box selected if you want to copy your audio file concurrently to your project folder.
Adding audio to your series

Step1 Go to the Project panel
Select Window, click on Project to open the Project panel.
Step2 Select audio file
Click on the audio file you imported to select it.
Step3 Check the waveform
Double click the file to open it in the Source panel to check the sound and waveform.
Step4 Check sounds
Play the audio file if you want to check the audio quality, volume, and overall sound.
Step5 Add audio to the video track
Hold the left click on your mouse to drag the audio file to the series in the Timeline panel. You can add any audio file to the video track listed in the panel window in this step.
Step6 Trim audio file
Select the Trim option to trim your audio file the same way you will edit the video file in the final step.
Part 2 How to adjust audio in Premiere Pro
Now that you have understood how to add audio to video in Adobe Premier Pro. Let’s know how to adjust audio in Premier Pro.

Step1 Activate the series
Press on the spacebar to activate your series in the Program panel (appears in the top right of the panel)
Step2 Stop playback
To stop the playback, press the space bar again.
Step3 Choose starting point of playback
Press down the left mouse button to hold and drag the Blue colored play head to wherever you desire the playback to start.
If you feel the audio track is mild or too harsh compared to the rest of the audio series, change each audio track’s volume separately.
Step1 Select Audio Track Mixer
Click Window selects Audio Track Mixer from the menu.
Step2 Click the series name to see the audio mixer
Click the series name of your audio file to show the audio mixer for your series.
Step3 Choose playback to play the audio
At the bottom of the panel is the Audio Track Mixer. Click on playback to star, pause or play your audio in-ring sequence.
Step4 Click on the slider
When your audio file plays or loops, click on the slider to move up or down. It will increase or reduce the volume of each separate audio track in your audio series.
Step5 Adjust the volume
Use the slider to adjust the overall audio volume
Tips
Always keep the audio projects within the -6 to 3 dB volume range to get the best quality of the audio effect. Any lower you won’t be able to hear the sound, or if it’s higher, the sound will hurt the listeners’ ears.
Professional advice to all beginner-level videographers is that as Premiere Pro is complex so you need more straightforward tools like Filmora for all your video editing work. Filmora is easy to use and much cheaper than Premiere Pro.
You may think now why or how Filmora can be the best as an alternative on how to add audio to video using Premiere Pro. Well! It will help you to transform your video into a piece of art incredibly by offering simple drag and drop options, including an easy-to-use interface and powerful editing tools. You can:
● Edit and create your videos with minimal effort
● Get a Music Library to add comedy, fear, tension, and love to every scene
● Get several royalty-free songs and sound effects
● Create videos with up to 800 stunning effects
● Unleash your creativity with its offered Hollywood effects
● Import and export in almost any type of video format
How to use Filmora to add audio to video
Adding sound to any video file enhances its viewability and the whole experience of watching any video. To do this, you need to add audio to video. The same can be done quickly in Filmora, a 3rd-party video editing software tool now the hot favorite of amateur and professional video editors. Below we describe how to add audio to video in Filmora.
Import Media
To start the process of adding audio to video follow these steps.
Step1 Select the audio, add using the Import option or drag and select
Import selected audio using the Filmora Media Panel and add it to your timeline. You can also choose and drag the audio file from the source folder to the Media Panel. Filmora supports multiple audio file formats to ease adding audio to video. The supported audio files are MP3, M4V, MPA, WAV, WMA.

Step2 Add and make the audio file
Adding the audio file to Filmora Media Panel makes it a media asset and can now be used multiple times in future projects. The original file remains as Filmora doesn’t change the original audio file.
Step3 Copying or deleting an audio file
In Filmora, using the feature of copying or deleting an audio file, you can work on the audio and video from any computer or remote PC.
Part 3 Adding Audio to Video files
Using Filmora, it is easy to sync or add audio to the video, which is separately recorded and stored on your device.
Using Filmora, it is easy to sync or add audio to the video, which is separately recorded and stored on your device.
Step1 Click on Import in the Media Panel
Select the audio and video files to import them into Filmora.
Step2 Click on the video file to add audio
Press the Ctrl key (Windows) or Cmd key (Mac OS) and click on the audio file.
Step3 Add audio to video
Right-click on the files selected and choose the Merge audio & video option to add audio to the video.
Filmora analyzes audio and video files and replaces the existing audio with the newly selected audio file. Once the synchronization process is over, the new merged file will be available in the Media Panel for future processing.
The synchronized file will have the same terminology as the original video file with a difference. It will get an extension Merged to its name.
The original file will not get affected in Filmora. This software tool only references the files to generate a new file. The new file created when you add audio to the video can now be added to the timeline and exported.
Wondershare Filmora
Get started easily with Filmora’s powerful performance, intuitive interface, and countless effects!
Try It Free Try It Free Try It Free Learn More about Filmora>

Conclusion
So, this article listed how to add audio to video in Premiere Pro via a step-by-step guide. The guide lets you know the easy method of adding audio to video in Adobe Premiere Pro to all potential videographers. Thus, you can now start your journey of video edition by putting your best click forward!
Look at any of the spot commercials, wedding videos, or even some family candid videos. Adding audio makes them appealing and likable. To catch a potential customer or create an emotional connection with the viewer combination of audio and video is a must. This makes the footage attractive and exceptional.
Read on to know more about the step-by-step approach how to add audio to video in Adobe Premiere Pro.
In this article
01 [How to add audio to video in Premiere Pro](#Part 1)
02 [How to adjust audio in Premiere Pro](#Part 2)
03 [Adding Audio to Video files](#Part 3)
Part 1 How to add audio to video in Premiere Pro
Some essential pointers for all would-be videographers are:
● Before you add audio to video in Premiere Pro, be ready to see your file size increase to a large extent. If you add a background score of 15MB, your total video file size will increase by the same amount of 15MB. The best way to take care of such a problem is to use additional compression techniques to get a suitable file size.
● Most videographers use lots of software tools to add audio to video professionally. One such trending software tool is the Adobe Premiere Pro. Its simple to add audio to video in Premiere Pro, edit your audio and video, and fine-tune the audio volume of each video project.
Let’s learn how.
Step1 Find out the Audio option
Navigate to the Audio workspace, select Audio at the top on the tools bar
Step2 Choose the Workspace
Click Window select Workspace click on Audio
Step3 Check toolbar
Within Audio, click on Choose Window Media Browser to show the Media Browser toolbar.
Step4 Select audio files
Go to your audio file; for Windows OS, right-click or control-click the selected audio file for macOS.
Step5 Import and add
Please select the desired audio file, then click import to add it to your Project.
An important tip is to keep the Ingest box selected if you want to copy your audio file concurrently to your project folder.
Adding audio to your series
Step1 Go to the Project panel
Select Window, click on Project to open the Project panel.
Step2 Select audio file
Click on the audio file you imported to select it.
Step3 Check the waveform
Double click the file to open it in the Source panel to check the sound and waveform.
Step4 Check sounds
Play the audio file if you want to check the audio quality, volume, and overall sound.
Step5 Add audio to the video track
Hold the left click on your mouse to drag the audio file to the series in the Timeline panel. You can add any audio file to the video track listed in the panel window in this step.
Step6 Trim audio file
Select the Trim option to trim your audio file the same way you will edit the video file in the final step.
Part 2 How to adjust audio in Premiere Pro
Now that you have understood how to add audio to video in Adobe Premier Pro. Let’s know how to adjust audio in Premier Pro.
Step1 Activate the series
Press on the spacebar to activate your series in the Program panel (appears in the top right of the panel)
Step2 Stop playback
To stop the playback, press the space bar again.
Step3 Choose starting point of playback
Press down the left mouse button to hold and drag the Blue colored play head to wherever you desire the playback to start.
If you feel the audio track is mild or too harsh compared to the rest of the audio series, change each audio track’s volume separately.
Step1 Select Audio Track Mixer
Click Window selects Audio Track Mixer from the menu.
Step2 Click the series name to see the audio mixer
Click the series name of your audio file to show the audio mixer for your series.
Step3 Choose playback to play the audio
At the bottom of the panel is the Audio Track Mixer. Click on playback to star, pause or play your audio in-ring sequence.
Step4 Click on the slider
When your audio file plays or loops, click on the slider to move up or down. It will increase or reduce the volume of each separate audio track in your audio series.
Step5 Adjust the volume
Use the slider to adjust the overall audio volume
Tips
Always keep the audio projects within the -6 to 3 dB volume range to get the best quality of the audio effect. Any lower you won’t be able to hear the sound, or if it’s higher, the sound will hurt the listeners’ ears.
Professional advice to all beginner-level videographers is that as Premiere Pro is complex so you need more straightforward tools like Filmora for all your video editing work. Filmora is easy to use and much cheaper than Premiere Pro.
You may think now why or how Filmora can be the best as an alternative on how to add audio to video using Premiere Pro. Well! It will help you to transform your video into a piece of art incredibly by offering simple drag and drop options, including an easy-to-use interface and powerful editing tools. You can:
● Edit and create your videos with minimal effort
● Get a Music Library to add comedy, fear, tension, and love to every scene
● Get several royalty-free songs and sound effects
● Create videos with up to 800 stunning effects
● Unleash your creativity with its offered Hollywood effects
● Import and export in almost any type of video format
How to use Filmora to add audio to video
Adding sound to any video file enhances its viewability and the whole experience of watching any video. To do this, you need to add audio to video. The same can be done quickly in Filmora, a 3rd-party video editing software tool now the hot favorite of amateur and professional video editors. Below we describe how to add audio to video in Filmora.
Import Media
To start the process of adding audio to video follow these steps.
Step1 Select the audio, add using the Import option or drag and select
Import selected audio using the Filmora Media Panel and add it to your timeline. You can also choose and drag the audio file from the source folder to the Media Panel. Filmora supports multiple audio file formats to ease adding audio to video. The supported audio files are MP3, M4V, MPA, WAV, WMA.
Step2 Add and make the audio file
Adding the audio file to Filmora Media Panel makes it a media asset and can now be used multiple times in future projects. The original file remains as Filmora doesn’t change the original audio file.
Step3 Copying or deleting an audio file
In Filmora, using the feature of copying or deleting an audio file, you can work on the audio and video from any computer or remote PC.
Part 3 Adding Audio to Video files
Using Filmora, it is easy to sync or add audio to the video, which is separately recorded and stored on your device.
Using Filmora, it is easy to sync or add audio to the video, which is separately recorded and stored on your device.
Step1 Click on Import in the Media Panel
Select the audio and video files to import them into Filmora.
Step2 Click on the video file to add audio
Press the Ctrl key (Windows) or Cmd key (Mac OS) and click on the audio file.
Step3 Add audio to video
Right-click on the files selected and choose the Merge audio & video option to add audio to the video.
Filmora analyzes audio and video files and replaces the existing audio with the newly selected audio file. Once the synchronization process is over, the new merged file will be available in the Media Panel for future processing.
The synchronized file will have the same terminology as the original video file with a difference. It will get an extension Merged to its name.
The original file will not get affected in Filmora. This software tool only references the files to generate a new file. The new file created when you add audio to the video can now be added to the timeline and exported.
Wondershare Filmora
Get started easily with Filmora’s powerful performance, intuitive interface, and countless effects!
Try It Free Try It Free Try It Free Learn More about Filmora>
Conclusion
So, this article listed how to add audio to video in Premiere Pro via a step-by-step guide. The guide lets you know the easy method of adding audio to video in Adobe Premiere Pro to all potential videographers. Thus, you can now start your journey of video edition by putting your best click forward!
Masterclass in Adding Song Layers to iMovie Videos for Professional Results
Versatile Video Editor - Wondershare Filmora
“Can you add songs to iMovie? I need someone who can help me find a solution by providing a Detailed Guide on how to add songs in iMovie.”
It is a fact that iMovie is free for Apple users. There is a bit of a learning process that a user needs to go through before they start using it. It is also pertinant to understand that the simple process of adding a song to iMovie can be pretty tough if you do not understand the process.
Without delaying any further, let’s go through a quick detailed guide on how to add songs on iMovie as follows:
In this article
01 [How to add Music to iMovie [iPhone & Mac]](#Part 1)
02 [Can I use iTunes songs on iMovie](#Part 2)
03 [Where can I get free songs to add to iMovie](#Part 3)
Part 1 How to add Music to iMovie [iPhone & Mac]
iMovie provides Apple users with varieties of great opportunities, especially those who are much more interested in making videos to add transitions, cut clips, overlay titles, and do more on the platform. More so, for those using them already, you will notice that there are about five songs already, which can be somewhat overwhelming.
The good news is that Apple users can now add more songs on iMovie using the following steps:
For iPhone: there are different methods of adding songs to the iMovie project using your iPhone device:
Add theme music and soundtrack
● While your project is still open, click on Add Media button +and then click on Audio.
● Click on Soundtracks and all the Soundtracks that you need to download will appear showing a Download button next to them.
● Click on a soundtrack you want to download and download it. After you download a soundtrack, you can click on it to preview.
● To download all the soundtracks, click on the Download button in the upper right.
● To add a soundtrack, click on the soundtrack you want to add and then click on the Add Audio option + that appears to add a soundtrack to your project.
● Scroll down to the Theme Music section available at the Soundtracks list and add theme music to your project to add theme music.
Add background song stored on your device
● While your project is still open, click on Add Media button + and click on Audio.
● To look for songs previously synced to your device from your computer, click on My Music.
● To listen to a song before adding them, click on the song.
● To add a song to your iMovie project, click on the song and then click on the Add Audio button +.
Add imported songs from an iCloud drive or other audio
Scroll the timeline so the white vertical line known as the ‘Playhead’ appears while your project is still open and select where you want to add the audio clip or songs.
Note: The new clip gets added before or after an existing clip. This is if the ‘Playhead’ is resting over a current clip.
● Click on Add Media + and then click on Audio.
● Click on the iCloud Drive listed in the categories.
● Navigate to the folder with the audio you want to use, located at the iCloud pane,
● Click on the name of the audio clip or song you want to add and tap the Add Audio button +.
For Mac: There are different methods of adding songs to the iMovie project using your Mac device:
Add background Music
● Click on the iMovie app on your Mac device and open your movie in the timeline. Then select Audio located above the browser.

Source
● In the audio sidebar, select from the dropdown; Sound Effects , GarageBand , or Music

The contents found in the selected item will appear as a list in the browser. Therefore, to filter what appears as a list in the browser:
● Tap the pop-up menu at the upper-left corner and select a category.
● Look for the clip you want to add to your project in the browser.
● Drag and drop the clip to the background music well below the timeline.

You can now trim, edit, and position, the background audio independently of clips in the timeline.
Add a sound clip
● Click on the iMovie app on your Mac device and open your movie in the timeline. Select Audio in the menu located above the browser.
● In the audio sidebar, select from the dropdown; Sound Effects , GarageBand , or Music
The contents found in the selected item will appear as a list in the browser. Now, to filter what appears as a list in the browser:
Tap the pop-up menu located at the upper-left corner of the browser and select a category.
In the browser, select the song you want to add to your movie and then do any of the following:
a) Add all audio clips by dragging the clip from the list to the timeline.
b) Add a part of the audio clip by selecting a range in the waveform at the top of the browser. Then drag the range to the timeline.

● Finally, the audio clip will then be attached to a clip in the timeline. Therefore, the audio clip will move as well if you move the clip the audio clip is linked to.
Source
Part 2 Can I use iTunes songs on iMovie
Before we know how to add songs from iTunes iMovie, you must realize that all Music is protected. You will get an error statement that; “the songs you selected are not usable in iMovie because they are DRM (which means Digital Rights Management) protected.”
Note that to use the songs you had downloaded from iTunes, you must be sure that they have copyright permission. Otherwise, you won’t be able to use such themes in iMovie as those downloaded content through iTunes come up with limited rights only. Available options are:
● Import music from iTunes to iMovie (Already existing, downloaded files)
● Can purchase the track from iTunes Store
● Rip the CD
● Purchase music from Amazon
● Subscribe for the program named ‘Match’ under iTunes (That will assist you in getting duplicate copies of DRM free music.)
Noted: You can use all those tracks you own, but not those tracks that you get on a rental basis (such as from Apple Music).
Alternatively, you have one more option: you can add songs to iMovie from Spotify. If you are willing to learn how to add songs to iMovie from Spotify, the process is quite simple. Firstly transfer your Spotify music/songs to your music library. Then open iMovie > Add media> Add Music and select your desired song/music/track from the library.

This way, you can easily add songs from Spotify to iMovie.
Part 3 Where can I get free songs to add to iMovie
To get and add songs in iMovie, you can visit the following free platform to download the songs on your device.
● dig.ccMixter

If you are looking to find some excellent soundtrack, Music to make the iMovie add song process smooth, then using this platform will be the right approach.
● HookSounds

If you want to learn how to add a song on iMovie iPhone or Mac devices, getting Royalty-Free Resources will be the desired choice. And that choice you will get with HookSounds.
● Free sound

There is one more free music resource platform that will give you multiple options to get some incredible soundtracks for free so that you would be able to understand quickly how do you add songs to iMovie.
Conclusion
Listening to your favorite Music at your ease is the best thing in the world. Especially the freedom of Music, video editing with iMovie is a great relief to the iPhone, Mac users. But, the limited availability of Audio or songs under the iMovie library will reduce the expedition. And the question always arises how to add songs from Apple Music to iMovie or different ways to download iMovie add Songs. The article gives you a detailed description of how to add Songs to iMovie on Mac and how to add Songs to iMovie on iPhone devices with respective details. Additionally, the options given to free resources to download Music will provide you further guidance to enrich your music library with iMovie.
“Can you add songs to iMovie? I need someone who can help me find a solution by providing a Detailed Guide on how to add songs in iMovie.”
It is a fact that iMovie is free for Apple users. There is a bit of a learning process that a user needs to go through before they start using it. It is also pertinant to understand that the simple process of adding a song to iMovie can be pretty tough if you do not understand the process.
Without delaying any further, let’s go through a quick detailed guide on how to add songs on iMovie as follows:
In this article
01 [How to add Music to iMovie [iPhone & Mac]](#Part 1)
02 [Can I use iTunes songs on iMovie](#Part 2)
03 [Where can I get free songs to add to iMovie](#Part 3)
Part 1 How to add Music to iMovie [iPhone & Mac]
iMovie provides Apple users with varieties of great opportunities, especially those who are much more interested in making videos to add transitions, cut clips, overlay titles, and do more on the platform. More so, for those using them already, you will notice that there are about five songs already, which can be somewhat overwhelming.
The good news is that Apple users can now add more songs on iMovie using the following steps:
For iPhone: there are different methods of adding songs to the iMovie project using your iPhone device:
Add theme music and soundtrack
● While your project is still open, click on Add Media button +and then click on Audio.
● Click on Soundtracks and all the Soundtracks that you need to download will appear showing a Download button next to them.
● Click on a soundtrack you want to download and download it. After you download a soundtrack, you can click on it to preview.
● To download all the soundtracks, click on the Download button in the upper right.
● To add a soundtrack, click on the soundtrack you want to add and then click on the Add Audio option + that appears to add a soundtrack to your project.
● Scroll down to the Theme Music section available at the Soundtracks list and add theme music to your project to add theme music.
Add background song stored on your device
● While your project is still open, click on Add Media button + and click on Audio.
● To look for songs previously synced to your device from your computer, click on My Music.
● To listen to a song before adding them, click on the song.
● To add a song to your iMovie project, click on the song and then click on the Add Audio button +.
Add imported songs from an iCloud drive or other audio
Scroll the timeline so the white vertical line known as the ‘Playhead’ appears while your project is still open and select where you want to add the audio clip or songs.
Note: The new clip gets added before or after an existing clip. This is if the ‘Playhead’ is resting over a current clip.
● Click on Add Media + and then click on Audio.
● Click on the iCloud Drive listed in the categories.
● Navigate to the folder with the audio you want to use, located at the iCloud pane,
● Click on the name of the audio clip or song you want to add and tap the Add Audio button +.
For Mac: There are different methods of adding songs to the iMovie project using your Mac device:
Add background Music
● Click on the iMovie app on your Mac device and open your movie in the timeline. Then select Audio located above the browser.
Source
● In the audio sidebar, select from the dropdown; Sound Effects , GarageBand , or Music
The contents found in the selected item will appear as a list in the browser. Therefore, to filter what appears as a list in the browser:
● Tap the pop-up menu at the upper-left corner and select a category.
● Look for the clip you want to add to your project in the browser.
● Drag and drop the clip to the background music well below the timeline.
You can now trim, edit, and position, the background audio independently of clips in the timeline.
Add a sound clip
● Click on the iMovie app on your Mac device and open your movie in the timeline. Select Audio in the menu located above the browser.
● In the audio sidebar, select from the dropdown; Sound Effects , GarageBand , or Music
The contents found in the selected item will appear as a list in the browser. Now, to filter what appears as a list in the browser:
Tap the pop-up menu located at the upper-left corner of the browser and select a category.
In the browser, select the song you want to add to your movie and then do any of the following:
a) Add all audio clips by dragging the clip from the list to the timeline.
b) Add a part of the audio clip by selecting a range in the waveform at the top of the browser. Then drag the range to the timeline.
● Finally, the audio clip will then be attached to a clip in the timeline. Therefore, the audio clip will move as well if you move the clip the audio clip is linked to.
Source
Part 2 Can I use iTunes songs on iMovie
Before we know how to add songs from iTunes iMovie, you must realize that all Music is protected. You will get an error statement that; “the songs you selected are not usable in iMovie because they are DRM (which means Digital Rights Management) protected.”
Note that to use the songs you had downloaded from iTunes, you must be sure that they have copyright permission. Otherwise, you won’t be able to use such themes in iMovie as those downloaded content through iTunes come up with limited rights only. Available options are:
● Import music from iTunes to iMovie (Already existing, downloaded files)
● Can purchase the track from iTunes Store
● Rip the CD
● Purchase music from Amazon
● Subscribe for the program named ‘Match’ under iTunes (That will assist you in getting duplicate copies of DRM free music.)
Noted: You can use all those tracks you own, but not those tracks that you get on a rental basis (such as from Apple Music).
Alternatively, you have one more option: you can add songs to iMovie from Spotify. If you are willing to learn how to add songs to iMovie from Spotify, the process is quite simple. Firstly transfer your Spotify music/songs to your music library. Then open iMovie > Add media> Add Music and select your desired song/music/track from the library.
This way, you can easily add songs from Spotify to iMovie.
Part 3 Where can I get free songs to add to iMovie
To get and add songs in iMovie, you can visit the following free platform to download the songs on your device.
● dig.ccMixter
If you are looking to find some excellent soundtrack, Music to make the iMovie add song process smooth, then using this platform will be the right approach.
● HookSounds
If you want to learn how to add a song on iMovie iPhone or Mac devices, getting Royalty-Free Resources will be the desired choice. And that choice you will get with HookSounds.
● Free sound
There is one more free music resource platform that will give you multiple options to get some incredible soundtracks for free so that you would be able to understand quickly how do you add songs to iMovie.
Conclusion
Listening to your favorite Music at your ease is the best thing in the world. Especially the freedom of Music, video editing with iMovie is a great relief to the iPhone, Mac users. But, the limited availability of Audio or songs under the iMovie library will reduce the expedition. And the question always arises how to add songs from Apple Music to iMovie or different ways to download iMovie add Songs. The article gives you a detailed description of how to add Songs to iMovie on Mac and how to add Songs to iMovie on iPhone devices with respective details. Additionally, the options given to free resources to download Music will provide you further guidance to enrich your music library with iMovie.
Also read:
- New In 2024, The Annual Showcase of Innovative Anime Casting Talent
- Updated In 2024, Essential Steps for Perfect Audio Capture in GarageBand
- Discovering Authentic Wolf Howling Ambiance
- In 2024, The Ultimate Voice Transformation Handbook Ranking the Leading 11 Speech Alteration Software for Mobile Platforms, No Cost
- In 2024, Noise Reduction for Video Streams A Comprehensive Guide to Muting Background Audio Online
- 2024 Approved Navigating the World of In-Game Voice Changing Software
- In 2024, Future Sounds A Journey Through the New Wave of Elegiac Harmonies
- Updated Navigating the In-Built Recording App A Comprehensive Guide to Samsung S10/S9
- New In 2024, Hush the Hubbub Innovative Methods for Diminishing Noise in Microphones
- Updated In 2024, How to Optimize Your iPhone Sound Levels by Turning Off Dynamic Volume Control
- New The Future of Remote Work Unveiling the Best Vocal Manipulation Apps for Google Meet Users
- Ultimate List of Websites Offering Authentic Nature Sound Archives
- Updated In 2024, The Alluring World of High-Quality Sound Editing Software Advantages, Disadvantages, and Competitive Insights
- Updated Boost Your Gameplay Auditory Experience Add Music to KineMaster Strategically
- Mute Movie Tracks Steps to Strip Audio From MOV Files in Windows and Mac OS for 2024
- 2024 Approved MP3 Cutter for Mac - Which Is the Best MP3 Cutter on Mac?
- Updated Discovering Comical Noise Sounds Digitally
- Updated 2024 Approved Harmonizing Sight and Sound Effective Methods for Audio Pairing in Android Video Production
- Updated In 2024, Mastering the Art of Audio Separation A Step-by-Step Premiere Pro Approach
- Updated 2024 Approved Strategies for Muting Unwanted Sounds in Multimedia
- New In 2024, From Amateur to Expert Utilizing Free Tools for Effective AutoTune in Audacity
- Pinpointing Audible Whistle Phenomena
- 2024 Approved Beat Yourself Up Less Dive Into a World of Free Audio Tracks
- New 2024 Approved Perfecting Your Production Top 8 Equalizers to Achieve Professional Sound Quality in Streaming Media
- New 2024 Approved Add Music to IGTV
- New In 2024, 7 Best Audacity Alternatives for Android
- Updated Streamlining Sound A Comprehensive Walkthrough to Tuning Audio Online
- Updated In 2024, Tranquil Trimming Tactics The Ultimate Guide to Quiet Video Enhancement Using Premiere Pro
- New Free and Open Source Audio Conversion Software Top Picks for 2024
- Unveiling the Best Music Production Software How Does MAGIX Samplitude Stack Up for 2024
- New 2024 Approved Locating Chilling Sonic Elements for Films
- Updated 2024 Approved Best Song Identifiers Online You Can Find
- Updated In 2024, The Ultimate List of Speech-Friendly Audio Recorders
- How to play HEVC H.265 video on Xiaomi Redmi 13C?
- Tecno Pop 7 Pro Screen Unresponsive? Heres How to Fix It | Dr.fone
- Full Solutions to Fix Error Code 920 In Google Play on Tecno Spark 10C | Dr.fone
- New Step by Step to Rotate Video in Google Photos
- 5 Hassle-Free Solutions to Fake Location on Find My Friends Of Realme C51 | Dr.fone
- In 2024, Best Anti Tracker Software For Motorola G24 Power | Dr.fone
- Updated No More Reddit Roulette Reliable Filmora Discounts Here for 2024
- How to Unlock Oppo F25 Pro 5G Phone without Any Data Loss
- How to Fix Error 495 While Download/Updating Android Apps On Infinix Smart 7 HD | Dr.fone
- New Face Swap Frenzy The Top-Rated Apps for iPhone and Android
- In 2024, Guide to Mirror Your Motorola Edge 2023 to Other Android devices | Dr.fone
- In 2024, Additional Tips About Sinnoh Stone For Vivo V30 Lite 5G | Dr.fone
- New Top 8 Video Animation Software for Mobile Devices for 2024
- Title: 2024 Approved Innovative Platforms to Connect Visually Videochat Alternatives to Omegle
- Author: Jacob
- Created at : 2024-05-20 00:04:13
- Updated at : 2024-05-21 00:04:13
- Link: https://audio-shaping.techidaily.com/2024-approved-innovative-platforms-to-connect-visually-videochat-alternatives-to-omegle/
- License: This work is licensed under CC BY-NC-SA 4.0.
