
:max_bytes(150000):strip_icc():format(webp)/Twitter-and-X-4c4103f6bc3c42e0b7197b60a50317ca.jpg)
Updated In 2024, How To Change Audio Speed and Pitch Online?
How To Change Audio Speed and Pitch Online?
If you have downloaded an audio story and you find out that the audio speed is rather slow which is making it sound boring, you can change the speed without downloading any software. Similarly, you downloaded a podcast where the speaker is speaking fast and you need to slow down the speed. That is where an audio speed changer online where you can change speed of any audio file easily.
When you change the speed, the pitch of the audio also changes simultaneously. Therefore, most audio speed changing tools are actually speed and pitch changers. However, there are certain audio speed changing tools where you can change speed without changing pitch. Apart from the online audio speed and pitcher charger tools, we have also provided you an audio speed changer software for your requirements.
1. Music Speed Changer
Music Speed Changer is an audio speed and pitch changer that lets you change speed as well as pitch independently. The user interface is quite appealing and you can make the changes and play the audio to check the changes. You can set a loop between any two points on the audio spectrum. Here are the key features of Music Speed Changer.
- Change speed(tempo) and pitch independently.
- Intuitive controls and save changes instantly.
- Make a loop by marking specific points.
- Listen to the changes instantly.
How to change audio speed and pitch with Music Speed Changer?
Step 1. Visit https://app.musicspeedchanger.com on your browser.
Step 2. Click on ‘Choose Audio File’ button to select your audio file.
Step 3. Use the sliders for changing speed(tempo) and pitch accordingly.
Step 4. Play the audio to check the changes and click on Save icon for downloading the modified audio file.

2. Audio Alter
If you have an audio file with an unusual file format such as WAC or OGG, Audio Alter has the best set of audio tools. If you want to change speed, you have to choose Tempo changer. If you want to change pitch, you have to choose audio pitch changer. Besides, there are other useful tools such as equalizer, volume changer, noise reducer and much more. Along with MP3 audio files, you can change speed for WAV, FLAC, OGG audio files. Here are the key features of Audio Alter.
- Individual tools for changing speed and pitch.
- Drag and drop audio file as well as browser from hard drive.
- Supports MP3, WAV, FLAC, OGG audio file formats.
- Live listen to the changes in the audio.
How to change audio speed or pitch with Audio Alter?
Step 1. Visit “audioalter.com/tempo” to change speed or “audioalter.com/pitch-shifter“ to change pitch on your web browser.
Step 2. Click on Browse computer button and select the audio file. Otherwise, drag and drop the audio file directly.
Step 3. Use the slider, you can change the speed or pitch.
Step 4. You can turn on the checkbox “Preserve Pitch” to change audio speed without changing pitch.
Step 5. You can play and check the changes and finally, click on Submit button to process the audio file.

3. Audio Speed Changer
Audio Speed Changer is one of the most popular audio pitch changer online as well as speed changer online tools. There are different sources from which you can upload audio files starting from your hard drive and cloud storage to websites through URLs. You can change speed by percentage as well as change pitch by semitones. Audio Speed Changer is also available as an app and you can opt for Audio Speed Changer Pro for added features. Here are the key features of Audio Speed Changer.
- Change the pitch and speed independently.
- Better processing via time-based and frequency-based methods.
- Save the modified audio file in MP3 or MA4 format.
- Step-by-step interface enables hassle-free operation.
How to change audio speed with Audio Speed Changer?
Step 1. Visit “www.audiospeedchanger.com” from the web browser.
Step 2. Click on Choose File button and select the audio file. If you want to refer to any website’s audio file, you can mention the URL as well.
Step 3. Change pitch and speed as per requirements.
Step 4. Select MP3 and M4A file format to save as the output file.
Step 5. Select the processing method and click on Convert Now button.

Bonus: Change Audio Speed With A Professional Software
If you are looking for a professional editor to tweak the speed, pitch, as well as various other audio properties, we recommend Wondershare Filmora. It is a video editor with inbuilt audio editor. You can even record video and audio on the software and you can trim out useless audio parts as well as sync audio with video perfectly. Most importantly, you can import and export audio files in different file formats. Here are the steps to change audio speed with Filmora.
For Win 7 or later (64-bit)
For macOS 10.12 or later
Step 1: Download and install Wondershare Filmora.
Step 2: Go to File menu and then go Import Media and select Import Media Files option.

Step 3: Import the audio file from your hard drive and it will appear under Project Media folder on Filmora. You need to drag and drop the audio file on audio timeline.

Step 4: Click on Speedometer icon and select the preset speed.

Step 5: If you want a custom speed, click on Custom Speed and set speed according to your requirements.

Step 6: Play the audio file to get satisfied with the changes, click on Export to save the file in preferred file format.
Conclusion
Change audio speed generally changes the pitch of the audio. However, you may want to change speed and pitch separately and independently. That is why we have selected the best audio speed and pitch changers where you can adjust the parameters as per your requirements. You can use these online tools on computer as well as smartphone. We have also recommended Wondershare Filmora for professional audio editing of various audio parameters.
How to change audio speed and pitch with Music Speed Changer?
Step 1. Visit https://app.musicspeedchanger.com on your browser.
Step 2. Click on ‘Choose Audio File’ button to select your audio file.
Step 3. Use the sliders for changing speed(tempo) and pitch accordingly.
Step 4. Play the audio to check the changes and click on Save icon for downloading the modified audio file.
2. Audio Alter
If you have an audio file with an unusual file format such as WAC or OGG, Audio Alter has the best set of audio tools. If you want to change speed, you have to choose Tempo changer. If you want to change pitch, you have to choose audio pitch changer. Besides, there are other useful tools such as equalizer, volume changer, noise reducer and much more. Along with MP3 audio files, you can change speed for WAV, FLAC, OGG audio files. Here are the key features of Audio Alter.
- Individual tools for changing speed and pitch.
- Drag and drop audio file as well as browser from hard drive.
- Supports MP3, WAV, FLAC, OGG audio file formats.
- Live listen to the changes in the audio.
How to change audio speed or pitch with Audio Alter?
Step 1. Visit “audioalter.com/tempo” to change speed or “audioalter.com/pitch-shifter“ to change pitch on your web browser.
Step 2. Click on Browse computer button and select the audio file. Otherwise, drag and drop the audio file directly.
Step 3. Use the slider, you can change the speed or pitch.
Step 4. You can turn on the checkbox “Preserve Pitch” to change audio speed without changing pitch.
Step 5. You can play and check the changes and finally, click on Submit button to process the audio file.
3. Audio Speed Changer
Audio Speed Changer is one of the most popular audio pitch changer online as well as speed changer online tools. There are different sources from which you can upload audio files starting from your hard drive and cloud storage to websites through URLs. You can change speed by percentage as well as change pitch by semitones. Audio Speed Changer is also available as an app and you can opt for Audio Speed Changer Pro for added features. Here are the key features of Audio Speed Changer.
- Change the pitch and speed independently.
- Better processing via time-based and frequency-based methods.
- Save the modified audio file in MP3 or MA4 format.
- Step-by-step interface enables hassle-free operation.
How to change audio speed with Audio Speed Changer?
Step 1. Visit “www.audiospeedchanger.com” from the web browser.
Step 2. Click on Choose File button and select the audio file. If you want to refer to any website’s audio file, you can mention the URL as well.
Step 3. Change pitch and speed as per requirements.
Step 4. Select MP3 and M4A file format to save as the output file.
Step 5. Select the processing method and click on Convert Now button.
Bonus: Change Audio Speed With A Professional Software
If you are looking for a professional editor to tweak the speed, pitch, as well as various other audio properties, we recommend Wondershare Filmora. It is a video editor with inbuilt audio editor. You can even record video and audio on the software and you can trim out useless audio parts as well as sync audio with video perfectly. Most importantly, you can import and export audio files in different file formats. Here are the steps to change audio speed with Filmora.
For Win 7 or later (64-bit)
For macOS 10.12 or later
Step 1: Download and install Wondershare Filmora.
Step 2: Go to File menu and then go Import Media and select Import Media Files option.
Step 3: Import the audio file from your hard drive and it will appear under Project Media folder on Filmora. You need to drag and drop the audio file on audio timeline.
Step 4: Click on Speedometer icon and select the preset speed.
Step 5: If you want a custom speed, click on Custom Speed and set speed according to your requirements.
Step 6: Play the audio file to get satisfied with the changes, click on Export to save the file in preferred file format.
Conclusion
Change audio speed generally changes the pitch of the audio. However, you may want to change speed and pitch separately and independently. That is why we have selected the best audio speed and pitch changers where you can adjust the parameters as per your requirements. You can use these online tools on computer as well as smartphone. We have also recommended Wondershare Filmora for professional audio editing of various audio parameters.
Normalizing Audio in 3 Quick Ways-Audio Normalization
Normalizing Audio in 3 Quick Ways-Audio Normalization

Richard Bennett
Mar 27, 2024• Proven solutions
To normalize audio is to apply a constant amount of gain to a recording to bring the amplitude to a target or norm. Or simply put, normalizing any audio file with a normalizer software searches the file for a peak volume to set a defined maximum and then brings up the rest of the audio to the same maximum level.
Audio normalization is a good practice to get your audio levels right for a better-balanced video, especially imperative for dialogue clips that stand out on YouTube and other platforms. However, out of many different reasons, getting the best audio results from old-fashioned AD/DA converters or matching a group of audios on the same volume levels are still the most common.
Nevertheless, it’s not always easy to find an efficient audio normalization tool and – most importantly – to master the process. But no worries because we have you covered. So, dive in to learn some of the best tools and how you can use them to create masterfully balanced soundtracks.
- Method 1: Normalize Audio Online
- Method 2: Normalize Audio with Wondershare Filmora’s Auto Normalization
- Method 3: Normalize Audio with Audacity
Method 1: Normalize Audio Online
Video2edit online video tool is a one-stop solution for all your audio and video editing needs. The versatile online tool offers a suite of editing features, from extracting audio to converting different formats to normalizing audio. With a drag and drop interface, it allows you to enhance the audio quality of your video and share it to YouTube, Facebook, or other social platforms.
Not to mention, it lets you convert your video files to various popular formats such as MP4, AVI, MOV, 3GP, and WEBM. One of the significant advantages of the tool is the convenience. Without any download or subscription fee hassles, you can normalize audio tracks in a few clicks using Video2edit.com. Here’s how you can use the free tool to get good-quality audio results.
Step 1: Launch the Video2edit Normalize audio tool
Begin by launching the online Video2edit.com on your browser. Then, on the main interface, select the Normalize audio tool from the variety of editing tools.

Step 2: Drop or upload your file
Now, drag and drop your video or audio file or tap the Choose file option to import the file from your local device.

Step 3: Normalize audio
From the Covert video to dropdown, choose the video format you want to convert your file to. Then, click on the Start button to start normalizing your file.

Step 4: Download the converted file
Once the conversion is completed, hit Download in front of the converted file to save it to your computer.

Method 2: Normalize Audio with Wondershare Filmora’s Auto Normalization
Yet another advanced audio normalization software is the Wondershare Filmora . Whether you are looking for basic editing tools or some advanced features, Filmora has it all. The powerful editor uses artificial intelligence editing that provides a smart way to improve your audio quality. The essence of this well-known software is the Auto Normalization feature that allows users to modify the volume of multiple recording clips to standard European audio programs at 23.0 LUFS – with just ONE CLICK.
And for the best part, the normalization process is pretty straightforward and lossless with Wondershare Filmora. Below is a quick step-by-step guide to using this intuitive audio enhancer tool.


Step 1: Download and install the Wondershare Filmora
To get started, download, and install the Wondershare Filmora on your PC. Then launch the program to enter the main interface.

Step 2: Import your audio/video file
From the main menu, go to Import media, then click on Import media files and select to upload your files in the media box. Once uploaded, drag and drop the media clips onto the timeline.

Step 3: Open the audio editing panel
Next, right-click on the audio or video clip on the timeline and then tap Adjust audio, or you can simply double-click it to enter the audio editing panel.

Step 4: Enable auto audio normalization
On the audio editing panel, scroll down and enable the Auto normalization feature. Wondershare Filmora will analyze and normalize the audio file automatically.

Step 5: Export the normalized file
After the normalization process is completed, preview your video or audio to check the auto normalization. If you are not satisfied with the output, hit Reset and try again. Finally, tap on the Export option, give your file a name, and again hit Export to save the high-quality output.

Method 3: Normalize Audio with Audacity
Audacity is a popular audio editor that works wonders for professional music producers. This free, open-source platform has taken audio editing to newer levels with a wide range of advanced features; there is a spectrogram view mode for visualizing and selecting frequencies. In addition, there is extensive support for various plug-ins.
Besides audio normalization, the creative platform can record, mix, add filters, and equalize multiple soundtracks. Moreover, when normalizing with Audacity, you don’t have to worry about losing audio quality, thanks to its 16-bit, 24-bit, and 32-bit support.
To take advantage of this excellent audio normalizer, just follow these quick steps and set your audio tone.
Step 1: Open Audacity on your computer
First, download the Audacity software on your computer, and then open the program.

Step 2: Import your audio files
Go to the File tab on the top menu bar and tap on Open. Then select audio files you want to normalize to import, or simply drag and drop the files on the main screen.

Step 3: Customize audio normalization settings
Now, select the added audio clip and go to Effect on the top menu bar. From the dropdown, choose Normalize and type your desired volume level into the dB.

Step 4: Normalize audio
After editing the normalization settings, click the OK button to start normalizing.

Step 5: Save the audio file
Once finished, select Export under the File tab, and choose how you want to save the file.

FAQs about Normalizing Audio
Here we sorted out some frequently asked questions about audio normalization, which can help you learn more about audio normalization.
1. What dB should I normalize audio to?
Well, that entirely depends on your audio use, and there is no exact number for normalizing an audio clip. However, for safety, the trick is to stay from the maximum volume level of 0 dB. For overall mix levels, most video editors recommend normalizing audio between -10 dB to -20 dB. Likewise, in the case of a dialogue clip, the recommended audio levels are -12 dB to -15 dB. Still some other suggestions are
- Music: -18 dB to -22 dB
- Soundeffects: -10 dB to -20 dB
2. What is the difference between audio normalization and compression?
Audio normalization only and purely changes the volume of a sound by applying a constant amount of gain with a goal to make the loudest peak reach 0 Db. And while normalizing also matches multiple audios to the same volume, it still does not affect the sound dynamics, unlike compression.
On the flip side, audio compression chops off the audio peaks in your recording to get a fuller, louder sound without reaching the clipping limit. In compression, you are changing a proportion of the audio over time in varying amounts.
3. Will the audio normalization process affect the sound quality?
Fortunately, no. Audio normalization, when appropriately done with the help of efficient audio editors, never affects the audio quality. When normalizing an audio clip, the digital bit having the highest level below 0 dB is identified, and all the other bits of the audio are amplified to the same level. This translates to no change in the relative difference between every bit, while the noise level also does not change. So, yes, the only thing affected is the output level and not the quality of the track.
Summing up
Audio normalization is an emerging trend as a good idea to manage high-quality audio levels. This feature can indeed benefit the final steps of mastering music production. However, you need to be careful when deciding where and when to normalize audio or avoid it for better results.
So, are you ready to level up your audio game? The above-mentioned audio editing tools are top-notch normalizers that will do the work for you. Also, don’t forget to try Wondershare Filmora’s distinctive auto normalization feature to produce studio-quality audio.
Richard Bennett
Richard Bennett is a writer and a lover of all things video.
Follow @Richard Bennett
Richard Bennett
Mar 27, 2024• Proven solutions
To normalize audio is to apply a constant amount of gain to a recording to bring the amplitude to a target or norm. Or simply put, normalizing any audio file with a normalizer software searches the file for a peak volume to set a defined maximum and then brings up the rest of the audio to the same maximum level.
Audio normalization is a good practice to get your audio levels right for a better-balanced video, especially imperative for dialogue clips that stand out on YouTube and other platforms. However, out of many different reasons, getting the best audio results from old-fashioned AD/DA converters or matching a group of audios on the same volume levels are still the most common.
Nevertheless, it’s not always easy to find an efficient audio normalization tool and – most importantly – to master the process. But no worries because we have you covered. So, dive in to learn some of the best tools and how you can use them to create masterfully balanced soundtracks.
- Method 1: Normalize Audio Online
- Method 2: Normalize Audio with Wondershare Filmora’s Auto Normalization
- Method 3: Normalize Audio with Audacity
Method 1: Normalize Audio Online
Video2edit online video tool is a one-stop solution for all your audio and video editing needs. The versatile online tool offers a suite of editing features, from extracting audio to converting different formats to normalizing audio. With a drag and drop interface, it allows you to enhance the audio quality of your video and share it to YouTube, Facebook, or other social platforms.
Not to mention, it lets you convert your video files to various popular formats such as MP4, AVI, MOV, 3GP, and WEBM. One of the significant advantages of the tool is the convenience. Without any download or subscription fee hassles, you can normalize audio tracks in a few clicks using Video2edit.com. Here’s how you can use the free tool to get good-quality audio results.
Step 1: Launch the Video2edit Normalize audio tool
Begin by launching the online Video2edit.com on your browser. Then, on the main interface, select the Normalize audio tool from the variety of editing tools.
Step 2: Drop or upload your file
Now, drag and drop your video or audio file or tap the Choose file option to import the file from your local device.
Step 3: Normalize audio
From the Covert video to dropdown, choose the video format you want to convert your file to. Then, click on the Start button to start normalizing your file.
Step 4: Download the converted file
Once the conversion is completed, hit Download in front of the converted file to save it to your computer.
Method 2: Normalize Audio with Wondershare Filmora’s Auto Normalization
Yet another advanced audio normalization software is the Wondershare Filmora . Whether you are looking for basic editing tools or some advanced features, Filmora has it all. The powerful editor uses artificial intelligence editing that provides a smart way to improve your audio quality. The essence of this well-known software is the Auto Normalization feature that allows users to modify the volume of multiple recording clips to standard European audio programs at 23.0 LUFS – with just ONE CLICK.
And for the best part, the normalization process is pretty straightforward and lossless with Wondershare Filmora. Below is a quick step-by-step guide to using this intuitive audio enhancer tool.
Step 1: Download and install the Wondershare Filmora
To get started, download, and install the Wondershare Filmora on your PC. Then launch the program to enter the main interface.
Step 2: Import your audio/video file
From the main menu, go to Import media, then click on Import media files and select to upload your files in the media box. Once uploaded, drag and drop the media clips onto the timeline.
Step 3: Open the audio editing panel
Next, right-click on the audio or video clip on the timeline and then tap Adjust audio, or you can simply double-click it to enter the audio editing panel.
Step 4: Enable auto audio normalization
On the audio editing panel, scroll down and enable the Auto normalization feature. Wondershare Filmora will analyze and normalize the audio file automatically.
Step 5: Export the normalized file
After the normalization process is completed, preview your video or audio to check the auto normalization. If you are not satisfied with the output, hit Reset and try again. Finally, tap on the Export option, give your file a name, and again hit Export to save the high-quality output.
Method 3: Normalize Audio with Audacity
Audacity is a popular audio editor that works wonders for professional music producers. This free, open-source platform has taken audio editing to newer levels with a wide range of advanced features; there is a spectrogram view mode for visualizing and selecting frequencies. In addition, there is extensive support for various plug-ins.
Besides audio normalization, the creative platform can record, mix, add filters, and equalize multiple soundtracks. Moreover, when normalizing with Audacity, you don’t have to worry about losing audio quality, thanks to its 16-bit, 24-bit, and 32-bit support.
To take advantage of this excellent audio normalizer, just follow these quick steps and set your audio tone.
Step 1: Open Audacity on your computer
First, download the Audacity software on your computer, and then open the program.
Step 2: Import your audio files
Go to the File tab on the top menu bar and tap on Open. Then select audio files you want to normalize to import, or simply drag and drop the files on the main screen.
Step 3: Customize audio normalization settings
Now, select the added audio clip and go to Effect on the top menu bar. From the dropdown, choose Normalize and type your desired volume level into the dB.
Step 4: Normalize audio
After editing the normalization settings, click the OK button to start normalizing.
Step 5: Save the audio file
Once finished, select Export under the File tab, and choose how you want to save the file.
FAQs about Normalizing Audio
Here we sorted out some frequently asked questions about audio normalization, which can help you learn more about audio normalization.
1. What dB should I normalize audio to?
Well, that entirely depends on your audio use, and there is no exact number for normalizing an audio clip. However, for safety, the trick is to stay from the maximum volume level of 0 dB. For overall mix levels, most video editors recommend normalizing audio between -10 dB to -20 dB. Likewise, in the case of a dialogue clip, the recommended audio levels are -12 dB to -15 dB. Still some other suggestions are
- Music: -18 dB to -22 dB
- Soundeffects: -10 dB to -20 dB
2. What is the difference between audio normalization and compression?
Audio normalization only and purely changes the volume of a sound by applying a constant amount of gain with a goal to make the loudest peak reach 0 Db. And while normalizing also matches multiple audios to the same volume, it still does not affect the sound dynamics, unlike compression.
On the flip side, audio compression chops off the audio peaks in your recording to get a fuller, louder sound without reaching the clipping limit. In compression, you are changing a proportion of the audio over time in varying amounts.
3. Will the audio normalization process affect the sound quality?
Fortunately, no. Audio normalization, when appropriately done with the help of efficient audio editors, never affects the audio quality. When normalizing an audio clip, the digital bit having the highest level below 0 dB is identified, and all the other bits of the audio are amplified to the same level. This translates to no change in the relative difference between every bit, while the noise level also does not change. So, yes, the only thing affected is the output level and not the quality of the track.
Summing up
Audio normalization is an emerging trend as a good idea to manage high-quality audio levels. This feature can indeed benefit the final steps of mastering music production. However, you need to be careful when deciding where and when to normalize audio or avoid it for better results.
So, are you ready to level up your audio game? The above-mentioned audio editing tools are top-notch normalizers that will do the work for you. Also, don’t forget to try Wondershare Filmora’s distinctive auto normalization feature to produce studio-quality audio.
Richard Bennett
Richard Bennett is a writer and a lover of all things video.
Follow @Richard Bennett
FREE Top 10 Best Websites to Download Sound Clips for Videos
FREE Top 10 Best Websites to Download Sound Clips for Videos

Liza Brown
Mar 27, 2024• Proven solutions
Are you working on animation , video, game, music, or maybe some other media file? Sound is a vital factor for all. It is the effect of the sound that can make or break a project.
But it can be difficult to find perfect and quality free sound clips. There are thousands of software for creating excellent videos, adding sounds , titles, overlays, tracks, and more. But what if you don’t wish to create a piece for just jazzing up your already existing video?
Free sound clips are great resources to download for videos if you don’t want to create sound effects.
Many people want to know the source of high-quality free audio for videos. These free sound samples are easy to find on the Internet.
In this article, you will get to know the 10 best websites to download free sound clips.
10 Best Free Sound Samples to Use
1. Freesound
Licensed under the Creative Commons License , the Freesound comprises of a large sound database. You can choose from the huge collection of sounds and decide which one is free and which sound needs attribution.
You can ensure if the sound can be used in commercial products or not. If you are not a professional and just need free sound samples for personal use, you may use free sound download from any site. The features of Freesound include-
- You can search for sounds or browse by tags or geotags
- The pack feature helps you to find a bunch of similar sounds very easily
- Preview the sound without logging in
- For downloading the sound, you need to log in
- Add your audio samples to contribute to the database
- You get 5 free sound clips download
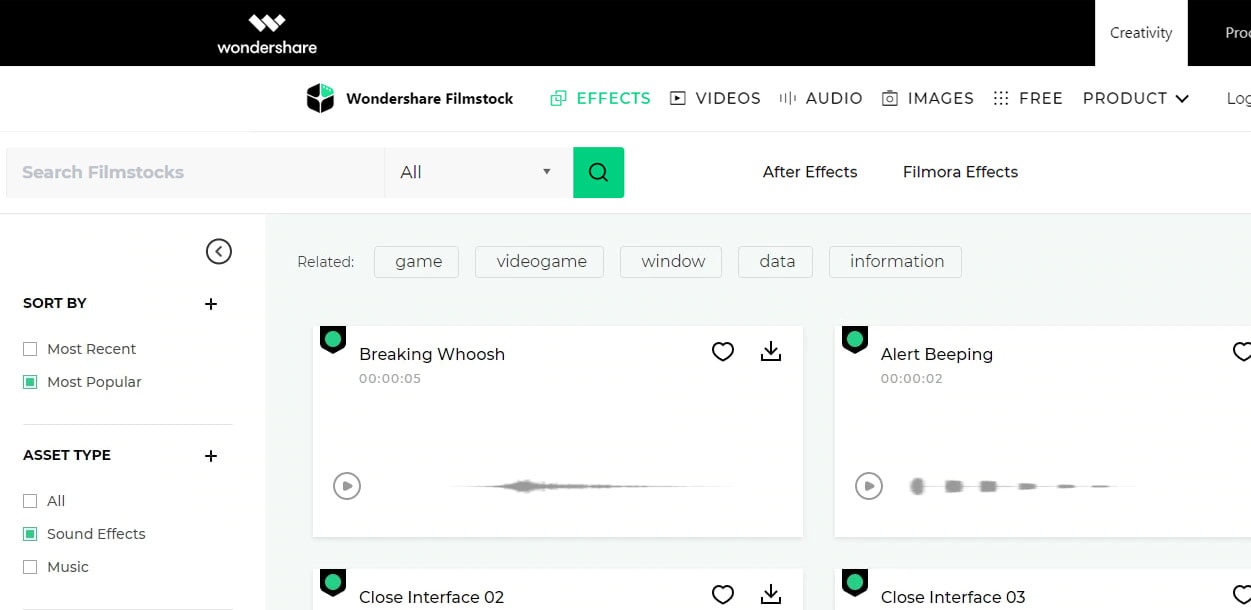
2. Filmstock
Filmstock from the house of Wondershare is one of the greatest libraries for free sound clips.
Any budget filmmaker would love to have this invaluable resource not just for free audio clips for videos but also for royalty-free sound clips.
You can bring your cinematic video to life from the Filmstock free-stuff one-stop-shop. The features of Filmstock include-
- Royalty-free video effects, audio, and stock media
- There are genres like science fiction, sci-fi, ufo, technology games
- Huge selection of curated quality stock images
- Filmstock library is continuously updated
- No attribution required for any project on Filmstock
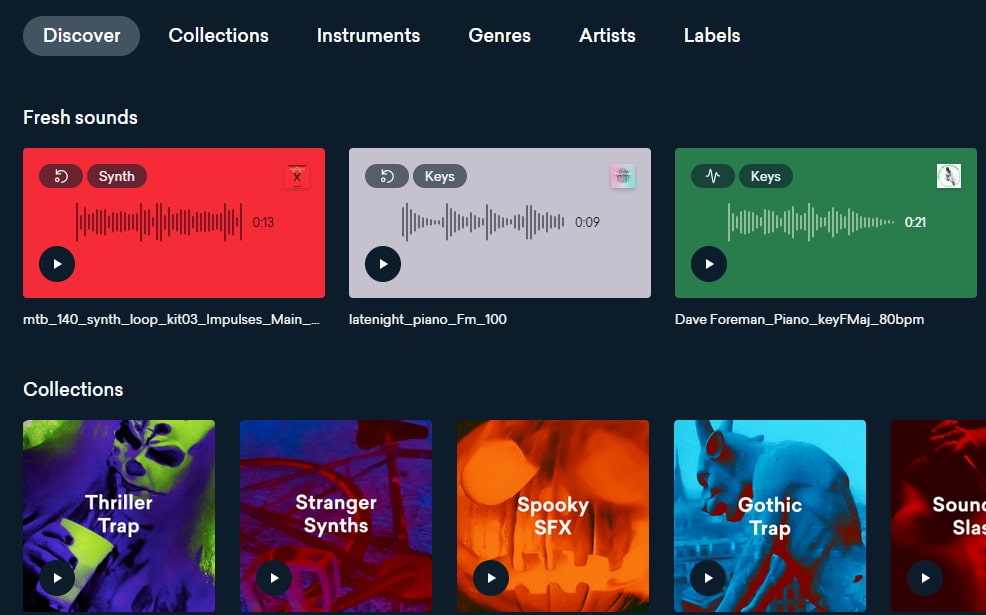
3. Landr
With a simple interface, Landr offers the best loops, packs, and samples to you. Make use of powerful Artificial Intelligence (AI) and you can spend lesser time searching and browsing. The features of Landr includes-
- You can browse free sound clips from the various collection of instruments
- Quickly find the right sound from the millions of free sound samples
- Get access to Selector tool powered by AI to make your browsing session faster
- Nourish your ideas with the curated collection and smart browsing
- The filter sounds by instrument, mood, BPM or key
- Go pro with your sampling
- Royalty-free sounds from today’s best artists, producers, and labels
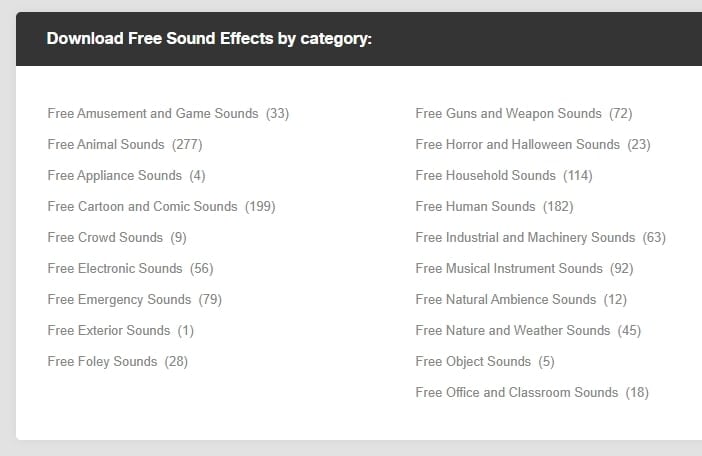
4. Audio Micro
Audio Micro is one of the best tools for downloading horror-based free sound clips. Once you register with Audio Micro, you can easily download free audio clips for videos.
For downloading sound for commercial uses like TV or mass reproduction, you must be a paid subscriber. The features of Audio Micro are-
- Get access to the collection of royalty-free music and 2000 free good quality sound effects
- High-quality audio content for commercial use, available at competitive prices without any hidden cost
- Research, locate, purchase, and download stock audio
- Easy and fast search option with free sound collection visible from the navigation bar on the homepage
5. Audio Blocks
It is an intuitive platform to download loops, sound effects, and music. It has a low-cost subscription model and the content is constantly updated based on the search results. The features of Audio Blocks are-
- Unlimited royalty-free audio
- Loop, sound effects, and music download
- Low-cost subscription offers more content at a nominal price
- There are flexible plans for every budget
- Use content multiple times for commercial and personal projects
6. Free Stock Music
Whether YouTube project or your personal Vlog, Free Stock Music offers royalty-free music for a range of media platforms.
For any non-copyrighted sound clips free download, always feel free to reach Free Stock Music. The features are-
- Free access to non-copyrighted music
- Just put the attribution in credits to use the sound clips
- Unlimited royalty-free music in all moods, lengths, tempos, and categories
7. Bensound
Available under the Creative Common License, Bensound is used for multimedia projects like web applications or videos.
You can use the free tracks available with Bensound stock music in the various website background score, animations, web adverts, slideshows, etc. The features of Bensound include-
- Royalty-free stock music in various genres like electronica, urban, cinematic, jazz, rock, etc.
- Download free sound clips from the huge collection and add attributions in credits
- If you don’t wish to give credits and use the high-quality premium tracks, get the Bensound Pro License
8. Sounds Crate
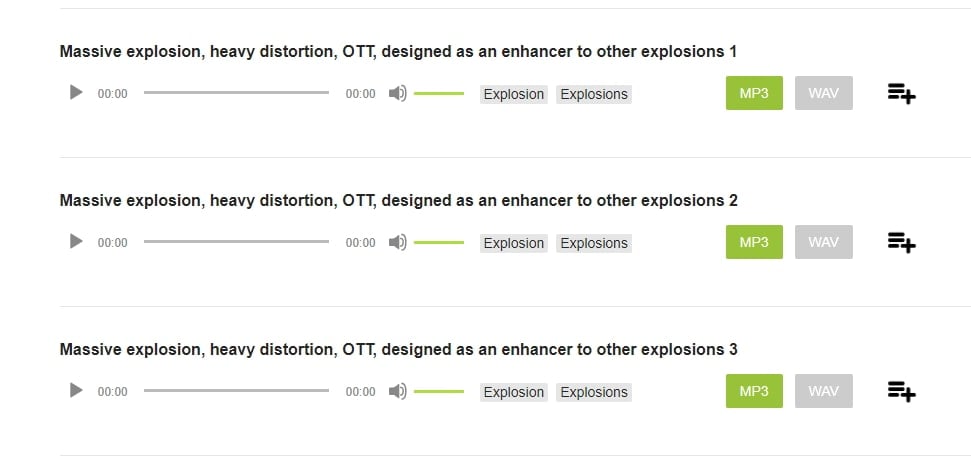
Are you looking for the best soundtrack for your video? Sounds Crate offers some of the best royalty-free music and sound FX.
With the tracks completely mastered for your production, Sound Crate offers 100% quality content created by industry professionals from Hollywood. The Sound Crate features include-
- Sound FX for electricity, gun, explosion, weapons, sci-fi, vehicles, movements, etc.
- Royalty-free music in diverse genres
- You can also use idents for corporate, news jingles, holiday idents, etc.
- Download and use the royalty-free sound clips easily
- Over 10000 plus HD assets
- No attribution required
- Browse from unlimited music, sound effects, etc.
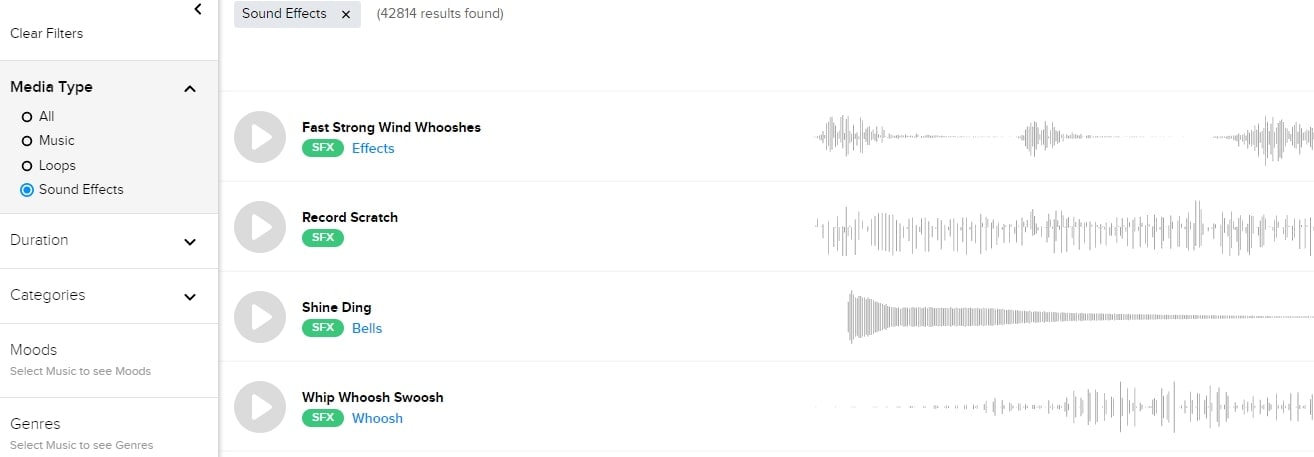
9. ZapSlat
Do your audio and video editing projects need some cool soundtracks to jazz it up? Look no further. ZapSlat is one of the best free sound download sites to make your project successful. The features of ZapSlat are-
- Comprises over 54,000 professional free sound effects and royalty-free music files
- Variety of free sound effect packs
- Download royalty-free music from a variety of genres
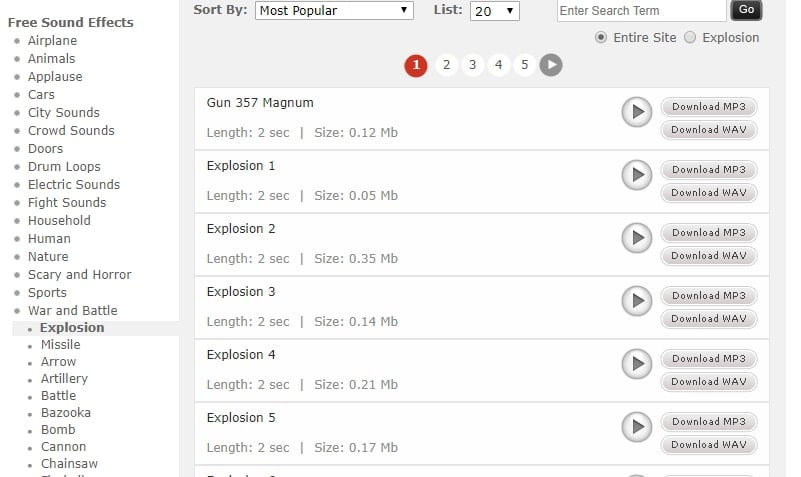
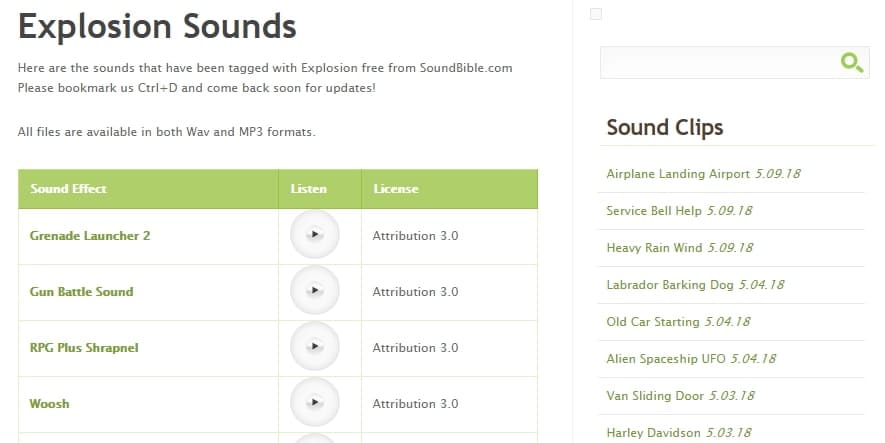
10. Sound Bible
Choose the best from 2000 free sound clips licensed under Creative Commons. To use the sound effect for commercial video, you can select from the royalty-free sounds. The features of SoundBible are-
- Download free sound clips without logging in or creating an account
- 2000 free sounds
- Copyright-free sound resources are weekly updated
Conclusion
Now that you know the best 10 free sound clip download sites, make use of it in your videos. Without worrying about the expense, you can use these sites to download free sound clips.
Liza Brown
Liza Brown is a writer and a lover of all things video.
Follow @Liza Brown
Liza Brown
Mar 27, 2024• Proven solutions
Are you working on animation , video, game, music, or maybe some other media file? Sound is a vital factor for all. It is the effect of the sound that can make or break a project.
But it can be difficult to find perfect and quality free sound clips. There are thousands of software for creating excellent videos, adding sounds , titles, overlays, tracks, and more. But what if you don’t wish to create a piece for just jazzing up your already existing video?
Free sound clips are great resources to download for videos if you don’t want to create sound effects.
Many people want to know the source of high-quality free audio for videos. These free sound samples are easy to find on the Internet.
In this article, you will get to know the 10 best websites to download free sound clips.
10 Best Free Sound Samples to Use
1. Freesound
Licensed under the Creative Commons License , the Freesound comprises of a large sound database. You can choose from the huge collection of sounds and decide which one is free and which sound needs attribution.
You can ensure if the sound can be used in commercial products or not. If you are not a professional and just need free sound samples for personal use, you may use free sound download from any site. The features of Freesound include-
- You can search for sounds or browse by tags or geotags
- The pack feature helps you to find a bunch of similar sounds very easily
- Preview the sound without logging in
- For downloading the sound, you need to log in
- Add your audio samples to contribute to the database
- You get 5 free sound clips download
2. Filmstock
Filmstock from the house of Wondershare is one of the greatest libraries for free sound clips.
Any budget filmmaker would love to have this invaluable resource not just for free audio clips for videos but also for royalty-free sound clips.
You can bring your cinematic video to life from the Filmstock free-stuff one-stop-shop. The features of Filmstock include-
- Royalty-free video effects, audio, and stock media
- There are genres like science fiction, sci-fi, ufo, technology games
- Huge selection of curated quality stock images
- Filmstock library is continuously updated
- No attribution required for any project on Filmstock
3. Landr
With a simple interface, Landr offers the best loops, packs, and samples to you. Make use of powerful Artificial Intelligence (AI) and you can spend lesser time searching and browsing. The features of Landr includes-
- You can browse free sound clips from the various collection of instruments
- Quickly find the right sound from the millions of free sound samples
- Get access to Selector tool powered by AI to make your browsing session faster
- Nourish your ideas with the curated collection and smart browsing
- The filter sounds by instrument, mood, BPM or key
- Go pro with your sampling
- Royalty-free sounds from today’s best artists, producers, and labels
4. Audio Micro
Audio Micro is one of the best tools for downloading horror-based free sound clips. Once you register with Audio Micro, you can easily download free audio clips for videos.
For downloading sound for commercial uses like TV or mass reproduction, you must be a paid subscriber. The features of Audio Micro are-
- Get access to the collection of royalty-free music and 2000 free good quality sound effects
- High-quality audio content for commercial use, available at competitive prices without any hidden cost
- Research, locate, purchase, and download stock audio
- Easy and fast search option with free sound collection visible from the navigation bar on the homepage
5. Audio Blocks
It is an intuitive platform to download loops, sound effects, and music. It has a low-cost subscription model and the content is constantly updated based on the search results. The features of Audio Blocks are-
- Unlimited royalty-free audio
- Loop, sound effects, and music download
- Low-cost subscription offers more content at a nominal price
- There are flexible plans for every budget
- Use content multiple times for commercial and personal projects
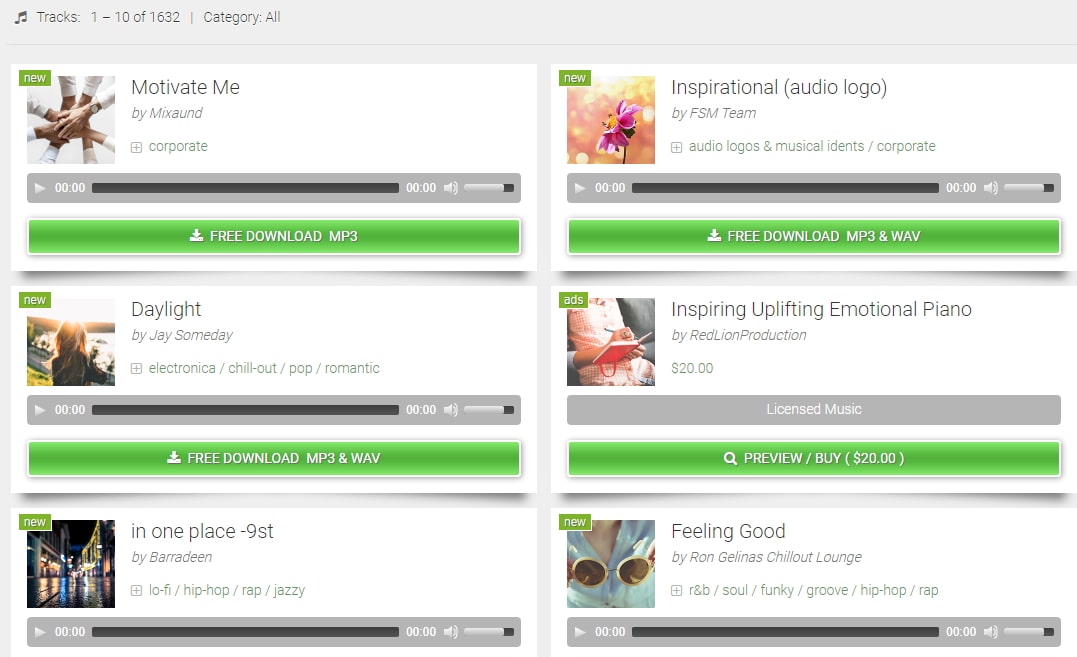
6. Free Stock Music
Whether YouTube project or your personal Vlog, Free Stock Music offers royalty-free music for a range of media platforms.
For any non-copyrighted sound clips free download, always feel free to reach Free Stock Music. The features are-
- Free access to non-copyrighted music
- Just put the attribution in credits to use the sound clips
- Unlimited royalty-free music in all moods, lengths, tempos, and categories
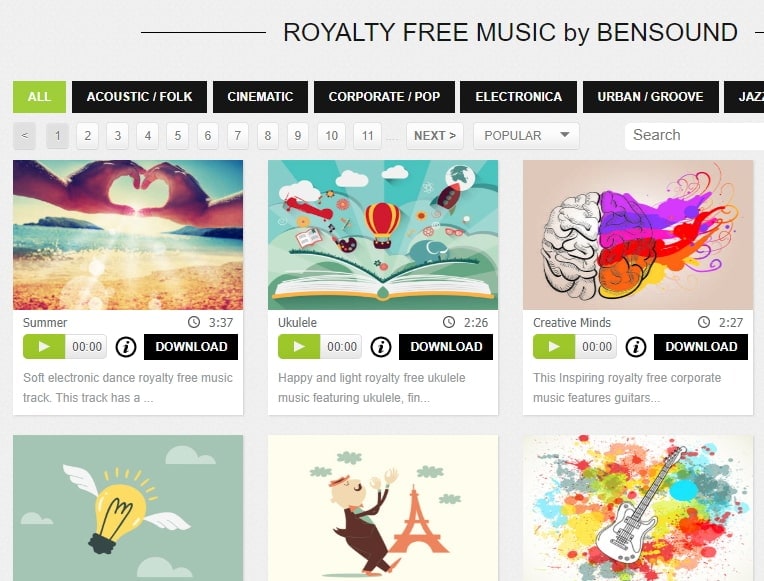
7. Bensound
Available under the Creative Common License, Bensound is used for multimedia projects like web applications or videos.
You can use the free tracks available with Bensound stock music in the various website background score, animations, web adverts, slideshows, etc. The features of Bensound include-
- Royalty-free stock music in various genres like electronica, urban, cinematic, jazz, rock, etc.
- Download free sound clips from the huge collection and add attributions in credits
- If you don’t wish to give credits and use the high-quality premium tracks, get the Bensound Pro License
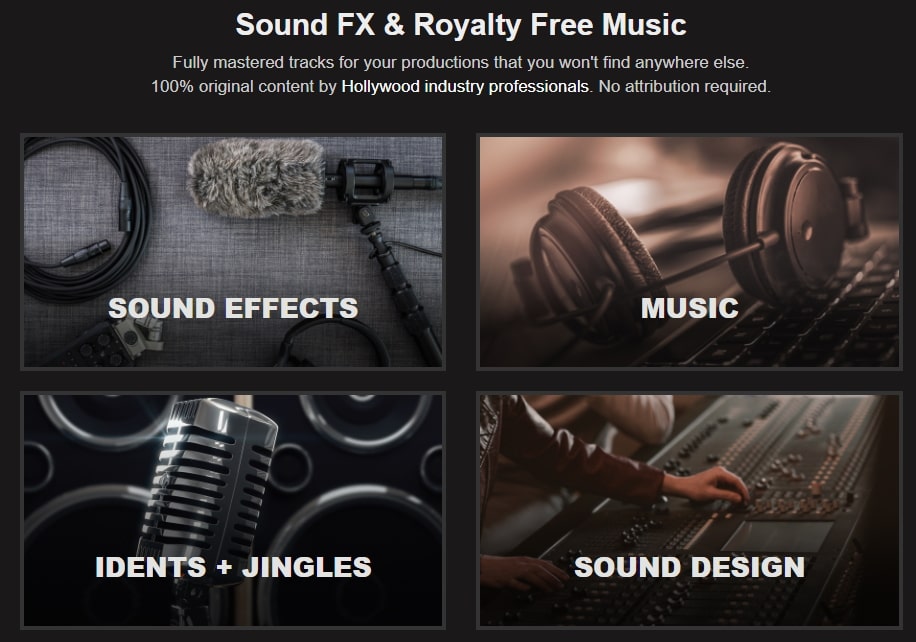
8. Sounds Crate
Are you looking for the best soundtrack for your video? Sounds Crate offers some of the best royalty-free music and sound FX.
With the tracks completely mastered for your production, Sound Crate offers 100% quality content created by industry professionals from Hollywood. The Sound Crate features include-
- Sound FX for electricity, gun, explosion, weapons, sci-fi, vehicles, movements, etc.
- Royalty-free music in diverse genres
- You can also use idents for corporate, news jingles, holiday idents, etc.
- Download and use the royalty-free sound clips easily
- Over 10000 plus HD assets
- No attribution required
- Browse from unlimited music, sound effects, etc.
9. ZapSlat
Do your audio and video editing projects need some cool soundtracks to jazz it up? Look no further. ZapSlat is one of the best free sound download sites to make your project successful. The features of ZapSlat are-
- Comprises over 54,000 professional free sound effects and royalty-free music files
- Variety of free sound effect packs
- Download royalty-free music from a variety of genres
10. Sound Bible
Choose the best from 2000 free sound clips licensed under Creative Commons. To use the sound effect for commercial video, you can select from the royalty-free sounds. The features of SoundBible are-
- Download free sound clips without logging in or creating an account
- 2000 free sounds
- Copyright-free sound resources are weekly updated
Conclusion
Now that you know the best 10 free sound clip download sites, make use of it in your videos. Without worrying about the expense, you can use these sites to download free sound clips.
Liza Brown
Liza Brown is a writer and a lover of all things video.
Follow @Liza Brown
Liza Brown
Mar 27, 2024• Proven solutions
Are you working on animation , video, game, music, or maybe some other media file? Sound is a vital factor for all. It is the effect of the sound that can make or break a project.
But it can be difficult to find perfect and quality free sound clips. There are thousands of software for creating excellent videos, adding sounds , titles, overlays, tracks, and more. But what if you don’t wish to create a piece for just jazzing up your already existing video?
Free sound clips are great resources to download for videos if you don’t want to create sound effects.
Many people want to know the source of high-quality free audio for videos. These free sound samples are easy to find on the Internet.
In this article, you will get to know the 10 best websites to download free sound clips.
10 Best Free Sound Samples to Use
1. Freesound
Licensed under the Creative Commons License , the Freesound comprises of a large sound database. You can choose from the huge collection of sounds and decide which one is free and which sound needs attribution.
You can ensure if the sound can be used in commercial products or not. If you are not a professional and just need free sound samples for personal use, you may use free sound download from any site. The features of Freesound include-
- You can search for sounds or browse by tags or geotags
- The pack feature helps you to find a bunch of similar sounds very easily
- Preview the sound without logging in
- For downloading the sound, you need to log in
- Add your audio samples to contribute to the database
- You get 5 free sound clips download
2. Filmstock
Filmstock from the house of Wondershare is one of the greatest libraries for free sound clips.
Any budget filmmaker would love to have this invaluable resource not just for free audio clips for videos but also for royalty-free sound clips.
You can bring your cinematic video to life from the Filmstock free-stuff one-stop-shop. The features of Filmstock include-
- Royalty-free video effects, audio, and stock media
- There are genres like science fiction, sci-fi, ufo, technology games
- Huge selection of curated quality stock images
- Filmstock library is continuously updated
- No attribution required for any project on Filmstock
3. Landr
With a simple interface, Landr offers the best loops, packs, and samples to you. Make use of powerful Artificial Intelligence (AI) and you can spend lesser time searching and browsing. The features of Landr includes-
- You can browse free sound clips from the various collection of instruments
- Quickly find the right sound from the millions of free sound samples
- Get access to Selector tool powered by AI to make your browsing session faster
- Nourish your ideas with the curated collection and smart browsing
- The filter sounds by instrument, mood, BPM or key
- Go pro with your sampling
- Royalty-free sounds from today’s best artists, producers, and labels
4. Audio Micro
Audio Micro is one of the best tools for downloading horror-based free sound clips. Once you register with Audio Micro, you can easily download free audio clips for videos.
For downloading sound for commercial uses like TV or mass reproduction, you must be a paid subscriber. The features of Audio Micro are-
- Get access to the collection of royalty-free music and 2000 free good quality sound effects
- High-quality audio content for commercial use, available at competitive prices without any hidden cost
- Research, locate, purchase, and download stock audio
- Easy and fast search option with free sound collection visible from the navigation bar on the homepage
5. Audio Blocks
It is an intuitive platform to download loops, sound effects, and music. It has a low-cost subscription model and the content is constantly updated based on the search results. The features of Audio Blocks are-
- Unlimited royalty-free audio
- Loop, sound effects, and music download
- Low-cost subscription offers more content at a nominal price
- There are flexible plans for every budget
- Use content multiple times for commercial and personal projects
6. Free Stock Music
Whether YouTube project or your personal Vlog, Free Stock Music offers royalty-free music for a range of media platforms.
For any non-copyrighted sound clips free download, always feel free to reach Free Stock Music. The features are-
- Free access to non-copyrighted music
- Just put the attribution in credits to use the sound clips
- Unlimited royalty-free music in all moods, lengths, tempos, and categories
7. Bensound
Available under the Creative Common License, Bensound is used for multimedia projects like web applications or videos.
You can use the free tracks available with Bensound stock music in the various website background score, animations, web adverts, slideshows, etc. The features of Bensound include-
- Royalty-free stock music in various genres like electronica, urban, cinematic, jazz, rock, etc.
- Download free sound clips from the huge collection and add attributions in credits
- If you don’t wish to give credits and use the high-quality premium tracks, get the Bensound Pro License
8. Sounds Crate
Are you looking for the best soundtrack for your video? Sounds Crate offers some of the best royalty-free music and sound FX.
With the tracks completely mastered for your production, Sound Crate offers 100% quality content created by industry professionals from Hollywood. The Sound Crate features include-
- Sound FX for electricity, gun, explosion, weapons, sci-fi, vehicles, movements, etc.
- Royalty-free music in diverse genres
- You can also use idents for corporate, news jingles, holiday idents, etc.
- Download and use the royalty-free sound clips easily
- Over 10000 plus HD assets
- No attribution required
- Browse from unlimited music, sound effects, etc.
9. ZapSlat
Do your audio and video editing projects need some cool soundtracks to jazz it up? Look no further. ZapSlat is one of the best free sound download sites to make your project successful. The features of ZapSlat are-
- Comprises over 54,000 professional free sound effects and royalty-free music files
- Variety of free sound effect packs
- Download royalty-free music from a variety of genres
10. Sound Bible
Choose the best from 2000 free sound clips licensed under Creative Commons. To use the sound effect for commercial video, you can select from the royalty-free sounds. The features of SoundBible are-
- Download free sound clips without logging in or creating an account
- 2000 free sounds
- Copyright-free sound resources are weekly updated
Conclusion
Now that you know the best 10 free sound clip download sites, make use of it in your videos. Without worrying about the expense, you can use these sites to download free sound clips.
Liza Brown
Liza Brown is a writer and a lover of all things video.
Follow @Liza Brown
Also read:
- Updated Auditory Landmarks Pinpointing Button-Induced Sounds in Software for 2024
- Updated Viral Cellphone Alert Songs You Cant Ignore
- In 2024, The Ultimate Backward Beat Playlist
- Updated Auditory Excellence Pinpointing the Best Songs to Accompany Your Montage Narrative for 2024
- 2024 Approved Mastering Soundscapes Best Background Noise Cancellers
- 2024 Approved Top 4 Best Music Editor for Mac
- Mastering the Art of Implementing Audio Decline Techniques for 2024
- 2024 Approved Chorus Questers A Comprehensive Search Engine for Todays Popular Music Hits
- New 50 Best Film Scores An Assortment for Every Video Format and Theme for 2024
- How to Add Audio Fade Out Effect?
- Is MAGIX Samplitude Setting the Benchmark in Digital Music Production for 2024
- Updated 2024 Approved 15 Vibrant Tracks for Enhancing Newsroom Energy and Creativity
- Updated In 2024, The Mirthful Minutiae Handbook Compiling Genuine Guffaw Guideposts
- In 2024, The Ultimate Selection of 5 Premium Mac Audio Equipment
- Updated Unveiling the Most Accessible and Affordable Browser-Based DAW Tools
- New 2024 Approved Identify Disturbing Sound Waves
- Updated In 2024, Elevate Your Video Edits Mastering the Art of Live Audio Dampening with Final Cut Pro Xs AutoDuck Capabilities
- New In 2024, From Chatter to Silence Utilizing iMovie for Superior Sound Filtration
- New The Best Free, Open-Source Audio Editing Software for Windows Users for 2024
- Updated In 2024, Mastering Vocal Modification in Audacity A Step-by-Step Guide
- In 2024, What Is Clubhouse All About? All You Need to Know About Clubhouse
- Updated Top 10 Audio Editing Apps Beyond Audacity
- Achieving Pristine Audio Quality Tips to Eradicate Distorted Sounds in Visual Media
- Updated 2024 Approved Unleashing the Power of Sound in Videography A Step-by-Step Tutorial
- Updated In 2024, Magix Movie Editor Secrets Perfecting Audio Fusion in Your Clips
- New In 2024, Discovering Optimal Acoustic Ambiance Sets for Video Production
- Updated 2024 Approved Comprehensive Catalog of Podcast Indexing Services
- Top 10 Calming Websites To Relax Your Mind for 2024
- 2024 Approved Integrating AutoTune Into Your Audacity Projects
- 2024 Approved Advanced Listeners Playbook Essential Equalizer Tweaks
- New In 2024, Harmonious Hollers Discovering Impactful Sound Effects
- Updated Windows Audio Level Automation Using Adobe Premiere for 2024
- 2024 Approved The Sonic Landscape A Study on Sound Forgeutility
- New In 2024, Maximize Your Library A Comprehensive List of Online MP3 Tag Editor Powerhouses
- Top 10 Browser-Compatible DAW Platforms (Free Edition) for 2024
- New Unlocking the Potential of Sound in Animated Windows GIF Creations for 2024
- New In 2024, The Ultimate Budget Transcription Toolkit - Discovering Three Accessible, Free Ways to Convert Audios Into Texts
- Updated Beyond the Hype Real Definitions of Modern Audio Production Tools (DAW)
- Updated 2024 Approved Premiere Picks 5 Highest-Rated Gratis Volume Equalizer Apps
- New In 2024, Professional Insights on Separating Soundtracks From Visual Media on Apple Technology
- How to Successfully Bypass iCloud Activation Lock from Apple iPhone X
- How to Simulate GPS Movement in AR games On Oppo Reno 9A? | Dr.fone
- In 2024, Top IMEI Unlokers for Your Samsung Galaxy XCover 6 Pro Tactical Edition Phone
- In 2024, How to Unlock Apple iPhone X with a Mask On | Dr.fone
- 2024 Approved Add a Professional Touch Free Video Watermark Software
- Reasons for Honor Play 7T Stuck on Startup Screen and Ways To Fix Them | Dr.fone
- Catch or Beat Sleeping Snorlax on Pokemon Go For Realme C53 | Dr.fone
- In 2024, How to Unlock iCloud Activation Lock and iCloud Account From Apple iPhone 7?
- How To Reset the Security Questions of Your Apple ID On Your Apple iPhone 14 Pro
- Solutions to restore deleted files from Google
- Updated In 2024, Transform Your Footage A Step-by-Step Guide to GoPro Quik for MacBook
- Fast and Reliable Best MP3 Converters for Mac OS for 2024
- In 2024, Top 11 Free Apps to Check IMEI on iPhone SE
- Why Is My Realme 10T 5G Offline? Troubleshooting Guide | Dr.fone
- New In 2024, Merge Your Videos for Free The Best Web-Based Tools
- How to Transfer Data After Switching From Honor 90 Lite to Latest Samsung | Dr.fone
- In 2024, How to Screen Mirroring Tecno Spark 10 5G to PC? | Dr.fone
- How to Come up With the Best Pokemon Team On Oppo K11x? | Dr.fone
- In 2024, How to Mirror Your Lava Blaze 2 Pro Screen to PC with Chromecast | Dr.fone
- Updated Comcast vs TiVo Which DVR Reigns Supreme for 2024
- How to Sign a Word 2019 document online
- Updated In 2024, IMovie on Windows? Try These 10+ Alternatives Instead
- How To Upgrade or Downgrade Apple iPhone 13 Pro Max Without Losing Data? | Dr.fone
- New 2024 Approved The Perfect Fit How to Adjust Amazon Prime Video Aspect Ratio for Your TV
- Android Screen Stuck General Samsung Galaxy A15 4G Partly Screen Unresponsive | Dr.fone
- New Cut, Edit, Share The 10 Best Free and Paid Android Video Editors for 2024
- Updated In 2024, Brighten Up The Best Video Editing Apps This Year
- Updated Create Motion Effect with Path Blur In Photoshop
- New Take It to the Next Level Add Slow Motion Effects to Your Videos at No Cost - Filmora for 2024
- The Ultimate Guide How to Bypass Swipe Screen to Unlock on Xiaomi Redmi Note 13 Pro+ 5G Device
- How To Repair System Issues of Apple iPhone 15 Pro Max? | Dr.fone
- In 2024, How to Migrate Android Data From Lava Blaze Pro 5G to New Android Phone? | Dr.fone
- New Mastering TikTok Aspect Ratios A Step-by-Step Guide
- Title: Updated In 2024, How To Change Audio Speed and Pitch Online?
- Author: Jacob
- Created at : 2024-05-05 04:16:00
- Updated at : 2024-05-06 04:16:00
- Link: https://audio-shaping.techidaily.com/1714937944058-updated-in-2024-how-to-change-audio-speed-and-pitch-online/
- License: This work is licensed under CC BY-NC-SA 4.0.
